Mobell S5035 User manual

User Manual
ABOUT ANDROID...........................................................................................................................................................................3
APPLICATIONS................................................................................................................................................................................3
YOUR PHONE....................................................................................................................................................................................3
GETTING STARTED........................................................................................................................................................................4
TOUCH SCREEN & KEYS...............................................................................................................................................................4
TOUCH TIPS.....................................................................................................................................................................................................4
ZOOMING TIPS.................................................................................................................................................................................................5
ROTATE THE SCREEN.......................................................................................................................................................................................5
KEY TIPS..........................................................................................................................................................................................................5
HOME SCREEN.................................................................................................................................................................................5
QUICK START:HOME SCREEN........................................................................................................................................................................5
WORKING WITH MENUS.................................................................................................................................................................................6
SHORTCUT.......................................................................................................................................................................................................6
WIDGET............................................................................................................................................................................................................7
ARRANGING YOUR HOME SCREEN..................................................................................................................................................................7
CHANGING THE BACKGROUND OF YOUR HOME SCREEN...............................................................................................................................7
APPLICATION MENU.....................................................................................................................................................................8
APPLICATION MENU.........................................................................................................................................................................................8
PHONE STATUS BAR AND NOTIFICATIONS.......................................................................................................................8
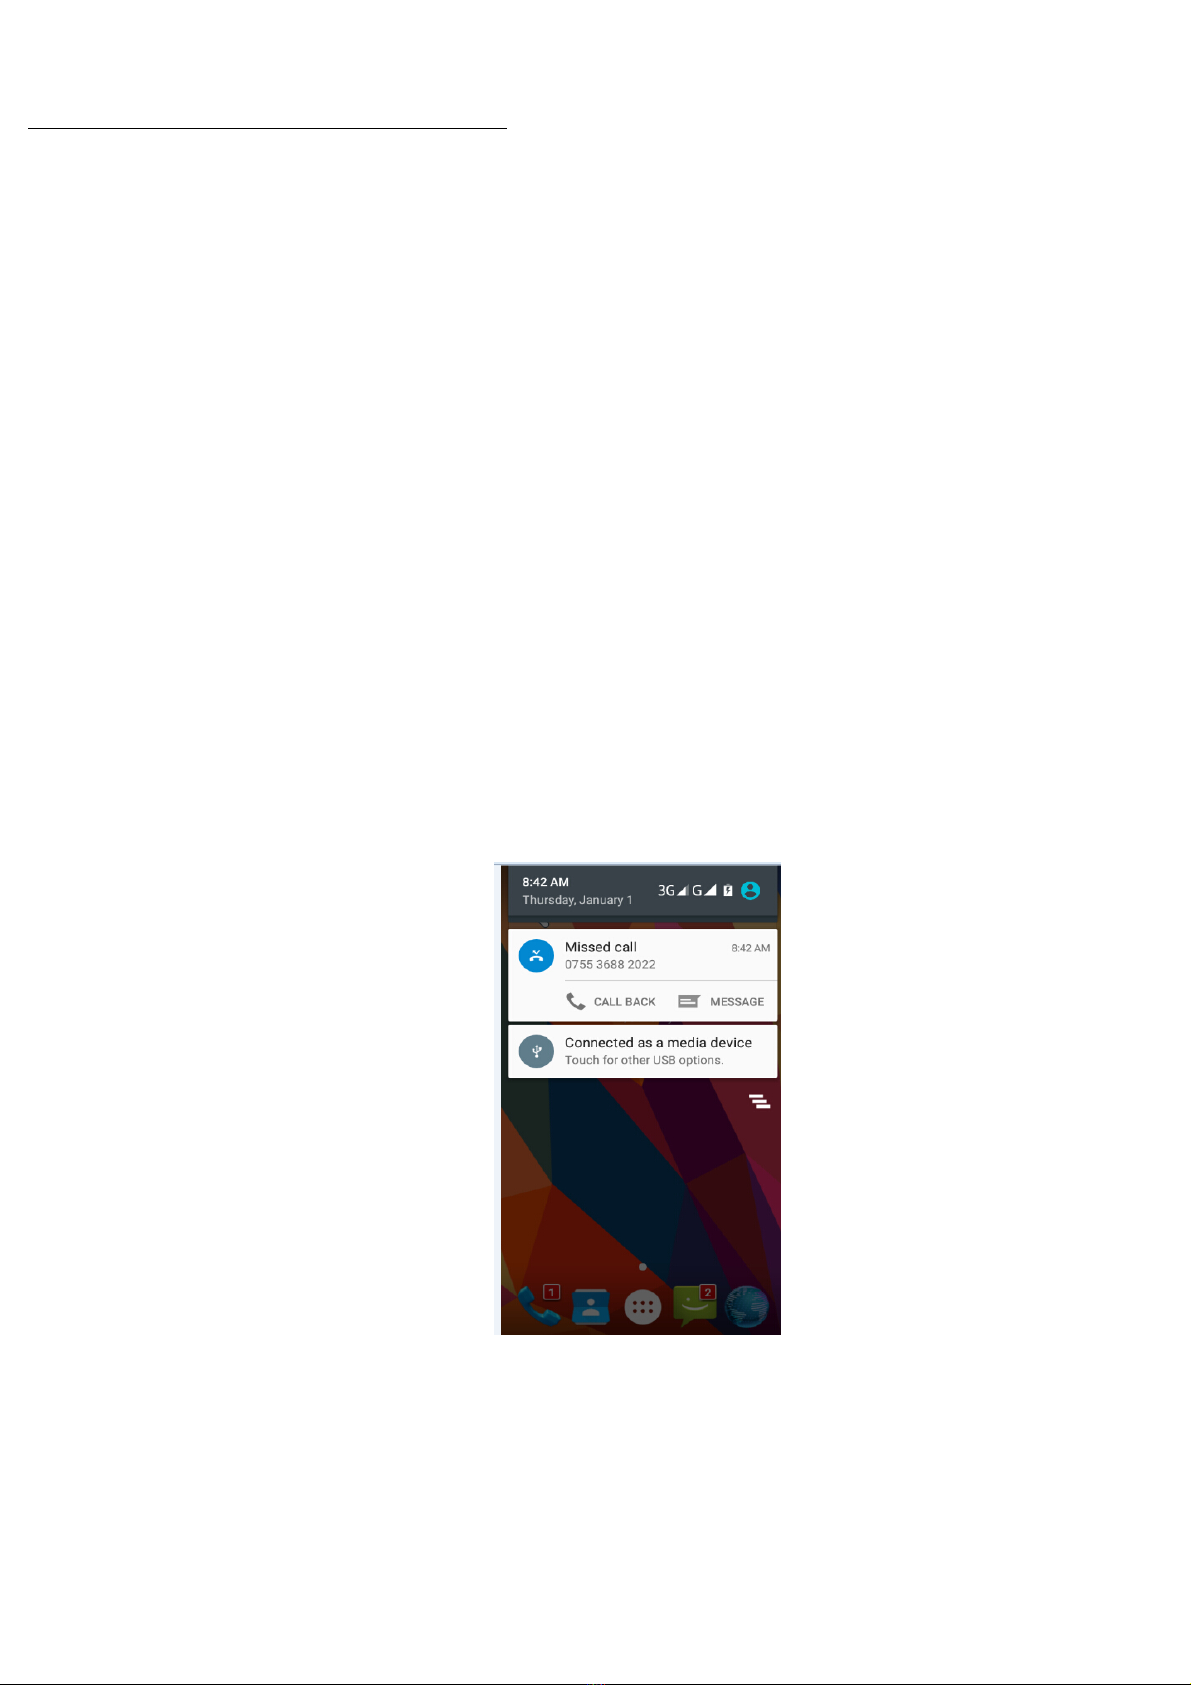
CHECKING NOTIFICATIONS AND ONGOING ACTIVATES................................................................................................................................8
TOOLKITS.........................................................................................................................................................................................................9
DIAL PAD...........................................................................................................................................................................................9
MAKE A CALL....................................................................................................................................................................................................9
OPTIONS AVAILABLE DURING A CALL.............................................................................................................................................................9
TEXT ENTRY....................................................................................................................................................................................10
ON-SCREEN KEYBOARD.................................................................................................................................................................................10
ENTER TEXT...................................................................................................................................................................................................10
ENTER VARIOUS CHARACTERS.....................................................................................................................................................................10
EDIT TEXT......................................................................................................................................................................................................10
SELECT TEXT.................................................................................................................................................................................................10
CUT /COPY/PASTE TEXT..............................................................................................................................................................................11
COMMUNICATION........................................................................................................................................................................11
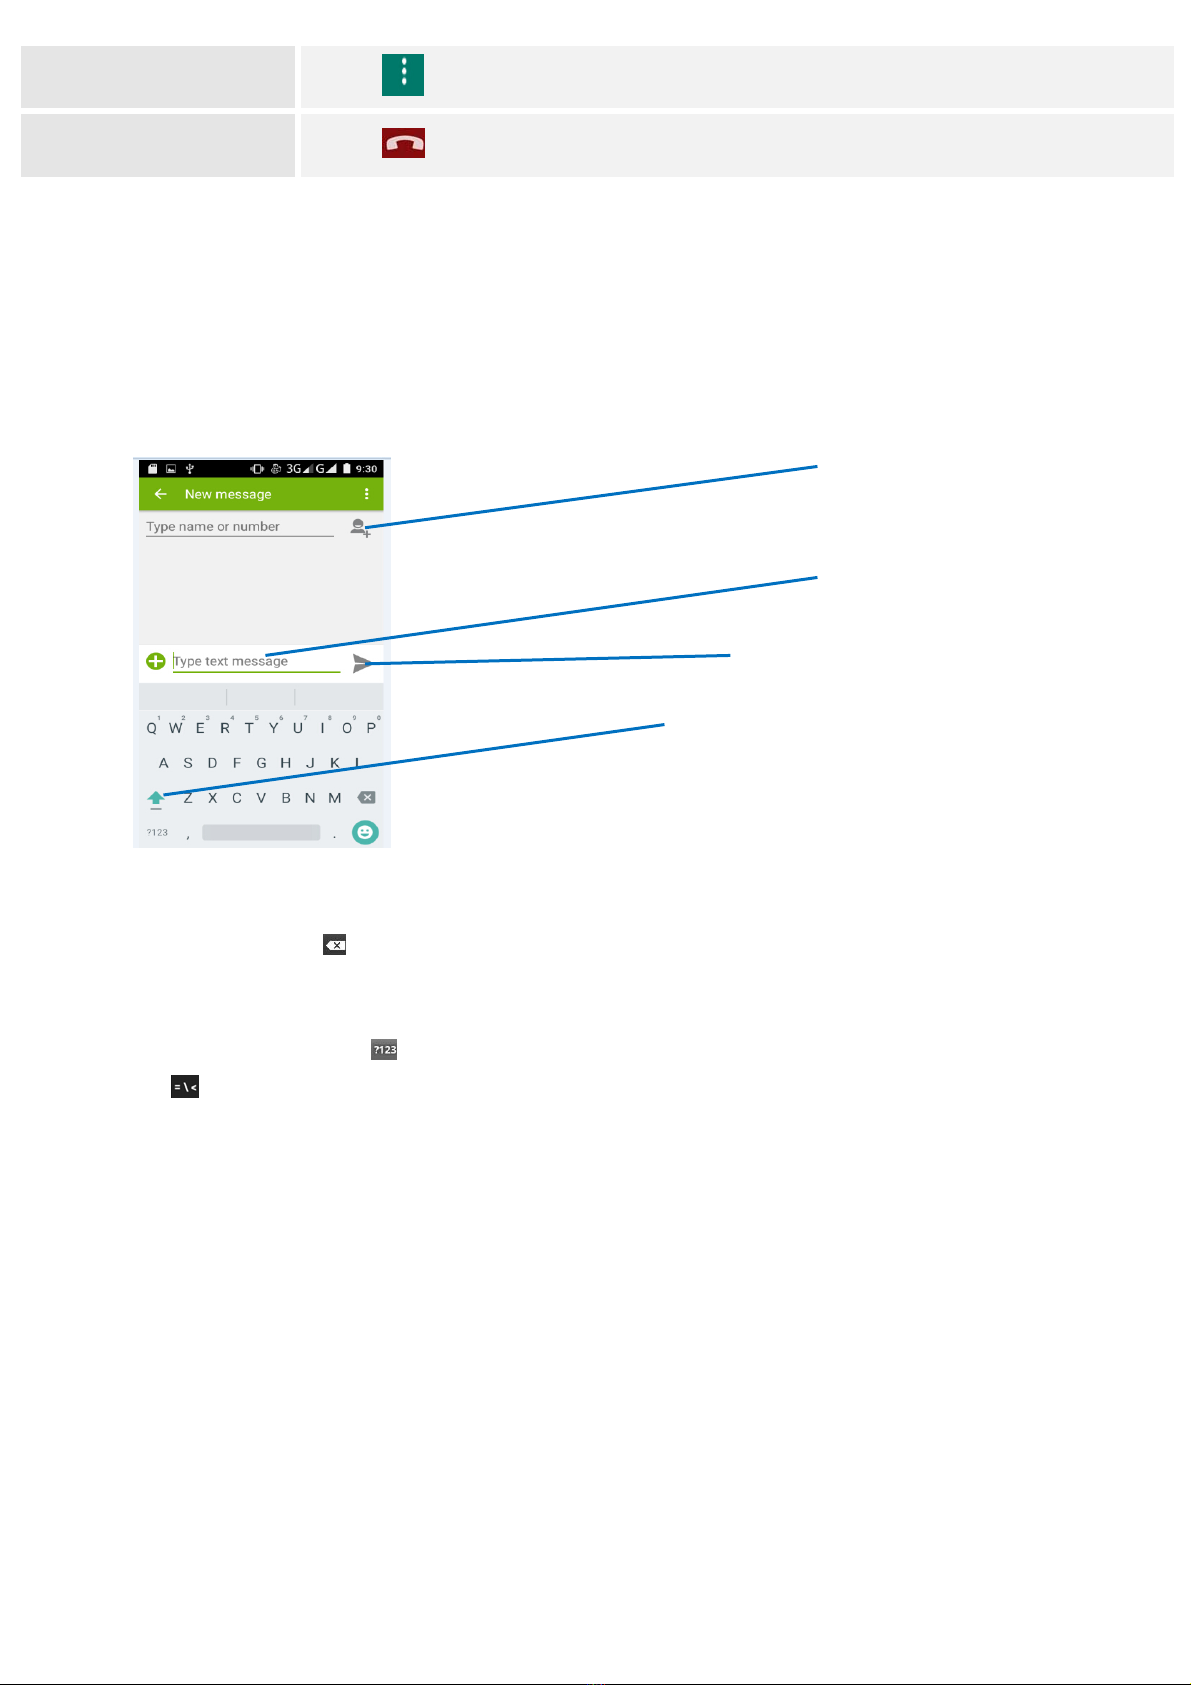
MESSAGING...................................................................................................................................................................................................11
PEOPLE...........................................................................................................................................................................................................12
PHONE............................................................................................................................................................................................................13
EMAIL.............................................................................................................................................................................................................13
MULTIMEDIA..................................................................................................................................................................................14

CAMERA..........................................................................................................................................................................................................14
MUSIC............................................................................................................................................................................................................15
FM RADIO......................................................................................................................................................................................................17
GALLERY.........................................................................................................................................................................................................18
SOUND RECORDER........................................................................................................................................................................................18
TOOLS...............................................................................................................................................................................................19
CALENDAR......................................................................................................................................................................................................19
CLOCK............................................................................................................................................................................................................19
CALCULATOR..................................................................................................................................................................................................19
BROWSER........................................................................................................................................................................................19
CONNECT TO NETWORKS AND DEVICES...........................................................................................................................20
DETERMINE THE NETWORK YOU ARE USING..............................................................................................................................................20
EDIT OR CREATE NEW ACCESS POINTS......................................................................................................................................................20
WI-FI NETWORKS.........................................................................................................................................................................................20
BLUETOOTH....................................................................................................................................................................................................21
CONNECT TO A COMPUTER VIA USB............................................................................................................................................................21
WORKING WITH SECURE CERTIFICATES.....................................................................................................................................................21
INSTALL SECURE CERTIFICATE FROM SD CARD........................................................................................................................................21
SETTINGS........................................................................................................................................................................................22
ACCESSING PASSWORD............................................................................................................................................................22
PIN CODE......................................................................................................................................................................................................23
PIN2 CODE...................................................................................................................................................................................................23
PUK CODE.....................................................................................................................................................................................................23
PUK2 CODE..................................................................................................................................................................................................23
PRECAUTIONS...............................................................................................................................................................................23
FREQUENTLY ASKED QUESTIONS AND TROUBLESHOOTING...................................................................................24
SAFETY INFORMATION AND NOTICES...............................................................................................................................26
USING THE MOBILE PHONE AND CHARGER.................................................................................................................................................26
USING THE MOBILE PHONE..........................................................................................................................................................................27
USING THE BATTERY.....................................................................................................................................................................................27
USING THE CHARGER....................................................................................................................................................................................28
REQUIREMENTS FOR MOBILE PHONE...........................................................................................................................................................28
REQUIREMENTS FOR THE BATTERY..............................................................................................................................................................28
REQUIREMENTS FOR THE CHARGER AND AC ADAPTER..............................................................................................................................28
CLEANING AND MAINTENANCE.....................................................................................................................................................................28

3
About Android
An Android phone can perform many of the same functions as a computer. But you can also adjust it to better
suit your needs, to receive the information you want, and have fun at the same time. You can add and delete
applications, or enhance them to improve functionality. At Android Market you can download a range of
applications and games from a constantly growing collection. You can also integrate applications on your
Android phone with your personal data and online accounts. For example, you can back up your track of your
appointments, and engage in as much social networking as you like.
Applications
An application is a phone program that helps you perform a task. For example, there are applications to make
calls, take photos and download more applications.
Note: The colors and specifications shown/mentioned in the user manual may differ from the actual product. Images shown are
for representation purpose only.
The content of the manual is correct when it is released, but we reserve the right to modify the technical specification without
additional notification.
Some content in the manual may be different from the mobile phone, as the accessory software, SIM card or service varies by
providers.
Your phone
the important keys & connectors
Phone overview
1 Charge/USB Port To connect charger or USB data cable for data exchange.
2 Earphone Jack To connect an earphone so you can listen to music/radio.
3 Front Camera
Lens Allow you to take pictures while facing the screen.
4Receiver To hear the voice of the other side when calling.
5 Menu Key Open a list of options available in the current screen or application.
6Home Key Go to Home screen;
Press and hold to open a window showing your most recently used applications.
7 Back Key Go back to the previous screen;
2
4
1
10
5 7
8
9
11
6 12
3 13

4
Close the on-screen keypad, a dialog box, an options menu, or the Notification panel.
8 Volume Keys To adjust the ringer volume, adjust the voice volume during a call, and adjust media
volume.
9 Shutter key Long press to enter camera application; In camera application, short press to take
picture.
10 Back Camera
Lens For taking photos.
11 Flashlight To take photos in low-light conditions.
12 Speaker To listen to music, and other sounds offered by your phone.
13 Power/Lock Key Switch the phone on and off;
Press and hold to open phone options menu.
Getting started
let's get you up and running
Assemble & charge
SIM card in
Make sure that the clipped corner of the SIM card is facing the correct direction and the metallic contacts are
facing the correct direction. Slide the SIM card into the card slot until it stops.
SD card in
Slide the SD card into the SD card slot with the metallic pins facing downwards. Push the card until it locks
into place.
Battery in
With the metallic contacts of the battery facing the metallic contacts in the battery slot, press the battery
down until it locks into place.
Charge up
Ensure the battery is inserted in the handset. To charge the battery, plug in the charger connector at your
phone (USB interface) and then plug the other end into an AC power socket.
The battery symbol indicates the charging status. While charging, the charge indicators will scroll. When all
the scroll bars are steady, the battery is fully charged. Disconnect the charger from the phone. Disconnect the
charger from the AC power socket.
Note: If the battery is powerless, the battery icon will reappear after a few minutes of charging.
Touch screen & keys
a few essentials
Touch tips
Here are some tips on how to navigate around your phone.
Touch
To choose an icon or option, touch it.
Touch & hold
Open special functions or additional options. Try it: From Application menu, touch Music icon to enter
Music library, then touch and hold an artist, a song, or an album, some options will be available to you. For
example: play, add to playlist, delete, etc.

5
Drag
To scroll through a list or move slowly, drag across the touchscreen. Try it: on the Home screen, touch
People icon to enter contacts list, you can drag contacts list up or down to scroll list.
Slide
To slide by moving your finger up or down on the touch screen quickly. Scroll through a list or move quickly,
slide across the touchscreen (drag quickly and release).
Double-touch
Touch quickly twice to zoom in/out. For example, double-touch a picture in Gallery to zoom in/out.
Zooming tips
When looking at maps, webpages or photos, place two fingers on the touch screen at once and pinch them
together to zoom out or spread them apart to zoom in.
Note: Use the zoom function when you view photos, maps or when you browsing the web.
Rotate the screen
On some screens, the orientation of the screen rotates with the phone as you turn it from upright to its slide
and back again. You can turn this feature on and off.
Key tips
Power/Lock key
When powering off status, press and hold to turn on the phone;
When powering on status, press and hold to enter phone options (Power off, Reboot, Airplane mode,
and so on);
To save your battery, prevent accidental touches or when you want to wipe smudges off your touch
screen, put the touch screen to sleep by pressing Power/Lock key;
To wake up the touch screen, just press Power/Lock key again, and then drag the lock icon to the right
on the screen to unlock according to the clue on the screen.
Menu key
Opens a menu with items related to the current screen/application.
Home key
Press Home key to close any menu or app and return to the Home screen. If you are viewing the left
or right Extended Home screen, open the central Home screen.
Press and hold Home key to view the applications you have used recently.
Back key
Press Back key to return to the previous screen you were working on.
Volume keys
Press Volume keys to change the volume. When playing music or video files, press Volume keys to
adjust media volume.
Shutter key
Long press to enter camera application. In camera application, short press to take picture.
Home screen
quick access to the things you need most
Quick start: Home screen

6
The Home screen gives you all your latest information in one place. It's what you
see when you turn on the phone. It is the equivalent of the desktop on a computer. It’s your gateway to the
main features in your phone. You can customize your Home screen with shortcuts, widgets, folders, and
wallpapers.
You need slide the Home screen left or right to view more content in other panels on the Home screen. You
can add shortcuts, widgets, folders, etc. to Home screen.
Note: Your Home screen might look a little different.
Working with Menus
The phone provides you with Options menus and context menus.
Options menus
Options menus contain tools that apply to the activities of the current screen or application, not to any
specific item on the screen. You can open options menu by pressing Menu key.
Not all screens have options menus. If you press Menu key on
a screen that has no options menu, nothing happens.
Shortcut
To add a shortcut to Home screen
1. From Home screen, touch Launcher icon.
2. From APPS tab, you will see application menu.
Phone
People
Launcher: Main menu
Messaging
Browser
Phone status bar and
notifications
Widgets

7
3. Touch and hold an application icon until it vibrates, then back to the Home screen, and drag it to the
desired location.
To remove a shortcut on Home screen
If you want to remove the shortcut, you can touch and hold the shortcut icon on Home screen until it vibrates,
and then drag it to Remove tab.
Widget
A widget is small application on the Home screen that typically displays information such as Analog clock,
Music and you can use directly on your Home screen. For example, the Music widget allows you to start
playing audio files directly on Home screen. You can also add a widget such as Analog clock that shows time.
You can also download additional widgets from the library of Android widgets.
To add a widget to Home screen
1. From Home screen, touch Launcher icon.
2. Touch WIDGETS tab, you will see widget options menu.
3. Touch and hold a widget icon to pick up the widget, then back to the Home screen, and drag it to the
desired location.
To remove a widget on Home screen
If you want to remove the widget, you can touch and hold the widget icon on Home screen, and then drag it
to Remove tab.
Arranging your Home screen
To move an item on Home screen
Touch and hold an item on Home screen until it vibrates, then drag it where you want.
To organize your apps with folders
To make a new folder on your Home screen, stack one app on top of another.
To name folder on Home screen
1. Touch the apps stack on Home screen to open
2. Touch the Unnamed Folder to show the name folder field.
3. Edit the folder name.
To move application shortcuts on Home screen to a folder
Touch and hold the item on Home screen until it vibrates, and then stack the app on top of others.
To move application shortcuts in a folder to Home screen
Touch and hold the item in a folder, and then drag the item out of the folder.
Changing the background of your Home screen
Adapt the Home screen to your own style using wallpapers from Gallery, Live wallpapers, Video wallpapers,
or Wallpapers.
Touch and hold the Home screen to select wallpaper from Gallery, Live wallpapers, Video wallpapers, or
Wallpapers. Then set it as wallpaper.
Tip: You can use camera to take a photo, and then set it as wallpaper.

8
Application menu
enjoy applications from the Application menu
Application menu
The Application menu, which you open from your Home screen, contains the applications that come installed
with your phone.
The Application menu extends beyond the screen width, so you need to slide left and right to view all content.
To open the Application menu
1. On Home screen, touch Launcher icon.
2. Touch APPS tab.
To browse the Application menu
Open the Application menu, then slide the screen left or right.
Phone status bar and notifications
The status bar at the top of the screen contains icons that tell you about messages and phone status and
shows what’s going on in your phone. At the top you get notifications when there is something new or
ongoing. For example, new message, missed call, signal strength, battery status and other information
appear here.
Checking notifications and ongoing activates
You can drag down the status bar to open the Notification panel and get more
information. For example, view missed calls from Notification panel. You can also open running applications,
such as the music player.
To open the Notification panel
Drag the status bar downwards.
To close the Notification panel
Drag the bottom of the Notification panel upwards.
To open a running application from the Notification panel
From the Notification panel, touch the icon for the running application to open it.

9
Toolkits
In the toolkits you can quickly start the common applications such as Bluetooth, Wi-Fi and so on.
Open the toolkits panel by touching
Dial pad
Make a call
Touch Phone icon on the Home screen.
In dialing screen, input number and touch dial icon to dial the inputted number.
Options available during a call
During a call, there are some call options available to you. These call options can be seen only during a call.
When a call is in progress, you can put it on hold, initiate a phone conference, mute your microphone etc.
To
Key pad: Go to the key
pad. Touch
Speaker: To turn on/off
the speaker. Touch
Mute: Mute your voice
so that the other party
cannot hear you. Touch
Hold: To place a call on
hold. Touch

10
Add call: Open dial pad
to dial the second call. Touch
End: To end a call. Touch
Press Volume keys to adjust the call volume.
Text entry
On-screen keyboard
Touch the keys of the on-screen QWERTY keyboard to enter text conveniently. You can open this keyboard by
touching a text field.
Android keyboard input method
Enter text
Touch the keys on the keyboard to type.
Use the Delete key to erase characters to the left of the cursor.
When you finished typing, Press Back key to close the keyboard.
Enter Various Characters
Touch the Symbols key to switch to the numbers and symbols keyboard.
Touch on the symbols keyboard to view additional symbols.
Edit Text
You can edit the text you enter in text fields and use menu commands to cut, copy, and paste text, within or
across applications. Some applications do not support editing some or all of the text they display. Others may
offer their own way to select text you want to work with.
Touch and hold the text field that contains the text to select the word.
Cut or copy the text.
Select Text
You can select text for cutting or copying. The selected text is highlighted in blue.
Touch and hold the portion that contains text. Some options open with icons.
Move the cursor to select the text.
T
ouch this icon to select
desired contact from
phonebook.
T
ext
field
Send messa
g
e
T
ouch to capitalize the
next letter you type.

11
Cut /Copy/Paste Text
1. Touch Cut icon or Copy icon in the menu that opens.
2. Touch and hold the text field where you want to paste the text.
3. Touch PASTE in the menu that opens. The text is inserted at the cursor.
You can paste the text that you copied from one application into a text field in any application.
Communication
it’s good to talk, text or email. . .
Messaging
Find it: Application menu > Messaging
You can compose, send and receive text messages from your phone, and also can compose, send and receive
multimedia messages, which contain media files such as pictures, videos and audios.
When you view your messages, they appear as conversations, which means that all messages to and from a
particular person are grouped together.
• Compose new message
1. From your Home screen, touch Messaging icon or find it: Application menu > Messaging.
2. Touch .
3. To add recipient(s), touch , then find and mark the contact name. To add more than one contact, mark
the contact name for the desired recipients. You can also enter the recipient’s phone number manually.
4. After you finish marking contact(s), touch OK.
5. Touch Type message to enter your message text.
6. If you want to insert a media file, touch , and select an attachment.
7. Touch , to send the message.
When editing message, press Menu key, some additional options will be
Copy
Select all Cut

12
available to you. For example, add subject. You can touch the options to do actions.
• Delete message threads
1. From your Home screen, touch Messaging icon or find it: Application menu > Messaging.
2. Touch and hold the message thread.
3. Select the conversations you want to delete.
4. Touch , then touch Delete in the menu that pops up.
You can also press Menu key and touch Delete all threads to delete all message threads from the window.
• Forward a message
1. From your Home screen, touch Messaging icon or find it: Application menu > Messaging.
2. Touch the conversation containing the message you want to forward.
3. Touch and hold the message you want to forward.
4. Touch Forward in the menu that opens.
5. Add recipient(s), touch , then find and mark the contact name. To add more than one contact, mark the
contact name for the desired recipients. You can also enter the recipient’s phone number manually.
6. Touch , to send the message.
• Lock a message
You can lock a message.
1. From your Home screen, touch Messaging icon or find it: Application menu > Messaging.
2. Touch the conversation containing the message you want to lock.
3. Touch and hold the message you want to lock.
4. Touch Lock in the menu that opens. A lock icon appears. Unlock a message by touching and holding the
message and then touch Unlock.
• Messaging settings
1. From your Home screen, touch Messaging icon or find it: Application menu > Messaging.
2. Press Menu key, select Settings in the menu that opens.
3. You can change messages settings, such as delete old messages as limits are reached, request a delivery
report for each message you send.
People
Find it: Application menu > People
The People application offers you to store and manage all your contacts.
• People screen overview
• Add a contact
1. From your Home screen, touch People icon or find it: Application menu > People.
Favorites tab Contacts tab
Touch a contact
to view its detailsTouch a contact
thumbnail to access
the quick contact
menu
Touch to search
Touch to add new
contact

13
2. Touch .
3. Select storage path to which you want to add this new contact.
4. Enter the information for the contact.
5. After you finish, touch DONE.
• Search a contact
1. From your Home screen, touch People icon or find it: Application menu > People.
2. Touch .
3. Input the first character of the name you are searching for in the cursor, and then all records meeting the
conditions will be displayed. Search results will be different due to different input content.
• Additional options
From contacts list screen, press Menu key, some additional options will be available to you. For example,
import/export, and share visible contacts.
Delete contact: You can mark much more than one contact, and then delete these marked contacts.
Contacts to display: To select what sort of contacts to display in the contacts list.
Import/export: Copy contacts to which you want import.
Accounts: You can synchronize your phone contacts with a synchronization account.
Settings: Change the settings involved display options.
Share visible contacts: You can share contacts via Bluetooth, Email, and so on.
To assign a contact to a group
1. From your Home screen, touch People icon or find it: Application menu > People.
2. Touch Groups tab.
3. Touch a group to which you want to assign contacts.
4. Press Menu key, touch Edit in the menu that opens.
5. Touch Type person’s name to input the contact’s name, then the corresponding contact entry will pop up,
select the desired contact entry.
6. After you finish editing, touch DONE.
• Favorites
You can set contacts as favorites so that you can get access to them from the People application.
To set a contact as favorite
1. From your Home screen, touch People icon or find it: Application menu > People.
2. From contacts list, touch a contact which you want to set as favorite.
3. Touch . If you want to cancel the favorite, touch .
Phone
Find it: Application menu > Phone
• Call log
Find it: Application menu > Phone > Call log tab
Touch different tabs such as All, Received, Dialed, and Missed calls on upside screen of Call log interface, and
then you can view different call logs.
Email
Find it: Application menu > Email
The Email application in your phone offers you to compose, send and receive emails through your regular
email account.
You need create account first, and then create email to send. You can configure Email for most accounts in
just a few steps.

14
• Set up an email account in your phone
1. From your Home screen, touch Launcher icon, then find it: Application menu > Email.
2. Enter your email address and password, then touch Next.
3. If the settings for the email account cannot be downloaded automatically, complete the setup manually. If
necessary, contact your email service provider for detailed settings.
4. When you are prompted, enter a name for your email account, so that it is easily identifiable. The same
name shows in the emails you send from this account.
5. After you finish, touch Next.
• Create and send an email
1. From your Home screen, touch Launcher icon, then find it: Application menu > Email.
2. Touch .
3. Enter recipients’ addresses, and subject.
4. Compose email. Press Menu key, you can attach a file, select the type of attachment, and select the file
which you want to attach from the list that appears.
5. If you want to add Cc/Bcc, press Menu key, then touch Add Cc/Bcc.
6. When you finish, touch to send the email.
• Receive emails
1. From your Home screen, touch Launcher icon, then find it: Application menu > Email.
2. Touch to refresh, you can download new emails.
• Read your emails
1. From your Home screen, touch Launcher icon, then find it: Application menu > Email.
2. In the email inbox, scroll up or down, and touch the email you want to read.
• Reply to an email
1. From your Home screen, touch Launcher icon, then find it: Application menu > Email.
2. In the email inbox, scroll up or down, and touch the email to which you want to reply.
3. Touch to reply or press Menu key, to select Reply all.
4. Enter your reply, touch to send the email.
• Forward an email
1. From your Home screen, touch Launcher icon, then find it: Application menu > Email.
2. In the email inbox, scroll up or down, and touch the email you want to forward.
3. Press Menu key, to select Forward.
4. Enter recipients’ addresses.
5. Touch to send the email.
• View all folders
1. From your Home screen, touch Launcher icon, then find it: Application menu > Email.
2. Touch at the bottom of the email inbox.
Multimedia
listen it, watch it, capture it, enjoy it!
Camera
Find it: Application menu > Camera
Take a photo or record a video with the camera in your phone. You can hold the camera horizontally or
vertically. Share a photo or a video with your friends, or upload your photos and videos to a web service.
• Camera control overview
5

15
1 Preview your pictures or videos you captured
2Take a photo
3 Record a video
4Settings
5 Switch between front camera and back camera
6Shooting mode
7 Sime mode
8 Photo mode and panorama mode
• Take a photo
Adjust your picture size, color effect, and other settings if you wish.
Frame your subject on screen. You can zoom in or out by placing two fingers on the touch screen and
pinching them together to zoom out or spreading them apart to zoom in.
Touch the shutter icon on the screen.
The picture you just took is displayed for a moment, and then is displayed as a thumbnail.
• Shoot a video
Adjust the video quality, color effect, and other settings if you wish.
Point the lens to the scene you want to shoot
Touch the camcorder icon to start.
Touch the camcorder icon again to stop shooting.
Music
Find it: Application menu > Music
The phone comes with a Music player that plays songs, listen to audio book and podcasts you have stored. It
gives you a host of setting options to make your listening experience interesting.
1
8
2
3
6
7
4

16
You can easily transfer your favorite music from your PC to the SD card and experience a whole world of
interesting and melodious music.
When you copy music to your SD card, the Music player searches the card for music files and builds a catalog
of your music, based on information about each file that is stored in the file itself.
• Music library
The Music library offers the following multiple categories that you can select.
Categories
Artists: Songs classified by singers
Albums: Songs classified by albums
Songs: Display all songs
Playlists: Display playlists
If you touch and hold an artist, a song, or an album, some options will be available to you. For example: play,
add to playlist, delete, etc.
CategoriesTouch toselect
Artists,Albums,SonsorPlaylists.

17
• Music player
You can return to the music library screen from music player screen in the Music applications by pressing
Menu key and touch Library. Press Menu key, some additional options such as
Party shuffle, Add to playlist, and Library will be
available to you.
FM radio
Find it: Application menu > FM radio
The phone comes with an in-built FM Radio. You can
listen to FM radio stations, and add them to channel
list. You have to plug in an earphone, as the antenna
of the FM radio. You can listen to the radio either
through an earphone, or through the speaker in the
phone.
1 Channel list
Music and settings controls
Play/Pause Touch /
Previous/Next Touch /
Rewind/Forward Touch and hold /
Volume adjust Press Volume keys
Now playing Touch
Shuffle Touch
Repeat: Touch
to repeat all
songs; touch
again to repeat
current song.
Touch
Music controls
Settings controls
Now playing
Song details
Total song timeProgress bar
1
2
3
5
4
6
7
8
9

18
2record FM
3 Earphone or Speaker
4Save or remove a channel as a favorite
5 To fine-tune the FM frequency
6To fine-tune the FM frequency
7 To search for the previous effective frequency
8 To search for the next effective frequency
9 Play or Pause
Gallery
Find it: Application menu > Gallery
The Gallery offers you to view photos and play videos which are downloaded as well as those taken by the
phone camera.
From Gallery, you can also share your photos and videos with your friends, via Messaging, Bluetooth, or
Email.
1. Touch an album to open it and view its contents.
2. Touch a picture or a video in an album to view it. When viewing a picture, press Menu key, some
additional options will be available to you, such as
slideshow, edit, rotate left, rotate right, crop, set
picture as, and details.
• Share an Album
1. From your Home screen, touch Launcher icon, then find it: Application menu > Gallery.
2. Press Menu key, touch Select album in the menu that opens.
3. Select the albums you want to share.
4. Touch .
5. In the menu that opens, touch the application to use to share the selected albums. You can share via Email,
Bluetooth, and Messaging.
Sound recorder
Find it: Applicati on menu > Sound recorder
Record sound and play sound file
.
1 To start recording
2Recording files list
3 To pause recording
4To stop recording
5 Review and play recorded file
To
Share via
various ways Touch
Delete Touch
4
125
3

19
Tools
stay on top of things
Calendar
Find it: Application menu > Calendar
Your phone has a calendar for managing your time schedule. You can use the calendar to keep track of
important events. After entering the calendar function menu, you can select year, month and date.
• To set the calendar view
1. From your Home screen, touch Launcher icon, then find it: Application menu > Calendar.
2. Touch .
3. Select day, week, or month in the menu that opens.
• To add a calendar event
1. From your Home screen, touch Launcher icon, then find it: Application menu > Calendar.
2. Touch Menu key, then touch New event in the menu that opens.
3. Enter the name, location, time, and description for the event.
4. Select a reminder for the event.
5. After you finish, touch DONE.
Clock
Find it: Application menu > Clock
The clock allows you to view time and date. You can also add an alarm, set the alarm and turn it on. Then, the
alarm can ring at a specific time you set.
• Add an alarm
1. From your Home screen, touch Launcher icon, then find it: Application menu > Clock.
2. Touch .
3. Touch .
4. You need set time, ringtone, repeat, and vibrate. Then, turn it on.
Then the alarm can ring at a specific time you set.
Calculator
Find it: Application menu > Calculator
Keep your calculations on your finger tips with the calculator. Using this application allows you to make
calculations. The calculator provides the basic arithmetic functions; addition, subtraction, multiplication, and
division. You can also use an advanced panel.
• How to use the calculator
1. From your Home screen, touch Launcher icon or find it: Application menu > Calculator.
2. Enter the first number using the numeric keys.
3. Enter the operation for your calculation by touching the Plus, Minus, Multiplication, or Division key.
4. Enter the next number.
5. To view the result, touch the “=” (equals) key.
Press Menu key, you can open advanced panel to do calculation.
Touch , you can only erase one numeric before the cursor.
Touch and hold , you can erase all numeric before the cursor.
Browser

20
Use your web browser to view and navigate web pages, add pages as bookmarks, and save pages for offline
reading. You can open several windows at the same time and switch among them easily.
• Open the web browser
From your Home screen, touch Browser icon or find it: Application menu > Browser.
• Search and address bar
• Manage bookmarks
Bookmarks let you access your favorite and frequently visited web pages quickly. You can add bookmarks
directly from your phone browser.
To bookmark a web page
1. When you are viewing the web page, press Menu key.
2. Touch Save to bookmarks.
3. If desired, you can edit the bookmark.
4. When you’re done, touch OK.
Connect to Networks and Devices
Your phone can connect to a variety of networks and devices, including Wi-Fi, Bluetooth, devices such as
headsets. You can also transfer files to/from your PC through the data cable.
Determine the Network You Are Using
1. Touch Launcher icon, and from Application menu, touch Settings.
2. Touch More... > Mobile networks > Access point names. The name of the wireless service provider
you are currently registered with is selected in the list.
Edit or Create New Access Points
If you and your wireless service provider determine that you need to change the settings of your current
access point name (APN) or to create a new one, you must obtain the APN and detailed settings from your
provider.
1. Touch Launcher icon, and from Application menu, touch Settings.
2. Touch More... > Mobile networks > Access point names.
3. Touch an existing APN to edit it, or press Menu key and touch New APN. Enter the APN settings that you
obtained from your wireless service provider.
4. When you finished, press Menu key and then Save.
5. If you created a new APN, touch it in the APNs screen to start using it.
Wi-Fi Networks
Wi-Fi is a wireless networking technology that can provide internet access at distance of up to 20 meters. To
use Wi-Fi on your phone, you access a wireless access point, or “hotspot”. Some hotspots are open and you
can simply connect to them. Others are hidden or implement other security features, so you must configure
your phone so it can connect to them.
TIP: Turn off Wi-Fi when you are not using it, to extend the life of your battery.
• Connect to Wi-Fi Network
1. Touch Launcher icon, and from Application menu, touch Settings.
2. Touch Wi-Fi.
3. Check Wi-Fi to turn it on. The phone scans for available Wi-Fi networks and displays the names of those it
Cancel the download
of the current web
page
Enter a search word
to search for a web
page, or enter a web
page address to load
a web page
View the download
progress of the
current web page
Table of contents