Mobility Designed MD10013 M+D Crutch User manual

1
Instructions For Use
TM
L10003 Rev 2 (9/29/17)

2
Thank you for your purchase of the M+D Crutch™!
At Mobility Designed, we believe mobility should
be as painless as possible. The M+D Crutch™ was
born out of personal inspiration to make life better
for someone we love. It is our sincere hope that
the M+D Crutch™ will assist you with your mobility
in ways that you never thought possible.
Please read this booklet in its entirety; this crutch
is unlike anything you have used before and we
want to make sure you are familiar with all of the
features and proper use before using it. If you
have any questions about your ability to use this
mobility device, please consult your physician.
We are excited to have you on this journey with us
as we step into the future of mobility!
Sincerely,
M+D Team

3
Setup:
4. Height and weight range
5. Intended Use
6. Product Structures and features
7. Inserting foot
8. Inserting leg/height adjustment
9. Tightening leg tension adjustment screw
10-12. Adjusting handle for arm length
13-17. Adjusting arm bands
General use:
18-19. How to use the M+D Crutches- ABC’s of M+D
20. Locking and unlocking the cradle
21. Using unlocked cradle
22. Rotating handle
23. Caution when using unlocked cradle
Help, Contact Info, FAQ
24. Warranty
25. FAQ
26. Replacement parts/Maintenance and Cleaning
27. Contact Info
Contact info, FAQ, & tutorial videos found at:
www.mobilitydesigned.com
INDEX

4
M+D Crutches Models
MD10013 M+D Crutch Pair - White
MD10014 M+D Crutch Pair - Black
MD10015 M+D Crutch Left - White
MD10016 M+D Crutch Right - White
MD10017 M+D Crutch Left - Black
MD10018 M+D Crutch Right -Black
MD10008 SKU Package, Replacement Feet
MD10009 SKU Package, Replacement Cradle Pad
Height and weight range
This device is suitable for users
4 ft 11 inches to 6 ft 8 inches in height
(1.5 m to 2.03 m)
Maximum weight:
300 lb
136 kgs

5
Intended Use
English- Intended Use
The M+D Crutch™ is to be used as a walking aid for
patients who are non-weight bearing on a single lower
extremity, or for users who require additional support
when walking.
Nederlands- Beoogd gebruik
De M+D Crutch™ wordt gebruikt als loophulpmiddel
voor patiënten die niet-gewichtsbelasting op één van
de onderste ledematen, of voor gebruikers die be-
hoefte hebben aan extra ondersteuning bijhet lopen.
Français - Utilisation prévue
La M+D Crutch™ doit être utilisée comme aide à la
marche pour les patients qui ne portent pas de poids sur
une seule extrémité inférieure ou pour les utilisateurs qui
ont besoin de soutien supplémentaire lors de la marche.
Español- Uso previsto
La muleta M+D Crutch™ debe utilizarse como ayuda
para caminar en pacientes que no soportan peso en
una sola extremidad inferior, o para usuarios que requie-
ren apoyo adicional al caminar.
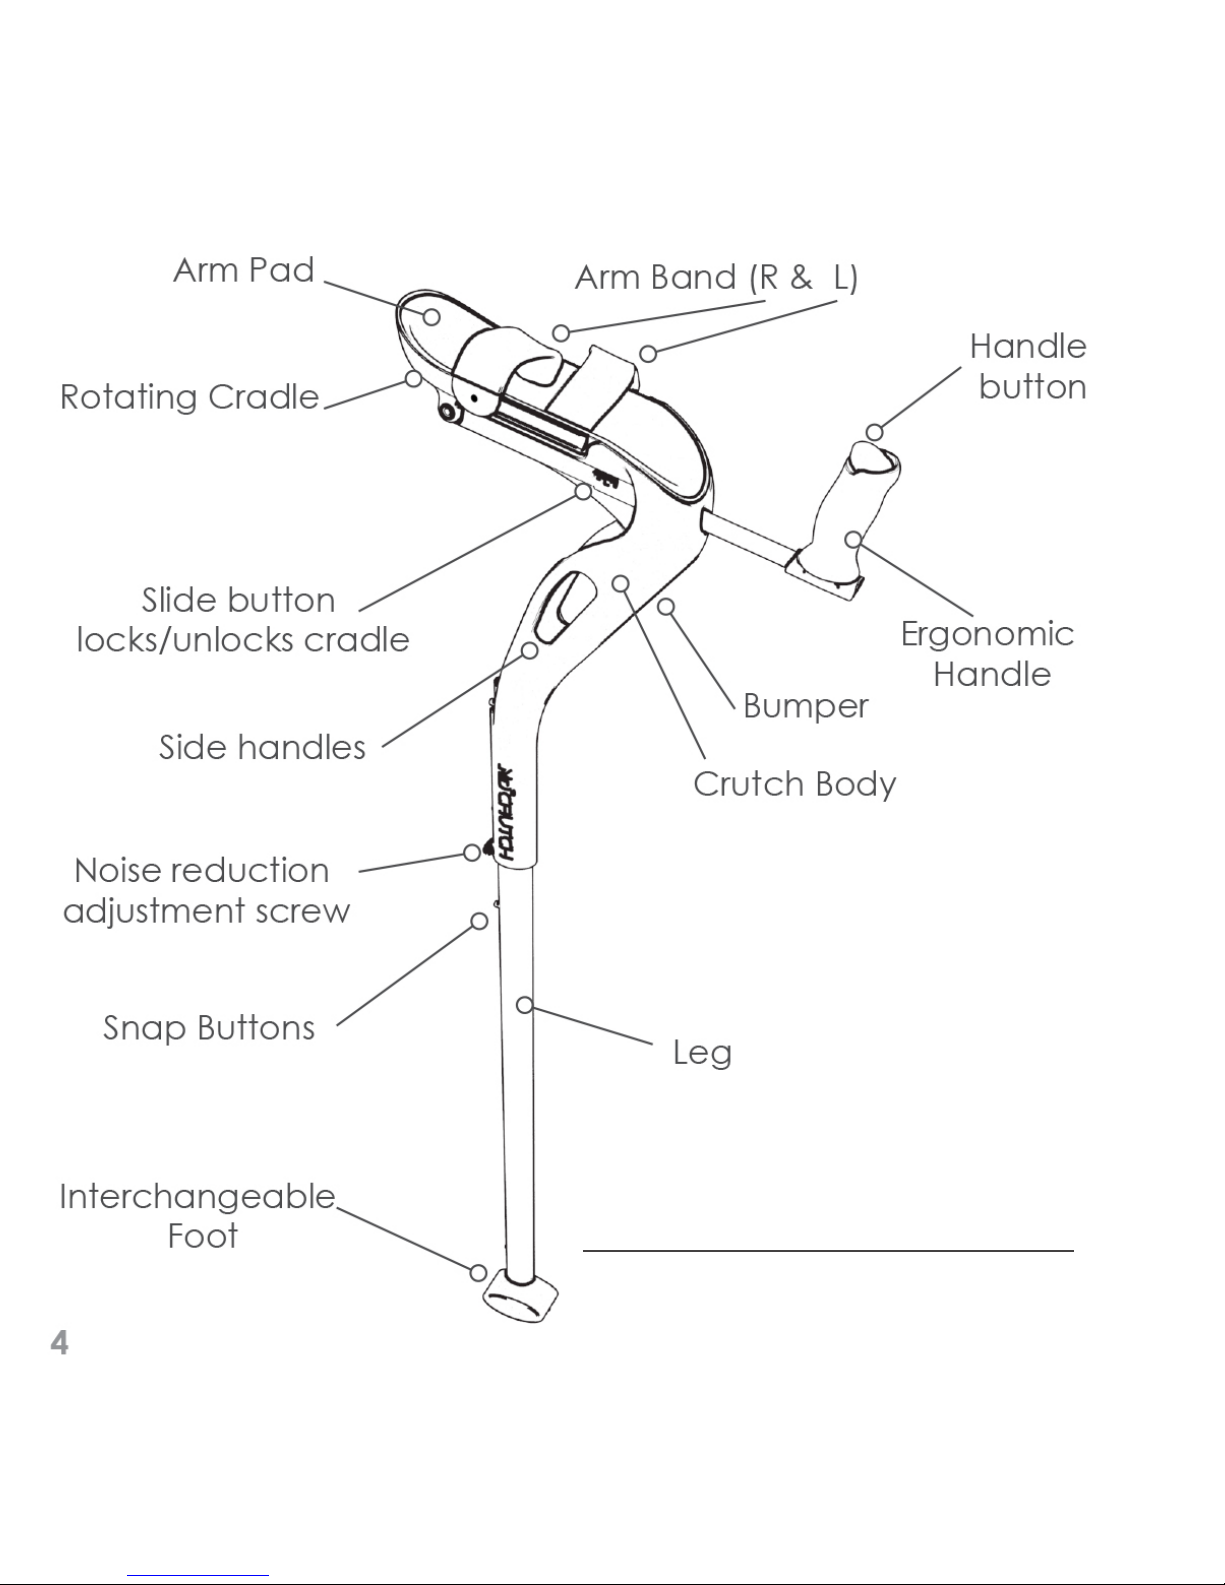
6
Structures and Features

7
Inserting foot: Depress snap button, insert foot-
stem into leg tube aligning with hole in leg.
*Tip: feet are designed for easy
removal and are snug to reduce
noise. If you nd removing foot is
tight, push snap button and apply
pressure on the top of the foot to
hold in place while pulling on leg
tube until released.
*Tip- Recommendations from the manufacturer.
Caution- User should take particular care to review.
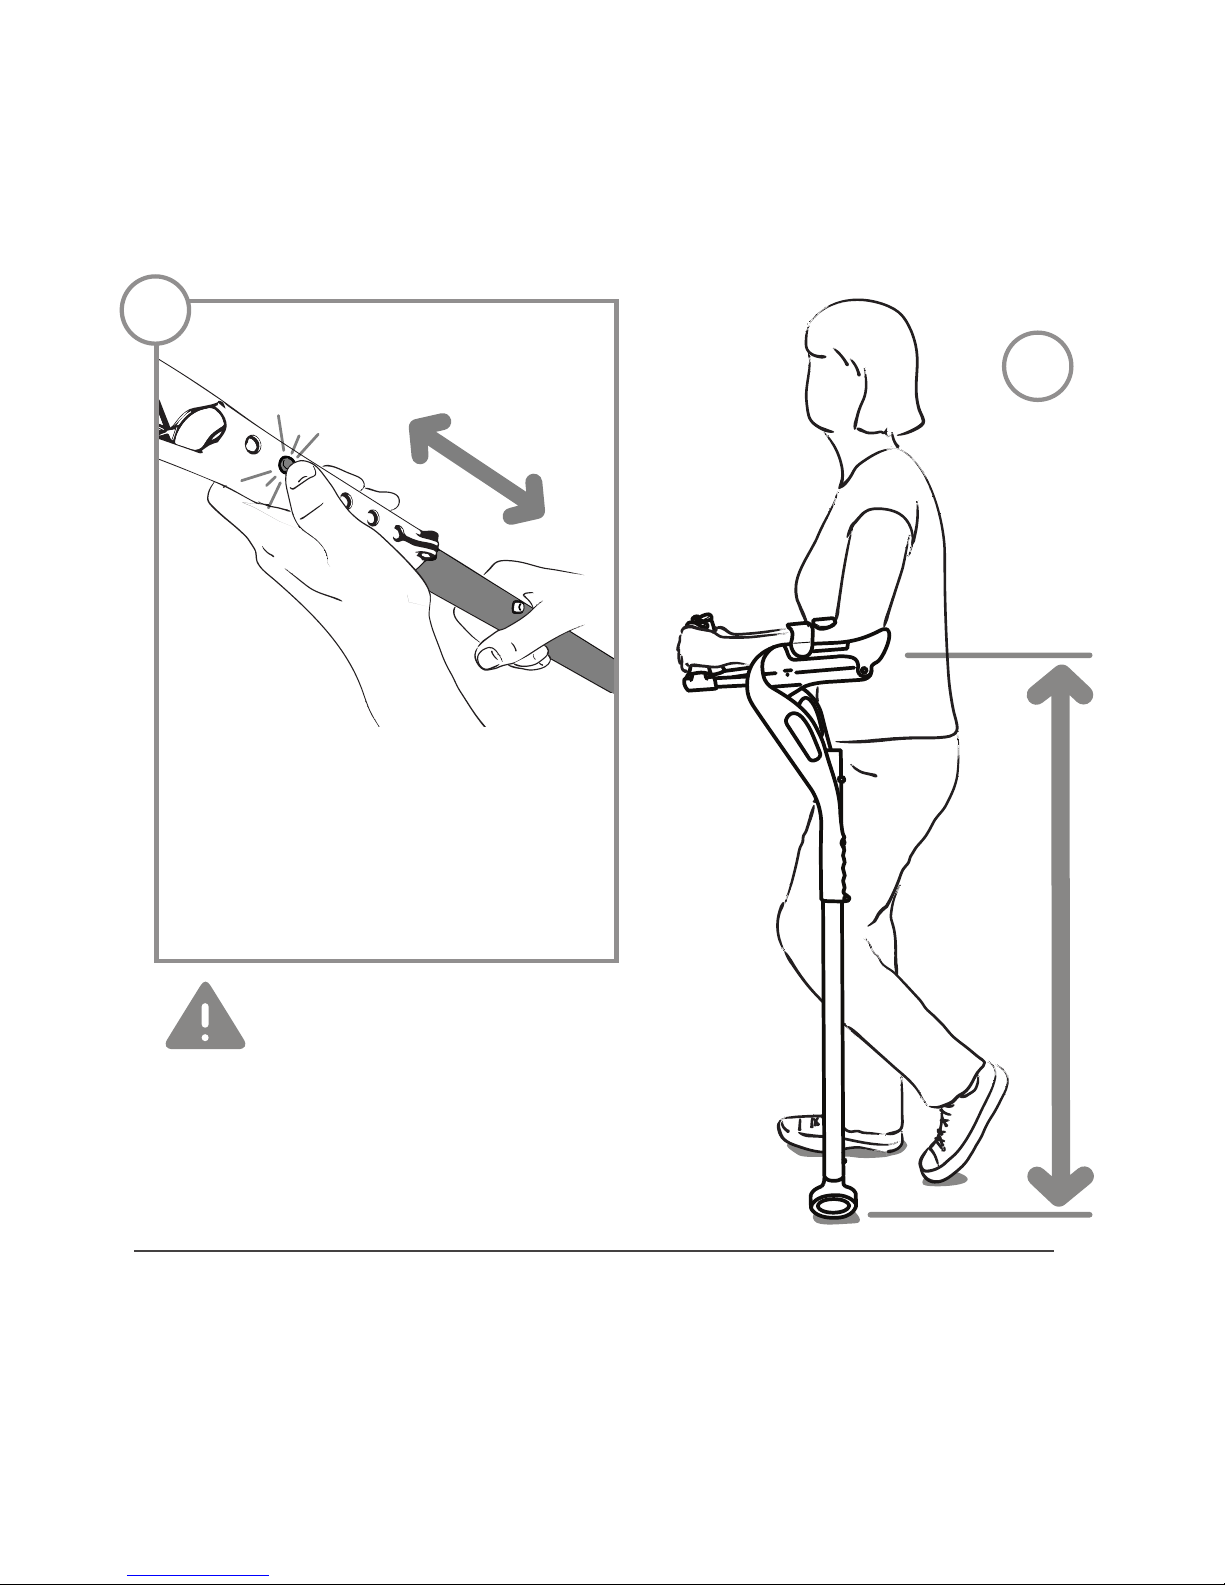
8
2. Height adjustment: Standing upright, elbow
should be rmly supported without lifting shoulders.
2
1Audible “click”
to secure leg.
*Caution: If snap-button
pushes too far inside leg: stop use
of crutch, use at-head screw-
driver to pop back out.
If unsuccessful call us for support.
1. Insert leg:
Depress snap-button in
leg to insert leg tube into
body of M+D Crutch™.
height.
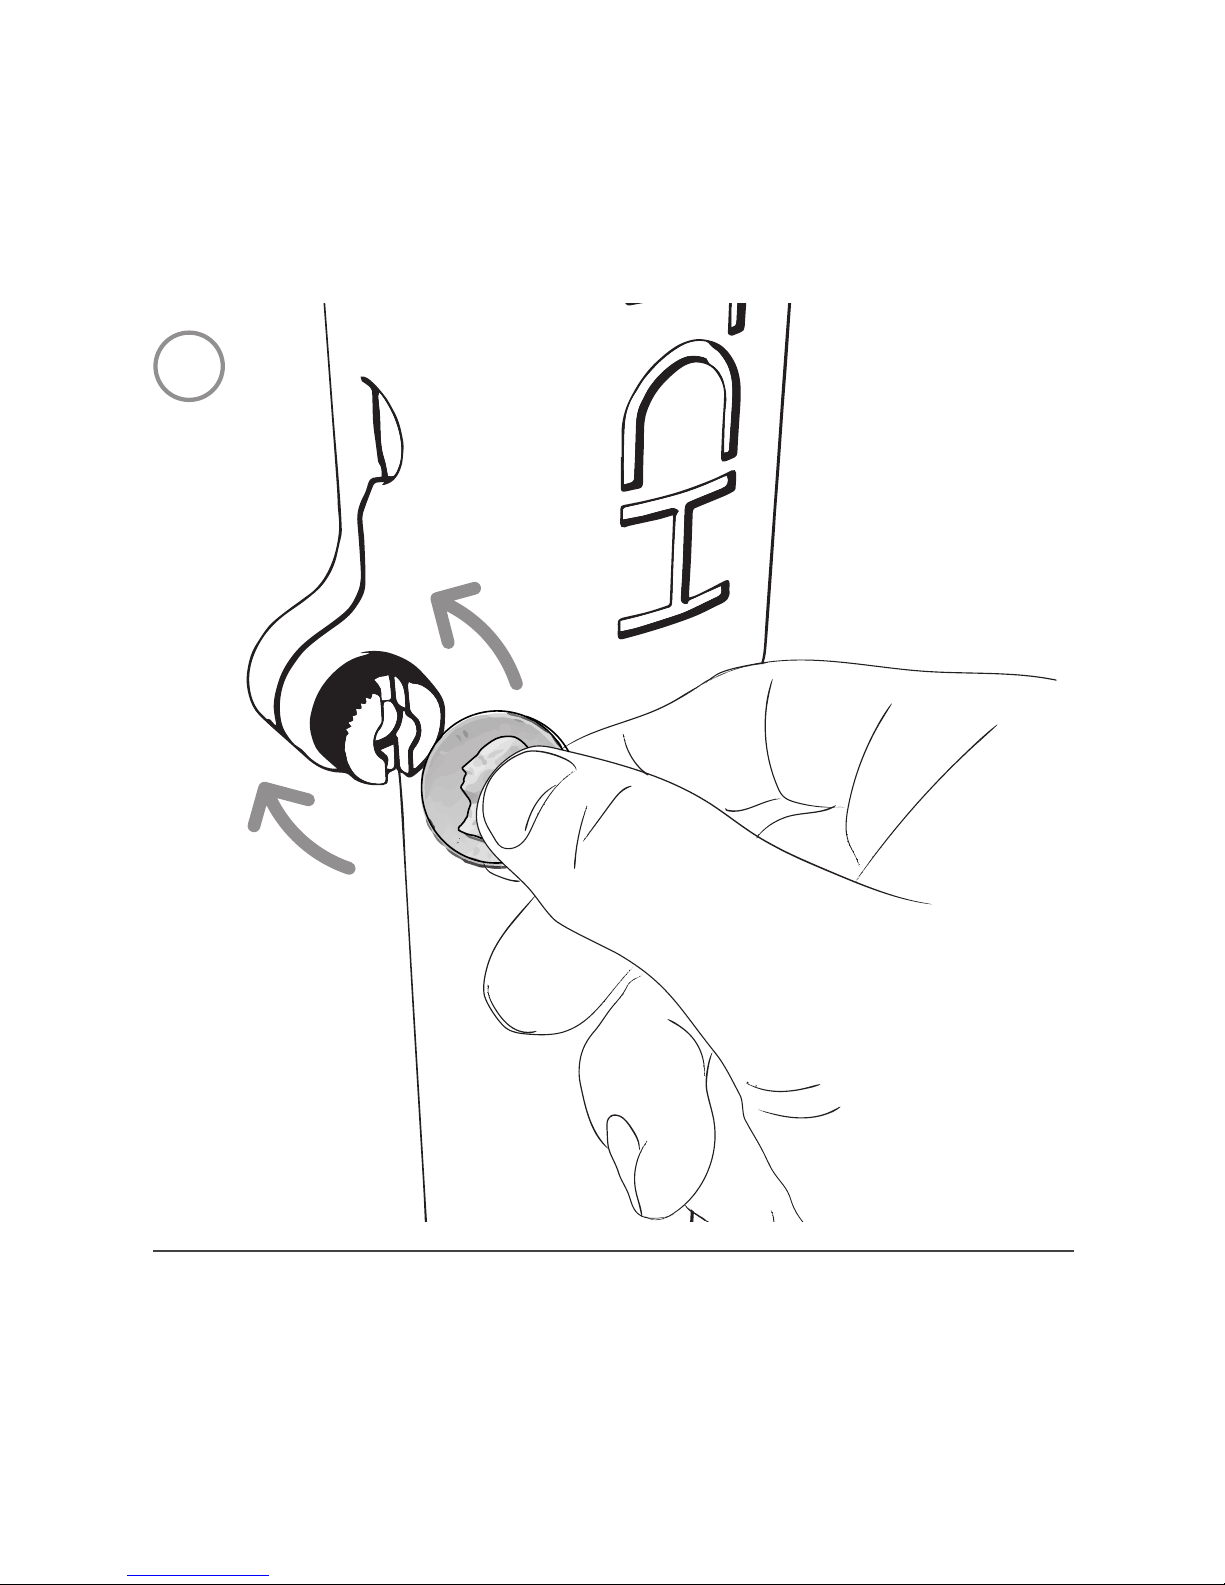
9
L
o
o
s
e
n
T
i
g
h
t
e
n
3
3. Finger tighten noise reduction screw until nger tight.
Snug up with screwdriver or coin to eliminate leg rattle.
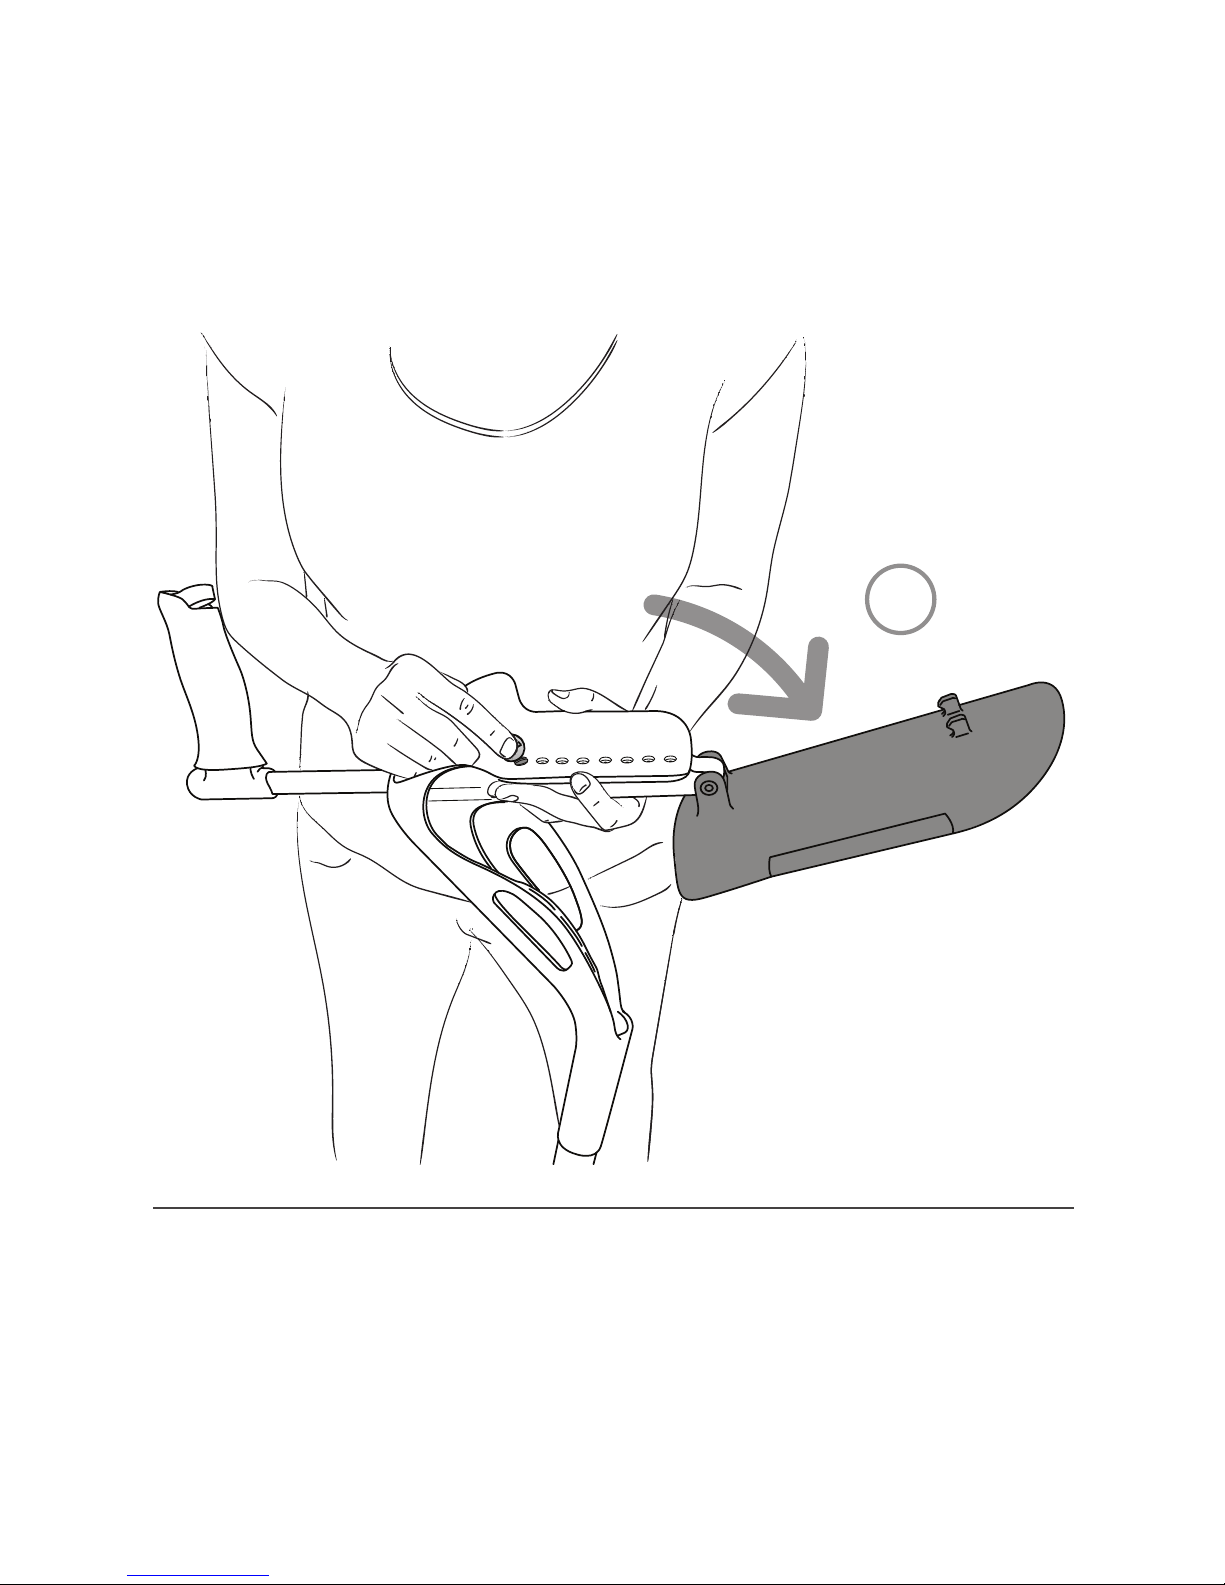
10
Adjusting handle length (step 1 of 4):
Press slide button to unlock the cradle. Raise cradle up
and out of the way.
1
This manual suits for next models
7
Table of contents
Popular Mobility Aid manuals by other brands


Decon wheel
Decon wheel TNS Notos Assembly instructions

ExoAtlet
ExoAtlet ExoAtlet-II user manual

Invacare
Invacare Storm Series parts catalog

Rhythm Healthcare
Rhythm Healthcare B3800F manual

AMF-BRUNS
AMF-BRUNS PROTEKTOR installation manual

Drive DeVilbiss Healthcare
Drive DeVilbiss Healthcare OTTER Instructions for use