MOCK Mockmill 100 User manual

Please read the operating instructions before using your Mockmill for the
first time to protect yourself from injury and avoid damaging the appliance.
Mockmill 100
Mockmill 200
Stone mill for milling grains,
pulses and spices
OPERATING INSTRUCTIONS
D-64747 Breuberg, Im Steigersfeld 7 / www.gojakob.de
Konstruktionsbüro Jakob
K
J
Chk. :
Drw.:
Chg.:
File:
Project
Mock M ühle 2016
GJA
16.11 .2016
Date
Name
Rev.
Shee t 1 from 1 S ize A0
M1:1
F:\c a d\ M o ck \G e h ä us e \M ühle ng e h äu se \ _E i n ze lt eile \Z e ic hnunge n Ge b ra uc h sm uste rs c hu tz .id w
-
-
-
-
1.0
Zusammenbau für
Gebrauchsmusterschutz
C
M
Y
CM
MY
CY
CMY
K
Mockmill 2017 Ansichten.pdf 1 25.07.18 09:10
*
* applies to Mockmill 100
DE
EN

TASTE -FEEL -EXPLORE
Get the most out of grains
T
A
S
T
E
S
B
E
T
T
E
R
FRESHLY
GROUND
FLOUR
A
N
D
W
H
O
L
E
S
O
M
E
HOME-MADE
FOOD IS GOOD
FOR YOU
J
U
S
T
T
R
Y
I
T
ANYONE
CAN BAKE GOOD
BREAD

3
Dear customer,
We are very pleased that you have purchased one of our Mockmills
and welcome you to the world of fresh milling. Now you begin enjoying
the variety, the great taste and the full flavour of whole grains and
other millable foods.
2000 years ago, the Romans understood that eating whole grains
is essential for health and high preformance. Each Roman soldier
received 800 g of wheat every day; every group carried a large hand-
operated stone mill. That enabled them to mill freshly their daily
ration, just-in-time. This is much easier today with your new Mockmill.
Try it our right away and enjoy a meal that makes you healthy.
We wish you years of enjoyment of your Mockmill, and of the fabulous,
healthy foods you will make. We would be delighted to receive any
feedback you have.
Best regards
Wolfgang Mock und Paul Lebeau
Welcome to the world of Mockmill!
JOIN THE
FOOD
REVOLUTION
DE
EN

4
Before the first use.
Please mill a handful of grain and then discard the flour. This will
remove any mineral debris from the manufacturing process on the
milling stones.
Getting started -Please follow in order
1. Connect the plug to the power socket
2. Place a bowl beneath the chute
3. Select milling grade
4. Switch on the mill
5. Add the grain to the hopper
After milling switch the mill off.
Important: Please remove the transport locking system this applies
only to the Mockmill 200. Instructions can be found on page 13.
QUICK GUIDE

5
Contents
Welcome page 3
Quick Guide page 4
Precautions and safety notices page 6
Components page 8
Getting started and cleaning page 9
Opening the Mockmill page 10
Further operating instructions page 13
Millable foods and grade settings page 14
Troubleshooting page 19
Warranty and repair page 20
Transport packaging and recycling page 21
Technical details and contents page 22
DE
EN

6
PRECAUTIONS
AND SAFETY NOTICES
Please read carefully before
using your Mockmill for the
first time.
Selecting grain
Use only cleaned grains. Unclean
grain may contain small stones
that can damage the milling
stones.
Milling foods or substances
other than those listed on pages
14- 16 can damage your mill
and void the warranty. In case
of doubt, please contact us by
sending an e-mail to
info@mockmill.com
Only use dry grain for milling
Moist grain will lead to the
build-up of a film on the milling
stones. You can remove the film
simply by milling dry grain on
a coarse setting. (Operating
instructions p. 10).
If in doubt, press a kernel onto
a hard surface with the back of
a spoon: If it breaks with a loud
crack, the grain is dry.
Grains that are too damp for
milling can be squashed flat
and then they look like a rolled
oat. Rye should be stored for
at least six months following
harvesting before milling. More
information about the different
grain types and their uses as
well as the adjustment of the
milling grades can be found on
our website under Service/Help
on mockmill.com
For home use
The Mockmill is intended
for home use and quantities
appropriate to normal family
requirements. It is not designed
for commercial use in which
large quantities of grain are to
be ground.
Milling spices
The Mockmill easily handles
dried spices and seasonings,
including pepper, coriander,
cardamon, cinnamon, and
more. Please note that some

7
spices, such as cinnamon, may
need to be broken into pieces
small enough to feed into the
Mockmill.
To flush the mill of the aroma of
milled spices, simply mill a small
amount of grain (such as wheat
or rice) right away. Then use this
“flavored flour” to add aroma to
your baking or sauces!
Oily / fatty foods
Please refrain from milling nuts
or oily foods such as sesame,
flax, or poppy seeds. Even coffee
beans contain a great deal of
oil, which leaves a film on the
milling stones, rendering them
incabable of processing the
grain properly.
How to clean the milling
stones and milling chamber
Choose a coarse setting and mill
about half a cup of dry grain,
such as wheat or rice. Move the
lever from coarse to fine and
back again while milling. Milling
on a very coarse setting, so that
the grains are just broken, will
quickly remove any film from the
milling stones. For thoroughness
the grains can be passed
repeatedly through the Mockmill.
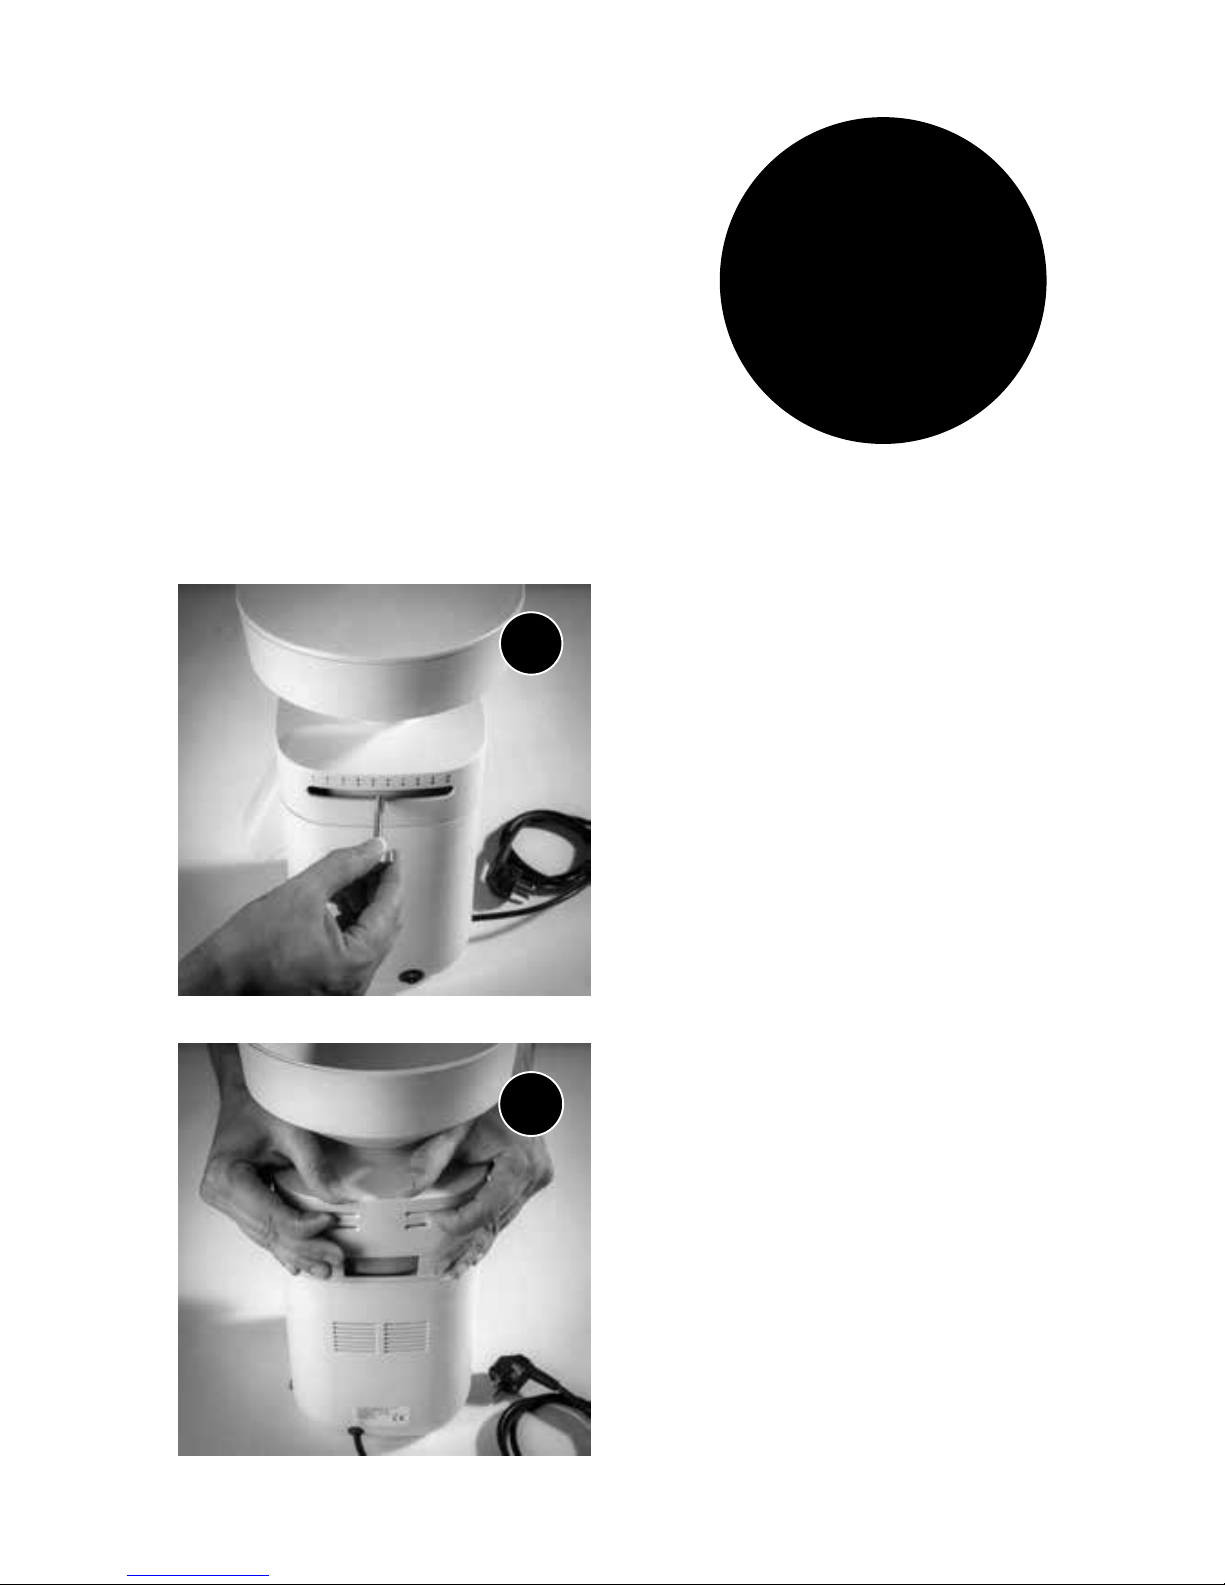
In severe cases, when a hard
film has built up on the stones ,
it is advisable that a few slits be
cut into the film’s surface with
a sharp object, such as the tip
of a paring knife. This creates a
starting point for the cleaning
process.
Supervision
The Mockmill is a piece of
electrical equipment and should
only be used under proper super-
vision (and not by children).
Warning
Keep hands and other objects
(such as spoons or screwdrivers)
away from the milling mecha-
nism at all times. Failure to do
so could cause injury (to the
fingers) and /or damage the
milling stones.
Cleaning
Never submerge the Mockmill in
water or any other liquid. Wipe
DE
EN

8
D
E
G
F
F
A
B
C
D-64747 Breuberg, Im Stei gersfeld 7 / www.gojakob.de
Konstruktionsbüro Jakob
K
J
Chk.:
Drw.:
Chg.:
File:
Project
Mock Mü hle 2016
GJA
16.11.2 016
Date
Name
Rev.
Sheet 1 from 1 Size A0
M1:1
F:\ca d\ M o ck \G e h ä us e \M ü h le n g eh ä u se \_ E in ze l te ile \Z ei c h n unge n Gebra u c h sm u s te rs c hu tz .id w
-
-
-
-
1.0
Zusammenbau für
Gebrauchsmusterschutz
C
M
Y
CM
MY
CY
CMY
K
Mockmill 2017 Ansichten.pdf 1 25.07.18 09:10
H
the casing clean with a slightly
damp cloth. It is important
that no water enter the mill.
The millstones should never be
cleaned with water or a wet cloth!
(Please see the section “Cleaning
the Mockmill”). Always disconnect
the appliance before cleaning.
COMPONENTS
A: Hopper cover
B: Hopper
C: Adjustment lever
D: Scale
E: Chute
F: Power switch
G: Power cable
H: Base

9
GETTING STARTED AND CLEANING
Initial start-up:
Before you use your Mockmill for the first time, please remove the
transport locking device (applies only to Mockmill 200). Instructions
can be found on p. 13.
Before first use
Please mill a handful of grain and then discard the flour. This will
remove any mineral debris from the manufacturing process on the
milling stones.
Getting started
1. Connect the plug to the power socket.
2. Place a bowl beneath the chute.
3. Select milling grade.
4. Switch on the mill.
5. Add grain to the hopper.
After milling, switch the mill off.
Cleaning
The milling stones clean themselves if you select a coarse setting from
time to time. If the mill is not to be used for a while (extended vacation,
for example), we recommend removing flour residues by milling on a
coarser setting. Please see “How to clean the Mockmill” on p. 7.
FURTHER OPERATING INSTRUCTIONS
On our homepage mockmill.com you will find videos containing
further operating instructions under Service/Help on mockmill.com
DE
EN

10
OPENING THE MOCKMILL
If the Mockmill is not operating
properly, or if heavy soiling is
suspected it makes sense to
open the Mockmill. Now the
milling chamber can be cleaned
thoroughly. Please follow the
instructions below.
Removing the adjustment lever
Please disconnect the Mockmill
from the power socket. Unscrew the
adjustment lever by turning counter-
clockwise.
Removing the Hopper
Now place your hands between the
funnel and the upper section of the
housing and press the two lugs on
the back of the upper section inwards
using both index fingers. While doing
so, lift the funnel and expose the
milling chamber.
1
2
FURTHER
QUESTIONS?
info@mockmill.com

11
Opening the milling chamber
You can now open the milling chamber
by unscrewing the large round cap
with the cross in the middle counter-
clockwise.
Remove Stator
Now you can remove the top stone
(stator). The bottom stone (rotor) is
now visible and is attached to the
motor shaft. If a hard film has built
up on the milling stones please see
p. 7. this will explain how it can be
removed. The top stone (stator) can
now be put back on.
Closing the milling chamber
Screw the large round cap back on
again, 2-3 turns until you feel a strong
resistance. Now turn the cap one
quarter-turn back. Plug the Mockmill
back in and turn on. Turn the cap
further until you hear a slight ticking
noise.
3
4
5
DE
EN

12
Reattach the hopper
Switch off the Mockmill and unplug
from the mains. The moveable inner
segment (which the lever was screwed
into) should be moved to the middle of
the right side of the mill.
Adjust adjusting lever
Screw in the adjusting lever a few
turns into the moving Segment (do
not tighten!). Now push the adjusting
lever to scale position 1 and tighten.
The scale position1 should always have
a a slight ticking sound . This stone
contact is causes no wear and will
stop when milling starts.
See p. 17 for further instructions.
6
7

13
Follow steps 1 -3 to open the mill
(p. 10 / 11). Remove the two transport
locking devices are positioned
opposite each other and between
housing and milling device .
Continue with the steps 5- 7
(p. 11 / 12) to close the mill.
FURTHER OPERATING INSTRUCTIONS.
On our homepage mockmill.com you will find videos containing
further operating instructions under Service/Help on mockmill.com
Removing the transport locking device (only Mockmill 200)
FURTHER
QUESTIONS?
info@mockmill.com
DE
EN

14
Soft Grains
Hard Grains
Seeds
Legumes
MM100
Milling Scale
MM200
Milling Scale
Essential
oils
Special Notes
Amaranth 0 – 1 0 – 1 –
Buckwheat 0 – 1 0 – 1 –
Chia seeds 6 – 7 7 –
Spelt 1 1 – 2 –
Einkorn wheat 1 1 – 2 –
Emmer wheat 0 – 1 1 –
Green spelt 1 1 –
Oats 3 4 – 5 –
Dried peas 1 1 –
Millet 1 1 –
Kamut 1 0 – 1 –
Chickpeas 4 – 5 3 – 4 –
Kidney beans 1 1 –
Lentils 1 1 –
SUBSTANCES FOR MILLING AND ADJUSTING THE SETTINGS
You can use your Mockmill to mill the following substances:

15
Soft Grains
Hard Grains
Seeds
Legumes
MM100
Milling Scale
MM200
Milling Scale
Essential
oils
Special Notes
Lupin seeds 2 2 –
Corn / Maize 1 – 2 1 – 2 – No
Popcorn
Milo
(Grain Sorghum)
0 – 1 2 – 2,5 –
Hulled barley 1 1 –
Natural long
grain rice
0 – 1 0 – 1 – No
parboiled rice
Pinto beans 2 1 – 2 –
Quinoa 0 – 1 0 – 1 –
Rye 1 1 –
Soya beans 1 – 2 5 –
Teff 0 – 1 0 – 1 –
White beans 0 – 1 0 – 1 –
Wheat 1 1 –
DE
EN

16
Herbs &
Spices
MM100
Milling Scale
MM200
Milling Scale
Essential
oils
Special Notes
Anis whole 4 4 – 5 √
Fenugreek seeds 1 2 – 2,5 –
Fennel seeds 2 3 √
Rosemary (dried) 2 2 –
Cardamon pods 0 – 1 0 – 1 √
Coriander seeds 1 2 √
Cumin 4 4 √
Caraway seeds 4 – 5 5√
Cloves 3 4 √
Allspice 1 1 –
Star Anise 2 – 3 3√Cut into
small pieces
Pepper 2 2 –
Tonka beans 9 – 10 10 √
Cinnamon
flowers
0 – 1 2√
Cinnamon sticks 1 1 – Cut into
small pieces

17
SUBSTANCES FOR MILLING
AND ADJUSTING THE SETTINGS
You can use your Mockmill to
mill all foods listed on pages
14 - 16.
Milling substances other than
those listed or on our website
may damage your mill and void
the warranty.
Do you have an idea or would
you like to try something that
you can not find on the list?
Then please send us a mail to
info@mockmill.com. We would like
to support you and your milling
ideas.
Adjusting the setting
Your Mockmill has a very
wide range of settings, and
is designed for very precise
adjustment. The setting is
pre-adjusted so that you can
hear a quiet sound of the stones
touching at lever position 1
when idling without grain.
The same noise can be heard
after the transport locking
system has been removed from
the Mockmill 200. This is the
finest setting, with lever position
10 you get coarser result.
If you hear no milling noise at
the lever position 1 or a very
strong milling noise already
from level 2, please adjust the
Mockmill as follows:
Loosen the adjusting lever two
turns, push the lever to setting
10 and tighten the lever again.
Now move the lever in direction
to setting 1 with the appliance
running.
As soon as the stone contact is
noticeable by a slight ticking,
loosen the lever again, move it
to setting 1 and tighten it firmly.
If no stone contact is heared,
please repeat the process.
If you require a coarser result
than achieved on the first scale,
DE
EN

18
you can adjust the Mockmill to
a coarser range as follows: With
the mill switched on, move the
lever as far as it will go towards
10. Now loosen the adjustment
lever. The lever now moves
freely back and forth. Move the
lever all the way back to postion
1 and tighten it back up (by
turning it clockwise). When you
now set the lever to 10 you will
get significantly coarser meal.
You can repeat this procedure a
second time if the milling result
is still not coarse enough for
your purposes.
To adjust the setting back
again to the fine range, proceed
as follows: Move the lever –
slowly – all the way to position
1. Now loosen it and move it over
to position 10. In this position,
tighten the adjusting lever
again. Repeat this procedure as
often as you did before to get to
the “coarse” setting range.
In position 1 you should hear
the quiet ticking noise made by
the milling stones when milling
chamber is empty. The Mockmill
is now set for a fine milling
result again. Once you have tried
out the procedure, it is easy to
use.
A video on this topic can be
found on our website under
Service / Help on mockmill.com

19
TROUBLESHOOTING
In the unlikely event that you experience a problem with your
Mockmill, or should you have any questions as to how it works,
please call us or send us an e-mail to info@mockmill.com (USA and
Canada support@mockmill.com). Our experts can solve virtually all
problems on the phone.
Listed below are some possible problems and how they can be
usually resolved.
The mockmill is humming, but it does not mill
Turn off the Mockmill and adjust the lever to position 10. Turn the
Mockmill on. The milling should start again. If it does not unplug the
Mockmill. Remove the grains from the hopper carefully turn the Mockmill
upside down. The Mockmill can then be opened as described on page
10. Remove any residuel material . The Mockmill can now be put back
together as described on p. 10. The problem should now be resolved. If
the stones are not clean of any film, follow instructions on p. 7
Please make sure that you always switch the Mockmill first and then
fill with grains, and always allow your Mockmill to finish the milling
job completely.
Mockmill does not mill fine
Adjust the Mockmill as described on p. 17, taking care to note the
ticking sound of first stone contact.
Important: Please make certain that the adjustment is and remains
screwed in tightly during adjustment.
DE
EN

20
MADE IN
GERMANY
Mockmill is turning, but not processing
A film has formed on the stones. With the Mockmill running, move to
a coarser setting and then back to a slightly less finer setting than
before. The flow of flour should resume. If not, empty the hopper
(see above) and clean the stones by milling some rice or wheat on a
coarse setting (p. 7.)
WARRANTY & REPAIR
The Mockmill is guaranteed by Wolfgang Mock GmbH for home use
against material and manufacturing defects for a period of 6 years
from the date of purchase. Please register your device online under
Service / Help on mockmill.com to ensure that your warranty is valid.
The warranty does not cover damage to fragile parts, such as the
hopper or flour chute, when caused by improper use. These can,
however, easily be replaced at a little or no cost to you. We will repair
or replace any defective Mockmill within the warranty period.
If repair or replacement parts are required, please call us or send
an email to info@mockmill.com (USA and Canada support@
mockmill.com) before returning the defective mill so that we can
locate the nearest authorized service center for you.
Other manuals for Mockmill 100
1
This manual suits for next models
1
Table of contents
Other MOCK Kitchen Appliance manuals
Popular Kitchen Appliance manuals by other brands

Concept2
Concept2 LO 706 Series manual

Silvercrest
Silvercrest SFW 400 A1 operating instructions

Knape&Vogt
Knape&Vogt Slide-Out Pot & Pan Caddy SPS27 installation instructions

Silvercrest
Silvercrest SPM 2000 A2 operating instructions

gourmetmaxx
gourmetmaxx Push n Ready operating instructions

Twin Eagles
Twin Eagles SALAMANGRILL TSGB-24 Assembly instruction