Modal Electronics ARGON8M Instructions and recipes

1
Modal ARGON8M
8 voice polyphonic wavetable synthesiser
Supplementary Manual
OS Version - 1.2

2 3
00
Introduction
Modal ARGON8M is a desktop & rack mountable 8-voice polyphonic wavetable synthesiser.
It features four digital oscillators per voice split into two controllable wavetables with one
innovative offline wave modifier available per wavetable with 28 different options to redraw
each wavetables and one modulateable oscillator modifier available per patch with 8 modifier
types to chose from.
There are 4 flexible multi-mode filters and 3 dedicated flexible envelope generators for AMP,
MOD and FILTER that can be accessed independently or all three simultaneously on board.
ARGON8M also boasts a hugely powerful “Mod Matrix” with eight assignable slots with four
additional fixed routes, 11 mod sources and 52 destinations.
The 4-axis joystick can be assigned to a huge range of modulation destinations and can be
‘locked’ in place when desired.
There are two Audio rate LFO’s with tempo sync (one poly, one global). Polyphonic LFO can
sync to frequency divisions.ARGON8M has 12 on board FX; a waveshaping distortion that is
followed by three incredibly powerful independent and user configurable stereo FX engines
that can create sophisticated Delays, lush Reverbs, Flanging, Phasing, and Rich Choruses to
name a few.
The hardware has been manufactured with high-quality components: a powder coated black
steel case, anodised aluminium top panel, Removable rubber grips that allow for rack ears to
be fitted, endless encoders and a super bright white on black OLED screen.
Among the many connections, Modal ARGON8M features a USB port to connect your synth
to the MODALapp user interface on a computer tablet or phone. This can be used for preset
design and management as well as updating the firmware on your ARGON8M

4 5
Specification
• True 8 voice polyphonic
• 120 carefully crafted wavetables split into 24 banks of 5 morphable waveform sets,
covering virtual analogue classics through to cutting edge EDM and many from the
original Modal 002 as well as a whole range of mathematically generated tables.
Additional PWM bank and 3 noise/modulation banks accessible on Oscillator 2
• 32 static wavetable modifiers including, de-rez, wave folders, wave shapers, phase
shapers and rectify that can be applied to the 120 wavetables to give a mind boggling
array of permutations and new waveshapes.
• 32 high resolution wavetable oscillators, 4 per voice
• 8 types of oscillator modifier including: Phase Mod (FM), Ring Mod, Amp Mod, Hard Sync
and Windowed Sync
• Voice Drift and Width controls that help to create massive stereo soundscapes
• Multiple voice modes, Mono, Poly, Unison 2, unison 4, unison 8, Stack 2 and Stack 4
• Inbuilt sophisticated programmable arpeggiator of 32 steps with rest capability with up to
2048 steps before repeating
• Glide/Portamento with both legato and staccato modes
• 4 Filter types. All filters types are 2 pole state-variable filters, the ‘Standard’ filters
are based on the resonant filter found in other Modal products (SKULPTsynth,
CRAFTsynth2.0). The ‘Classic’ types have a more rounded character and a softer
resonance response.
• 8 assignable modulation slots
• 4 additional fixed modulation routings for common assignments
• 11 modulation sources
• 52 modulation destinations
• 4-axis joystick that can be assigned to a huge range of modulation destinations and
virtually ‘locked’ when desired
• 3 dedicated envelope generators for AMP, MOD and FILTER that can be accessed
independently or all three simultaneously including negative (reverse) versions
• 2 Audio rate LFO’s with tempo sync (one poly, one global). Polyphonic LFO can sync to
frequency divisions
• Waveshaping distortion
• 3 incredibly powerful independent and user configurable stereo FX engines for Chorus,
Phaser, Flanger (Pos), Flanger (Neg), Tremolo, LoFi, Rotary, Stereo Delay, Ping-Pong Delay,
X-Over Delay and Reverb that can be arranged in any order
• 32-step programmable arpeggiator
• Real time sequencer with 512 notes with input quantise and four recordable / editable
parameter animations (Delay FX, LFO’s, sequencer and arpeggiator can be either clocked
internally or externally)
Specification
• 500 patch memories, all fully editable and ships with 300 factory programs
• 200 user patch spaces. Patch upload and download through the free MODALapp
• 100 sequencer presets that can be linked to any patch for quickly loading arrangements
• 100 FX presets
• 4 Quick Recall slots accessible from the panel for quickly loading your favourite patches
• Analogue clock sync in and out (configured to the KORG / Teenage Engineering
specification)
• MIDI DIN in and out
• Full size quarter inch jacks for stereo audio outs, headphones and external control such as
sustain and expression
• 3.5 mm stereo input with ability to route incoming audio through the FX
• 1.54 inch large OLED display – that provides instant visual feedback to the user at all
times of playing/editing
• Class compliant MIDI provided over USB connection to host computer or tablet
• Free MODALapp software editor available for macOS, Windows, iOS and Android
• MODALapp can also be run within your Digital Audio Workstation (DAW), with VST3
and AU versions available
• Power: DC-9.0V - 1.5A center-positive
• Road ready Steel and Aluminium chassis
• Included 3U rack mounting ears. Use right angle cables or leave 1U blank above when
mounting
Dimensions
• Length: 384mm – 15 inches
• Width: 127mm – 5 inches
• Height: 80mm – 3 inches

6 7
01
Getting Started
Basic Functions
Powering on
Connect the power lead to your ARGON8M then connect the outputs of the ARGON8M to
your mixer, or if you prefer, connect your headphones. Optionally connect a USB cable from
your computer or tablet device to the ARGON8M for MODALapp communication.
Then power on.
You will see a loading animation on the screen. When the synth has loaded it will change to
show the main patch page.
Screen Control
The Modal ARGON8M interface is designed to be extremely intuitive and easy to use, so
that all the most important parameters are easily accessible and tweakable directly from the
top panel, however, all functions are also accessible and tweakable on-screen using the two
indented encoders.
These two switched-encoders are located either side of the screen are used for screen
navigation and control and can be clicked to either switch mode or trigger / modify the
selected function:
• Page/Param - When this encoder is in ‘Page’ mode (top row of on-screen text) it cycles
through the parameter pages / groups (e.g. Osc1, Osc2, Filter); when it’s in ‘Param’ mode
(bottom row of on-screen text) it cycles through the parameters on that page / group.
Use the switch by clicking the encoder to toggle between the two modes, where the
mode is displayed on the screen with a line at top for ‘Page’ mode and at the bottom for
‘Param’ mode.
• Preset/Edit (/Bank) - This encoder/switch is used to adjust the currently selected value
or ‘trigger’ the currently displayed parameter. When the panel is in ‘Shift’ mode the
‘Load Patch’ encoder is used to select the patch bank number, jumping up or down in
increments of 100.

8 9
Basic Functions
Secondary functions
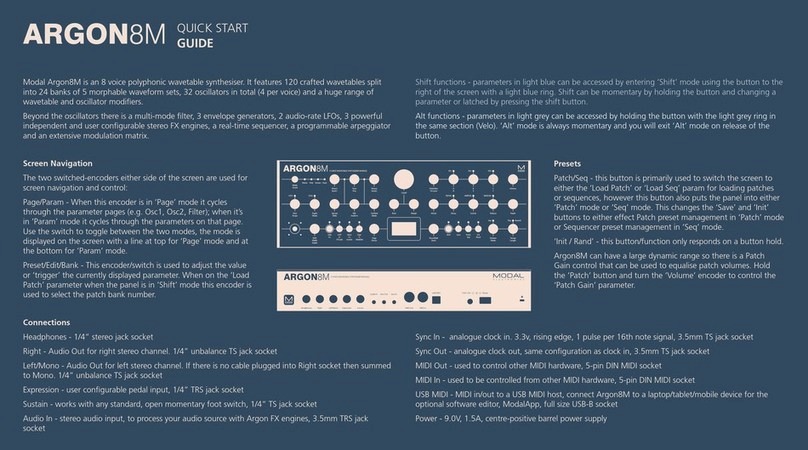
ARGON8M is a comprehensive and fully featured synthesiser despite its small size. Therefore
there are a number of user interface combinations that are required to access some of the
deeper functions of the synth.
All encoders with LEDs above also function as switches for various functions.
The top panel UI has 3 buttons that can access secondary functions. These are the SHIFT,
PATCH & VELO buttons.
To access the functions labelled in light blue text you may either press ‘Shift’ to latch shift
mode or use it momentarily by holding ‘Shift’ and turning an encoder or pressing a button.
Once let go the panel will return automatically to it’s regular non-Shift state.
To access the functions on the panel labelled in light grey text (3 buttons bottom left), hold
the button that has a light grey ring (‘Velo’ button) and press the relevant button. NOTE:
These combinations are momentary, not latch-able.
The ‘Patch/Seq’ button is primarily used to switch the screen to either the ‘Load Patch’ or
‘Load Seq’ param for loading patches or sequences, entering the panel into either ‘Patch’
mode or ‘Seq’ mode. When in ‘Patch’ mode the ‘Save’ and ‘Init’ buttons are used for patch
preset management, however when in ‘Seq’ mode the ‘Save’ and ‘Init’ buttons are used
for sequence preset management. When the white LED above this button is lit, it signifies
that the panel is in ‘Seq’ mode. When held the ‘Patch/Seq’ button can also be used to select
‘WavMod’s for each wavetable by turning either of the ‘Wave1’ or ‘Wave2’ encoders, to select
the Filter Type by turning the ‘Cutoff’ encoder, to select the ‘Arp Gate’ length by turning the
‘Arp’ encoder or, to dial in the amount of dynamics processing being applied by the ‘Patch
Gain’ function by turning the ‘Volume’ encoder.
The ‘Init / Rand’ button/functions respond to a button hold.
Navigating and Loading Preset
To navigate through and load patches first press the ‘Patch/Seq’ button to return to the Patch
page and use the ‘Preset/Edit’ encoder to scroll through presets. Click this encoder in on the
desired preset to load it. An asterisk will appear on next to the current preset name to indicate
unsaved edits.
Init Preset
Press and hold the ‘Init’ button, a confirmation message will appear on-screen however the
preset will not be overwritten until saved.
Basic Functions
Randomise Preset
Either when in ’Shift’ mode or while momentarily holding ‘Shift’ press and hold the ‘Rand’
button, a confirmation message will appear on-screen however the preset will not be
overwritten until saved. Randomise is only available for patches.
Save Preset
First press the ’Save’ button to enter the ‘full’ save procedure (setting preset slot and/or name
- see below), or hold the ‘Save’ button to perform a ‘quick’ save (saving preset directly into
current slot with current name).
Once you are in the ‘full’ save procedure, presets are saved in the following way:
Slot Selection
Use the ‘Preset/Edit’ encoder to select the preset bank/number to save into, and press the
‘Edit’ switch to select it.
Naming
Use the ‘Page/Param’ encoder to select the character position, and use the ‘Edit’ encoder
to select the character. Press the ‘Preset/Edit’ switch to finish editing the name. There are a
number of panel shortcuts here:
• Press ‘Velo‘ to jump to lowercase characters
• Press ‘AftT’ to jump to uppercase characters
• Press ‘Note’ to jump to numbers
• Press ‘Expr’ to jump to symbols
• Press the ‘Page/Param’ switch to add a space (increment all above characters)
• Press ‘Init’ to delete the current character (decrement all above characters)
• Hold ‘Init’ to delete the entire name
Confirming
Press the ‘Preset/Edit’ switch to confirm the settings and save the preset.
At any point during the save procedure hold the ‘Page/Param’ switch to move back a step.
To exit/quit the procedure without saving the preset, press the ‘Patch/Seq’ button.

10 11
UI Combinations
Quick Recalls
ARGON8M has 4 Quick Recall slots for quickly loading presets. Quick Recalls are controlled
using the following button combos:
• Hold ‘Patch’ + hold one of the four buttons on bottom left of the panel to assign the
currently loaded patch to a QR slot
• Hold ‘Patch’ + press one of the four buttons on bottom left of the panel to load the
patch in the QR slot
LFO
• Turn the ‘Rate’ encoders into the negative range to access synced rates
• Press the ‘LFO1/LFO2’ switch when LFO is already selected to latch LFO assign
Oscillators
• Hold the ‘Patch’ button and turn the ‘Wave1’ or ’Wave2’ encoder to control the WavMod
parameters
• Press the ‘Tune/Fine’ switch to toggle between Osc1 and Osc2 tune and fine tune controls
Filter
• Hold the ‘Patch’ button and turn the ‘Cutoff’ encoder to control the Filter Type parameter
Envelopes
• Hold any of the EG buttons for one second and then turn the ADSR encoders to adjust all
envelopes simultaneously
• Press the MEG button when MEG is already selected to latch MEG assign
Sequencer
• Hold the ‘Patch’ and ‘Play’ button to clear the sequencer notes
• When the screen is displaying the ‘Linked Sequence’ parameter, hold the ‘Edit’ switch to
set the value to be the currently loaded sequence.
UI Combinations
Arp
• Hold the ‘Arp’ button and press keys on the internal or an external keyboard to add
pattern notes or press the ‘Play’ button to add a rest to the pattern
• Hold the ‘Patch’ button and turn the ‘Division’ encoder to control Arp Gate
Voice
• Press ‘Mode’ repeatedly to cycle through the different voice modes Mono, Poly, Unison
(2,4 and 8) and Stack (2 and 4).
• Press ‘Chord’ whilst holding a chord on an external keyboard to set the chord mode
chord.
Modulation
• To assign a Mod Slot either hold (momentary) or latch the desired Mod source button -
then set a depth by turning desired modulation destination parameter encoder
• When latched in a Mod Source assign mode pressing the flashing Mod Source button
again will exit assign mode
• Mod source button + ‘Depth’ encoder - set global depth for that mod source
• Press ModSlot repeatedly to cycle through and view all mod slot settings on the screen
• When the screen is displaying a mod slot ‘Depth’ parameter (most easily accessed via
assigning modulation using the panel or via the ModSlot button), hold the ‘Edit’ switch to
clear the mod slot assignment.
• To assign a mod source to an osc’s global frequency destination, use either of the fine
tune controls. ‘Tune1’ will assign to Osc1 tune, ‘Tune2’ will assign to Osc2 tune.
FX
• Press FX1 / FX2 / FX3 button repeatedly to change the FX type of the slot
• Hold FX1 / FX2 / FX3 button to reset the FX type of the slot to ‘None’
• Turn the ‘B’ encoder into the negative range for the slot with a Delay FX assigned to
access synced delay times
• Press FX1 + FX2 + FX3 to jump to the ‘FX Preset Load’ parameter
Global Settings
• When the screen is displaying the ‘Reset’ option, hold the ‘Edit’ switch to trigger the
‘Reset’ function.

12 13
How to mount ARGON8M in 19” rack
For users who would like to mount
their ARGON8M in a 19” rack, a pair of
rack mounting ears are provided in the
accessories box inside your ARGON8M
packaging.
To install these, first grab a corner of the
textured rubber side panels fitted to your
ARGON8M and pull these back to remove
them from the unit. You may wish to retain
these for future use if the unit is removed
from rackmount use.
Removing the rubber side panels will
expose two screw holes, recessed into the
side of the ARGON8M. Take the provided
rack ear mounting screws and install
them into the smaller holes in the rack
ear, then align the ear with the side of the
ARGON8M and secure the screws.
Do not apply too much force when
tightening these screws as this may
damage the aluminium sides.
Please note, when installed in a 19” rack,
you will need to allow 1U of space above
the ARGON8M to allow the installation of
cables into the back / top of the unit
For full manual please consult the Modal
ARGON8 User Manual:
https://www.modalelectronics.com/argon8-manual
Differences for ARGON8M:
• No ‘Transpose’ button, but the ‘transpose’ parameter can still be accessed on the screen
• No ‘Octave’ buttons, but the ‘octave’ parameter can still be accessed on the screen if the
‘MIDI-in Octave Offset’ global setting is enabled.
• Swing parameter is accessed on the screen only
• Seq Loop is is accessed on the screen only
• Seq Hold is accessed on the screen only
• Animation lane muting and clearing is accessed on the screen only
• No keyboard settings on the screen
Table of contents
Other Modal Electronics Synthesizer manuals

Modal Electronics
Modal Electronics Cobalt 5S User manual

Modal Electronics
Modal Electronics ARGON8M User manual

Modal Electronics
Modal Electronics ARGON8 User manual

Modal Electronics
Modal Electronics ARGON8X User manual

Modal Electronics
Modal Electronics COBALT8X User manual

Modal Electronics
Modal Electronics ARGON8 User manual

Modal Electronics
Modal Electronics COBALT8M User manual

Modal Electronics
Modal Electronics 002R User manual

Modal Electronics
Modal Electronics CRAFT SYNTH User manual

Modal Electronics
Modal Electronics 8 User manual