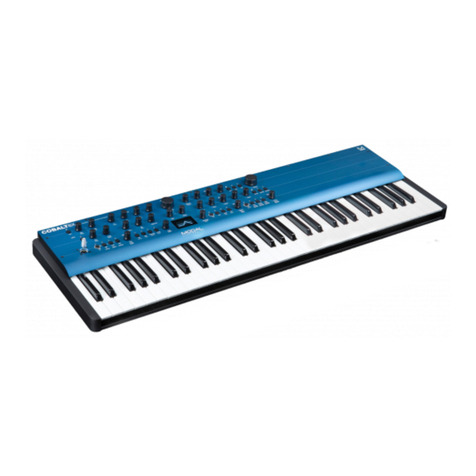
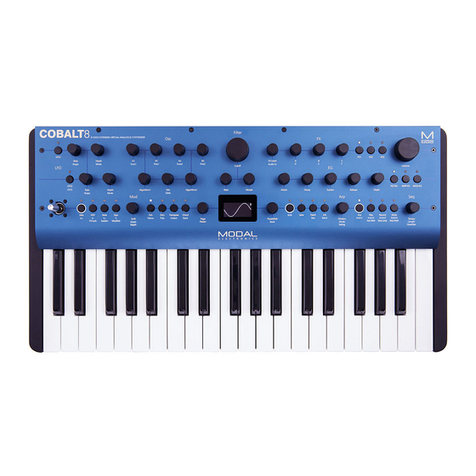
Modal Electronics COBALT8M User manual

1
Modal COBALT8M
8 voice polyphonic extended virtual-analogue synthesiser
User Manual
OS Version - 1.0

2 3
Important Safety Information
WARNING – AS WITH ALL ELECTRICAL PRODUCTS, care and general precautions must
be observed in order to operate this equipment safely. If you are unsure how to operate this
apparatus in a safe manner, please seek appropriate advice on its safe use.
ENSURE CORRECT PSU POLARITY - FAILURE TO DO SO MAY CAUSE PERMANENT
DAMAGE - RECOMMENDED USE WITH PROVIDED POWER SUPPLY
This apparatus MUST NOT BE OPERATED NEAR WATER or where there is risk of the
apparatus coming into contact with sources of water such as sinks, taps, showers or outdoor
water units, or wet environments such as in the rain. Take care to ensure that no liquids are
spilt onto or come into contact with the apparatus. In the event this should happen remove
power from the unit immediately and seek expert assistance.
This apparatus produces sound that could cause permanent damage to hearing. Always
operate the apparatus at safe listening volumes and ensure you take regular breaks from
being exposed to sound levels
THERE ARE NO USER SERVICEABLE PARTS INSIDE THIS APPARATUS. It should only be
serviced by qualified service personnel, specifically when:
• The apparatus has been dropped or damaged in any way or anything has fallen on the
apparatus
• The apparatus has been exposed to liquid whether this has entered the apparatus or not
• The power supply cables to the apparatus have been damaged in anyway whatsoever
• The apparatus functions in an abnormal manner or appears to operate differently in any
way whatsoever.

4 5
Index
00. Introduction
Specification
01. Getting Started
Basic Functions
UI Combinations
Screen Map
02. Connections
03. Synthesis Engine
Oscillators
Algorithms
Filter
Envelopes
LFOs
Arpeggiator
Sequencer
FX
Modulation
Voice
Joystick + Audio Input
Audio Output + Gain
Settings
04. MIDI
MIDI Implementation Chart
MPE
Polychain
05. Update
06. MODALapp
Getting Started
Main Editor
Preset Manager + Modulation Tab
Sequencer Tab
FX, Keyboard + Settings
Warranty Information
6
8
12
12
16
20
22
24
26
27
30
32
34
36
37
38
44
46
50
52
53
54
60
64
66
68
70
72
74
75
76
78
79
82

6 7
00
Introduction
Modal COBALT8M is an eight voice polyphonic extended virtual-analogue synthesiser.
It features two independent oscillator groups, each containing 34 different algorithms. There
is a Mix control between the oscillator groups and an extended Oscillator Drift control for
creating huge super-sounds.
The available algorithms include a variety of complex analogue synthesis techniques, built
in cross-modulation (SYNC, RM, and many more), PWM, smooth Morphing between VA
waves, bit crushing and filtered noise. Each algorithm has carefully curated controls that make
complex synthesis simple with just two parameters.
There is a digital ladder filter with various configurations and three dedicated flexible envelope
generators for AMP, MOD and FILTER that can be accessed independently or all three
simultaneously on board.
COBALT8M also boasts a hugely powerful “Mod Matrix” with eight assignable slots and four
additional fixed routes, 12 mod sources and 55 destinations.
The 4-axis joystick can be assigned to a huge range of modulation destinations and can be
‘locked’ in place when desired.
There are three LFO’s with tempo sync (two poly, one global).
COBALT8M has three incredibly powerful, independent and user configurable stereo FX
engines with 11 FX options available that can create sophisticated Delays, lush Reverb,
Flanging, Phasing, and Rich Choruses to name a few.
The hardware has been manufactured with high-quality components: a tabletop-style
enclosure, brackets for 19” 3U rackmount included (requires 1U free space above or right-
angled connectors), anodised aluminium top panel, endless encoders and a super bright white
on black OLED screen.
Among the many connections, Modal COBALT8M features a USB port to connect your synth
to the MODALapp user interface on a computer tablet or phone. This can be used for preset
design and management as well as updating the firmware on your COBALT8M (please see
‘Updates’ section).

8 9
Specification
Polyphony
• True 8 voice polyphonic with option to polychain any two COBALT synthesisers for 16
voice polyphony.
MPE
• Supports MPE-compatible MIDI controllers, allowing you to apply polyphonic control and
expression to individual notes
Oscillators
• 2 independent oscillator groups, each with selectable algorithms, self-contained oscillator
cross-modulation and control
• 34 algorithms including a variety of complex analogue synthesis techniques, built in cross-
modulation (SYNC, RM, and many more), PWM, smooth Morphing between VA waves,
bit crushing and filtered noise
• Each algorithm has carefully curated controls that make complex synthesis simple with
just two parameters
• Extended Oscillator Drift and Voice Width controls that help to create massive stereo
soundscapes
Filter
• Four-pole morphable ladder filter, with switchable configurations
Modulation
• 3 dedicated envelope generators for AMP, MOD and FILTER that can be accessed
independently or all three simultaneously including negative (reverse) versions and
multiple envelope curve options
• 3 assignable LFO’s, two polyphonic, one global
• 8 assignable modulation slots and 4 additional fixed modulation routings for common
assignments with 12 modulation sources and 55 modulation destinations
Specification
Sequencer and Arpeggiator
• Polyphonic Real-time and Step sequencer with 512 notes and four recordable/editable
parameter animations (Delay FX, LFO’s, sequencer and arpeggiator can be either clocked
internally or externally)
• Step Sequencer holds up to 64 steps, 8 notes per step, 4 lanes of Parameter-Lock style
animation, Step Input mode, multiple playback modes including gate modes and rest
function
• Built-In sophisticated programmable arpeggiator of 32 steps with rest capability and
random up to 2048 steps before repeating
FX
• 3 incredibly powerful independent and user-configurable stereo FX engines for Chorus,
Phaser, Flanger (Pos), Flanger (Neg), Tremolo, LoFi, Rotary, Stereo Delay, Ping-Pong Delay,
X-Over Delay and Reverb that can be arranged in any order
User Memory
• 500 patch memories, all fully editable and ships with 300 factory programs
• 100 sequencer presets that can be linked to any patch for quickly loading arrangements
• 100 FX presets
• 4 Quick Recall slots accessible from the panel for quickly loading your favourite patches
Controls and Performance
• 13 switched encoders, 13 encoders, 9 buttons
• 4-axis joystick that can be assigned to a huge range of modulation destinations and
virtually ‘locked’ when desired
• Multiple voice modes, Mono, Poly, Unison 2, unison 4, unison 8, Stack 2 and Stack 4
• Glide/Portamento with both legato and staccato modes
• Chord Invert control to easily create chord inversions and variation

10 11
Specification
Inputs and Outputs
• 6.35 mm / 1/4” TS dual-mono line outputs
• 6.35 mm / 1/4” TRS headphone output
• 3.5 mm / 1/8” TRS stereo audio input
• MIDI DIN In and Out
• 3.5 mm / 1/8” TS Analogue clock sync In and Out
• Class compliant MIDI over USB B connection
• 6.35 mm / 1/4” TRS expression pedal input
• 6.35 mm / 1/4” TS sustain pedal input
Enclosure and Display
• Tabletop-style enclosure, brackets for 19” 3U rackmount included (requires 1U free space
above or right-angled connectors)
• 1.54-inch large OLED display for instant visual feedback at all times of playing/editing
Power
• Power: DC-9.0V – 1.5A centre-positive
Editor Software
• Free MODALapp software editor available for macOS, Windows, iOS and Android
• MODALapp can also be run within your Digital Audio Workstation (DAW), with VST3 and
AU versions available
Dimensions (L x W x H)
• 384 x 127 x 81 mm / 15.1” x 5” x 3.2”
Weight
• 2.1 kg / 4.6 lbs

12 13
01
Getting Started
Basic Functions
Powering on
Connect the power lead to your COBALT8M then connect the outputs of the COBALT8M to
your mixer, or if you prefer, connect your headphones. Optionally connect a USB cable from
your computer or tablet device to the COBALT8M for MODALapp communication.
Then power on.
You will see a loading animation on the screen. When the synth has loaded it will change to
show the main patch page.
Screen Control
The Modal COBALT8M interface is designed to be extremely intuitive and easy to use, so
that all the most important parameters are easily accessible and tweakable directly from the
top panel, however, all functions are also accessible and tweakable on-screen using the two
detented encoders.
These two switched-encoders are located either side of the screen are used for screen
navigation and control and can be clicked to either switch mode or trigger / modify the
selected function:
• Page/Param - When this encoder is in ‘Page’ mode (top row of on-screen text) it cycles
through the parameter pages / groups (e.g. Osc1, Osc2, Filter); when it’s in ‘Param’ mode
(bottom row of on-screen text) it cycles through the parameters on that page / group.
Use the switch by clicking the encoder to toggle between the two modes, where the
mode is displayed on the screen with a line at top for ‘Page’ mode and at the bottom for
‘Param’ mode.
• Preset/Edit (/Bank) - This encoder/switch is used to adjust the currently selected value
or ‘trigger’ the currently displayed parameter. When the panel is in ‘Shift’ mode the
‘Load Patch’ encoder is used to select the patch bank number, jumping up or down in
increments of 100.

14 15
Basic Functions
Secondary functions
COBALT8M is a comprehensive and fully featured synthesiser. Therefore there are a number of
user interface combinations that are required to access some of the deeper functions of the
synth.
The top panel UI has 3 buttons that can access secondary functions. These are the ‘Shift’,
‘Patch’ & ‘Velo’ buttons.
To access the functions labelled in light blue text you may either press ‘Shift’ to latch shift
mode or use it momentarily by holding ‘Shift’ and turning an encoder or pressing a button.
Once let go the panel will return automatically to its regular non-Shift state.
To access the functions on the panel labelled in light grey text (3 buttons bottom left), hold
the button in that section that has a light grey ring (‘Velo’ button) and press the relevant
button. NOTE: These combinations are momentary, not latch-able.
The ‘Patch/Seq’ button is primarily used to switch the screen to either the ‘Load Patch’ or
‘Load Seq’ param for loading patches or sequences, entering the panel into either ‘Patch’
mode or ‘Seq’ mode. When in ‘Patch’ mode the ‘Save’ and ‘Init’ buttons are used for patch
preset management, however when in ‘Seq’ mode the ‘Save’ and ‘Init’ buttons are used for
sequence preset management. When the white LED above this button is lit, it signifies that the
panel is in ‘Seq’ mode.
When held the ‘Patch/Seq’ button can also be used to select the Filter Type by turning the
‘Cutoff’ encoder, to select the ‘Arp Gate’ length by turning the ‘Arp’ encoder or, to dial in
the amount of dynamics processing being applied by the ‘Patch Gain’ function by turning the
‘Volume’ encoder, and to select the Chord Inversion type by turning the ‘Drift’ encoder.
The ‘Init / Rand’ button/functions respond to a button hold.
Navigating and Loading Preset
To navigate through and load patches first press the ‘Patch/Seq’ button to return to the Patch
page and use the ‘Preset/Edit’ encoder to scroll through presets. Click this encoder (if Preset
Auto-Load is not enabled) on the desired preset to load it. An asterisk will appear on next to
the current preset name to indicate unsaved edits.
Init Preset
Press and hold the ‘Init’ button, a confirmation message will appear on-screen however the
preset will not be overwritten until saved.
Basic Functions
Randomise Preset
Either when in ’Shift’ mode or while momentarily holding ‘Shift’ press and hold the ‘Rand’
button, a confirmation message will appear on-screen however the preset will not be
overwritten until saved. Randomise is only available for patches.
Save Preset
First press the ’Save’ button to enter the ‘full’ save procedure (setting preset slot and/or name
- see below), or hold the ‘Save’ button to perform a ‘quick’ save (saving preset directly into
current slot with current name).
Once you are in the ‘full’ save procedure, presets are saved in the following way:
Slot Selection
Use the ‘Preset/Edit’ encoder to select the preset bank/number to save into, and press the
‘Edit’ switch to select it.
Naming
Use the ‘Page/Param’ encoder to select the character position, and use the ‘Edit’ encoder
to select the character. Press the ‘Preset/Edit’ switch to finish editing the name. There are a
number of panel shortcuts here:
• Press ‘Velo‘ to jump to lowercase characters
• Press ‘AftT’ to jump to uppercase characters
• Press ‘Note’ to jump to numbers
• Press ‘Expr’ to jump to symbols
• Press the ‘Page/Param’ switch to add a space (increment all above characters)
• Press ‘Init’ to delete the current character (decrement all above characters)
• Hold ‘Init’ to delete the entire name
Confirming
Press the ‘Preset/Edit’ switch to confirm the settings and save the preset.
At any point during the save procedure hold the ‘Page/Param’ switch to move back a step.
To exit/quit the procedure without saving the preset, press the ‘Patch/Seq’ button.
16 17
UI Combinations
Quick Recalls
COBALT8M has 4 Quick Recall slots for quickly loading presets. Quick Recalls are controlled
using the following button combos:
• Hold ‘Patch’ + hold one of the four buttons on bottom left of the panel to assign the
currently loaded patch to a QR slot
• Hold ‘Patch’ + press one of the four buttons on bottom left of the panel to load the
patch in the QR slot
LFO
• Turn the ‘Rate’ encoders into the negative range to access synced rates
• To access LFO3 parameters enter ‘Shift’ mode and press the LFO2/LFO3 switch
Oscillators
• Press the ‘Algorithm’ switch to toggle between Osc1 and Osc2 algorithm select controls
Filter
• Hold the ‘Patch’ button and turn the ‘Cutoff’ encoder to control the Filter Type parameter
Envelopes
• Hold any of the EG switches for one second and then turn the ADSR encoders to adjust
all envelopes simultaneously
• Press the ‘MEG’ switch when MEG is already selected to latch MEG assign
Sequencer
• Hold the ‘Patch’ and ‘Play’ button to clear the sequencer notes
• When the screen is displaying the ‘Linked Sequence’ parameter, hold the ‘Edit’ switch to
set the value to be the currently loaded sequence.
• Hold the ‘Patch’ button and press the ‘Record’ button to enter the Step Sequencer ‘Edit’
Mode, if the currently loaded sequence is in ‘Step’ mode
UI Combinations
Arp
• Hold the ‘Arp’ switch and press keys on an external keyboard to add pattern notes or
press the ‘Play’ button to add a rest to the pattern
• Hold the ‘Patch’ button and turn the ‘Division’ encoder to control Arp Gate
Keyboard/Voice
• Press ‘Mode’ repeatedly to cycle through the different voice modes Mono, Poly, Unison
(2,4 and 8) and Stack (2 and 4).
• Press ‘Chord’ whilst holding a chord on an external keyboard to set the chord mode
chord.
Modulation
• To assign a Mod Slot either hold (momentary) or latch the desired Mod source button -
then set a depth by turning desired modulation destination parameter
• When latched in a Mod Source assign mode pressing the flashing Mod Source button
again will exit assign mode
• Mod source button + ‘Depth’ encoder - set global depth for that mod source
• Press ModSlot repeatedly to cycle through and view all mod slot settings on the screen
• When the screen is displaying a mod slot ‘Depth’ parameter (most easily accessed via
assigning modulation using the panel or via the ModSlot button), hold the ‘Edit’ switch to
clear the mod slot assignment.
• To assign a mod source to the global frequency destination, use either of the fine tune
controls. ‘Tune1’ will assign to Osc1 tune, ‘Tune2’ will assign to Osc2 tune.

18 19
UI Combinations
FX
• Press FX1 / FX2 / FX3 switch repeatedly to change the FX type of the slot
• Hold FX1 / FX2 / FX3 switch to reset the FX type of the slot to ‘None’
• Turn the ‘B’ encoder into the negative range for the slot with a Delay FX assigned to
access synced delay times
• Press FX1 + FX2 + FX3 to jump to the ‘FX Preset Load’ parameter
Global Settings
• When the screen is displaying the ‘Reset’ option, press the ‘Edit’ switch and follow the
confirm instructions to reset all global settings to the factory default settings. Please note
that this will also reset the Main Volume and Tempo parameter values but your presets
will be unaffected
• Hold the ‘Patch’ button and turn the ‘Volume’ encoder to control the Patch Gain
parameter.
Screen Parameter List
• If a screen parameter is crossed out this means that it is ‘inactive’ (and can’t be controlled)
due to the value or state of other parameters or settings.
• If a screen parameter value is underlined to indicate the currently selected value, you will
need to use the Edit encoder switch to apply newly selected values.
How to mount COBALT8M in a 19” rack
For users who would like to mount
their COBALT8M in a 19” rack, a pair of
rack mounting ears are provided in the
accessories box inside your COBALT8M
packaging.
To install these, first grab a corner of the
textured rubber side panels fitted to your
COBALT8M and pull these back to remove
them from the unit. You may wish to retain
these for future use if the unit is removed
from rackmount use.
Removing the rubber side panels will
expose two screw holes, recessed into the
side of the COBALT8M. Take the provided
rack ear mounting screws and install
them into the smaller holes in the rack
ear, then align the ear with the side of the
COBALT8M and secure the screws.
Do not apply too much force when
tightening these screws as this may
damage the aluminium sides.
Please note, when installed in a 19” rack,
you will need to allow 1U of space above
the COBALT8M to allow the installation of
cables into the back / top of the unit

20 21
Screen Map
Patch Preset
Load Patch
Save Patch
Init Patch
Randomise Patch
Linked Sequence
Keyboard / Voice
Voice Mode
Glide
Octave
Transpose
Chord Latch
Voice Width
Sustain
Velo Assign
Velo Depth
AftT Assign
AftT Depth
Note Assign
Note Depth
Expr Assign
Expr Depth
Chord Invert
Osc1
Algorithm
Param A
Param B
Tune
Fine
Osc2
Algorithm
Param A
Param B
Tune
Fine
Osc (General)
Mix
Drift
Screen Map
FX Preset
Load FX
Save FX
FX (General)
Level
FX-1
Type
A
B
C
D
E
F
Delay Mode
Delay Sync
Swap
FX-2
Type
A
B
C
D
E
F
Delay Mode
Delay Sync
Swap
FX-3
Type
A
B
C
D
E
F
Delay Mode
Delay Sync
Swap
Arpeggiator
Status
Division
Direction
Octave
Swing
Gate
Sequence Preset
Load Sequence
Save Sequence
Init Sequence
Sequencer
Play
Record
Mode
Length
Step Length
Num Steps
Step Mode
Step Overdub
Note Mute
Note Clear
Anim1 Status
Anim1 Param
Anim1 Clear
Anim2 Status
Anim2 Param
Anim2 Clear
Anim3 Status
Anim3 Param
Anim3 Clear
Anim4 Status
Anim4 Param
Anim4 Clear
Loop
Hold
Clock
Tempo
Audio
Main Volume
Patch Gain
Headphone Level
Gain Boost
Audio In Volume
Audio In -> FX
Settings - MIDI
Channel
Omni
Pitchbend Range
MPE Mode
MPE Master Channel
MPE Num Channels
MPE Pitchbend Range
DIN In Filters
DIN Out Filters
DIN Thru
USB Thru
Arp / Seq Out
MIDI-in Oct Offset
MIDI-in Monitor
Settings - UI
Screen Brightness
Screen Switch Mode
Screensaver Idle Time
LEDs Brightness
Keyboard Local
Velocity Curve
Aftertouch Curve
Modwheel Out
Pitchbend Out
X+ Calibration
X- Calibration
Y+ Calibration
Y- Calibration
Centre Calibration
Expr Pedal - Type
Settings - Sequencer
Metronome
Pre-Roll
Quantise
Transport
Settings - General
Clock Source
Global Tune
Polychain Master
Preset Auto-Load
Reset Settings
Firmware Version
Filter
Cutoff
Reso
Morph
Type
Filter EG
Amount / Depth
Attack
Decay
Sustain
Release
Type
Amp EG
Amount / Depth
Attack
Decay
Sustain
Release
Type
Mod EG
Amount / Depth
Attack
Decay
Sustain
Release
Type
Assign
LFO1
Shape
Rate
Depth
Mode
Sync
Assign
LFO2
Shape
Rate
Depth
Mode
Sync
Assign
LFO3
Shape
Rate
Depth
Mode
Sync
Assign
Mod Slot 1
Status
Source
Destination
Depth
Clear
Mod Slot 2
Status
Source
Destination
Depth
Clear
Mod Slot 3
Status
Source
Destination
Depth
Clear
Mod Slot 4
Status
Source
Destination
Depth
Clear
Mod Slot 5
Status
Source
Destination
Depth
Clear
Mod Slot 6
Status
Source
Destination
Depth
Clear
Mod Slot 7
Status
Source
Destination
Depth
Clear
Mod Slot 8
Status
Source
Destination
Depth
Clear
Mod (General)
Note -> Cutoff
Y+ -> LFO1 Depth
AftT -> Cutoff
Velo -> AEG Amount
Joystick
XYLock
Pitch Bend Status
X+ Assign
X+ Depth
X- Assign
X- Depth
Y+ Assign
Y+ Depth
Y- Assign
Y- Depth

22 23
02
Connections
Headphones
Headphone output on 1/4” stereo/TRS
jack. The volume can be adjusted using
the VOLUME knob or the dedicated
Headphone Level control on the screen.
The headphone output will match the
audio output so it can be either stereo
or mono depending on the current
audio out configuration.
Line Out
Line level stereo outputs on 1/4” TS
dual-mono jacks. The left jack only will
break the stereo circuit and collapse
the signal to mono. These outputs can
be connected to any line level input
for monitoring and recording. The
line output is higher quality than the
headphone output, so always use it
when recording or performing. The
Line out level can be adjusted using the
‘Volume’ knob.
Expression Pedal over standard 1/4”
stereo/TRS jack from an external
expression source.
COBALT8M works best with expression pedals that use
the TRS polarity and have a resistance of 10k or above.
However COBALT8M has a software configuration option
for providing basic compatibility with RTS polarity pedals
as well as for improving the compatibility with different
resistances. If your expression pedal has a polarity switch
we recommend setting it to the ‘TRS’ polarity (the default
setting on most pedals). For setting maximum compatibility
with your expression pedal’s polarity and resistance value,
please see the ‘Settings - Pedal Type’ section. If you are
unable to configure COBALT8M to work adequately with
your expression pedal, you may need to use a TRS Polarity
Adapter. Please note that expression pedals with the TS
polarity will not work with COBALT8M.
Audio In
Audio Input on 1/8” stereo/TRS jack.
Sustain Pedal over standard 1/4” mono/
TS from an external sustain pedal.
Note: COBALT8M supports both types of sustain pedal
polarities. “Positive / Normally Open” pedals can be
connected / disconnected whilst COBALT8M is powered
on, however “Negative / Normally Closed” pedals must be
connected before powering on the device and disconnected
after powering off the device in order to work correctly.
If your sustain pedal has a polarity switch we recommend
setting it to the “Positive” polarity. If you are unsure of your
pedal’s polarity type, it is recommended to only connect /
disconnected the pedal whilst the device is powered off.
Clock Sync (In, Out)
Clock Sync In / Out on 1/8” mono/TS
jack. Simply plug into your clockable
gear as desired. (See the Sync section)
Power
Power switch for COBALT8M. Power
via DC-9.0V - 1.5A center-positive PSU
(supplied)
USB MIDI
COBALT8M is a class compliant USB
MIDI device and connects to a USB host
via USB B Connection for MODALapp
communication, MIDI input and MIDI
output. Simply connect COBALT8M to a
USB socket, such as on your computer
or tablet with a standard USB cable and
find ‘COBALT8M’ listed as a MIDI port
on your computer or tablet.
MIDI (In, Out)
MIDI In / Out on MIDI 5-pin DIN
cable. These outputs can be used
to communicate with any other
MIDI devices. The MIDI Out can be
set to Thru using MODALapp or
MODALplugin (See the MIDI section)

24 25
03
Synthesis engine

26 27
Oscillators
COBALT8M features two independent oscillator groups, each containing 34 different
algorithms. There is a Mix control between the oscillator groups and an extended Oscillator
Drift control for creating huge super-sounds.
• Algorithm1: This encoder allows you to select which algorithm to use for Oscillator
Group 1.
• A1: This encoder allows you to control the Param A for the selected algorithm on
Oscillator Group 1.
• B1: This encoder allows you to control the Param B for the selected algorithm on
Oscillator Group 1.
• Tune1: Holding the ‘Shift’ button (or when latched in shift mode) and turning this
encoder allows us to control the coarse tuning of Wave1 (Tune) at desirable intervals +/- 2
octaves.
• Fine1: Holding the ‘Shift’ button (or when latched in shift mode) and turning this
encoder allows us to control the fine tuning of Wave1 (Fine) +/- 100 cents.
• Algorithm2: This encoder allows you to select which algorithm to use for Oscillator
Group 2.
• A2: This encoder allows you to control the Param A for the selected algorithm on
Oscillator Group 2.
• B2: This encoder allows you to control the Param B for the selected algorithm on
Oscillator Group 2.
• Tune2: Holding the ‘Shift’ button (or when latched in shift mode) and turning this
encoder allows us to control the coarse tuning of Wave2 (Tune) at desirable intervals +/- 2
octaves.
• Fine2: Holding the ‘Shift’ button (or when latched in shift mode) and turning this
encoder allows us to control the fine tuning of Wave 2 (Fine) +/- 100 cents.
• Glide: Holding the ‘Shift’ button (or when latched in shift mode) and turning this
encoder controls the speed with which the oscillators change their pitch, ‘sliding’ from
one note to the next one pressed. Positive values control the amount of Auto Glide and
negative values control the amount of Legato Glide and will only glide if another note is
already held.
• Mix: This encoder allows you to balance the volume between each oscillator group. All
the way to the left you will hear only Algorithm 1, All the way to the right you will hear
Algorithm 2. In the centre you will hear a balanced blend of both waves.
• Drift: This encoder controls the oscillator drift amount. This is the amount of slop or
random detuning of each oscillators phase and tune.
Algorithms
The available algorithms on COBALT8M include a variety of complex analogue synthesis
techniques, built in cross-modulation (SYNC, RM, and many more), PWM, smooth Morphing
between VA waves, bit crushing and filtered noise. Each algorithm has carefully curated
controls that make complex synthesis simple with just two parameters.
• VA Sweep: Sweep through sine, triangle, saw, square, pulse (with pulse width) (A),
ability to detune the oscillators (or snap to musical intervals) using spread (B)
• VA Crushed: Sweep through sine, triangle and saw shapes (A) with real-time control over
bit crushing (B)
• Spread Saw: Spread mode with increased oscillator count, ability to blend between the
fundamental and detuned oscillators (A) and more comprehensive spread (B) options (e.g
oct up + detuned)
• Spread Square: Spread mode with increased oscillator count, ability to blend between
the fundamental and detuned oscillators (A) and more comprehensive spread (B) options
(e.g oct up + detuned)
• Spread Triangle: Spread mode with increased oscillator count, ability to blend between
the fundamental and detuned oscillators (A) and more comprehensive spread (B)options
(e.g oct up + detuned)
• PWM: Classic Pulse Width Modulation with width control (A) and ability to detune the
oscillators using spread (B)
• PWM Dual: PWM mode where as the width control (A) changes, the pulse width
increases in the first cycle of the wave and decreases in the second cycle. Oscillators can
be detuned using the spread (B) control
• PWM Triangle / Square: Alternating triangle and square waves with control over the
width of the triangle portion (A) and an asymmetry control (B) that allows every second
cycle to have a different triangle width (inverse) to the first
• PWM Saw Eraser: Wave with both a saw and PWM portion, with control over the ratio
between the two portions (A) and the width of the PWM portion (B) relative to parameter
A
• PWM Triangle Pinch: Triangle wave with pulse width modulation (A) and an asymmetry
control (B) which allows every second cycle of the wave to have a different width to the
first (can be wider or narrower)
• Hard Sync Saw: Classic hard sync with un-quantised ratio (A) that can be blended with a
sub oscillator (B) one octave below the fundamental
• Hard Sync Square: Classic hard sync with un-quantised ratio (A) that can be blended
with a sub oscillator (B) one octave below the fundamental
• Hard Sync Triangle: Classic hard sync with un-quantised ratio (A) that can be blended
with a sub oscillator (B) one octave below the fundamental

28 29
Algorithms
• Ring Mod Square: Ring mod applied to two square waves, with quantised ratio control
(A) that snaps through a series of useful ratios, and a fine control (B), which cross-fades
between these ratios allowing precise control across the whole range
• Ring Mod Triangle: Ring mod applied to two triangle waves, with quantised ratio
control (A) that snaps through a series of useful ratios, and a fine control (B), which cross-
fades between these ratios allowing precise control across the whole range
• Ring Mod Triangle / Square: Ring mod applied to a triangle and a square wave, with
quantised ratio control (A) that snaps through a series of useful ratios, and a fine control
(B), which cross-fades between these ratios allowing precise control across the whole
range
• Ring Mod Saw / Square: Ring mod applied to a saw and square wave, with quantised
ratio control (A) that snaps through a series of useful ratios, and a fine control (B), which
cross-fades between these ratios allowing precise control across the whole range
• Ring Mod Saw / Triangle: Ring mod applied to a saw and triangle wave, with quantised
ratio control (A) that snaps through a series of useful ratios, and a fine control (B), which
cross-fades between these ratios allowing precise control across the whole range
• Chaos Saw: Un-quantised ring modulation (A) combined with randomisation (B)
• Chaos Square: Un-quantised ring modulation (A) combined with randomisation (B)
• Chaos Triangle: Un-quantised ring modulation (A) combined with randomisation (B)
• Fold Triangle: Triangle wave-folding (A) with DC offset (B)
• Filtered Noise: Noise generator combined with a morphable filter with full control over
Cutoff (A) and Morph (B)
Note: The oscillator spread controls function as follows:
• 0 - all oscillators are perfectly in tune
• 1 - 63 - increasing oscillator detune
• 64 - 127 - oscillators detuned in musical intervals
Algorithms
• Fractal Saw: Complex sync with un-quantised control over ratio (A) and and an
asymmetry control (B) that allows every second cycle of the wave to have a different sync
ratio to the first
• Fractal Square: Complex sync with un-quantised control over ratio (A) and and an
asymmetry control (B) that allows every second cycle of the wave to have a different sync
ratio to the first
• Fractal Triangle: Complex sync with un-quantised control over ratio (A) and and an
asymmetry control (B) that allows every second cycle of the wave to have a different sync
ratio to the first
• Reverse Saw: Periodically reverses the direction of the waveform and changes the
playback rate (A), asymmetry control (B) changes the period length (I.e the switch point
within a cycle)
• Reverse Square: Periodically reverses the direction of the waveform and changes the
playback rate (A), asymmetry control (B) changes the period length (I.e the switch point
within a cycle)
• Reverse Triangle: Periodically reverses the direction of the waveform and changes the
playback rate (A), asymmetry control (B) changes the period length (I.e the switch point
within a cycle)
• Window Amp Sync: Applies amplitude modulation to a sine wave using a hard synced
waveform. Features an un-quantised sync ratio control (A) and the ability to morph
between multiple window shapes (B)
• Metal Saw: Creates ring modulation/amplitude modulation like effects by syncing a
waveform to two separate signals, one at the base rate and one at the sync rate. Features
un-quantised control over sync rate (A) and ability to balance between the base wave and
the modulated signal (B)
• Metal Square: Creates ring modulation/amplitude modulation like effects by syncing a
waveform to two separate signals, one at the base rate and one at the sync rate. Features
un-quantised control over sync rate (A) and ability to balance between the base wave and
the modulated signal (B)
• Metal Triangle: Creates ring modulation/amplitude modulation like effects by syncing a
waveform to two separate signals, one at the base rate and one at the sync rate. Features
un-quantised control over sync rate (A) and ability to balance between the base wave and
the modulated signal (B)
• Ring Mod Saw: Ring mod applied to two saw waves, with quantised ratio control (A)
that snaps through a series of useful ratios, and a fine control (B), which cross-fades
between these ratios allowing precise control across the whole range

30 31
Filter
COBALT8M has a 4-pole morphable ladder filter, with switchable configurations
• Cutoff: This parameter controls the filter cutoff frequency. This affects the cutoff
frequency of the filter, from 0Hz up to 22kHz.
• Reso: This parameter controls the amount of resonance of the filter.
• Morph: This encoder changes the frequency response of the filter. See below for how
this control morphs each of the different filter types.
• Type: Holding the ‘Patch/Seq’ button and turning the Cutoff encoder selects the current
type of the filter. The filter types available are:
Resonant Low Pass - Morphs 4-pole lowpass, through bandpass, to 1-pole lowpass
Balanced Low Pass - Morphs 4-pole lowpass, through bandpass, to 1-pole lowpass
Balanced High Pass - Morphs 4-pole highpass, through notch, to 1-pole highpass
Balanced Phase - Morph controls the width and depth of the dual notches
The Resonant Low Pass filter type is designed to maximise resonance response.
The Balanced Filter types lose less low end frequencies at high resonance settings, with the
trade off that resonance is reduced when sweeping the cutoff towards lower frequencies.

32 33
Envelopes
COBALT8M provides 3 separate 4-stage Envelope Generators (i.e. envelopes), one for the filter
(FILT-EG), one for the amplifier (AMP-EG) and one for modulations (MOD-EG). With negative
amounts (FILT-EG and MOD-EG) only the attack, decay and sustain levels are inverted, the
release phase will still tend to 0.
The envelope generator represented on the encoders can be selected using the 3 dedicated
buttons to the right of the envelope depth encoder.
• Attack: This parameter controls the time passing from the moment you press a key (i.e.
‘MIDI Note On’ message) until the sound reaches its maximum value.
• Decay: This parameter controls the time passing for the envelope to drop from its
maximum value to a sustain level (see below).
• Sustain: This parameter controls the level of the sustain phase (i.e. the volume of the
sound while keeping the key pressed for AMP-EG). If there are no modulations active, this
volume keeps constant until you release the key. (The envelope then enters the ‘release’
phase)
• Release: This parameter controls the time passing from the moment you leave a key (i.e.
‘MIDI Note Off’ message) until the sound reaches silence.
• Depth: This controls the envelope depth amount of the selected envelope generator.
This gives bi-polar (FILT-EG and MOD-EG) or uni-polar (AMP-EG) control of the amount of
modulation the envelope has over its destination/s.
• Type: There are 8 envelope types. These types are stored per-patch and each envelope
type is independent so you can have a different type for MEG, FEG and AEG in the same
patch. You can find these settings at the bottom of the AEG, FEG and MEG pages on the
screen.
- Expo - classic exponential curve - suited for most sound types
- Snappy - fast attack and decay time curves - best suited for percussive material
- Soft - smoother attack and release time curves - best suited for pads
- Linear - simple linear ramp for each envelope stage - best suited for modulation
- Expo Long – Expo curve with double the maximum time for each stage of the envelope
- Snappy Long – Snappy curve with double the maximum time for each stage of the
envelope
- Soft Long – Soft curve with double the maximum time for each stage of the envelope
- Linear Long – Linear curve with double the maximum time for each stage of the
envelope
Long variants possess a maximum release time of 10 seconds.
Envelopes
• FILT-EG, AMP-EG, MOD-EG: These buttons selects which envelope generator the above
controls are representing.
Pressing the MOD-EG button again latches the assign mode - you will notice the LED
blinking to indicate you are in assign mode. Press again to exit assign mode.
TIP: Holding either the FILT-EG or AMP-EG button and changing the ADSR parameters
will alter all three envelopes simultaneously and is a useful shortcut to quickly change all
envelopes at once.

34 35
LFOs
COBALT8M features three individual low frequency oscillators. LFO1 is global and LFO2 and
LFO3 are polyphonic.
All LFO’s can be set to Retrigger, Single and Free mode and have these parameters:
• LFO1: This button enters and exits assign mode for LFO1
• LFO2/LFO3: This button is used to both toggle between LFO2 / LFO3 (for editing the
LFOs parameters) as well as for entering and exiting assign mode for LFO2 / LFO3.
If the edit mode is currently LFO2 (LED off), use this button to enter and exit LFO2 assign
mode (LED slow flash) or use ‘Shift’ and this button to toggle to LFO3 edit mode.
If the edit mode is currently LFO3 (LED constantly on), use ‘Shift’ and this button to enter
and exit LFO3 assign mode (LED fast flash) or use this button on it’s own to toggle to
LFO2 edit mode.
Once in an LFO assign mode, simply turning the knob for the parameter that you would
like the LFO to modulate, you will see the LED above the button begin to flash to indicate
you are currently in an assign mode
• Rate: This parameter controls the speed of the LFO.
An LFO in a positive amount is a free rate meaning it will run independently from the
synths tempo / MIDI clock input. In negative amounts it is synced to the synths tempo /
MIDI clock input at various subdivisions
• Shape: Holding the ‘Shift’ button and (or when latched in shift mode) turning this
encoder controls the given LFO Shape. The available shapes are Sine, Tri, Sqr, Sawtooth /
Ramp up, Sawtooth / Ramp down, S+H, Slewed S+H
• Depth: This parameter controls the depth of the given LFOs modulation.
• Mode: Holding the ‘Shift’ button and (or when latched in shift mode) turning this
encoder selects the Retrigger Mode. The modes are:
Retrigger - In this mode, each new keypress restarts the LFO and it the continues to run -
particularly useful for Unison/Stack sounds.
Free - In this mode the LFO is never reset, so it could be at any phase when a note is
pressed.
Single - In this mode, the LFO will start when a new key is pressed, complete cycle and
stop, but will not retrigger when a new note is triggered and one is already held.
Arpeggiator
COBALT8M features an intuitive programmable arpeggiator. The speed of the arpeggiator is
controlled by the current clock which can either be received from the sync in port, external
MIDI or from the internal clock in COBALT8M.
For arpeggiator ‘hold’ functionality please use the Sustain ‘Latch Mode’ as described below.
• Arp: The Arp can be enabled / disabled by pressing this button. Holding this and entering
notes using the keys or over USB or MIDI connection will input notes to the Arp. Rests
can be input by pressing the Arp Rest button while entering notes.
• Division: Turning this encoder allows you to select the clock division of the Arp
• Mode: Holding the ‘Shift’ button and (or when latched in shift mode) turning this
encoder allows you to select the octave range and direction of the Arp.
• Swing: This screen only setting allows you to dial in swing to the Arp. This setting is bi-
polar allowing us to nudge every other note backward or forward in time.
• Arp Gate: Holding the ‘Patch’ button and turning the Arp encoder allows you to set Arp
Gate length.
• Sustain ‘Latch Mode’: Holding ‘Velo’ and holding the ‘Sustain’ button for one second
will enable Sustain ‘Latch Mode’ - press and release a note / chord to sustain it, press a
new note / chord to overwrite the existing one. This also provides the classic arpeggiator
‘Hold’ functionality.
Note. Programmed patterns in the arpeggiator are temporary and are not saved per patch.
They will remain until reprogrammed or until the unit is power cycled.

36 37
Sequencer
COBALT8M has an extremely powerful sequencer on board, that can be configured in either
real-time or step modes. Both modes feature four recordable / editable parameter animation
lanes, allowing you to add parameter motion to your sequences over time.
NOTE: Most screen only sequencer parameters can be found on the Seq page of the screen
menu. To navigate to this, Scroll the Page/Param left screen encoder in Page mode to the Seq
page. Click the left screen encoder to enter Param mode and scroll through the parameters.
• Play: This button starts and stops the sequencer.
• Record: This button allows you to record enable and disable. See below for record
behaviour in real-time and step modes.
• Mode: This is a screen only parameter that sets the current sequence to either real-time
(default) or step modes.
NOTE: switching a sequence from real time to step mode (or vice versa) will initialise the
sequence, as the two modes are not compatible. Once a sequence is saved as a step
sequence, it will always load in step mode.
• Mute: This is a screen only parameter mutes all notes in the sequence. Hold the ‘Mute’
button to clear all the sequencer notes in the currently selected sequence.
• Tempo: Turning this encoder selects the tempo of the internal clock.
• Length: Holding the ‘Shift’ button and (or when latched in shift mode) turning this
encoder allows you to select the length of the selected sequence.
• Quantise: Holding the ‘Arp’ button and turning the ‘Tempo’ encoder allows you to select
an input quantise value for the sequencer.
• Seq Loop: This is a screen only parameter allows you to loop certain parts of the
sequencer. When the button is first pressed is the loop start point and when it is released
becomes the loop end point. When a loop is active pressing the button again will disable
the loop.
When the sequence is configured in real time mode, the looped portion is quantised to
1/16th of the total sequence length.
• Seq Hold: This is a screen only parameter holds the current sequencer step and repeats
it, like a beat repeater. When the button is released the sequencer carries on from the
location it should have been before the step was repeated so it will still be in time.
In real-time mode a ‘step’ is a 16th of the total sequence length, on release, the
sequencer carries on playing from the current position
Sequencer
• Linked Sequences: This is a screen only parameter that allows you to link a sequence
to a specific patch. This loads this sequence every time its linked patch is loaded. You
can access this easily by pressing the Patch button and using the Page/Param encoder to
scroll all the way to the right. Simply input the desired sequence number for that patch
or select ‘Off’ for no linked sequence. Like any other patch parameter, the patch must be
saved in order to retain the linked sequence number.
Tip: When selecting a Linked Sequence, hold the Preset/Edit switch to select the current
sequence.
Real-time Mode
The Real-time sequencer boasts a 512-note capacity and will record notes as you have played
them in making this the ideal sketchpad for your musical ideas.
• Recording: Pressing record starts the sequencer recording. If the sequencer is not
running when this is pressed and pre-roll is disabled, the sequencer will start. By default,
a metronome will play whilst the sequencer is recording.
Up to four parameters can be recorded while recording, one for each animation lane.
Tip: You can enable or disable the metronome in the MODALapp or on-screen on the
Settings – Seq page.
• Length (Shift + Tempo): Allows you to select the length of the selected sequence.
• Quantise (Arp + Tempo): Allows you to select an input quantise value for the
sequencer. This setting is global and can be found on the screen on the Settings – Seq
page.
The Sequence position LED will always cycle 1 - 8 over the current sequence length. Eg. if
sequencer is set to 4 bars; it will take 4 bars for the sequencer LED to scroll from 1 to 8 (i.e.
not steps) If sequencer is running, any sequencer length changes will only take affect at the
beginning of a bar.

38 39
Sequencer
Step Mode
The step sequencer is a 64-step, 8 note-per-step sequencer giving you full step-by-step control
of your melodies and ideas. It also features a number of Step Modes that add powerful
flexibility to deploy your sequences in a variety of setups and situations. Entering notes into
the step sequencer can be achieved in three ways:
Step Input Mode
• Accessed when the sequencer is not playing, but is recording.
• The first note received will clear all notes in the sequence and reset the number of steps
(great for starting again quickly).
• Sequencer step will progress when no notes are held, you can keep adding notes until all
notes are released.
• You can also input animation data when in this mode, progressing through the steps by
triggering notes or adding rests.
• Enter rest steps using the ‘Arp’ + ‘Play’ combo.
• Exit this mode by toggling record or hitting play.
Step Edit Mode
• Accessed using Patch + Record when the sequencer is NOT recording, exit using the same
combo or pressing Patch (not in Shift mode).
• Page mode + left screen encoder allows you to scroll through the notes and animator
data for each step.
• Shift + page mode + left screen encoder allows you to scroll through only the currently
selected page type for each step only (e.g. just notes pages, or, animation).
• Param mode + left screen encoder moves the cursor to change which value is being
edited.
• Right screen encoder edits the value highlighted by the cursor.
• Pressing the right screen encoder triggers/previews the currently displayed step.
• Shift + holding the right screen encoder will clear a highlighted note.
• When the cursor is over a note value, note input (MIDI) will set the highlighted value
• When the cursor is over an animator value, parameter changes (panel or MIDI) will assign
an animation lane and/or set the highlighted value.
Sequencer
Overdub
• While the sequencer is playing, press Record to allow notes to be overdubbed into the
sequencer.
• Any animated parameter changed while overdubbing will replace control values on the
current step.
• here are two step overdub modes, found on the Seq page of the Screen:
• Replace - Note input will replace notes on a given step when overdubbing.
• Add - Note input will be added to notes on a given step when overdubbing.
The step sequencer also has the following parameters:
• Num Steps: Turning the Length encoder on the panel (Shift + Tempo) controls the
number of steps that are played back without changing any of the step data, so can be
used as a performance tool.
• Step Length: Turning the Quantise encoder on the panel (Arp + Tempo) controls the
length of each step (globally) when the sequencer is running in clock step mode (see
below).
• Step Mode: This is a screen only parameter that controls the way in which the sequencer
steps advance. The modes are:
Clock - Step sequencer will follow the same clock as the rest of COBALT, with the clock
division set by the Step Length control.
Each step will play until the start of the next step.
This means you can run the step sequencer and the arp at different clock divisions.
Gate - Sequence progresses when a note on is received and no other notes are held.
Sequencer will play the current step until all notes are released.
Only notes from the sequencer are sent to the voices. This means you can play back a
sequence by pressing a single note repeatedly, varying the rhythm.
You could also play chords and have the sequence progress with each new chord that is
played.
Tip: Using the arp with any of the gate modes allows the step sequencer to follow the
rhythm of the arpeggiator exactly, complete with Swing and Gate Amount.
Table of contents
Other Modal Electronics Synthesizer manuals

Modal Electronics
Modal Electronics 002R User manual

Modal Electronics
Modal Electronics Cobalt 5S User manual

Modal Electronics
Modal Electronics COBALT8 User manual

Modal Electronics
Modal Electronics COBALT8X User manual

Modal Electronics
Modal Electronics ARGON8X User manual

Modal Electronics
Modal Electronics ARGON8 User manual

Modal Electronics
Modal Electronics 8 User manual

Modal Electronics
Modal Electronics ARGON8X User manual

Modal Electronics
Modal Electronics ARGON8M User manual

Modal Electronics
Modal Electronics CRAFTsynth 2.0 User manual