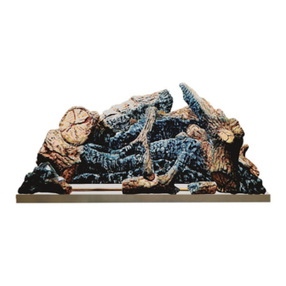
MODENO OCK50-NG01 User manual

Manual No.: ANGM50-A0
Natural Gas Conversion Kit
OCK50-NG01
DANGER
FIRE OR EXPLOSION HAZARD
If you smell gas:
• Shut off gas to the appliance.
• Extinguish any open flame.
• If odor continues, leave the area immediately.
• After leaving the area, call your gas supplier or
fire department.
Failure to follow these instructions could result in
fire or explosion,which could cause property
damage, personal injury, or death.
!
WARNING
!
IMPORTANT
INSTALLER:
Leave this manual with the appliance.
CONSUMER:
Retain this manual for future reference.
!
US
R
C
Contact Ocean Rock USA for Technical Support.
Customer Service:800-678-7294
EN
This conversion kit shall be installed by a
qualified service agency in accordance with
the manufacturer’s instructions and all
applicable codes and requirements of the
Authority Having Jurisdiction. If the
information in these instructions is not
followed exactly, a fire, explosion or
production of carbon monoxide may
result causing property damage, personal
injury or loss of life. The qualified service
agency is responsible for the proper
installation of this kit. The installation is not
proper and complete until the operation of
the converted appliance is checked as
specified in the manufacturer’s instructions
supplied with the kit.

Important Safety Information -----------------------------------------------------------------------3
Parts List ------------------------------------------------------------------------------------------------7
Natural Gas Conversion Instruction--------------------------------------------------------------12
Leakage Test ------------------------------------------------------------------------------------------13
Lighting Instructions ---------------------------------------------------------------------------------14
TABLE OF CONTENTS
WARNING: This product can expose you to Carbon
monoxide, which is known to the Sate of California to cause birth
defects or other reproductive harm. For more information go to
www.P65Warnings.ca.gov .
!DANGER CARBON MONOXIDE HAZARD
This appliance can produce carbon monoxide
which has no odor.
Using it in an enclosed space can kill you.
Never use this appliance in an enclosed
space such as a camper, tent, car or home.
2 / 40

IMPORTANT SAFETY INFORMATION
!WARNING FIRE TABLE IS FOR OUTDOOR USE ONLY
IF YOU SMELL GAS
• Shut off gas supply to the fire table.
• Extinguish any open fame.
• Do not try lighting any appliance.
• Do not touch any electrical switch; do not use any phone in your building.
• Immediately call your gas supplier from a neighbor’s phone.
• Follow the gas supplier’s instructions.
• If you cannot reach your gas supplier, call the fire department.
Installation and repair should be done by a qualified service person. The appliance should be
inspected before use and at least annually by a qualified service person. More frequent cleaning may
be required as necessary. It is imperative that the control compartment, burners, and circulating air
passageways of the appliance are kept clean.
• WARNING: Installation and service must be performed by a qualified installer, service agency or gas
supplier.
• WARNING: Failure to follow with the safety warnings and precautions in this manual may result in
serious bodily injury or death, a fire or an explosion causing damage to property.
• IMPORTANT NOTICE: Read and understand all warnings and precautions prior to assembly and
use your gas fire table. Improper installation, adjustment, alteration, service or maintenance can
cause injury or property damage.
3 / 40
!This conversion kit is for changing a liquefied Petroleum(LP) fire table into a Natural Gas
Fire Table.

PARTS LIST
Plaque
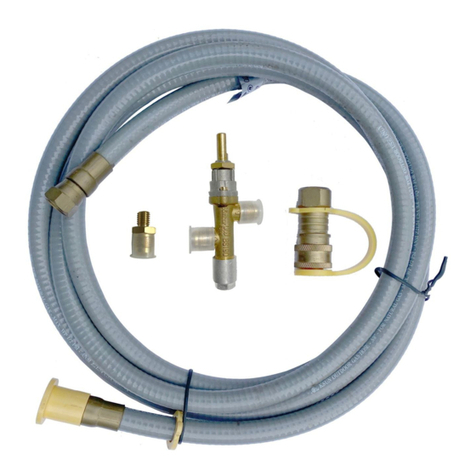
1, Natural Gas Hose and Quick Disconnect x 1 pc
2, Natural Gas Orifice 3.86mm or 3.9mm x 1 pc
3, Natural Gas Valve x 1 pc
4, Sleeve x 1 pc
5, Natural Gas Conversion Plaque x 1 pc
6, Natural Gas Conversion Kit Manual x 1 pc
7, Cable Kit x 1 pc
8, Knob Fixing Block x 1 pc
1
Applicable Model:
2
3
5
4
4 / 40
OFG107LP2 Bellows
1 Bellow OFG148LP
OFG114LP
OFG141LP OFG132LP OFG113LP OFG135LP
Manual 6
78

NATURAL GAS CONVERSION INSTRUCTION
1ENSURE THE UNIT IS OFF AND COMPLETELY COOL, AND THE GAS
SUPPLY TO THE UNIT IS TURNED OFF.
!WARNING
Disconnecting the LP Gas Tank
Make sure the valve on the LP gas tank is OFF.
Disconnect by turning the knob counter clockwise until it is
detached from the valve.
2Remove lava rock from burner pan area carefully.
Fire Table
3
Fire
Table
Lay down blanket or cardboard to avoid
damaging the finish, carefully tilt unit on
its side.
Blanket or cardboard
5 / 40

NATURAL GAS CONVERSION INSTRUCTION
6 / 40
4
5
Disconnect the Propane regulator from the fire table.
For TWO piece Bellows models, please see A.
For ONE pieces Bellows models, please see B.
Attach NG hose to the unit.
For TWO piece Bellows models, please see A.
For ONE pieces Bellows models, please see B.
6
Fire table
Propane Regulator and Hose
Propane Regulator and Hose LP valve Bellows
AB
NG Hose
Quick Disconnect Socket
Natural Gas Hose and Quick Disconnect
LP valve Bellows
AB
Hold the knob and knob fixing block, pull it out of the LP valve.
Knob
Knob Fixing
Block

NATURAL GAS CONVERSION INSTRUCTION
7
ONLY turn the brass joint counterclockwise on the bellows when disconnecting it from valve.
DO NOT rotate the stainless steel tube. Excessive rotation of the stainless steel tube will cause the gas pipe to
twist or break,causing gas leaks.
!WARNING
Brass joint
SS tube
Brass joint
8
7 / 40
Turn the hex nut counterclockwise to disconnect the LP valve from the control
panel.
Disconnect
Disconnect
Disconnect
Bellows
Bellows
LP Valve
Thermocouple
Gas inlet
(connect to regulator)
Gas outlet
(connect to burner)
A
B
C
Disconnect the bellows from the LP valve.
For ONE piece Bellows models, please see A.
For TWO pieces Bellows models, please see A&B.
Disconnect the thermocouple from the LP valve.(see C)

NATURAL GAS CONVERSION INSTRUCTION
9Disconnect the bellows.
Disconnect the LP orifice spud from the Burner tube.
Burner Tube
Bellows
LP Orifice Spud
1 2
Burner Tube
Bellows
NG Orifice Spud
1
2
1
2
8 / 40
10 Slip sleeve over the end of burner tube and cover the LP primary air hole,
then screw it.
11
After
After
Burner Tube
LP Primary Air HoleSleeve
1
2
Find the new NG orifice spud, verify it is the correct size, the sign 3.86mm
(3.9mm for OFG107 Rock Fire Table ) should be on the side of the orifice spud.
Screw the new NG orifice spud into Burner tube.
Re-attach bellows to the NG orifice spud.
3.86

NATURAL GAS CONVERSION INSTRUCTION
12 Locate the new NG valve, verify it is the correct one, the lable
with NATURAL GAS VALVE should be on the new NG valve.
Re-attach bellows to the NG Valve.
For ONE piece Bellows models, please see E.
For TWO pieces Bellows models, please see D&E.
Re-attach thermocouple to NG Valve.(see F)
Please note that the valve has an air inlet and an air outlet with arrows
indicating the flow direction of the gas,the gas comes out of from the
Natural Gas Piping Quick Disconnect and NG Hose Valve
Orifice Spud Burner.
Failure to follow the instructions could result in fire or explosion,
which could cause property damage, personal injury, or death.
IMPORTANT
!
When connecting the bellows, please ONLY
turn the brass joint counterclockwise on the
bellows.Do not rotate the stainless steel tube.
Excessive rotation of the stainless steel tube
will cause the gas pipe to twist or break,
causing gas leaks.
!WARNING
Brass joint
SS tube
Brass joint
9 / 40
Gas inlet
Gas outlet
F
Connect
Connect
NATURAL GAS VALVE
VANNE A GAZ NATUREL
Gas inlet
(bellows connect to
NG source)
Gas outlet
(bellows connect to
burner)
D
E
Natural Gas Hose
Quick Disconnect
Valve
Bellows
Bellows
Burner
Connect

NATURAL GAS CONVERSION INSTRUCTION
13 Connect the new NG valve to the control panel.
14
15 Attach quick disconnect to the gas supply.
NG Hose
Quick Disconnect Socket
House Natural gas piping
Shut-off Valve
10 / 40
Connect the knob and knob fixing block to the new NG valve.
Attention: There is a spare knob fixing block in the conversion kit to prevent
it from being lost or damaged.
Knob
Knob Fixing
Block

NATURAL GAS CONVERSION INSTRUCTION
16
17
After installing the conversion kit, verify the location of the Thermocouple and
Igniter Pin using the illustration below.
Thermocouple
Igniter Pin
5mm /
0.196”
Note to installation technicians. Verify the manifold pressure by using a
3/8” flared T-junction(not included) at the location marked by the arrow below.
Then usinga digital manometer verify that the pressure before the orifice is
7” W.C. Also verify that the orifice spud has the 3.86mm or 3.9mm marked.
This will allow you to verify that the input rating of the appliance is correct.
Installing at Altitude
!
For installations at elevations above 2000 ft. (610 m) contact your local dealer or gas
supplier before installing as input rating should be reduced approximately 4% for each
1000 ft. above sea level. Refer to the National Fuel Gas Code.
Contact the Ocean Rock USA for more information at 800-678-7294.
IMPORTANT
!The proper manifold pressure for this converted appliance is 7” W.C..
The maximum inlet gas pressure for this unit is 10.5 in wc (2.61 kPa)
The minimum inlet gas pressure for this unit is 3.5 in wc (0.87 kPa)
11 / 40
Burner Tube
Bellows
NG Orifice Spud
To Manometer

NATURAL GAS CONVERSION INSTRUCTION
18 WARNING
!
Before using this outdoor fire table, make sure
you have read, understand and follow all information provided in the
Important Safety Information section of this manual. Failure to follow those
instructions can cause death, serious injury or property damage.
Checking for Leaks
Make a leak check solution by mixing 1-part dishwashing
soap with 3 parts water in a spray bottle.
Make sure control knob is “OFF.” Then, turn natural gas on
at its source.
Spray leak check solution on valve connections paying particular
attention to the areas indicated by arrows.
If any bubbles appear turn natural gas off, reconnect and
re-test. If you continue to see bubbles after several attempts,
disconnect natural gas source and contact Ocean Rock USA at
800-678-7294 for assistance.
If no bubbles appear after one-minute turn source OFF, wipe
away solution and proceed.
19 Attach the NG conversion plaque included with this kit to the fire table using
the included cable kit.
Spanish
French
English
Spanish
French
English
NG Conversion
Plaque
12 / 40
Check for leaks at these locations

LIGHTING INSTRUCTIONS
Using the Ignitor
1. Read instructions before lighting.
2. Burner control knob must be in the “OFF” position.
3. Connect natural gas source (see above pages).
4. Open the natural gas supply to the unit.
5. Push and hold igniter button to create sparks.
6. While holding the igniter button with one hand, use your other hand to push and turn the control knob
to the “LOW” position to light the burner.
7. If ignition does not occur in 5 seconds, push and turn the Control Knob to “OFF”, wait 5 mimutes and
allow gas to dissipate.
8. Once the burner is lit, continue to hold the knob in for another 20 seconds and release.
9. Observe flame, make sure all burner ports are lit. Flame height should be no higher than 13 inches tall.
10. Adjust flame to desired flame with the control knob.
Using a Long Match or Lighter
1. Prior to lighting, use a shovel to move lava rocks for access to
the burner.
2. Wearing heat resistant gloves, position the burning long match
or burning butane lighter near the side of the burner. DO NOT lean
over the fire table while lighting!
3. Turn control knob counterclockwise to “LOW”.
4. Remove long match/long butane lighter.
5.After lighting, use a shovel and heat resistant gloves to carefully
move the lava rocks back into their proper position.
6. Observe flame, make sure all burner ports are lit. Flame height
should be no higher than 13 inches tall.
7. Adjust the flame to the desired height with the control knob.
Keep the lava rock covered and make sure it is dry before igniting.
!
When using this method to light your fire table, use heat resistant gloves and follow the step by
step instructions.Failure to do so could result in severe injury.
WARNING
!
WARNING
!
If burner fame goes out during operation, immediately turn the control knob “OFF” and let the gas
clear a minimum of 5 minutes before attempting to re-light the fire table.
TURNING OFF
1.Push and turn the control knob clockwise to the “OFF”position.
2.Shut off gas supply at the shut-off valve and disconnect the quick disconnect socket from the main
gas supply.
LOW
(BAS)
HIGH
(HAUT)
OFF(ARRET)
13 / 40

Natural Gas Conversion Kit
OCK50-NG01
DANGER
DANGER D'INCENDIE OU D'EXPLOSION
S’il y a une odeur de gaz :
• Coupez l’admission de gaz del’appareil.
• Éteindre toute flamme nue.
• Si l’odeur persiste, vous éloigner de l’appareil
et appeler immédiatement.
• Après avoir quitté la zone, appelez votre
fournisseur de gaz ou le service d'incendie.
Le non-respect de ces instructions peut entraîner
la mort, des blessures graves ou des dommages
matériels.
!
AVERTISSEMENT
!
IMPORTANT
INSTALLATEUR:
Laissez ce manuel avec l'appareil.
CONSOMMATEUR:
Garde ce manuel pour y revenir plus tard.
!
US
R
C
Contactez Ocean Rock USA pour le support technique.
Service à la clientèle: 800-678-7294
FR
Ce kit de conversion doit être installé par
une agence de service quali fi ée
conformément aux instructions du fabricant
et à tous les codes et exigences applicables
de l'autorité compétente. Si les informations
contenues dans ces instructions ne sont pas
suivies à la lettre, un incendie, une explosion
ou une production de monoxyde de carbone
pourrait en résulter, entraînant des
dommages matériels, des blessures
corporelles ou la mort. L’agence de service
quali fi ée est responsable de l’installation
correcte de ce kit. L’installation n’est pas
correcte et complète jusqu’à ce que le
fonctionnement de l’appareil converti soit
vérifié, comme indiqué dans les instructions
du fabricant fournies avec le kit.

Instruction de sécurité importante----------------------------------------------------------------16
Liste des pièces --------------------------------------------------------------------------------------17
Instruction de conversion au gaz naturel-------------------------------------------------------18
Test de fuite -------------------------------------------------------------------------------------------25
Instructions d’allumage -----------------------------------------------------------------------------26
TABLE DES MATIÈRES
AVERTISSEMENT: Ce produit peut vous exposer au
monoxyde de carbone, qui est reconnu par l'État de Californie
comme pouvant causer des malformations congénitales ou
d'autres problèmes de reproduction. Pour plus d'informations,
rendez-vous sur www.P65Warnings.ca.gov.
!DANGER MONOXYDE DE CARBONE
Cet appareil peut produire du monoxyde de
carboneinodore.
Son utilisation dans un espace clos peut être
mortel.
Ne jamais utiliser cet appareil dans un espace
comme caravane, tente, voiture ou maison.
15 / 40

!Ce kit de conversion est destiné à transformer une table à incendie de pétrole liquéfié (LP)
en une table à incendie à gaz naturel.
16 / 40
INSTRUCTION DE SÉCURITÉ IMPORTANTE
!ATTENTION POUR USAGE EXTÉRIEUR SEULEMENT.
ODEUR DE GAZ
• Couper l'alimentation en gaz à la table de feu.
• Éteindre toute flamme.
• Ne pas tenter d’allumer d’autres appareils.
• Ne toucher à aucun interrupteur électrique; ne pas utiliser de téléphone dans votre bâtiment.
• Appeler immédiatement votre fournisseur de gaz à partir du téléphone d'un voisin.
• Suivre les instructions du fournisseur de gaz.
• Si vous ne pouvez pas joindre votre fournisseur de gaz, appelez le service des incendies.
L’installation et les réparations doivent être faites par un technicien qualifié. L’appareil devrait être
inspecté avant usage et au moins une fois l’an par un technicien qualifié. Des nettoyages plus
fréquents peuvent être nécessaires. Le compartiment des boutons de contrôle, les brûleurs, et les
canaux de circulation de l’air devraient toujours être gardés propres.
• AVERTISSEMENT: L'installation et l'entretien doivent être effectués par un installateur qualifié,
une agence de service ou un fournisseur de gaz.
• AVERTISSEMENT: Le non-respect du danger, d'avertissement et des mises en garde dans ce
service d'incendie peut entraîner des blessures corporelles graves ou la mort, ou un incendie ou
une explosion causant des dommages à la propriété.
• AVIS IMPORTANT: Lire et comprendre tous les avertissements et précautions avant de procéder
à l'assemblage et l'utilisation de votre table de feu à gaz. Une installation, un réglage, une modification
à ce dernier, un service ou l’entretien peuvent causer des blessures ou des dommages matériels.

Plaque
12
3
5
4
Manual 6
78
LISTE DES PIÈCES
1, Tuyau de gaz naturel et déconnexion rapide x 1 pc
2, Orifice de gaz naturel 3.86mm or 3.9mm x 1 pc
3, Vanne de gaz naturel x 1 pc
4, Manche x 1 pc
5, Plaque de conversion au gaz naturel x 1 pc
6, Instruction du kit de conversion au gaz naturel x 1 pc
7, Kit de câbles x 1 pc
8, Bloc de fixation de bouton x 1 pc
17 / 40
Applicable Model:
OFG107LP2 Bellows
1 Bellow OFG148LP
OFG114LP
OFG141LP OFG132LP OFG113LP OFG135LP

INSTRUCTION DE CONVERSION DE GAZ NATUREL
1ASSUREZ-VOUS QUE L’APPAREIL EST ÉTEINT ET COMPLÈTEMENT
REFROIDI ET L’ALIMENTATION EN GAZ À L’APPAREIL EST ÉTEINT.
!AVERTISSEMENT
Déconnecter le réservoir de gaz propane
Assurez-vous que la valve sur le réservoir de gaz
propane est en position OFF.
Déconnecter en tournant le bouton dans le sens
horaire jusqu'à ce qu'elle se détache de la valve.
2Enlevez soigneusement les pierres de lave de la zone du plateau des brûleurs.
Table de feu
3
Table
de
feu
Couchez une couverture ou un carton
pour ne pas abîmer le fini, inclinez avec
précaution l'unité sur le côté.
Couverture ou carton
18 / 40

INSTRUCTION DE CONVERSION DE GAZ NATUREL
19 / 40
4
5
6
Déconnectez le détendeur de propane de la table à feu.
Pour les modèles à 2 soufflet, voir A.
Pour les modèles à 1 soufflets, voir B.
Fixez le tuyau NG à l'appareil.
Pour les modèles à soufflet 2 pièce, veuillez voir A.
Pour les modèles à soufflets en 1 pièces, voir B.
Mesa de fuego
Regulador de propano y manguera Regulador de propano y manguera
Válvula LP Fuelle
AB
Manguera de gas natural
Enchufe de desconexión rápida
Manguera de gas natural y desconexión rápida
Válvula LP Fuelle
AB
Maintenez le bouton et le bloc de fixation du bouton, retirez-le de la valve BP.
Bouton
Bloc de fixation
de bouton

Tournez l'écrou hexagonal dans le sens antihoraire pour déconnecter la
soupape LP du panneau de commande.
7
8
Déconnecter
Déconnecter
Déconnecter
Soufflet
Soufflet
Valve de propane
Thermocouple
Entrée de gaz
(se connecter au régulateur)
Sortie de gaz
(connecter au graveur)
A
B
C
Déconnectez le soufflet de la vanne BP.
Pour les modèles à soufflet 1 pièce, veuillez voir A.
Pour les modèles à soufflet 2 pièces, voir A & B.
Déconnectez le thermocouple de la vanne BP (voir C).
INSTRUCTION DE CONVERSION DE GAZ NATUREL
UNIQUEMENT dans le sens antihoraire le raccord en laiton du soufflet lors de la déconnexion de la vanne.
NE PAS faire pivoter le tube en acier inoxydable. Une rotation excessive du tube en acier inoxydable entraînera
le tuyau de gaz à tordre ou casser, provoquant des fuites de gaz.
!AVERTISSEMENT
Joint en laiton
Tube en acier inoxydable
Joint en laiton
20 / 40
Table of contents
Languages:
Other MODENO Fireplace Accessories manuals
Popular Fireplace Accessories manuals by other brands

Valor
Valor G3.5 Series installation manual

Travis Industries
Travis Industries ProBuilder 36 quick start guide

Valor
Valor 1430CIK installation manual

IHP
IHP BVCBK instruction sheet

Empire Comfort Systems
Empire Comfort Systems EMBF-1S-C-1 Assembly instructions

Empire Comfort Systems
Empire Comfort Systems DVP32NKR installation instructions

Sunnydaze Decor
Sunnydaze Decor GWC-456 manual

Design Specialties
Design Specialties Hearth Craft Mirage MG36290 owner's manual

Lennox Hearth Products
Lennox Hearth Products LSS-CA35 installation instructions

Valor
Valor 715CVI installation manual

Heat & Glo
Heat & Glo SL-550F instructions

Contro l4
Contro l4 C4-FS1-Z installation guide