ANTENNA
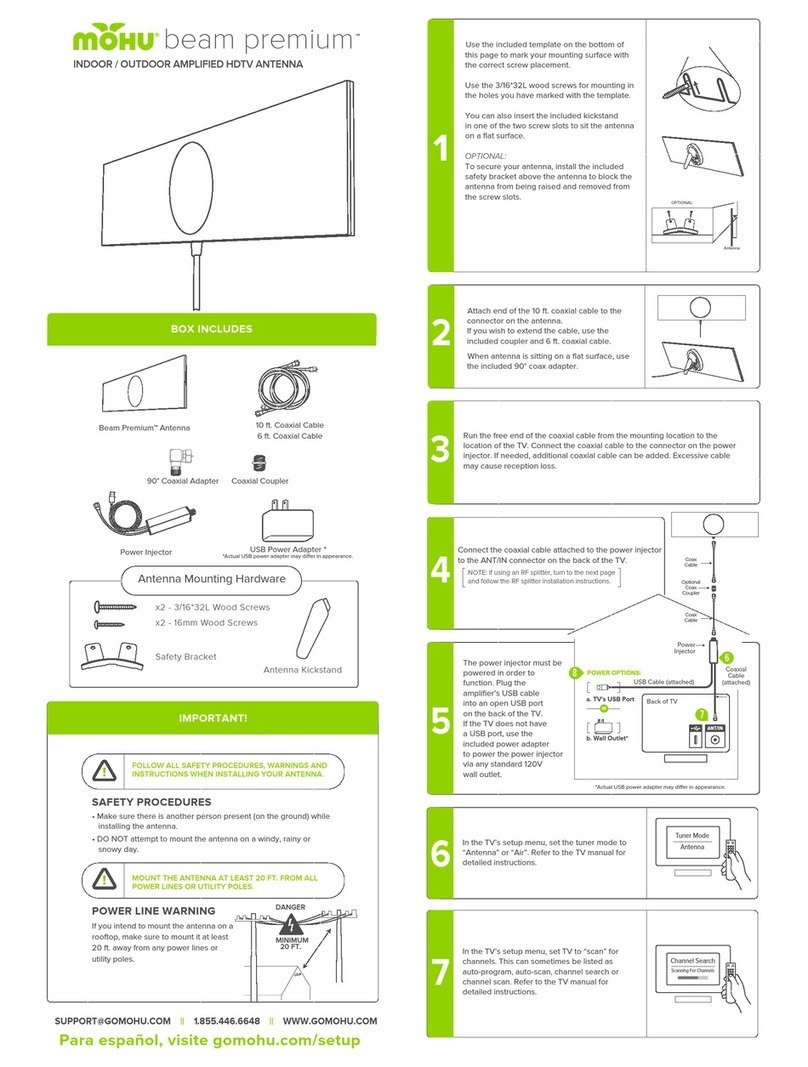
TUNER MODE
SCANNING FOR CHANNELS
CHANNEL SEARCH
ALTERNATIVE MOUNTING OPTION
C
D
D
A
OR
D
D
A
B
A
E
G
C
G
MOHU
SKY ANTENNA
POWER
INJECTOR
HOUSING
30 FT.
COAXIAL
CABLE
E
I
G
F
H
H
G
TELEVISION
(not included)
E
ANT
TELEVISION
(not included)
POWER
INJECTOR
HOUSING
I
K
J
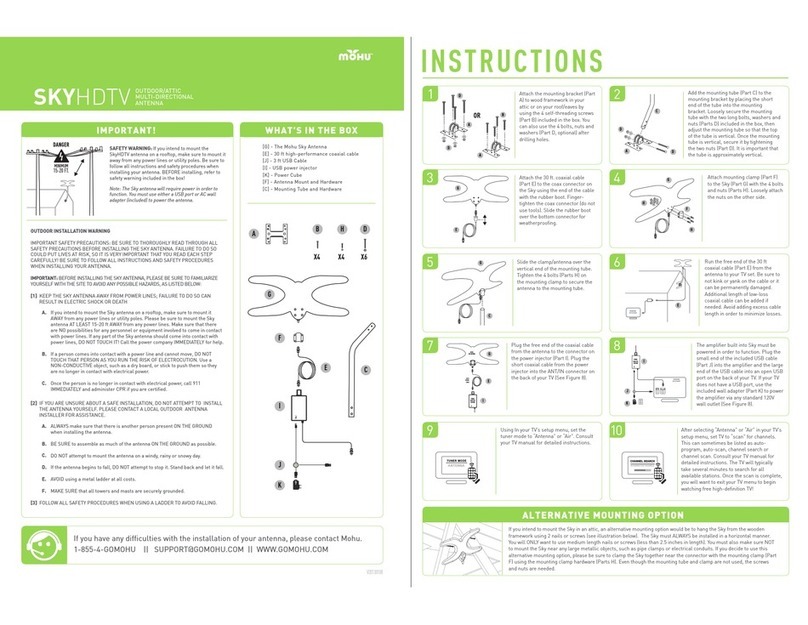
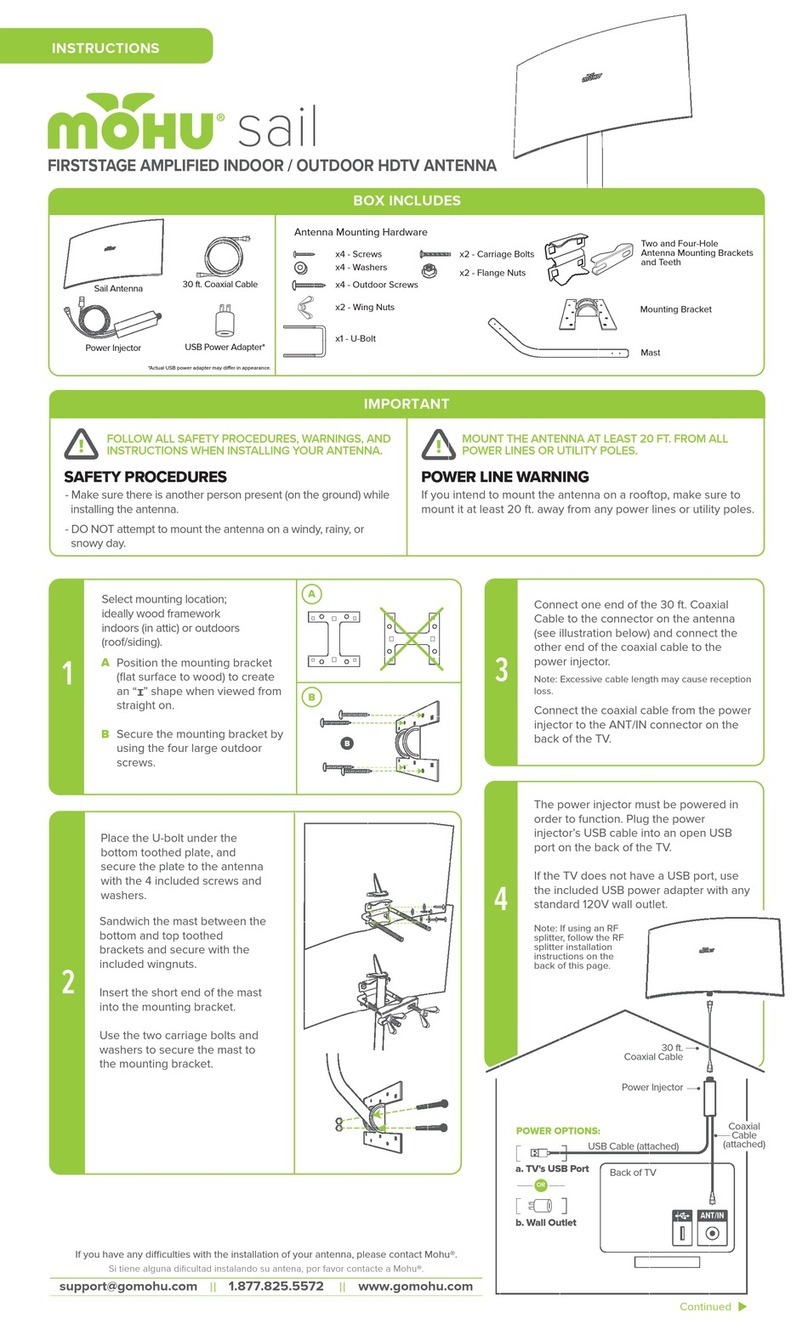
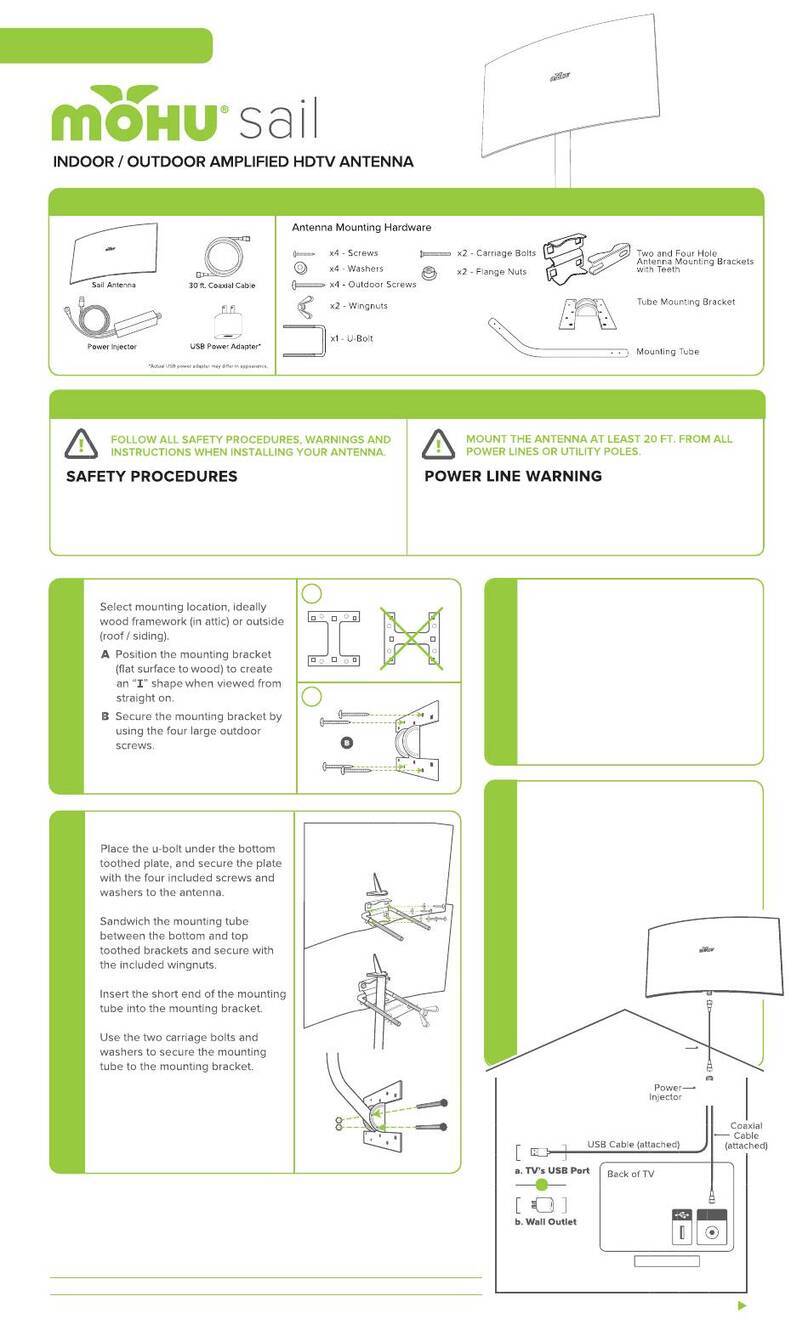
Attach the mounting bracket (Part
A) to wood framework in your
attic or on your roof/eaves by
using the 4 self-threading screws
(Part B) included in the box. You
can also use the 4 bolts, nuts and
washers (Part D, optional) after
drilling holes.
Add the mounting tube (Part C) to the
mounting bracket by placing the short
end of the tube into the mounting
bracket. Loosely secure the mounting
tube with the two long bolts, washers and
nuts (Parts D) included in the box, then
adjust the mounting tube so that the top
of the tube is vertical. Once the mounting
tube is vertical, secure it by tightening
the two nuts (Part D). It is important that
the tube is approximately vertical.
Attach the 30 ft. coaxial cable
(Part E) to the coax connector on
the Sky using the end of the cable
with the rubber boot. Finger-
tighten the coax connector (do not
use tools). Slide the rubber boot
over the bottom connector for
weatherproofing.
Attach mounting clamp (Part F)
to the Sky (Part G) with the 4 bolts
and nuts (Parts H). Loosely attach
the nuts on the other side.
Slide the clamp/antenna over the
vertical end of the mounting tube.
Tighten the 4 bolts (Parts H) on
the mounting clamp to secure the
antenna to the mounting tube.
Run the free end of the 30 ft
coaxial cable (Part E) from the
antenna to your TV set. Be sure to
not kink or yank on the cable or it
can be permanently damaged.
Additional length of low-loss
coaxial cable can be added if
needed. Avoid adding excess cable
length in order to minimize losses.
Plug the free end of the coaxial cable
from the antenna to the connector on
the power injector (Part I). Plug the
short coaxial cable from the power
injector into the ANT/IN connector on
the back of your TV (See Figure 8).
The amplifier built into Sky must be
powered in order to function. Plug the
small end of the included USB cable
(Part J) into the amplifier and the large
end of the USB cable into an open USB
port on the back of your TV. If your TV
does not have a USB port, use the
included wall adapter (Part K) to power
the amplifier via any standard 120V
wall outlet (See Figure 8).
Using In your TV’s setup menu, set the
tuner mode to “Antenna” or “Air”. Consult
your TV manual for detailed instructions.
After selecting “Antenna” or “Air” in your TV’s
setup menu, set TV to “scan” for channels.
This can sometimes be listed as auto-
program, auto-scan, channel search or
channel scan. Consult your TV manual for
detailed instructions. The TV will typically
take several minutes to search for all
available stations. Once the scan is complete,
you will want to exit your TV menu to begin
watching free high-definition TV!
If you intend to mount the Sky in an attic, an alternative mounting option would be to hang the Sky from the wooden
framework using 2 nails or screws (see illustration below). The Sky must ALWAYS be installed in a horizontal manner.
You will ONLY want to use medium length nails or screws (less than 2.5 inches in length). You must also make sure NOT
to mount the Sky near any large metallic objects, such as pipe clamps or electrical conduits. If you decide to use this
alternative mounting option, please be sure to clamp the Sky together near the connector with the mounting clamp (Part
F) using the mounting clamp hardware (Parts H). Even though the mounting tube and clamp are not used, the screws
and nuts are needed.
INSTRUCTIONS
1
3 4
5 6
7 8
910
2


