Monark 839 E User manual

Manual
English
Monark 839 E
Ergomedic 839 E


© 2009 MONARK EXERCISE AB, Vansbro, Sweden
Contents 3
1 Monark Exercise AB 4
2 Product Information 5
2.1 Specifications 5
3 Operation Instruction 6
3.1 Operate the ergometer 6
3.2 RPM Display and Visual Metronome/Pulse 6
3.3 Cycle adjustments 6
3.4 Where to obtain additional information 7
3.5 Waranty 7
3.6 Final assembly instructions 7
3.7 Initial operation 7
4 Connection to controler 8
4.1 Connection to PC 8
4.2 Connection to an external ECGdevice, digital control 9
4.3 Printer 9
4.4 Analog control 9
5 Calibration 10
5.1 Validation 10
5.2 Force 10
5.3 Calibration electronics 11
5.4 Power on crank or flywheel 11
6 Testing with Ergomedic 839 E 12
6.1 Heart rate (Telemetry system) 12
6.2 Subject supervision 12
6.3 Reviewing results 13
7 Computer Reference 14
7.1 Description of the terminal 14
7.2 Menu 1: Fitness test 19
7.3 Menu 2: Manual/ Work test 23
7.4 Menu 3: Sequence programs (user defined protocols) 25
7.5 Menu 4: Analog control 26
7.6 Menu 5: Calibration 26
7.7 Menu 6: System 27
7.8 Menu 99: Service menu (hidden) 28
8 Service 31
8.1 Service check & maintenance 31
8.2 Transport 31
8.3 Calibration of pendulum weight 32
8.4 Zero adjustment of meter panel 32
8.5 Brake belt contact surface 33
8.6 Replacement of brake belt 33
8.7 Pendulum weight bearing 33
8.8 Chain 1/2” x 1/8” 34
8.9 Crank bearing 34
8.10 Freewheel sprocket 35
8.11 Flywheel bearing 35
9 Spare parts 36
10 Appendix 38
10.1 Operation interferences 38
10.2 Trouble shooting guide 38
10.3 Error messages 39
10.4 References 39
Contents
Contents

Monark Ergomedic 839 E
4
1 Monark Exercise AB
Monark has 100 years’ experience of bicycle production. The Monark tradi-
tion has yielded know-how, experience, and a real feel for the product and qua-
lity. Since the early 1900s, Monark’s cycles have been living proof of precision,
reliability, strength and service. That is one of the reasons we are now the words
leader in cycle ergometers and the market leader in Scandinavia in transport cycles.
We manufacture, develop and market ergometers and exercise bikes, transport bikes
and specialized bicycles. Our largest customer groups are within health care, sports
medicine, public authorities, industry and postal services.
For more information: www.monark.net
Monark Exercise AB

Monark Ergomedic 839 E 5
2 Product Information
Congratulations on your new Ergometer.
Monark Ergomedic 839 E is one of the world’s
most precise and user-friendly computerized pe-
dulum ergometers.
The Ergometer is controlled by either a control
unit, an external PC or other external units. The
bike can perform max and submax fitness tests
and calculate the VO2 max. The ergometer can
be connected to ECG to do work tests.
Product Information
It is possible to build personal programs that are
custom made for the user. The bike can also be
used for manual training.
NOTE!
The use of Ergomedic 839 E can be physically
strenuous. Always consult a doctor before begin-
ning an exercise program and stop immediately if
feeling faint or dizzy.
2.1 Specifications
Construction:
Large, well balanced flywheel, 22 kg•
Brake power 0-1400 W at 200 RPM•
Pendulum scale, easy to calibrate•
Comfortable saddle with adjustable height•
Handlebars with adjustable height and distan-•
ce from seat
Stable, heavy duty steel frame•
Powder painted•
Wheels for easy transport•
Computer:
Computer system 8MHz•
Multi-colour RPM pacing bar graph display•
Visual metronome or heart rate•
Serial communcation port: 300 - 38400 baud•
HR-training•
Electrical:
Voltage 24 VDC or 18 VAC.•
Transformer to wall outlet. 100 - 240 VAC,•
50/60 Hz, 15 W. Note: The transformer must
be approved by your national electrical autho-
rities.
Measured quantities:
Distance: meter, miles
Energi: kcal
Heart rate: beats/minute(bpm)
Force: Newton(N)
Power: Watts( W), kpm/min or VO2
ml/min/kg
Time: min, sec
Weight: kilogram(kg), pounds(lb)
Dimensions:
Length: 1120 mm (44”)
Width: 530 mm (21”)
Height,
handlebar: 650-1135 mm (30”-45”)
Height,
saddle: 800-1120 mm (31,5”-44”)
Wegiht: 55 kg (112 lbs)
Certificate
CE 93/42
ISO-9001

Monark Ergomedic 839 E
6
3.3 Cycle adjustments
Seat height should be adjusted to a comfortable
position. A suitable height is when your knee is
slightly bent and the middle of the foot is straight
above the pedal axle with the pedal in its lowest
position. To adjust the seat height loosen the lever
on the seat tube. See fig: Adjustments.
The handlebar setting should give a comfortable
position when cycling. During longer exercise
sessions it is recommended that you occasional-
ly change the handlebar position. To adjust the
handlebar loosen the quick release lever. See fig:
Adjustments.
NOTE! The handlebar stem should be inserted
into the frame tube at least 3 inches (about 8 cm).
this measure is marked out on the stem(3).
3.1 Operate the ergometer
Ergomedic 839 E is built on a stabile frame, a
large well balanced flywheel, a break belt and a
pendulum weight which measure the force. Pe-
dals and a chain drive are provided to spin the
flywheel as a tension device tightens the belt to
regulate the braking force applied to the wheel.
The pendulum indicates the applied force direc-
tly on the scale located on the right side of the
flywheel.
The computer system consists of one main unit
and one control unit (terminal, PC or ECG). The
main unit reads in the pedal speed, the applied
force and determines the subjects heart rate by
a chest transmitter. Additionally, the base con-
troller activates motor to adjust the tension of
the belt, thereby regulating the applied braking
force. The force may be automatically varied in
response to changes in pedal speed to maintain a
constant power workload.
For information about how respective control
unit works, see ”Connection to controller”.
3 Operation Instruction
Operation Instruction
The metronome (the two green LED bars in the
middle) flashes once per pedal stroke at a preset
rate. The two green LED bars in the middle can
also be set to show pulse. It makes one flash for
every heart beat. Pedal frequency compared to
metronome rate is always shown.
Underspeed:
Pedal speed is lower than desired metronome
rate. 2, 4, 8, 16 or more depending which LED
bar that indicates.
Overspeed:
Pedal speed is greater than desired metronome
rate. 2, 4, 8, 16 or more depending which LED
bar that indicates.
3.2 RPM Display and Visual Metronome/Pulse
1
min. 3”
2
3
Fig: RPM display
16842
16842
Metro/Puls
RPM
Fig: Adjustments
1) Lever, seat post
2) Lever, handlebar
3) Inserted min. 3”

Monark Ergomedic 839 E 7
3.5 Waranty
EU countries private use
If you are a natural person you will have a mini-
mum level of protection against defects in accor-
dance with EC Directive 1999/44/EC.
In short, the directive provides for that your Mo-
nark Dealer will be liable for any defects, which
existed at the time of delivery. In case of defects,
you will be entitled to have the defect remedied
within a reasonable time, free of charge, by re-
pair or replacement.
EU countries professional use
Monark products and parts are guaranteed
against defects in materials and workmanship
for a period of one year from the initial date of
purchase of the unit.
In the event of a defect in material or workman-
ship during that period above, Monark Exercise
will repair or replace (at its option) the product.
Monark Exercise will do so at its expense for the
cost of materials but not for labor or shipping.
Operation Instruction
The user may require more information concer-
ning several areas of the ergometer usage. This
manual was intended to instruct the reader pri-
marily in the operationof the ergometer. Referen-
ce are made to related topics in the discussions
concerning the testing procedures and the pro-
tocol operation sections. The following readings
may provide some greater insight to ergometer
based testing without confusing the reader with
extremely technical medical terms. Both texts
were written specifically to provide basic under-
standing of the testing methodology and results.
Attention is paid to details concerning program
setup and management.
Golding LA, Myers CR, Sinning WE, The y´s•
way to physical fitness“, YMCA of the USA,
Rosemont, IL, 1982 .
Astrand P-O, “Work Tests with the Bicycle Er-•
gometer“, Monark AB, Varberg, Sweden.
For more technical details, see the section entitled
“Appendix: Reference“.
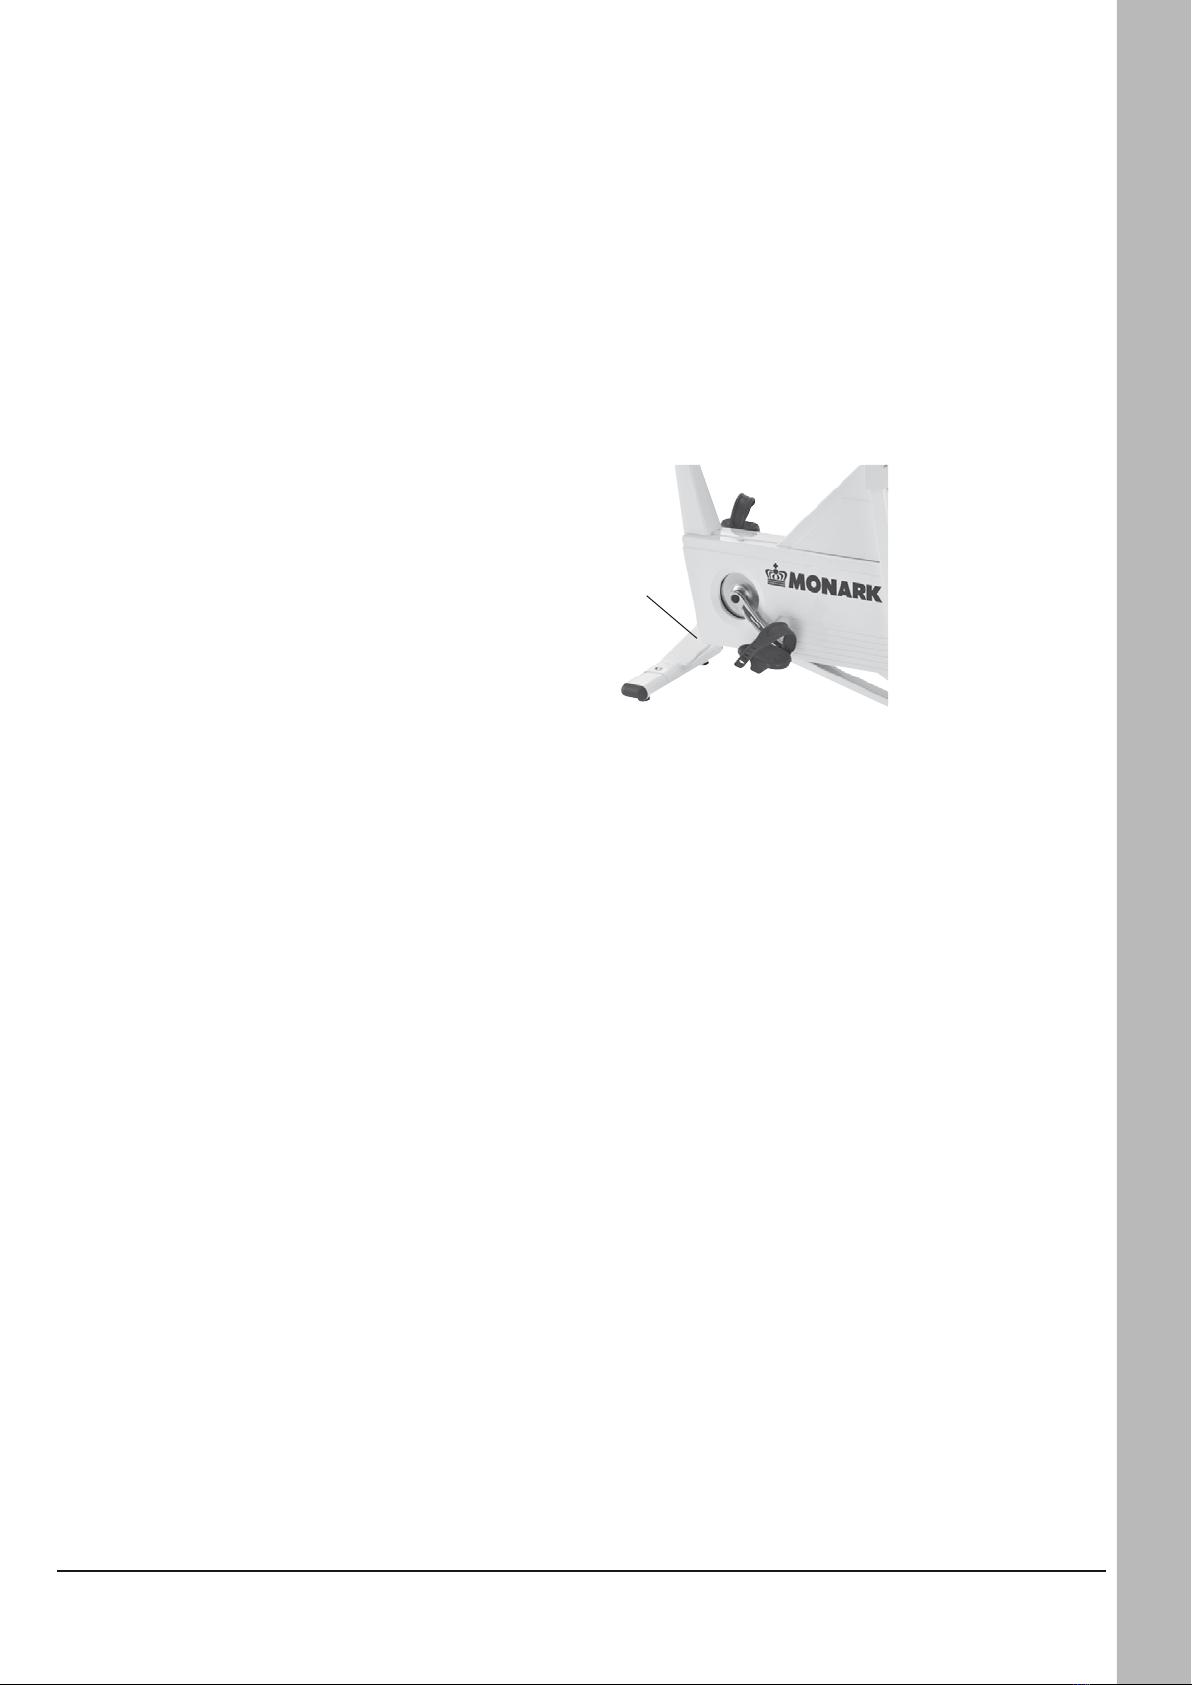
Please note: The
production number
of your Ergometer is
placed according to
fig: Serial number.
Fig: Serial number (1)
1
3.4 Where to obtain additional information
Other countries
Monark products and parts are guaranteed
against defects in materials and workmanship
for a period of one year from the initial date of
purchase of the unit. In the event of a defect in
material or workmanship during that period
above, Monark Exercise will repair or replace (at
its option) the product. Monark Exercise will do
so at its expense for the cost of materials but not
for labor or shipping.
3.6 Final assembly instructions
Read these instructions prior to assembling the
ergometer! Assemble the supporting legs, pedals,
saddle and handlebar as specified in the ”Quick
guide”. Remember to remove the transport tape
on the pendulum.
3.7 Initial operation
Although all 839 ergometers are 100% calibra-
ted at the factory, the user may wish to verify this
by performing the mechanical calibration of the
pendulum weight. See section ”Calibration of
Pendulum Weight”.
Apply power to the ergometer by first connecting
the cable from the transformer to the ergometer
at the front connector labeled “ 24VAC/18VAC“.
Then plug the transformer into the wall outlet.
Turn the power switch to on position. A green
LED indicates power to the 839.
Perform the electrical calibration as specified in
section ”Calibration Electronics”.
Test ride the ergometer. The 839 Electronic Ergo-
meter is now fully functional and ready.

Monark Ergomedic 839 E
8
4 Connection to controler
The Monark Ergometer 839E can be controlled
externally from a terminal, a computer or a ECG.
A printer can also be connected to the ergome-
ter.
The control is performed over a serial line using
ANSI/ISO/ASCII format commands. The inter-
face is a 9 pin male D-sub connector, compatible
with the RS232 standard, located on the front of
the electronic. To connect to a PC use a 0-modem
serial cable with 9 pin female connectors in both
ends.
It is also possible to use a analog control from an
external source to set the workload. This is done
by the contacts b32 and z32 on the main connec-
tor on the bike.
The ergometer need not be turned off prior to
connection of the external components, alt-
hough removing the power from all devices may
prevent erroneous data transfer between equip-
ment during interconnection. Caution must be
exercised in the connection of various types of
equipment from different manufactures to avoid
electrical hazards and physical damage. The user
must be certain that the instrument connector
and the cable are designed for the intended pur-
pose. Serious injury to the user and/or equipment
may result if inappropriate connections are at-
tempted.
For a complete description of the command in-
terface setup order the Technical Manual for Mo-
nark 839E, from Monark Exercise AB, Sweden.
4.1 Connection to PC
To connect a PC to the ergometer, use a 0-modem
cable (RS232) with a 9-pin D-sub female at each
end. If no RS232 Serial port is available on the
computer use a USB serial RS232 converter.
To control the ergometer use the PC software
supplied with the ergometer or other PC software
made for the Ergomedic 839 E.
From software version MEC3V11R14 and later
settings can be made from a PC in terminal mode
if the handheld terminal is not available.
Do as follows:
Set PC in terminal mode. A terminal emulator1. is normally available in i.e. Windows under
Accessories/Communication.
If no RS232 serial port is available on the PC2. use a USB serial converter to connect to a USB
port.
In terminal mode do the following settings:3.
- 9600 baud
- 8 data bit
- 1 stop bit
- no parity
- no flow control
- set terminal emulation to VT100
- set the com port number.
A USB serial converter is automatically as
signed to a com port number by Windows.
Connect Ergometer and PC with the 0-modem4. cable (normally used for the ergometer hand-
held terminal).
Turn on power to the ergometer. The ergo-5. meter is now checking what type of device is
connected. When finished a message appears
on the PC screen. Common commands:
- Calibration: Type: cali[enter] and
follow the instructions
on the screen.
- Setting to control ergometer from
an external Siemens
Megacart ECG device:
Type: env cndtype=1[enter]
- Setting to control ergometer from
other external ECG devices:
(most common setting)
type: env cmdtype=2[enter]
To go back to control the ergometer with the6. handheld terminal. Type: env cmdtype=[enter]
or env cmdtype=0[enter]
A lot of other settings can be made. For more
information about this please see Technical Refe-
rence Manual MEC3V11Rn.
Connection to controler

Monark Ergomedic 839 E 9
Connection to controler
4.2 Connection to an external ECG
device, digital control
Connect the handheld unit to the main unit on7. the front of the bike (use the 0-modem cable
with a 9-pin D-sub female at each end).
Connect the net adaptor to a suitable wall8. outlet and to the Monark Ergometer 839 and
then turn power on.
After a short while the main menu is shown9. on the handheld display.
Press ’99’ and the service menu comes up on10.
the display.
Press ’6’ for Service setup.11.
Press ’Enter’ on the following settings until12.
’Command Type’ is shown.
This says:13.
- 0 Terminal/PC
- 1-3 see manual
- (0) _
If a zero (0) is displayed at the 3rd line, the
bicycle is in normal mode which means that
the bike can not be controlled by an external
ECG device. Press ‘1’ if a Siemens Megacart
with Ergomed 940 will be used. For use of
other devices press ’2’ or ’3’ and then ’Enter’.
If correct figure is displayed from the begin-
ning just press ‘Enter’.
Return to main menu by pressing ’0’ and14.
press ’0’ again to finish. The computer will
then save the settings in the memory before
it turns off. Computer will start up again
automatically after a few seconds.
Turn off the power and remove the handheld15.
unit.
Connect the cable (Megacart needs a specific16.
cable) into the ECG device.’
The Ergometer can now be controlled only from
an external ECG device.
Reset of the Ergometer to normal mode (control-
led from a handheld unit).
Follow steps 1 – 7. At step 7 press ’0’ and then
’Enter’. The Ergometer can now be controlled
again from the handheld unit or an exetrnal PC.
4.3 Printer
The 839 Electronic Ergometer interfaces to seve-
ral optional devices. A parallel interfaced printer
may be attached to provide written reports.
The terminal or the computer attaches both via a
serial cable to the 9 pin interface connector loca-
ted on the front of the ergometer. Attach a printer
if available to the parallel port on the front.
If the instrument is a terminal or printer, the sys-
tem may need to be setup. Verify that the System
setup have been set to enable automatic printout.
If it has been disabled, no output will reach the
device until it has been enabled. Also, the baud
rate selected by the interface cable must match
that of the device. If the device is a printer, proper
paper loading and unit selection must be comple-
ted prior to operation (refer to printer instruction
manual).
The automatic printout length is a preset to eleven
inch pages for standard fanfold or zee-fold paper.
At the top of the each page, a header designating
the columns is printed.
The time period between the printing of each line
may be set as desired, from 0 (continuous output)
to 255 seconds in one second increments. The
standard setting is 15 seconds between printouts.
This provides reasonable documentation while
not wasting large quantities of paper.
4.4 Analog control
Please see chapter 7.5 Menu 4: Analog control.

Monark Ergomedic 839 E
10
Calibration
5 Calibration
The 839 E is a mechanically weighted and braked
ergometer, making performance validation a
simple procedure. The work performed on the er-
gometer is the product of the weight lifted times
the numbers of revolutions (factored). Validation
includes both mechanical and electronic proce-
dures. If the ergometer fails to pass any section of
the validation, proceed to the calibration and/or
service menu (99 in the main menu).
Inspection of all mechanical components is sug-
gested after any repair, or component service.
Once per year, the following validation should be
performed.
Remove the cover from the flywheel.1. Loosen the brake belt at the balancing spring.2. Wait until the flywheel is not moving any long-3. er.
The pendulum weight index should be aligned4. with “0“ on the scale.
Attach the calibration weight to the point at5. which the spring was attached.
The known weight should match the value6. on the scale. If not see section “Calibration of
Pendulum Weight “.
Reattach the tension belt.7. Reassemble the cover.8.
Proceed to the validation to complete.
5.1 Validation
The following procedure will assure the user that
the ergometer is performing properly on a daily
basis. The test exercises the mechanical braking,
pedaling and speed detecting systems as well as
the computer regulation and sensing capability of
the mechanical system.
Additionally, if a calibrated ECG simulator is
available, it may be used to verify the heart rate
measuring system. Whether the simulator is used
or not, the heart rate system may be validated by
simply taking a pulse point rate measurement at
the neck for example. While a patient is at rest
and has been prepared for chest belt electrodes or
an ear sensor, the pulse indicator flashes once per
pulse beat. The displayed rate, should agree with
5.2 Force
From main menu go to any start display with
newtons (N).
With the pendulum at zero, the display should1. read “ 0“.
Move the pendulum weight to the 4 kp posi-2. tion and the display should read “39“ New-
tons.
Decrease the position of the weight by steps of3. 1 kp. The display should read correctly at all
positions.
NB: After this check the brake belt will be so-
mewhat loose and because of this it will take a
few seconds before normal workload is obtained
the first time the ergometer is used.
Power:
Power calculation
1 rpm = 6 m on the flywheel brake surface.
50 rpm = 300 m
2 kp force makes 2 x 300 = 600 kpm/min
100 rpm= 600 m
1 kp force makes 1 x 600 = 600 kpm/min
(watt = RPM x kp)
the manually detected pulse rate. If not, check
the patient electrode connection and skin prepa-
ration prior to requesting service.

Monark Ergomedic 839 E 11
5.3 Calibration electronics
Calibration is necessary to match the mechanics
of the ergometer to the electronics of the com-
puter. The following steps are required to recali-
brate the electronics to the pendulum scale.
1. Check at the bottom of the flywheel that the
brake belt is loose. If not move the pendulum up
to 3 kp and hold it for a few seconds. Move the
pendulum to the zero position again. Check that
the brake belt is loose.
2. Align the force scale with zero mar-
ker on the pendulum. Refer to section
”Zero adjustment of meter panel” for details.
3. Press key 5 in the main menu (Calibration) and
follow the display instructions. Hold the pendu-
lum at 0-position and wait for one “beep”.
4. Hold the pendulum at 2 kp-position and wait
for one “beep”. Hold the pendulum at 4 kp-po-
sition and wait for one “beep”. Move the pen-
dulum to the 6 kp position as told in the display.
Hold it in position and wait for two “beeps”
shortly after each other.
5. Lower the pendulum to the resting position
(0-marking). Calibration is done.
The calibration coefficient which has been cal-
culated by the computer is stored in the continu-
ous memory. Whenever power is applied to the
ergometer, the latest calibration value is restored
to maintain memory. A new calibration replaces
previous values.
Generally, it is not necessary to recalibrate the er-
gometer often. The coefficient is maintained even
when power is removed and the physical orien-
tation of the frame, within the limits of normal
riding, has no effect on the electrical calibration.
Recalibration should be preformed following any
service, component replacement, or transport of
the unit or after setting to default in the service
menu(99).
A daily validation of the pendulum force sensor
should be preformed. If the procedure reveals an
error, recalibration may be necessary.
Check of the electronic calibration can be done
as follows;
From main menu go to any of the test displays
shoeing newtons (N). Move the pendulum to 4
kp(39N). This position shall now be read in the
display. If not perform a new calibration.
NOTE!
After this check the brake belt will be loose,
which means that the first time the ergometer is
used after calibration it it will take a few seconds
before normal workload is obtained.
5.4 Power on crank or flywheel
839 Ergometer adapted to ECG-work tests is set
to measure the power on the crank.
839 Ergometer adapted to fitness tests is set to
measure the power on the flywheel.
A sticker, placed on the head tube, see fig: EKG-
sticker, informs that the ergometer is set to me-
asure the power on the crank.
Calibration
Fig: EKG-sticker

Monark Ergomedic 839 E
12
6.1 Heart rate (Telemetry system)
The subject’s heart rate can be monitored by chest
belt telemetry system. The system with chest belt
electrodes is standard equipment.
The chest belt should be secured at a comfortable
tension around the mid section, just below the
breasts. Moisten the electrodes before use. Heart
rate monitoring, free from artifact, requires good
electrode contacts and adequate skin preparation.
Prior to placing the electrodes, the subjects skin,
at the electrodes sites, should be cleaned with one
of the commercial skin prep solution. To make
sure that you have found the correct position
the logo should have been placed in the center of
chest and also be readable for another person. To
enable a reliable contact with pulse receiver on
the bike the distance should be kept below 100
cm. It is important to identify the chest belt with
the pulse receiver by standing close to it before
beginning (max 60 cm, concerns Polar belts).
After the chest belt is placed the heart rate will be
displayed and the heart will verify each beat. If
the RPM bar is set to show optical heart beat in
the middle section this will also verify each heart
beat.
NOTE! Electromagnetic waves can interfere the
telemetry system. Cellular phones are not allo-
wed to be used near the bike during test.
If the ergometer is to be used without chestbelt
note that max heart alarm should be set in off
position so that external noise not can cause a
random max pulse or higher. This switch is in on
position by default. If the heart rate exceeds the
maximum level set, the alarm will sound and the
ergometer braking force will decrease until the
heart rate drops below the alarm level.
6.2 Subject supervision
The ergometer performs automated tests virtual-
ly by itself, requiring minimal intervention by the
operator. This allows the operator to pay careful
Testing with Ergomedic 839 E
Finally, the chest belt should be applied and mo-
nitored to check for proper heart rate operation.
The baseline heart rate may also be of assistance
in determining the nervousness of the subject.
The subject should exhibit a relatively stable res-
ting heart rate prior to starting the protocol.
6 Testing with
Ergomedic 839 E
The versatility of the 839 Electronic Ergometer
enable it to be utilized in a variety of testing en-
vironments. The precision and reproducibility
of measurements made with the ergometer in
conjunction with the ease of testing, allow it to
be employed in clinical exercise stress facilities,
corporate fitness programs and health clubs. The
backgrounds of both the individuals being tested
and those administering the test may be vastly dif-
ferent in these widely varying testing situations.
In general, whether in a clinical laboratory or a
health club, the subject may be exercised quite
strenuously, depending on workloads which have
been selected. As a precaution, it may be advi-
sable, prior to beginning an exercise protocol,
that each subject consult with a physician. Be-
fore testing, the operator should review the entire
protocol operation with the subject, explaining
the work which will be required and the duration
of the procedure. A system of communicating
fatigue, chest pain or other abnormal physical re-
sponse to the exercise should be discussed.
The subject should not engage in heavy physi-
cal activity for several hours prior to testing to
establish maximum oxygen consumption. In ad-
dition, all testing and exercise protocols should
be performed a reasonable time after meals. The
subject should also refrain from smoking within
an hour of the testing period.
The subject should not be prepared for riding the
ergometer, including the selection of proper clo-
thing which neither interferes with the physical
activity nor endangers the health of the subject.
The subject may need some general education
concerning the pedaling of the ergometer. The
saddle and the handlebars should be adjusted
for comfort and proper mechanical distance. The
saddle height should be set so that when the ball
of the subject’s foot is placed on the pedal, there
is a slight bend at the knee with the pedal in the
lowest position.
The operation of the speed metronome and over/
under display should be reviewed. The mainte-
nance of the proper speed should be practiced at
a low workload.

Monark Ergomedic 839 E 13
Testing with Ergomedic 839 E
6.3 Reviewing results
The maximum oxygen uptake is the standard
measurement of cardiopulmonary fitness. Depen-
dent on the linear relationship between work and
oxygen uptake and between work and heart rate,
the heart rate response to work may be used to
estimate the oxygen consumption. If the maxi-
mum heart rate is considered, the maximum oxy-
gen consumption may be determined.
The YMCA and Astrand protocols estimate the
maximum oxygen consumption, based on a sub-
maximal workload while all others report the
oxygen consumption required by the final wor-
kload. The Bruce and Naughton protocols requi-
re that the subject exercise at a workload level for
a minimum of one minute to establish the oxygen
consumption; If less than one minute is observed,
The previous workload value is used.
The estimated maximum oxygen consumption
derived from some of the ergometer tests is sub-
ject to the error of the “ age related predicted
maximum heart rate“. Although there is a defi-
nite and linear relationship between work and
oxygen uptake, there are some differences in ac-
tual oxygen uptake based on individual work ef-
ficiency. Subject who are less familiar with bicycle
exercise and those individuals who are less fit, are
more likely be less efficient than those who ride
bicycles frequently.
It should be noted that these results are estimates
or predictions of maximal response and have a
greater chance of being in error than if the indivi-
dual were tested to their actual maximum value.
Interpretation should therefore be made more ca-
refully with an understanding of the possibility of
errors in the methodology.
A relative fitness index can be obtained from the
following tables:
Fitness Rating Index - Males
Maximum Oxygen Consumption ml/kg/min
Fitness Rating Index - Females
Maximum Oxygen Consumption ml/kg/min
Rating Rating
-36 yrs 36-45 yrs 45- yrs -36 yrs 36-45 yrs 45- yrs
Excellent 54 53 43 Excellent 55 49 46
Good 49 45 38 Good 45 43 38
Above Av. 46 39 34 Above Av. 39 37 32
Average 36 33 30 Average 34 33 27
Below Av. 32 29 27 Below Av. 30 29 24
Fair 28 25 24 Fair 26 26 20
Poor 24 23 20 Poor 20 22 18
See also table 7 in “ Work tests with the Bicycle Ergometer“ by P O Astrand.
attention to the subject without distraction. The
response to the exercise protocol an be accurate-
ly estimated and appropriate action to assist the
subject, if necessary, may be given. The rider is
subjected to considerable exercise in certain ad-
vanced protocol stages. The effect on the subject
should not be underestimated.
During the testing, the general appearance and
heart rate may be the most crucial factors to mo-
nitor. The testing should be stopped immediately
if the subject reports chest pain, difficulty brea-
thing, etc. A system of prompt medical attention
should be set up prior to testing, in case of emer-
gency.
The subject may also show difficulty in regula-
ting the speed of the ergometer. The power will
be properly regulated regardless of the speed, as-
suming that the protocol work type is not force
and that the speed is maintained above the pedal
low setting (default is 30 RPM).
In addition , some subjects may become sensitive
to the display on the handheld remote controller.
If this is suspected, the controller may be remo-
ved from its cradle and located out of view. Simi-
larly, the pulse LED may disturb the subject and
may be disabled.

Monark Ergomedic 839 E
14
7.1 Description of the terminal
The Monark Ergometer 839E can be controlled
externally from a terminal, a computer or a ECG.
This chapter describes the terminal.
7.1.1 Display
Options on the display;
1 Fitness test
2 Man./Work test
3 Seq.programs
4 Analog control
5 Calibration
6 System
0 Exit
7.1.2 Keyboard layout
Used keys:
Key 1 - 9: menu choice and numeric input
Arrow key up/down: scroll function
Dot key: decimal input
Del.key: delete function
Enter: enters input
Special function during fixed protocols:
Key 9: increase step on force/power level
Key 6: decrease step on force/power level
Key 3: start/stop program
Key 7 8 9: increase level
Key 4 5 6: decrease level
7 Computer Reference
7.1.3 Ergometer continuous memory
To ease operation of the ergo meter, several “va-
riables” are stored in “nonvolatile memory”.
These variables are restored to normal memory
each time power is applied to the ergometer.
Computer Reference
1 Fitness test
2 Man./Work test
3 Seq.programs
4 Analog control

Monark Ergomedic 839 E 15
Computer Reference
7.1.4 Printer report
If a parallel printer (DOS compatible) is connected to the Ergometer a hard copy test report may be
obtained, documenting the protocol progress at preset time intervals. At the end of a fixed protocol, a
calculation is prepared.
NOTE!
The auto printout function must be enabled for the printer to operate outside fixed protocols.
To change the time interval between successive printouts, see System menu.
Sample Report:
Monark Ergometer 839E. Åstrand - Report: xx Page: 1
Name: .......................................................................
Test: ...........................................................................
Date: ......................................................................
Sign: ..........................................................................
Age: 43 years Weight: 82.0 kg Sex: Male
Max. Heart Rate(bpm):177
Time RPM BPM N kcal km/h km Ref.
00:30 64 82 04 01.0 23.1 0.2 1500kpm/min
01:00 64 107 38 08.0 23.1 0.4 1500kpm/min
01:30 57 127 43 16.0 20.4 0.6 1500kpm/min
02:00 53 139 46 25.0 19.1 0.8 1500kpm/min
02:30 52 143 47 33.0 18.7 1.0 1500kpm/min
03:00 53 151 48 41.0 19.1 1.1 1500kpm/min
03:30 53 150 46 50.0 19.1 1.3 1500kpm/min
04:00 51 153 48 58.0 18.3 1.4 1500kpm/min
04:30 52 154 48 67.0 19.8 1.6 1500kpm/min
05:00 53 155 46 75.0 19.0 1.7 1500kpm/min
05:30 54 157 46 83.0 19.5 1.8 1500kpm/min
06:00 57 156 43 92.0 20.4 2.0 1500kpm/min
Measured heart rate (BPM) : 156
Calculated maximum V02: Max: 49.4 ml/kg/min 4.05 l/min

Monark Ergomedic 839 E
16
7.1.5 Protocol operation
A protocol operation cycles the ergometer th-
rough a predefined workload sequence, automa-
tically. The protocol may be designed to alter the
workload according to time or a physiological re-
sponse such as heart rate. Several of the protocols
may be modified or customized by the user to suit
specific needs.
The programmed sequence of workload may be
set to provide a varying workload. The rate of
change of the workload may be specifically set in
some protocols. Still other protocols may exer-
cise the subject to a maximum (or submaximal)
effort to determine an index of fitness (oxygen
consumption).
A protocol may terminate based on the passage
of time or the satisfaction of a specific physiologi-
cal conditions such as a “steady state” heart rate.
For details, refer to the specific protocol opera-
tion description.
At the conclusion of a protocol, a summary is
printed, if the optional external printer is in-
stalled. This report includes various identifica-
tion data: the protocol name , the subjects age,
weight, sex. In addition, test results are printed,
including the predicted maximum heart rate, the
actual steady state heart rate, the maximum wor-
kload and the “V02 max”. The V02 maximum is
expressed both as a total body usage in l/minute
and per kg of body weight in ml/kg/minute. If a
printer is not available, only the V02 max data,
both in l/min and ml/kg/min are displayed. The
interpretation and meaning of the V02 max data
is specific to the design of the particular protocol.
Certain protocols are simply programmed exer-
cise and therefore are not designed to measure
V02. Please refer to the specific protocol descrip-
tion prior to attaching any significance to the re-
ported value.
The computer controller for the 839 Ergometer
can perform different protocols in addition to
strict manual operation. Four protocols have been
preset and 2 are partly preset . Several prepro-
grammed protocols measure oxygen consump-
tion at steady state: the Astrand, using a single
workload, the YMCA, using multiple branching
workloads (“YMCAs Way to Physical Fitness”
bicycle test) and the Bruce and Naughton, using
multiple increasing workloads (treadmill proto-
cols adapted to bicycles ergometry). Additional
preprogrammed protocols, not designed to me-
asure V02, provide timed increasing workloads
(ramp and incremental) and a heart rate training
program in which a target heart rate is set and the
ergometer attempts to maintain the target rate by
varying the applied workload accordingly.
All protocol operations enable the heart alarm
feature. The alarm value is preset to 220 - age.
During the test setup procedure, the maximum
heart rate may be changed depending on the sub-
jects exercise prescription or other constraints.
If the heart rate exceeds the alarm value, a beep-
ing tone will be heard until the heart rate falls
below the alarm point or the alarm is disabled.
When the alarm sounds, the workload is remo-
ved, automatically, to prevent overstressing the
subject.
The alarm feature may be disabled, particularly
if the protocol does not require monitoring of the
subject’s heart rate. If heart rate is not being mo-
nitored, start the protocol and then disable the
alarm.
The automatic protocol attempt to exercise the
subject at specific oxygen consumption levels.
The ergometer achieves this by producing a bra-
king force which, in normal individuals, requires
the consumption of the desired volume of oxy-
gen. Note that most protocols express the V02
in ml/kg/min, therefore, the total V02 required
is calculated using the subjects weight and sub-
sequently converted to a power workload. The
table below shows the nominal work equivalent
to various oxygen consumption rates.
Work load Oxygen uptake
(Kpm/min) (L/min)
300 0,9
600 1,5
900 2,1
1200 2,8
1500 3,5
1800 4,2
2100 5,0
2400 5,7
Computer Reference

Monark Ergomedic 839 E 17
Computer Reference
7.1.6 Menu system
34

Monark Ergomedic 839 E
18
Computer Reference
Kommandotyp
- 0 Terminal/PC
- 1-3 Se manual
- <0>

Monark Ergomedic 839 E 19
7.2 Menu 1: Fitness test
7.2.1 Åstrand - Protocol
The Astrand protocol is designed to determine
maximal oxygen consumption by exercising the
subject at a submaximal workload and measur-
ing the steady state heart rate. The workload, in
conjunction with the resultant heart rate, is com-
pared to the predicted relationship, adjusted for
age and sex and a maximal oxygen consumption
is computed.
The protocol defines nine workloads at which
the subject may be evaluated. The workloads for
male subjects span 300 kpm/min to 1500 kpm/
min in 150 kpm/min steps. The workloads for
females cover 300 kpm/min to 900 kpm/min in
75 kpm/min steps.
The workload selection is preformed manual-
ly during the first two minutes of the test. The
workload should be difficult enough to elicit a
steady heart rate of at least 120 bpm. If too high
a workload is chosen, the subject may not be able
to complete the minimum of six minutes neces-
sary to reach steady state conditions. The proto-
col has been designed to test individuals with a
normal mechanical efficiency during steady state;
very high workloads can only be preformed aero-
bically by individuals with a very high work ca-
pacity.
During the workload selection interval, the wor-
kload should be increased until the heart rate va-
ries no more than 4bpm and is consistently grea-
ter than 120 bpm.
At the end of the fifth minute, the heart rate is
recorded. If, by the end of the next minute, the
heart rate is within 4 bpm of the previous obser-
vations, the protocol is finished. If not, the test
continues until the pulse rate has been within 4
beats for one minute. Note: If the heart rate is
erratic or the workload is improperly adjusted
for steady state exercise, the test will fail to com-
plete. Of course, the protocol may be interrupted
by the START/STOP key, although the error mes-
sage “Test Aborted” and no calculation of V02
max will result.
The maximum oxygen consumption is obtained
through the look up of the steady state heart rate
and workload in the appropriate male or female
table of “Predicted V02 Max from Heart Rate
and Workload”. This estimate is then multiplied
by a factor which is related to the age of the sub-
ject. The factor is found in the following table
according to the predicted maximum heart rate:
Performance:
Instruct subject about the protocol and adjust•
the chest belt for reliable pulse.
Setup subject data according to the menu. See•
menu Astrand test.
Select ASTRAND and push key 3 = start.•
V02 Correction Factor
Maxpuls Factor
over 200 1.12
191-200 1.00
181-190 0.93
171-180 0.83
161-170 0.75
151-160 0.69
less than 151 0.64
Computer Reference

Monark Ergomedic 839 E
20
7.2.2 YMCA protocol ”Y’s way to physical fit-
ness”
The YMCA protocol is based on the “Y´s Way
to Physical Fitness” bicycle test. The design is a
submaximal test, using branching multiple wor-
kloads in which the next workload is determined
by the steady state heart rate elicited by the pre-
vious level. For details, refer to the “ Workload
Branching” tables, later in this section.
Every three minutes the workload is advanced
until the subject has completed three levels, requi-
ring a total of nine minutes. If the subject has an
abnormally high heart rate response to the initial
workload (100 bpm or more), the test is termina-
ted at the end of the second level. If the operator
senses that the subject is experiencing difficulty
completing the third level of the protocol, the
START/STOP key may be used to conclude the
test early. If the test is stopped prior to the com-
pletion of the second level, an error message is
displayed, indicating that the test was “aborted”
and no calculation of V02 max is possible.
At the conclusion of the test, estimates of the V02
max and the maximum workload are extrapola-
ted from the data collected during the previous
two levels. The V02 max is reported on the dis-
play and the maximum workload contained in
the report, available only if the optional external
printer is installed.
performance:
Instruct subject about the protocol and adjust•
the chest belt for reliable pulse.
Select YCMA protocol.•
Setup subject age, maximum heart rate, weight•
and sex according to menu.
Protocol operation may be terminated by de-•
pressing START/STOP (3).
The protocol will terminate automatically under
two circumstances;
1) nine minutes (3 levels) have been
completed, or
2)six minutes (2 levels) have been
completed and the heart rate elicited by
the first level was 110 bpm or more.
In addition, START/STOP may be used to end
protocol operation after six minutes if the subject
is having difficulty.
Note: Stated HR values are at the end of each level.
Male:
Level 1:
HR:
Level 2:
HR:
Level 3:
Female:
Level 1:
HR:
Level 2:
HR:
Level 3:
Computer Reference
Other manuals for 839 E
2
Table of contents
Other Monark Medical Equipment manuals
Popular Medical Equipment manuals by other brands

Optimum Medical
Optimum Medical ugofix leg bag straps Instructions for use

Gima
Gima 27320 quick start guide

Michigan Instruments
Michigan Instruments LIFE-STAT 1008MII Instructions for use

Juzo
Juzo JuzoFlex Patella Xtra Instructions for use

MedaCure
MedaCure SUPER LOW BED 3.9 manual

Claridge
Claridge calyx XCHANGE Assembly instructions