Mondo TMD-740 User manual

TMD-740 Dash Cam
USER MANUAL
Mondo | TMD-740 Dash Cam

Table of Contents iii
Table of Contents
1. Introduction to Your New Dash Cam System .....................................................1
1.1 About ...........................................................................................................1
1.2 Disclaimers....................................................................................................1
1.3 Items included in package.............................................................................1
1.4 Product overview..........................................................................................2
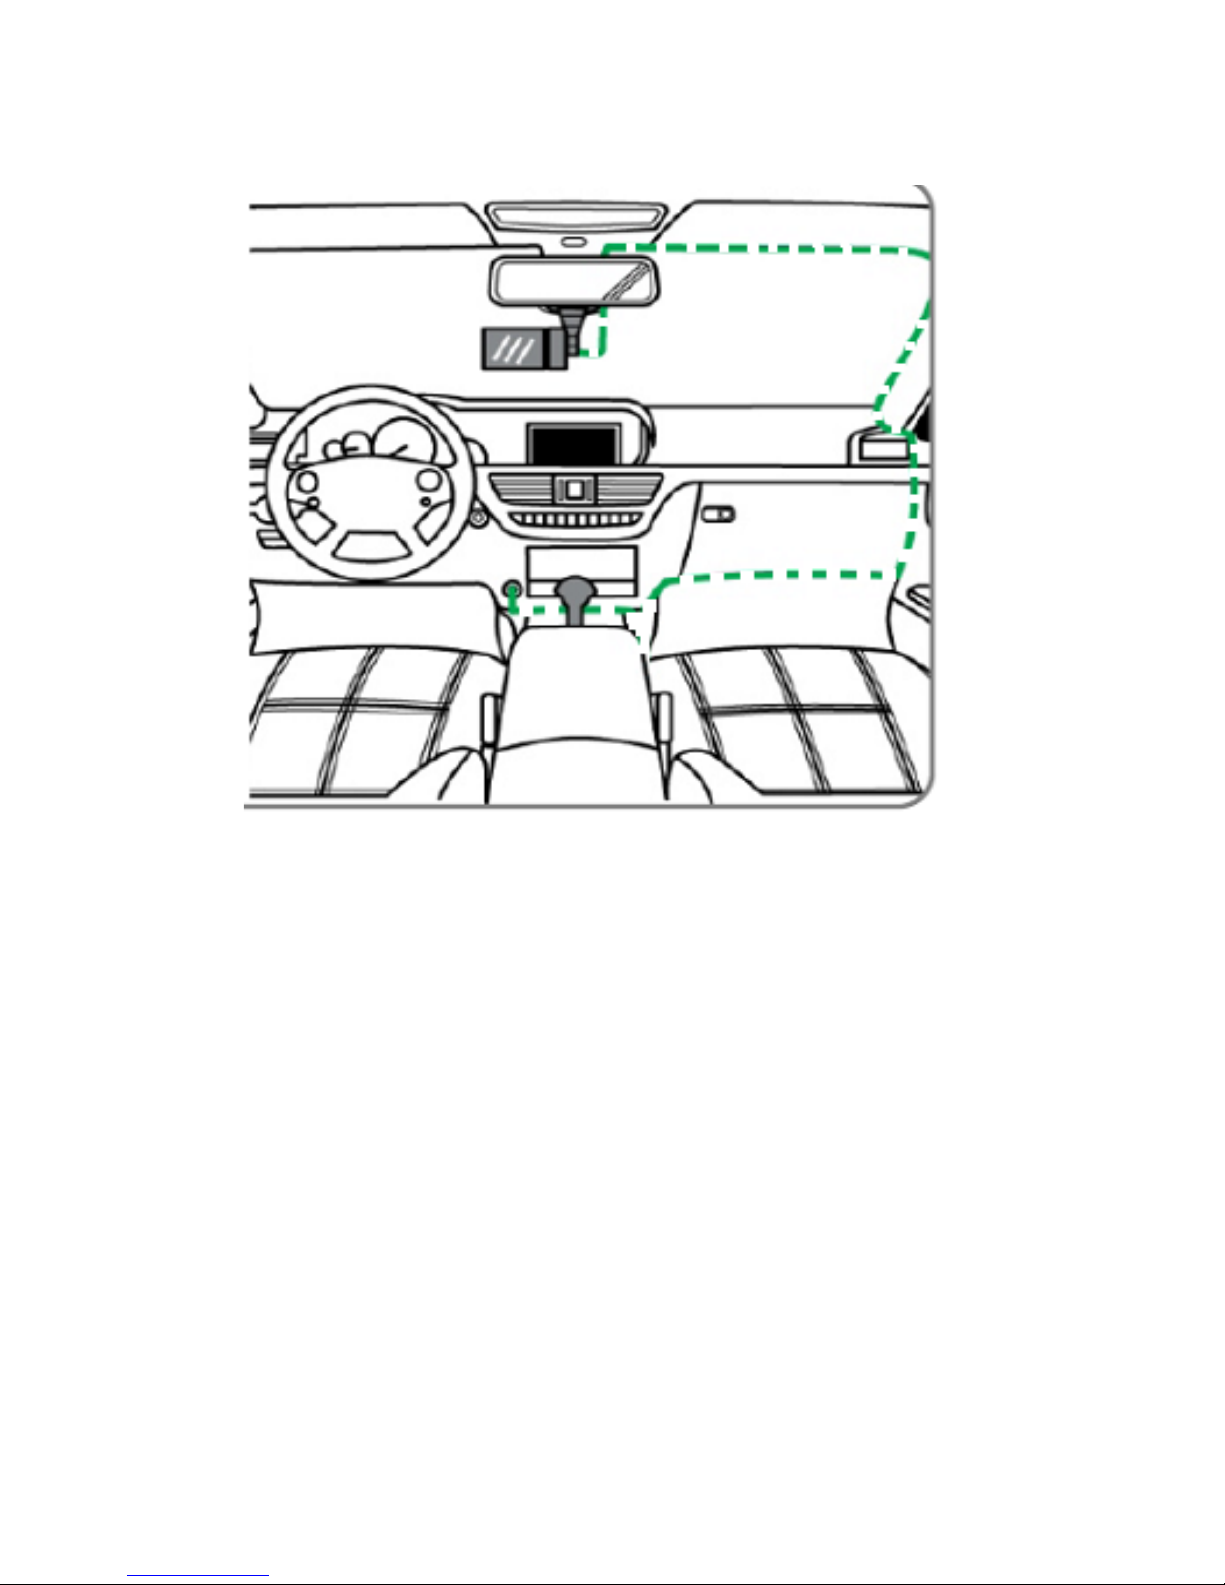
2. Getting Started – Dash Cam Installation ...........................................................3
2.1 MicroSD card requirements ..........................................................................3
2.1.1 Video recording time ..........................................................................3
2.2 Inserting microSD card into dash cam...........................................................3
2.3 Removing microSD card from dash cam........................................................3
2.4 Organizing the cable .....................................................................................4
2.5 Attaching dash cam to mount.......................................................................5
2.6 Attaching mount to windshield.....................................................................5
2.7 Adjusting/removing mount from windshield ................................................5
3. Getting Started – Device Set Up ........................................................................6
3.1 Powering dash cam on/off ...........................................................................6
3.1.1 Understanding interface layout on LCD display ..................................6
3.2. Video and record settings ........................................................................ 6-7
3.3. Basic operations............................................................................................7
3.3.1 Language setting.................................................................................7
3.3.2 Time setting ........................................................................................7
3.3.3 LCD display setting ..............................................................................7
3.3.3.1 Understanding interface layout on LCD display.......................8
3.3.4 Reverting settings to default...............................................................8
3.4 Features and recording modes .....................................................................9
3.4.1 Automatic Loop Recording..................................................................9
Mondo | TMD-740 Dash Cam

Table of contents
3.4.2 File Lock ..............................................................................................9
3.4.3 Movie Mode .......................................................................................9
3.4.4 Parking Monitoring Mode...................................................................9
3.3.4.1 P Mode ...................................................................................9
3.3.4.2 T Mode....................................................................................9
3.4.5 Motion Detection Video Mode ...........................................................9
3.4.6 Snapshot Mode.................................................................................10
4. Getting Started – Video Management ...........................................................11
4.1 Understanding the File Management System .............................................11
4.2 Managing footage on dash cam ..................................................................11
4.2.1 Reviewing footage in Playback Mode ...............................................11
4.2.2 Accessing advanced playback options ..............................................11
4.3 Managing footage on personal computer...................................................11
4.3.1 With USB cable .................................................................................11
4.3.2 With microSD card ............................................................................11
5. Taking Care of Your Dash Cam System ...........................................................12
5.1 Dash Cam....................................................................................................12
5.1.1 Cleaning ............................................................................................12
5.1.2.1 Camera lens ..........................................................................12
5.1.2.2 Windshield ............................................................................12
5.1.2 Keeping firmware up to date ............................................................12
5.1.2.1 Checking firmware version ..................................................12
5.1.2.2 Updating firmware of dash cam ...........................................12
5.2 MicroSD card ..............................................................................................13
5.2.1 Regular formatting .............................................................................13
5.2.1.1 Formatting on device ............................................................13
Mondo | TMD-740 Dash Cam

Table of contents
5.2.1.2 Formatting on Windows PC...................................................13
5.1.1.3 Formatting on Mac PC...........................................................13
5.2.2 Swapping microSD cards ....................................................................13
6. Additional Help ...............................................................................................14
6.1 Contact .......................................................................................................14
7. Limited Warranty ...........................................................................................15
8. Technical Specifications ..................................................................................15
Mondo | TMD-740 Dash Cam

1. Introduction To Your New Dash Cam System 1
1.1 About
This manual is both an introduction and step-by-step guide to using the dash cam. More detailed
information can be found on our website at www.mondosystem.com. If further assistance is required,
please contact us directly at help@mondosystem.com.*
1.2 Disclaimers
The instructions in this manual were written for the dash cam to be installed and used with authorized
accessories only. Any damage to the dash cam or vehicle incurred from modification, use of
unauthorized accessories and improper installation are not covered by the warranty.
1.3 Items Included in Package
•Dash cam unit
•Adhesive mount
•Car charger
•User manual
•Microfiber cloth
•USB Connection Cable
If you are missing any of the accessories above, please contact the retailer and exchange the product. If
exchange with retailer is not available, please contact us directly.*
*Our contact information can be found on page 14 of this manual.
NOTE: Modification of these accessories and dash cam will void the warranty. Usage of non-authorized
accessories is not recommended, as compatibility to the dash cam cannot be guaranteed. Damages to
the dash cam or vehicle from improper installation and usage of unauthorized accessories are not
covered by warranty.
Mondo | TMD-740 Dash Cam

1. Introduction To Your New Dash Cam System 2
1.4 Product Overview
1) Power Button
2) SOS Emergency Button /
Parking Monitoring Button
3) Menu Button/ Mode
Button
4) Up Button /
Recording Button
5) Down Button / Motion
Detection Button
6) OK Button / Time-Lapse
video key
7) Reset Button
8) Microphone
9) Indicator Light
10) Display Screen
11) Memory card slot
12) USB Port
13) Speaker output
14) Camera Lens
15) Mount Connection
Mondo | TMD-740 Dash Cam

2. Getting Started – Dash Cam Installation 3
2.1 Memory card requirements
•A MicroSD card that is class 6 or higher must be used. A class 8 or higher memory card is
recommended for the most efficient and secure storage.
•This dash cam supports memory cards up to 64 GB.
2.1.1 Video recording time*
*The data above is for reference only.
NOTE: Recording will continue once microSD card is filled, as the oldest files are automatically
overwritten to store new footage.
2.2 Inserting microSD card into dash cam
1.) Insert microSD card* into memory card slot with the front of microSD card facing towards
the display screen.
*Please format the microSD card before use. See steps from sections 5.2.1.1 (Formatting on device),
5.2.1.2 (Formatting on Windows PC) and 5.2.1.3 (Formatting on Mac PC) on page 13 for instructions on
how to format the microSD card.
2.3 Removing microSD card from dash cam
1.) Gently press onto microSD card to eject from memory card slot.
NOTE: Do not remove microSD card from dash cam while device is still powered or damage to microSD
card may occur.
MicroSD card capacity
1080p Video recording time
32GB
16GB
8GB
4GB
280 minutes
140 minutes
70 minutes
40 minutes
Mondo | TMD-740 Dash Cam

2. Getting Started – Dash Cam Installation 4
2.4 Organizing the cable
1.) Arrange the power cable as recommended in diagram to avoid distraction and obstruction of
vision.
2.) Place cable inside gaps between headliner and ceiling for a clean installation.
3.) It is highly recommended that users unplug dash cams from continuously powered 12V outlets
when vehicle is not in use to avoid potential vehicle battery drainage.
Mondo | TMD-740 Dash Cam

2. Getting Started – Dash Cam Installation 5
2.5Attaching dash cam to mount
1.) Tighten the mount to top of dash cam.
2.) Rotate the dial clockwise until dash cam is securely fastened to the mount.
2.6Attaching mount to windshield
1.) Clean the area* of windshield where the adhesive mount is to be placed.
2.) Power on dash cam and use the LCD display as a guide to position mount
3.) Peel off adhesive sticker and place on windshield.
*As the camera on the dash cam is located on the left, it is highly recommended to position the device
slightly right of center of the windshield for optimal view of road. Make sure that the device does not
obstruct vision.
2.7 Adjusting or removing mount from windshield
1.) Heat adhesive part of mount using a heat gun or blow dryer.
2.) Use a thin string (such as floss) to glide in between adhesive and windshield.
3.) Reposition where desired and follow steps 1-3 from section 2.5 “Attaching mount to
windshield” on page 5.
NOTE: Extreme temperatures and direct sunlight for long periods of time could damage the dash cam
and affect the performance of adhesive.
Mondo | TMD-740 Dash Cam

3. Getting Started- Device Set Up 6
3.1 Powering dash cam on/off
Automatic ON/OFF: dash cam will automatically power on/off along with the connected power
supply.
Manual ON/OFF: press on the POWER button to power dash cam on/off at any time.
Users can also adjust the Power Off setting to have dash cam power off after a predetermined
time interval of inactivity by accessing the main menu with MENU button selecting General
Settings scrolling down for Power Off.
NOTE: Remove protection film around lens before use.
3.1.1 Understanding LED lights as status indicators
•Red: Dash cam is on.
•Blinking Red and Green: Dash cam is recording in Movie Mode.
•Blinking Red: Dash cam is recording in Motion Detection Recording.
•Green: Dash cam is recharging while the device is off.
3.2 Adjusting Video and Record Settings
to enable
to disable
NOTE: The dash cam will cease recording when menu is accessed.
Access the main menu with MENU button Select Movie Mode to make changes for the
following video and recording settings:
•Movie Mode: Adjusting the video resolution and video quality.
•Auto Record: Enabling/disabling dash cam to begin recording once connected to
power supply.
•Movie Clip Time: Adjusting the video interval length for Movie Mode recordings.
•Movie OFF Time: Adjusting how long the dash cam continues recording after being
disconnected from power source.
•Sound Record: Enabling/disabling dash cam to record sound.
•Motion Detection: Enabling/disabling motion detection recording.
•Motion Event REC: Adjusting the video interval length for Motion Event recordings.
•Video Time Lapse: Enabling/disabling T mode.
NOTE: If Auto Record is disabled, users must press the OK button to begin recording.
Mondo | TMD-740 Dash Cam

3. Getting Started- Device Set Up 7
For more record settings, access the main menu with MENU button Select General Settings
•Power Off: Adjusting how long the dash cam continues to be powered after
inactivity.
•Protect Level: Adjusting level of impact required for Automatic File Locking.
•Parking Monitoring: Enabling/disabling dash cam to record and save incident
recordings on microSD card after being disconnected from power source.
3.3 Basic Operations
3.3.1 Language setting
Access Main menu with MENU button scroll to and select Language Selection with OK
button select language save settings with OK button.
3.3.2 Time setting
Access Main menu with MENU button Select General Settings scroll and select Clock
Settingsadjust according to local date and time.
3.3.3 LCD Display settings
The LCD display can be set to automatically turn off after periods of inactivity or remain active at
all times.
Access Main menu with MENU button Select General Settings scroll and select LCD
Power Save change setting save settings with OK button.
NOTE: The dash cam can record with the LCD display off. To confirm if dash cam is powered, by pressing
on the OK button to activate the LCD display. If the LCD display remains inactive, the dash cam is not
powered.
Mondo | TMD-740 Dash Cam

3. Getting Started- Device Set Up 8
3.3.3.1
Understanding interface layout on LCD display
NOTE: The dash cam can record with the LCD display off. To confirm if dash cam is powered, by pressing
on the OK button to activate the LCD display. If the LCD display remains inactive, the dash cam is not
powered.
3.3.4 Reverting settings to default
Access Main menu with MENU button Select General Settings scroll and select Reset
Setup with OK button.
NOTE: The main menu cannot be accessed to change settings and view videos when dash cam is in
Motion Detection Video Recording mode. To stop recording, press the OK button.
Mondo | TMD-740 Dash Cam

3. Getting Started- Device Set Up 9
3.4Features and Recording Modes
3.4.1 Automatic Loop Recording
The oldest unprotected recording will automatically be replaced with new recordings once
microSD card is full.
3.4.2 File Lock feature
Manual file lock: Secure specific recordings from being overwritten by pressing the SOS
emergency button. To unlock a previously locked file, press the SOS emergency button again.
Automatic file lock: Using the built-in G-sensor, the dash cam will automatically lock files that
were recorded with levels of impact.
3.4.3 Movie Mode
Recording will begin automatically once connected to a power source.
3.4.4 Parking Monitoring mode
This device has two types of parking monitoring modes*:
3.4.4.1
P mode (parking incident)
Dash cam will start and record incident footage when vehicle is turned off. Dash cam
will power off 30 seconds after impact to secure the incident footage.
To activate/deactivate this feature, briefly press the parking monitoring button for the icon to
appear/disappear on top of the screen. The icon will change red when the impact sensor is
triggered.
3.4.4.2
T mode (time-lapse photography)
Footage recorded with this mode can be replayed at 20x faster than the initial frame
rate of recording.
To activate/deactivate this feature, press on the OK button until icon appears/disappears on
screen.
*Both parking monitoring modes require usage of the internal battery for operation. Please consider
the device’s battery levels before using these parking monitoring modes.
3.4.5 Motion Detection Video Recording
Objects in front of dash cam will be automatically monitored for changes in movement. If
motion is detected, the dash cam will store recording onto microSD card.
NOTE: The main menu cannot be accessed to change settings and view videos when dash cam is in
Motion Detection Video Recording mode.
Mondo | TMD-740 Dash Cam

8. Technical Specifications 10
3.4.6 Snapshot Mode
Capture snapshots of road and surrounding landscapes with the Snapshot mode.
To activate this feature, hold on to the MENU button to switch into Snapshot mode. Press the OK button
to take a snapshot.
Briefly press on the MENU button again and select Still Capture to make changes for the
following settings:
•Still Image Size: Adjusting the size of snapshots
•Still Quality: Adjusting the image quality of snapshots
•Exposure: Adjust the brightness level of snapshots
•ISO Sensitivity: Adjust the image sensitivity level to surrounding sources of light
Mondo | TMD-740 Dash Cam

4. Video Management 11
4.1 Understanding the File Management System
Naming method: Videos are named according to date and time stamp.
File allocation: Files will be stored according to the recording mode.
•Default Recording Mode – Saved in folder specified by date stamp.
•Locked Motion Detection Mode recordings – Saved in EVENT folder.
•Locked T mode recordings – Saved in PARK folder.
4.2 Managing footage on dash cam
This section is dedicated to reviewing footage on the device. For more information on how to adjust
settings relating to how videos are saved and categorized, see sections 3.2 (Adjusting video and record
settings) on pages 6 and 7.
4.2.1 Reviewing footage in Playback Mode
To access Playback Mode, hold the MENU button until the dash cam switches into
Snapshot mode. Once in Snapshot mode, hold the MENU button again to access Playback Mode.
•Play/Pause file: Press OK button.
•Fast Forward/Rewind: Press UP/DOWNbutton.
4.2.2 Accessing advanced playback options
In Playback mode, navigate footage instantaneously on the LCD display. Hold the
MENU button and scroll for the following options:
•Volume:Adjusting volume for video playback.
•Delete: Removing specific file from microSD card.
•Delete All:Removing all files from microSD card.
•Protect:Lock a specific file on microSD card.
•Unprotect One: Unlock a specific file on microSD card
4.3 Managing footage on personal computer
4.3.1 With USB cable
1.) Detach device from mount.
2.) Connect dash cam to computer with USB cable.
3.) When successfully connected, the external drive will appear under “Removable disks”(or
“Devices” for Mac PC).
4.) Locate file on microSD and click to play using video viewing tool.
4.3.2 With microSD card
1.) Eject microSD card from dash cam. See section 2.2 (Removing microSD from dash cam)
on page 3 for instructions.
2.) Place microSD card into a memory card reader (not included).
3.) Insert into appropriate port on personal computer.
4.) When successfully inserted, the external drive will appear under “Removable disks” (for
Windows PC) or “Devices” (for Mac PC).
5.) Locate file on microSD and select to play using video viewing tool.
Mondo | TMD-740 Dash Cam

5. Taking Care Of Your Dash Cam System 12
5.1 Dash cam
5.1.1Cleaning
Particles on the dash cam lens and/or windshield will negatively affect the video quality of
recordings. Cleaning your dash cam lens and windshield regularly allows your dash cam to
record with consistent video quality.
5.1.1.1
Camera Lens
1.) Dampen microfiber cloth with water and gently wipe the camera lens.
NOTE: Do not use chemical solutions to clean the camera lens. Direct application of liquids to the dash
cam will damage the internal components.
5.1.1.2
Windshield
1.) Clean both sides of the windshield with cloth for optimal video recording quality.
Use liquid solutions if necessary.
5.1.2Keeping firmware up to date
Firmware updates address glitches and introduce new features to your dash cam. Please
periodically check our website (www.mondosystem.com) for new firmware versions updates.
5.1.2.1
Checking firmware version of dash cam
Access Main menu with MENU button Select General Settings scroll and
select FW Versioncompare to the latest firmware version available on our website
(www.mondosystem.com). If it is different from the firmware version stated, proceed
with section 5.2.2 (Updating dash cam firmware)
5.1.2.2
Updating dash cam firmware
1.) Download firmware file from website.
2.) Insert microSD card into computer.
3.) Format microSD card. See steps from sections 5.2.1.1 (Formatting on device), 5.2.1.2
(Formatting on Windows PC) and 5.2.1.3 (Formatting on Mac PC) on page 13 for
instructions on how to format the microSD card.
4.) Copy firmware file and paste into formatted card.
5.) Eject microSD card computer.
6.) Reinsert to dash cam.
NOTE: The firmware update process could take up to 15 minutes. Do not disrupt power to the dash cam
while updating process or irreversible damage to dash cam may occur.
Mondo | TMD-740 Dash Cam

5. Taking Care Of Your Dash Cam System 13
5.2 MicroSD card
5.2.1 Regular formatting
Formatting the microSD card* allows the dash cam to store important footage efficiently and
securely. Format once every 2 weeks to maintain optimal performance of the microSD card.
NOTE: Formatting the microSD card will remove all recordings saved onto the card. Transfer important
recordings to your personal computer before formatting.
5.2.1.1
Formatting on device
1.) Press the MENU button
2.) Go to General Settings
3.) Scroll down and select Format SD-Card
4.) Click Yes to proceed with format
5.2.1.1
Formatting on Windows PC
1.) Place microSD card into memory card adapter* or card reader*
2.) Insert into appropriate port on personal computer
3.) When microSD card is successfully inserted, the external drive will appear under
“Removable disks”
4.) Right click for “Format…” option
5.) Click “Start” to proceed with format
5.2.1.2
Formatting on Mac PC
1.) Place microSD card into memory card adapter* or card reader*.
2.) Insert into appropriate port on personal computer.
3.) Go to Launchpad and search for “Disk Utility”.
4.) When microSD card is successfully inserted, the external drive will appear the left of
“Disk Utility”dialog box.
5.) Select the “Erase”tab on top.
6.) Click the “Erase” option on bottom right to proceed with format.
*MicroSD card and accessories are not included in package. See section 1.3 (Items included in package)
on page 1 for a list of items included in package.
NOTE: Do not remove the microSD card while formatting otherwise damages to the microSD card and /
or dash cam may occur.
5.2.2 Swapping microSD cards
Constant overwriting cycles can inhibit recordings from being saved securely on the microSD
card#. It is highly recommended for users to rotate between microSD cards to ensure that
recordings are securely and efficiently stored onto the microSD card.
#This device requires a memory card that is class 6 or higher. Please format the microSD card before
initial use.
Mondo | TMD-740 Dash Cam

6. Additional Help 14
For further details on how to use your dash cam or topics not discussed in this manual, please contact us
directly.
6.1 Contact
Email: help@mondosystem.com
Website: www.mondosystem.com
*Our service is closed in observance of all major North American Holidays.
Mondo | TMD-740 Dash Cam

7. Limitd Warranty 15
This product is warranted to be free from defects in materials or
workmanship for the
warranty period from the date of purchase.
Within this period, we will, at its sole option,
repair or replace any
components that fail in normal use. This warranty does not apply to
the following damages, and the charge for repairs or replacement
will be made for parts or
labor.
•
damage caused by irresistible or uncontrollable external shocks
•
damage caused by improper operation or not following the
safety information
specified on the user guide
•
damage caused by flood or material loss
•
damage caused when shipping to the service center without
proper package
Warranty period
•
For the Dash Cam : one year
•
For the power supply : one year
•
For the cables : one year
Mondo | TMD-740 Dash Cam

8. Technical Specifications 16
Display 2.7 inches, 16: 9 high definition display screen
Camera Lens Φ=25mm A+ grade high resolution, wide angle fish-eye lens
Video resolution 1920×1080p 30FPS, 1280×720p 30FPS, 640×480p 30FPS
Video format AVI
Image resolution 5MP, 3MP, 2MHD, VGA
Image format JPEG
Gravity sensor Built-in
Memory Card Micro SD
Supported Memory Card
Capacity Up to 64GB
Microphone / Speaker Built-in
Flicker 50Hz/60Hz
USB interface USB 2.0
Power Supply Interface DC 5V 1A
Battery Type Built-in lithium polymer battery
System requirement Windows 2000 and later
Languages English / French
Mondo | TMD-740 Dash Cam
Table of contents