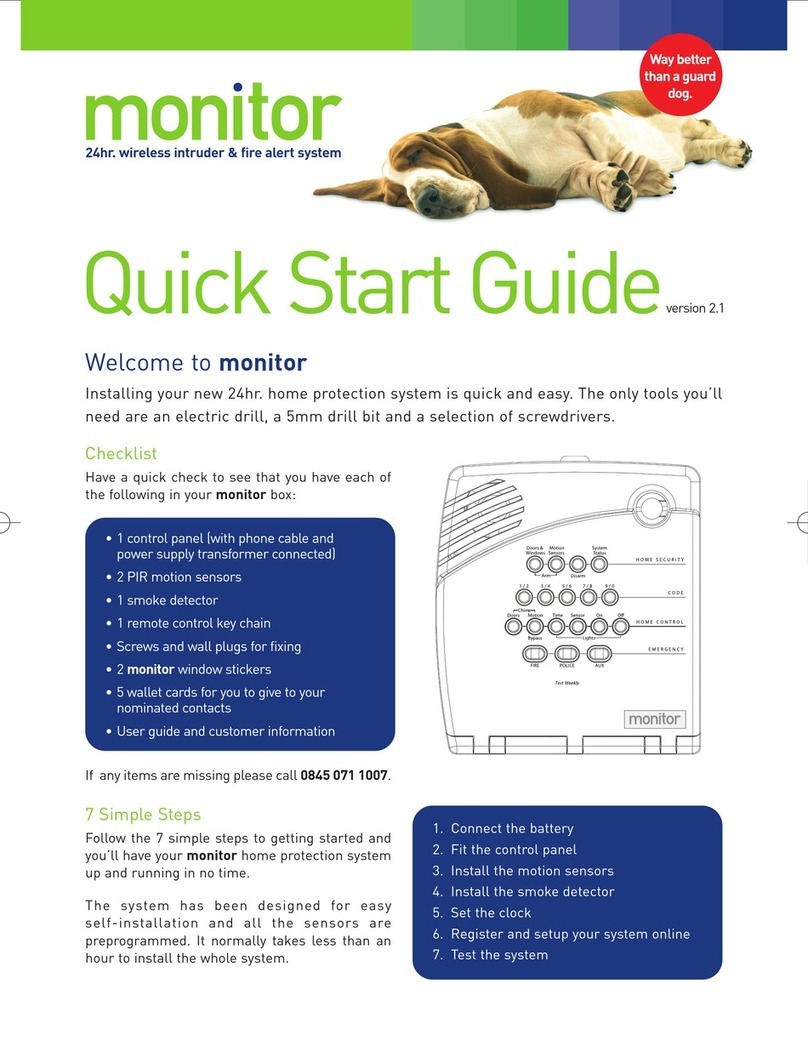
Monitor Home Protection System and Monitoring... User manual

USER GUIDE
version 2.1
Home Protection System and
Monitoring Service
35296 SSE User Guide 16/1/07 12:08 Page 1

2
Home Protection System and
Monitoring Service
35296 SSE User Guide 16/1/07 12:08 Page 2

3
CONTENTS PAGE NO.
Your monitor system 4
Control Panel 4
Remote Control Keychain 4
Motion Sensors 4
Smoke Detector 4
Optional Accessories 5
Using your monitor system 6
Control Panel 6
Remote Control Keychain 6
Telephone 6
Remote Handheld Touchpad 6
Control Panel - Home Security 6
Arm and Disarm your system 6
Exit and Entry Delay 7
System Status 7
Sub-disarm 7
Control Panel - Code 8
Using your Access Codes 8
Control Panel - Home Control 8
Chime function 9
Sensor Bypassing 9
Silent Exit 9
Control Panel - Emergency 9
Using your Emergency alarm buttons 9
Remote Control Keychain 10
Using your Remote Control Keychain 10
Telephone 10
Remote access dial-in function 10
Remote Handheld Touchpad 11
Using your Remote Handheld Touchpad 11
How your system communicates with you 12
Panel Voice Messages 12
Panel Beeps 12
Panel Indicator lights 13
Alarm Siren Sounds 13
monitor Alarm Notification Service 14
Contacts 14
Telephone Notification 14
Text Notification 14
Email Notification 14
Alarm Signal Notification Types 14
Notification process diagram 15
Website 15
Programming your system 16
Set the Clock 16
Set up your Access Codes 17
How to add or change an Access Code 17
How to delete an Access Code 17
Programming options 18
Option 1 – Panel Beeps 18
Option 2 – Panel Voice 18
Option 41 – Chime Voice 19
Option 42 – Speaker Level 19
Option 55 – Panel Beep Volume 20
Additional advice for locating and maintaining
your sensors 20
Motion Sensors 20
Installation Guidelines 20
Maintenance 21
Replacing Batteries 21
Smoke Detector 21
Installation Guidelines 21
Maintenance 22
Replacing Batteries 22
Troubleshooting and problem solving guide 22
Silencing Trouble Beeps 22
AC Power Failure 22
Low Battery 23
Sensor or Detector Failure 23
Sensor Low Battery 23
Failure to Communicate 23
Sensor open 23
Sensor Tampered 23
Option 50 detected 23
System Access Alarm 23
Smoke Detector problems 24
Clear System Status light 24
Testing your system 24
Walk Test of the Motion Sensors 24
Testing your sensor’s signal strength 24
Smoke Detector Smoke Test 25
Smoke Detector Sensitivity Test 25
Cancelling and preventing accidental alarms 26
Planning for emergencies 26
Alarm system limitations 26
Important codes to remember 27
Sensor numbers and locations 27
Quick reference table 28
Battery requirements 28
Your monitor warranty 29
Emergency planning 30
PAGE NO.
35296 SSE User Guide 16/1/07 12:08 Page 3

4
YOUR MONITOR SYSTEM
Your monitor system uses wireless technology to warn you and your family about intrusion and fire, it communicates
with our monitoring centre and will send alert messages to you and your nominated contacts via phone, text or
email.
It has devices called sensors and detectors that use radio waves to communicate alarms to the Control Panel. It is a
supervised system, meaning that the panel checks the status of each sensor and detector and it will report any
problems to the monitoring centre, in addition to highlighting problems with beeps and indicator lights on the panel
itself.
This User Guide describes how to get the best out of your system and the monitoring service. It will guide you through
basic arming and disarming commands, programming instructions and how to customise the monitoring service to suit
your needs.
•Control Panel
The Control Panel is used to operate and program your system. It communicates to you using digital voice
messages, beeps and by lighting or flashing buttons. The panel communicates with our monitoring centre to
notify you and your nominated contacts of events at home.
•Remote Control Keychain
This is used to arm and disarm the system from within your home or nearby.
•Motion Sensors (x2)
Indoor Pet Immune Motion Sensors detect movement in a protected indoor area and respond by sounding an
alarm (or a chime, if specified). The sensor is designed for use with pets that have a combined weight of less
than 18kg (40lbs) to help avoid false alarms. The sensor should be located where your pets cannot get within
2m of the sensor.
•Smoke Detector
The smoke detector has a built in siren that sounds when smoke or a significant rise in temperature is detected.
35296 SSE User Guide 16/1/07 12:08 Page 4

5
OPTIONAL ACCESSORIES AVAILABLE
•Remote Handheld Touchpad
This can be used to control your system remotely from
within the home. The Touchpad is ideal for location
near your main point of exit and entry, if your control
panel is installed in a less accessible position.
•Door / Window Sensors
These sensors can be installed to detect the opening
of a door or window for added security.
•Panic Button
The water resistant panic button can be used in an
emergency to notify the nominated contacts.
•Motion Sensor
You can purchase motion sensors to protect additional
areas. The sensor can be programmed to provide
either intruder protection or special chime function to
let you know that someone has passed by it.
•Smoke Detector
The smoke detector has a built in siren that sounds
when smoke or a significant rise in temperature is
detected.
•Remote Control Keychain
This is used to arm and disarm the system from within
your home or nearby.
These accessories can be ordered by visiting
www.myhomemonitor.co.uk
or calling 0845 071 1007
35296 SSE User Guide 16/1/07 12:08 Page 5

USING YOUR MONITOR SYSTEM
Sending commands or instructions to your system can be done through the control panel, remote control keychain,
telephone or handheld touchpad.
Note - Your control panel is programmed with a default Master Access Code 1234 which you should change to
a code that you will remember and keep a record of in a safe place. This Master Access Code is used to disarm
the system and when you are carrying out any programming changes.
Control Panel
You can enter commands by simple key presses on the panel. Depending on how your system is programmed, you
may need to enter your access code for certain commands.
Remote Control Keychain
The keychain is handy for simple arming and disarming. They are portable and can be carried off-site in a purse,
pocket or on a key-ring.
Telephone
Touchtone telephones can be used to communicate with your system while you are away from home. This is
particularly useful if you have forgotten to arm your system before leaving home.
Remote Handheld Touchpad (available as an optional accessory)
This touchpad gives you the option to enter commands from any room in your home. You can enter commands
through simple key presses on the touchpad. A remote touchpad can be located near your main point of entry or
exit, if your control panel is less accessible.
CONTROL PANEL - HOME SECURITY
Arm
Turns on intrusion and burglary protection for your system. You can arm motion sensors and/or door/window
sensors (if fitted) or both depending on the buttons you press.
•To Arm Motion Sensors
•Press Arm Motion Sensors button once.
•Panel announces,
Motions on.
•Arm Motion Sensors light will be lit and the
exit delay will begin.
6
•To Arm Doors and Windows
•Close all doors and windows.
•Press Arm Doors & Windows button.
•Panel announces,
Doors and Windows on,
•Arm Doors & Windows light will be lit and the
exit delay will begin.
•Press twice to eliminate the pre-programmed
entry delay.
35296 SSE User Guide 16/1/07 12:08 Page 6

Exit Delay
Exit Delay is the amount of time the system gives you to leave the property before the system is armed. When
you arm you will hear beeps during the exit delay.
Your Exit Delay is set for 45 seconds.
Disarm
Turn off intrusion and burglary protection for your system. Only intrusion and burglary sensors such as motion
sensors and door/window sensors (if fitted) are disarmed. Environmental sensors, such as smoke detectors stay
active at all times.
•Disarming Your System
•Upon entering your home the entry delay will begin.
•Status beeps will sound.
•Enter your access code using the Code buttons.
•Panel announces,
System disarmed.
•Disarm light will be lit.
Entry Delay
Entry Delay is the amount of time the system gives you to disarm the system after entering the home. When you
enter your home you will hear beeps during the entry delay.
Your Entry Delay is set for 20 seconds.
Note: The default exit and entry delay times are designed for most situations. However if you feel the delay times
are not appropriate for you, please call 0845 071 1007 and our Customer Services team will arrange for this to be
changed for you.
System Status
Press to hear information about your system. If the button is lit, there is a problem with the system. If the button is
blinking, an alarm has occurred. Press the button to hear what is wrong with the system. Press Disarm after you
have heard the alarm message or cleared the fault to turn this warning light off.
Sub-disarm
You can add additional accessories to your system that will allow you to protect specific areas 24 hours a day even
when the system is not armed (such as safes or jewellery boxes). You must sub-disarm the panel before accessing
these areas to avoid causing an alarm. Smoke detectors stay active at all times.
•To Sub-disarm Your System
•Enter your Master Access Code while the system is disarmed.
•Panel announces,
System disarmed.
•Disarm button light blinks and the system is sub-disarmed.
•When you’ve finished accessing the protected areas, press the Disarm button again. Panel announces,
System disarmed.
•Disarm button light stops blinking. System is in Disarm mode.
7
35296 SSE User Guide 16/1/07 12:08 Page 7

CONTROL PANEL - CODE
There are 5 CODE buttons located in the second row of the panel. Each button represents 2 numbers. The
left CODE button is 1/2, which means that this button is pressed when entering either 1 or 2. For example, if
your access code is 1234 you must press the 1/2 button twice and the 3/4 button twice to enter that access
code.
Your system is programmed with a default Master Access Code 1234 which you should change to a code that
you will remember and then keep a record of in a safe place. This Master Access Code is used to disarm the
system and is required when you are carrying out any programming changes such as setting the clock.
You can allocate up to 5 other access codes that will disarm the system but will not allow any programming
changes. You can give these codes to family members, trusted friends or neighbours. They can be changed at
any time.
You can send a silent panic message to the monitoring centre using a Silent Panic Access Code on the
control panel.
For more information on programming Access Codes refer to the ‘Programming Your System’ section on
page 17.
Note: You will get 10 chances to enter your code and then any further error will cause a system access alarm.
The alarm locks all touchpads, except keychains, for 90 seconds.
If you enter your home and you hear alarm sirens, an intruder may be inside or another emergency
may have occurred. Leave immediately and call for help.
CONTROL PANEL - HOME CONTROL (Some functions are not available)
The Home Control buttons are used to monitor activity within and around the home. They are not used for intrusion
protection. If any of the Home Control buttons are pressed and a sensor or module is not associated
(or programmed) with this feature the panel will announce,
Function not available
.
Chime Doors (only if a Chime door/window sensor is installed )
Chime Doors is used to signal or chime when a protected door is opened while the system is disarmed. The panel
will announce the door that has been tripped and will chime twice. This is a good feature to use if you’re busy in one
part of your home and you want to know when family members are going in and out of your home.
•Turn Chime Doors on:
•System must be disarmed. Press Chime Doors button.
•Panel will announce,
Chime on.
•Chime Doors button will be lit.
8
•Turn Chime Doors off:
•Press Chime Doors button.
•Panel will announce,
Chime off.
•Chime Doors button no longer lit.
35296 SSE User Guide 16/1/07 12:08 Page 8

Chime Motion (only if a Chime motion sensor is installed)
This is used to detect movement within a specific area. These Motion Sensors are not used for intrusion protection.
The panel will chime three times and announce the sensor that has been tripped. Use the same panel procedures
as Chime Doors, except, with the Chime Motion button. You would use this feature if you have Motion Sensors
located in areas such as the front door or hall area and you want to know when someone is approaching.
Remember that motion sensors can be set for intruder protection or chime, but not both.
Note: If there are no Chime Motion Sensors in your system, the Chime Motion button can be used for Direct
Bypassing (see below).
Bypass
This enables you to bypass certain sensors whilst the system is armed. This allows you to disable a sensor while
the system is armed in an area where you expect movement, perhaps from a large pet.
•Direct Bypassing
•Arm system, press the Bypass button until you reach the sensor you wish to bypass
•Enter Master Access Code
Silent Exit
This feature silences the panel beeps that accompany the exit delay (see Panel Beeps section on page 12). Press
Chime Doors after you arm the system to silence panel beeps. The panel will still beep at the beginning and end of
the exit delay.
Note: Enabling Silent Exit doubles the Exit Delay Time.
•Time Activated Lights – function not available
•Sensor Activated Lights – function not available
•All Lights On and Off – functions not available
CONTROL PANEL - EMERGENCY
If you press the FIRE, POLICE or AUX buttons for 2 seconds (or press twice quickly) a signal is sent to the
monitoring centre to notify an emergency or panic call for help. The siren in the control panel will sound and the
notification process will start by contacting your nominated contacts in the order you specified, in addition a text
message will be sent simultaneously to all contacts you have selected to receive text messages.
The message that will be sent to your nominated contacts from the monitoring centre is as follows.
FIRE - There has been a fire alarm reported......
POLICE - There has been a Panic alarm reported......
AUX - There has been a Medical alarm reported......
Note: The monitor system is not directly connected to the Police, Fire or Emergency Services. Instead it puts you
and your nominated contacts in control of what happens next and you can choose how to respond to the alert.
9
35296 SSE User Guide 16/1/07 12:08 Page 9

REMOTE CONTROL KEYCHAIN
LOCK
Press once to arm doors and windows (only active if you have installed door/window sensors).
LOCK
Press twice to arm doors/windows and motion sensors.
UNLOCK
Press once to disarm the system.
Hold LOCK and UNLOCK
If you press both buttons for 3 seconds a panic signal is sent to the monitoring centre to notify an
emergency or panic call for help. The siren in the control panel will sound and the notification process will
start by contacting your nominated contacts in the order you specified, in addition a text message will be
sent simultaneously to all contacts you have selected to receive text messages. If the panic signal is
initiated from a Remote Control keychain this signal can only be disarmed by entering an access code on
the control panel (or with another Remote Control Keychain).
These functions are not available and will not activate the control panel.
TELEPHONE
This function enables you to communicate with your system remotely by dialling into your control panel using a
mobile phone or landline. This is particularly useful if you have forgotten to arm or disarm your system before
leaving home - or if you wish to hear the status of your alarm.
Note: You may have to dial more than once to make contact with your system. If you get an engaged tone, wait 5
minutes and dial again.
•Call your home telephone number that the panel is connected to and let the phone ring once then hang up.
•Wait 10 - 40 seconds and call again.
•The panel should answer on the first ring. The panel will announce
“System On”
.
•Press the * button on your telephone and you will hear
“System Activated”
.
•At this point you may perform the actions listed in the table below.
•CODE refers to the master and access codes programmed into your system.
10
Panel Function Phone Command
DISARM * type CODE, type 1
ARM Doors/Windows (if installed) * type CODE, type 2
ARM Doors/Windows with No Entry Delay (if installed) * type CODE, type 2, type 2
ARM Motions * type CODE, type 3
ARM Doors/Windows and Motions * type CODE, type 2, type 3
System Status * type CODE, type #, type 1
Hang Up * type, CODE, type 9
35296 SSE User Guide 16/1/07 12:08 Page 10

REMOTE HANDHELD TOUCHPAD (AVAILABLE AS AN OPTIONAL ACCESSORY)
A Touchpad can be used to control the system from any location within or near your home. Communicating with the
system using a Remote Handheld Touchpad is similar to using the panel.
•System Status
Press System Status once to hear information about your system from the panel.
•ARM Doors & Windows (if installed)
Press Arm Doors & Windows button once to turn the security system protection on for all protected doors and
windows. Press twice to eliminate the pre-programmed entry delay.
•ARM Motion Sensors
Press Arm Motion Sensors button once to turn protection on for all Motion Sensors. Use when no one is at
home. This is usually used in combination with ARM Doors & Windows.
•Disarm
Press Disarm button once and enter your access code using the NUMERIC buttons to turn security
protection off.
•Sub-disarm
Enter your Master Access Code using the NUMERIC buttons while the system is disarmed.
Panel will announce,
system disarmed.
The Disarm button on the control panel will begin to blink.
•Lights - function not available
•Emergency
Press both EMERGENCY buttons for 3 seconds to cause the system to call the monitoring centre to report an
emergency or panic call. The notification service will contact your nominated contacts in the order you specified
and a text message will be sent simultaneously to all contacts you have selected to receive text messages.
11
35296 SSE User Guide 16/1/07 12:08 Page 11

HOW YOUR SYSTEM COMMUNICATES WITH YOU
Your system responds to you through the use of panel voice messages, beeps, alarms and panel indicator lights.
•Panel Voice Messages
When you press the buttons on the panel, remote control keychain or touchpad, the panel responds with voice
messages. Panel voice can be enabled or disabled (see Option 2 on page 18).
These messages may be system information or prompt you to take further action. For example, if you want to
disarm the system and you press the DISARM button, the panel responds by announcing, “
Please enter your
access code.”
If you press a button and the feature has not been programmed, the panel voice will respond with “
Function not
available.”
•Panel Beeps
Panel beeps are used to indicate key presses, status and problems with the system. They can be enabled or
disabled or their volume can be adjusted (see Option 1 on page 18).
12
Activity Beep Response
ARM Motions Exit delay and Entry delay beeps sound 3 times every 5 seconds
and 3 times per second during the last 10 seconds (if Silent
Exit is used, the Exit delay beeps will only sound 3 times when
you arm and 3 times when the Exit delay expires)
ARM Doors/Windows Exit delay and Entry delay beeps sound twice every 5 seconds
(if installed) and twice per second during the last 10 seconds (if Silent Exit is
used, the Exit delay beeps will only sound twice when you arm
and twice when the Exit delay expires)
ARM Doors/Windows and Motions Exit delay and Entry delay beeps sound 4 times every 5 seconds
and 4 times per second during the last 10 seconds (if Silent Exit
is used, the Exit delay beeps will only sound 4 times when you
arm and 4 times when the Exit delay expires)
DISARM 1 beep
CHIME DOORS 2 beeps
CHIME SPECIAL MOTION 3 beeps
Trouble Beeps 6 beeps every minute. Press the SYSTEM STATUS button to stop
beeps for 4 hours or disable the beeps until the problem is
resolved (see Trouble shooting section on pages 22 and 23)
35296 SSE User Guide 16/1/07 12:08 Page 12

•Panel Indicator Lights
See trouble shooting and problem solving guide on pages 22 and 23 for more information.
•Alarm siren sounds
13
Button When the Button Light is On When the Button Light Flashes
ARM Motions Sensors Motion Sensors armed
ARM Doors & Windows
(if installed) Doors and Windows armed Doors and Windows armed and No Entry Delay on
Disarm System disarmed System sub-disarmed
System Status System Trouble or Open Sensor System in alarm
Chime Doors Opening door/window will
cause chime
Chime Motions Motion will cause chime
Time Lights Not applicable Not applicable
Sensor Lights Not Applicable Not Applicable
Alarm Type Siren Sound
Fire Continuous pattern of 3 siren pulses, then off for
2 seconds
Intrusion Steady siren
Emergency Fast on and off
The siren makes 3 different alarm sounds on the premises, each indicating a different type of alarm. Sirens are
pre-programmed to time-out and stop sounding after around 4 minutes. Use the following table to understand the
siren sounds used by the system.
35296 SSE User Guide 16/1/07 12:08 Page 13

MONITOR ALARM NOTIFICATION SERVICE
Your monitor system communicates alarm activation and alert messages to our monitoring centre via your
telephone line. The monitoring centre will begin to notify you and your nominated Contacts within seconds of
receiving the message from your control panel.
•Contacts
You can nominate up to five Contacts to receive alerts from the monitoring centre and you can choose how they will
be notified (telephone, text message or email, or a combination of all three).
Installation of your system requires you to register your control panel at www.myhomemonitor.co.uk. During
registration you will be asked to nominate up to 5 Contacts to be notified in the event of an alert. For each Contact
you will be asked to select a password and the method(s) of notification. Once you have selected your Contacts
and assigned passwords please ensure that you:
•Tell your Contacts that they are a nominated Contact for your monitor system
•Inform them of the password they will have to use to respond to an alert
•Explain to them how the system works and what they are expected to do if they receive a notification
•Telephone notification
If you select telephone notification, our automated operator Sally will sequentially call the nominated Contacts
confirming exactly what has happened and giving the Contact the opportunity to respond to the alert, e.g. if a
motion sensor has been activated, Sally will confirm which sensor has been tripped and the time the event
occurred. When a call from Sally is received, the Contact must respond by using their password followed by the
# key and will be given three options
1) To acknowledge and cancel – Press 1. You do this when you intend to act on the notification.
2) To hear the message again – Press 2.
3) To acknowledge, cancel and disable all notification – Press 3. You can select a period
between 1 and 12 hours to stop the notification service from contacting you. The alarm
system will still operate, but the notification service to all contacts will be temporarily
cancelled.
You can select up to three telephone numbers for each nominated Contact, these numbers could be a mobile
phone, work and home telephone number. It is not compulsory to have three telephone numbers entered for each
Contact, however the more numbers available to the monitoring centre, the greater the likelihood of notifying the
Contact of an event.
•Text notification
If you enable text notification for any of your Contacts they will all be sent a text message at the same time. This is
particularly important if a panic alarm signal is sent from the Emergency buttons on your Control Panel or the
Remote Control Keychain. The text message confirms the time and description of what has occurred. If there was
more than one event, such as two motion sensors being activated the message ends with +++.
•Email notification
You can choose to be sent an email to confirm each alarm event, the email will confirm what has happened and the
time the event took place.
•Alarm signal notification types
The monitoring centre will notify you and your Contacts of the details of the alert such as,
•Intruder alarm – this represents a risk to your home from an intruder. These signals are communicated
from the motion sensors and any door and window contacts that have been installed.
•Fire alarm – this represents a risk to your home from fire. These signals are communicated from the
smoke detectors.
•Personal threat – this is a panic alarm activated from your control panel, remote control keychain or
panic button (if purchased as an optional extra).
•Subsistence signal – these indicate a fault or failure of the system that requires you to take remedial
action, such as a low battery or warning of power failure.
The table opposite explains how the notification service works.
14
35296 SSE User Guide 16/1/07 12:08 Page 14

•Website
You can use the website at www.myhomemonitor.co.uk to update or review your system settings at any time. You
can also view the History section of the website, which logs each event so you can see exactly what happened and
when. Just click the (+) button to expand the message to see who the monitoring centre contacted and the order in
which the notifications occurred.
You can change the ways you wish your Contacts to be notified by clicking on the symbol for phone, text or
envelope. The order you wish your Contacts to be notified can be easily changed by clicking the red arrow. To add,
edit or delete a Contact, just use the Add Contact button or the appropriate icons next to each Contact. You’ll need
to disable all notification methods before deleting a Contact.
To stop a Contact from logging into your on-line account, click the green tick beside the Contact and it will change
to a red cross. If you wish your Contact to have access to your account on the website you will have to provide
them with your User ID.
15
Notifiable event
Call 1st Nominated
Contact Phone
Number 1
Phone
Number 2
(if specified)
Phone
Number 3
(if specified)
Call 2nd Nominated
Contact Phone
Number 1
Phone
Number 2
(if specified)
Phone
Number 3
(if specified)
Call 3rd Nominated
Contact
If the monitoring centre does not
get a response from your
nominated contacts the notification
cycle starts again until two cycles
have been completed.
Phone
Number 1
Phone
Number 2
(if specified)
Phone
Number 3
(if specified)
Notify All Contacts simultaneously, if Text and
Email notification is enabled
This process is repeated for up to five
nominated contacts in total
When a contact responds to the monitoring
centre by typing their password and selecting 1
or 3, the notification process will stop.
Such as an an intruder,
smoke detector or panic alarm
being activated
35296 SSE User Guide 16/1/07 12:08 Page 15

PROGRAMMING YOUR SYSTEM
Open the Panel Cover by pressing the plastic latch on the top of the panel. The label underneath provides
instructions designed to make system programming easier for you. Follow the prompts and flow arrows to complete
the desired task.
You will immediately be prompted by the panel voice to use the numbered keys to enter your ID, you must enter
your Master Access Code to unable programming.
Note: The Master Access Code is 1234 when the panel is delivered to you. You should change your Master Access
Code after your system is installed to a number that you and your family will remember (see Access Codes section
on page 17).
•SET THE CLOCK
If the panel loses power, the clock must be reset. The clock is set in 12 hour mode, giving you AM and PM options.
•Open the panel cover. Panel announces,
Use numbered keys to enter ID.
•Enter the Master Access Code. Panel announces,
Please select from Start Menu.
•Press Clock Set from the Start Menu. Panel announces,
Time is ****, to change press hours and
minutes, then press done.
•Follow the arrow from the Clock Set button to the Hours keys.
•Press the Hours +/– keys and listen to the voice prompts. Stop when panel voice announces the
correct hour.
•Press the Minutes +/– keys and listen to the voice prompts. Stop when the panel announces the
correct minutes.
•Press Done. The panel will announce the set time.
•Close the cover.
16
35296 SSE User Guide 16/1/07 12:08 Page 16

•ACCESS CODES
Your security system has a Master Access Code and access codes 1 to 5 can also be used for arming and
disarming the panel. The Master Access Code will allow you to disarm and program your system. Access codes 1 to
5 are generally used for other members of the family, trusted friends or neighbours.
IMPORTANT: Because different codes can be entered using the same button presses, you have to use caution
when programming different codes. You need to ensure that one access code does not use the same button
presses as other access codes. For example, if the master code is 1234, do not program another code to be 2244
as the panel would interpret these numbers to be the same code.
•ADD OR CHANGE AN ACCESS CODE:
•Open the cover of the panel.
•The panel voice prompts you to
Use numbered keys to enter ID.
Enter your Master Access Code using the
numbered keys.
•The panel voice prompts you to
Please select from START MENU.
Press the Add button on the START
MENU.
•The panel voice prompts you to
Select from MAIN MENU.
Press the Access Code button on the
MAIN MENU.
•The panel voice responds with
Master Access Code, press again for next access code, DONE to select or
press CANCEL to quit.
Press the access code button again to hear the next access code. When you hear
the access code you wish to change press the DONE Button
.
•Enter 4 new numbers using the numbered keys.
•Close the panel cover.
Note The last Access Code option is Panic Access Code. If you select this option, it enables you to send a silent
emergency signal to the monitoring centre using the keypad on the control panel.
•DELETE AN ACCESS CODE:
•Open the cover of the panel.
•The panel voice prompts you to
Use numbered keys to enter ID.
Enter your Master Access Code using the
numbered keys.
•The panel voice prompts you to
Please select from START MENU.
Press the Delete button on the
START MENU.
•The panel voice prompts you to
Select from MAIN MENU.
Press the Access Code button on the
MAIN MENU.
•The panel voice responds with
Access Code 1, press again for next access code, DONE to select or press
CANCEL to quit.
Press the access code button again to hear the next access code. When you hear the
access code you wish to delete, press the DONE Button
.
The panel voice responds with
Access Code ‘X’
deleted
.
•Close the panel cover.
17
Press
Delete Access Code DONE
Press then use red number
Add
Add Access Code
Access Code DONE
35296 SSE User Guide 16/1/07 12:08 Page 17

PROGRAMMING OPTIONS
The following table is a list of options you can change.
Press Add in the START MENU and follow the voice prompts to turn an option on.
Press Delete in the START MENU to turn an option off.
When entering a single digit option number (1-9), you must type a zero before the number (i.e. 01, 02 ...). All option
numbers must be 2 digits.
•OPTION 01- PANEL BEEPS
Add this option to enable panel beeps. These are any beeps (including chime beeps) that come from the panel.
See “Panel Beeps”.
1. Open panel cover. Panel announces,
Use numbered keys to enter ID.
2. Enter Master Access Code using the numbered keys. Panel announces,
Please select from Start Menu.
3. Press Add from the Start menu. Panel announces,
Select from main menu.
4. Press Option #. Panel announces,
Option 1, press again for next option or done to select
5. Press DONE. Panel announces,
Option 1 is on
.
Delete turns off panel beeps.
1. Open panel cover. Panel announces,
Use numbered keys to enter ID.
2. Enter Master Access Code using the numbered keys. Panel announces,
Please select from
Start Menu.
3. Press Delete from the Start menu. Panel announces,
Select from main menu.
4. Press Option #. Panel announces,
Option 1, press again for next option or done to select.
5. Press DONE. Panel announces,
Option 1 deleted.
•OPTION 02 - PANEL VOICE
Panel Voice may be disabled, except for status messages, open sensor responses, and when in program mode.
Add enables the panel voice.
1. Open panel cover. Panel announces,
Use numbered keys to enter ID.
2. Enter Master Access Code using the numbered keys. Panel announces,
Please select from Start Menu.
3. Press Add from the Start menu. Panel announces,
Select from main menu.
4. Press Option #. Panel announces,
Option 1, press again for next option or done to select.
5. Press 02. Panel announces,
Option 2, press again for next option or done to select.
6. Press DONE. Panel announces,
Option 2 is on
.
18
Option # Add Delete
01 - Panel Beeps On Off
02 - Panel Voice On Off
03 – Latchkey Time Not available Not available
36 and 37 – Sensor light lock out times Not available Not available
41 – Chime Voice On Off
42 – Speaker Volume 1-8 8 (highest)
43 – Pager Phone Number Not available Not available
55 – Status Beep Volume 1-10 5
35296 SSE User Guide 16/1/07 12:08 Page 18

Delete disables the panel voice.
1. Open panel cover. Panel announces,
Use numbered keys to enter ID.
2. Enter Master Access Code using the numbered keys. Panel announces,
Please select from Start Menu.
3. Press Delete from the Start menu. Panel announces,
Select from main menu.
4. Press Option #. Panel announces,
Option 1, press again for next option or done to select.
5. Press 02. Panel announces,
Option 2 press again for next option or done to select.
6. Press DONE. Panel announces,
Option 2 deleted.
•OPTION 41- CHIME VOICE (applies only to optional accessories)
If you have installed additional sensors with the chime facility, the panel can be programmed to verbally announce
which chime sensor has been tripped if the chime feature is on.
Add enables chime voice.
1. Open panel cover. Panel announces,
Use numbered keys to enter ID.
2. Enter Master Access Code using the numbered keys. Panel announces,
Please select from
Start Menu.
3. Press Add from the Start menu. Panel announces,
Select from main menu.
4. Press Option #. Panel announces,
Option 1, press again for next option or done to select.
5. Press 41. Panel announces,
Option 41, press again for next option or done to select.
6. Press DONE. Panel announces,
Option 41 is on.
Delete disables chime voice. The panel will not announce which chime sensor has been tripped but will still chime 2
times for doors and 3 times for motion sensors when a given sensor is tripped.
1. Open panel cover. Panel announces,
Use numbered keys to enter ID.
2. Enter Master Access Code using the numbered keys. Panel announces,
Please select from
Start Menu.
3. Press Delete from the Start menu. Panel announces,
Select from main menu.
4. Press Option #. Panel announces,
Option 1, press again for next option or done to select.
5. Press 41. Panel announces,
Option 41, press again for next option or done to delete.
6. Press DONE. Panel announces,
Option 41 deleted.
•OPTION 42- SPEAKER LEVEL
You can adjust the speaker level if you believe the digital voice is too loud. When this option is turned on you can
set the panel speaker level from 1 (the lowest voice level) to 8 (the highest voice level). When you turn this option
off, the speaker level is set to the default level of 8 (the highest voice level).
Add allows you to set the speaker level from 1-8.
1. Open panel cover. Panel announces,
Use numbered keys to enter ID.
2. Enter Master Access Code using the numbered keys. Panel announces,
Please select from
Start Menu.
3. Press Add from the Start menu. Panel announces,
Select from main menu.
4. Press Option #. Panel announces,
Option 1, press again for next option or done to select.
5. Press 42. Panel announces,
Option 42, press again for next option or use numbered keys to enter
option.
6. Enter the voice level (1-8) with the numbered keys.
7. Panel announces the speaker level that has been selected.
Delete sets the speaker level to 8 (the highest voice level).
1. Open panel cover. Panel announces,
Use numbered keys to enter ID.
2. Enter Master Access Code using the numbered keys. Panel announces,
Please select from
Start Menu.
3. Press Delete from the Start menu. Panel announces,
Select from main menu.
4. Press Option #. Panel announces,
Option 1, press again for next option or done to select.
5. Press 42. Panel announces,
Option 42, press again for next option or done to delete.
6. Press DONE. Panel announces,
Option 42 deleted.
19
35296 SSE User Guide 16/1/07 12:08 Page 19

•OPTION 55- PANEL BEEP VOLUME
You can adjust the level of the system’s arming beeps, trouble beeps and panel beeps if you believe they are too
loud. Add allows you to set the volume for the system’s beeps. The lowest volume setting is 1, the highest is 10.
1. Open panel cover. Panel announces,
Use numbered keys to enter ID.
2. Enter Master Access Code using the numbered keys. Panel announces,
Please select from Start Menu.
3. Press Add from the Start menu. Panel announces,
Select from main menu.
4. Press Option #. Panel announces,
Option 1, press again for next option or done to select.
5. Press 55. Panel announces,
Option 55, press again for next option or done to select.
6. Use the numbered keys to enter the desired volume setting (01-10).
7. Press DONE.
Delete sets the volume of status sounds to the default setting (7).
1. Open panel cover. Panel announces,
Use numbered keys to enter ID.
2. Enter Access Code using the numbered keys. Panel announces,
Please select from Start Menu.
3. Press Delete from the Start menu. Panel announces,
Select from main menu.
4. Press Option #. Panel announces,
Option 1, press again for next option or done to select.
5. Press 55.
6. Press DONE.
ADDITIONAL ADVICE FOR LOCATING AND MAINTAINING YOUR SENSORS
•MOTION SENSORS
Motion sensors detect movement by sensing the infrared energy which comes off a body as it moves across the
sensor’s field of vision, the sensor transmits an alarm signal to the control panel. It is designed to be ‘pet friendly’ to
help reduce false alarms from most pets. They are designed for indoor use only and are best located in areas
where an intruder would have to pass through to gain access to your valuables, such as a hall or living room.
The wireless motion sensor has the following features:
•Pet sensitive lens to help reduce false alarms from pets up to
18kg (40lbs)
•They can protect an area up to 11m by 12m
•Three minute transmitter lock out time to help extend battery life
•Reports a low battery warning to the control panel before they lose
power
•Replacement AA batteries are widely available
Installation Guidelines
1. Locate sensors within 30m (100 ft) of the control panel for best performance.
2. The recommended mounting height is 2.3m (71/2ft) but the sensor can be mounted from 1.5m to 2.4m
(5 to 8ft) high in the corner of the area you want to protect. The higher mounting position provides better range
(up to 11m or 35ft).
3. Position the sensor to protect an area where an intruder would be most likely to walk across the sensor’s field of
vision.
4. Mount the motion sensor on a rigid surface which is free from vibrations.
5. Position the sensor so it faces a solid reference point, like an internal wall.
6. Do not aim the sensor at windows, fireplaces, air conditioners, heaters, forced air heating vents, or place in
direct sunlight. Sudden changes in temperature may trigger a false alarm.
20
35296 SSE User Guide 16/1/07 12:08 Page 20
Table of contents
Other Monitor Security System manuals
Popular Security System manuals by other brands

Fire Burglary Instruments
Fire Burglary Instruments XL1236 Programming instructions

Dahua
Dahua DHI-ARC3008C Installer manual

Direct Supply
Direct Supply Attendant owner's manual

Bosch
Bosch PAVIRO Software manual

Interlogix
Interlogix ZEROWIRE ZW-6404 installation manual

Bentel Security
Bentel Security Wave/WSB quick start guide

Hitachi
Hitachi PC-KCB120 user guide

Visonic
Visonic POWERMAXCOMPLETE PANEL - Installer's guide

Federal Signal Corporation
Federal Signal Corporation Vision SLR Series Installation maintenance and service manual

Eclipse
Eclipse EC-P8 user manual

Akai
Akai ARW100 user manual

Advent
Advent home navigator user guide