More Werdu Plus 0123 User manual

MANUAL DE
INSTALACIÓN
INSTALLATION
MANUAL
MANUAL DE
INSTALAÇÃO
0-36 kg
0123

IMPORTANTE:
Conservar para futuras consultas.
Procure que las instrucciones puedan conservarse en
el sistema de retención infantil durante su ciclo vital.
WARNING:
Keep for future reference.
Please kindly pay attention to the state of the
instructions manual, so that it can be kept during the
life cycle of the child restraint system.
IMPORTANTE:
Conservar estas instruções para consulta no futuro.
Por favor, prestar atenção para o estado do manual de
instruções, de modo que possa ser mantido durante o
ciclo de vida da cadeira de segurança para crianças.
Español
—
MANUAL DE INSTALACIÓN - Sistema de retención infantil
Grupo 0+/1/2/3. De 0 a 36 kg (de 0 a 12 años aprox.)
P. 4
P. 21
P. 38
English
—
INSTALLATION MANUAL - Child safety seat
Group 0+/1/2/3. From 0 to 36 kg (from 0 to 12 years approx.)
Portugues
—
MANUAL DE INSTALAÇAO - Dispositivo de retenção para crianças
Grupo 0+/1/2/3. Entre 0 e 36 kg (0 aos 12 anos aprox.)

Lea detenidamente estas instrucciones.
Guárdelas siempre a mano en el bolsillo
de la silla de seguridad.
.1 Sólo es apropiado si los vehículos homologados
están provistos de cinturones de seguridad de
tres puntos, homologados por el Reglamento
nº 16 de la CEPE u norma equivalente.
2. Bajo ninguna circunstancia se debe instalar la
silla de seguridad en el asiento delantero del
vehículo en sentido contrario de la marcha si va
equipado con un Airbag activo.
3. No utilice esta silla de seguridad para niños en
asientos de pasajeros equipados con airbag.
4. Esta silla infantil debe utilizarse CON el sistema
de arnés para niños entre 0 y 18 Kg.
5. Esta silla infantil puede utilizarse SIN el sistema
de arnés para niños de 15 a 36 Kg.
6. Por favor lea cuidadosamente las instrucciones
porque una instalación incorrecta podría causar
serios daños. En ese caso el fabricante no tendrá
ningún tipo de responsabilidad.
7.
Es
ta silla es acorde a la normativa de Regulación
ECE 44/04 y puede ser instalada en la mayoría
de vehículos equipados con cinturones de 3
puntos acordes a la Regulación ECE 16. No
obstante, siempre debe probar la silla en su
vehículo y con el niño/a a bordo antes de la
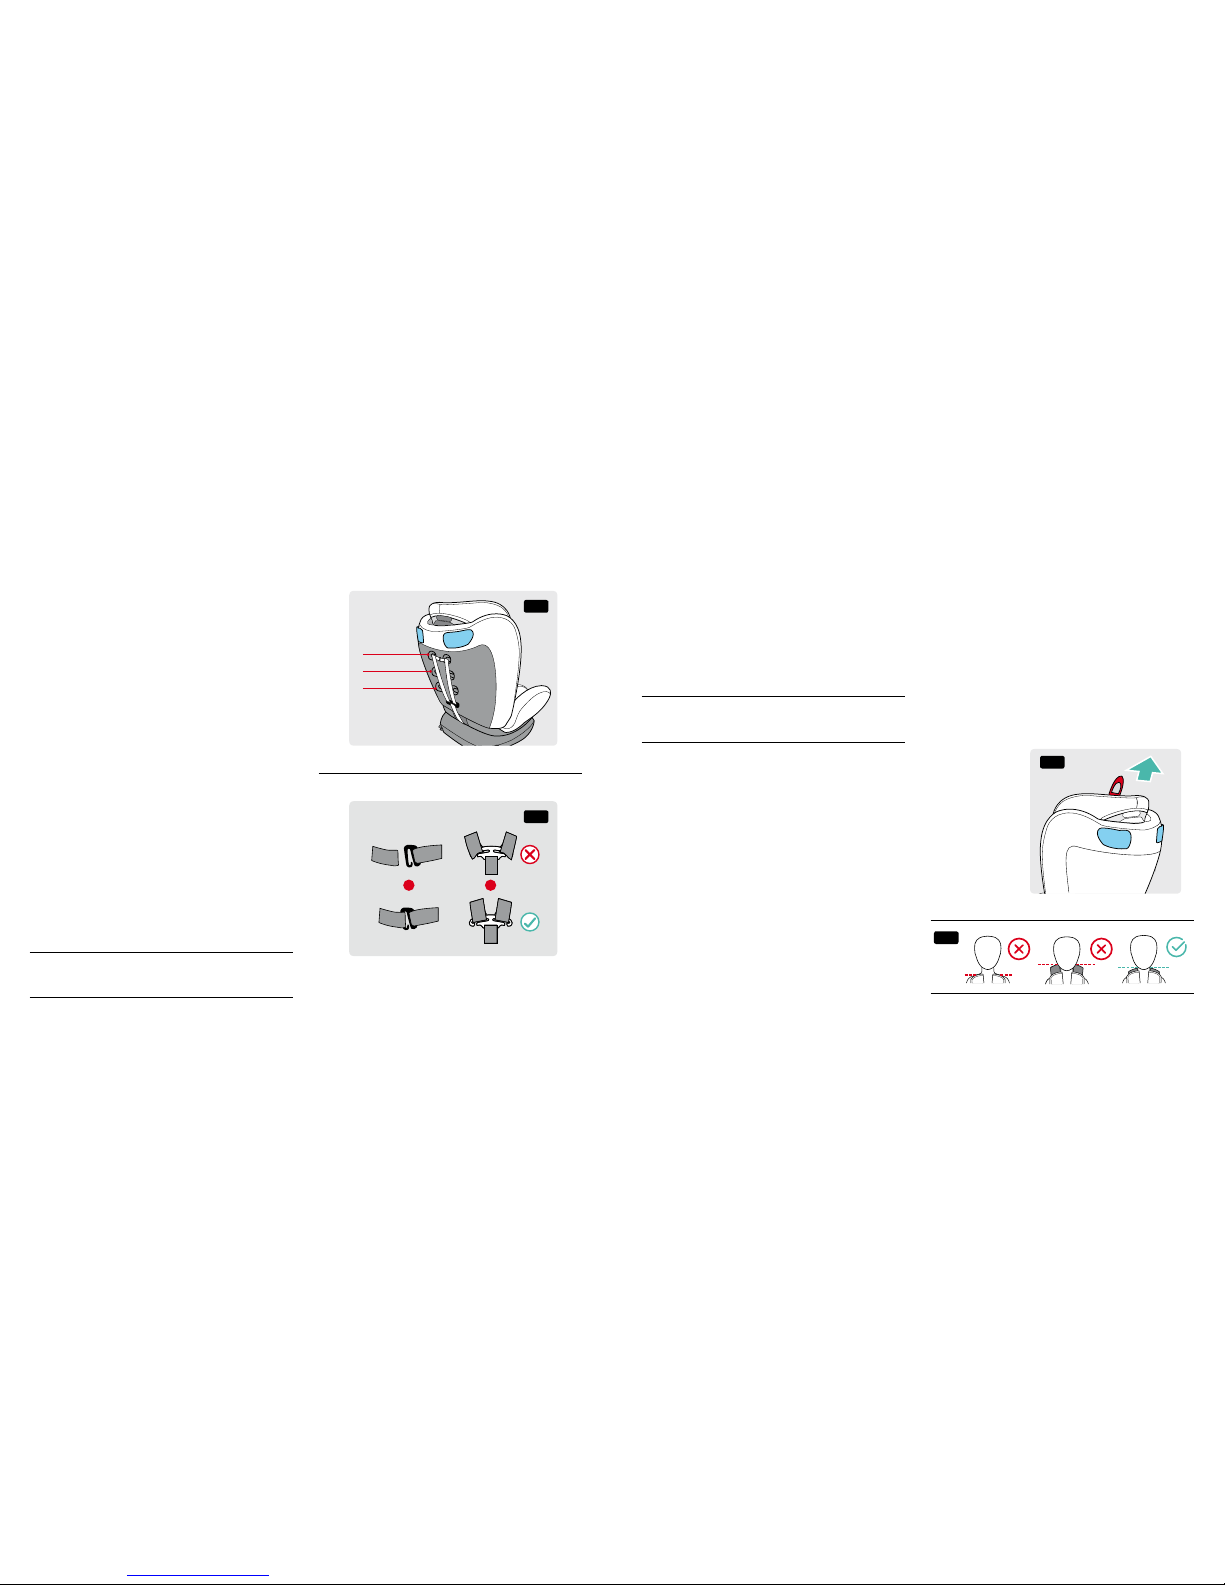
(1) Reposacabezas
(2) Guía del cinturón
diagonal
(grupo 2/3)
(3) Protectores de
hombro
(10) Correas de
hombro
(9) Regulador
de altura del
reposacabezas
(7) Hebilla del
arnés
(5) Broches de la
hebilla
(4) Colchoneta
(6) Botón de la
hebilla del arnés
(8) Protector de
entrepierna
(13) Botón de ajuste
del arnés
(14) Cinta de ajuste
del arnés
(15) Palanca de
reclinado
(12) Base
(11) Guía del cinturón
abdominal
(grupo 1/2/3)
1. VISTA GENERAL
compra, para asegurarse que el modelo cumple
con sus necesidades. No está permitido utilizar
la silla asegurada solamente con cinturones de 2
puntos.
8.
Consulte en el folleto adjunto de vehículos
compatibles si la marca y modelo de su vehículo
esta incluída en el listado, para asegurar la
instalación correcta de la silla en el vehículo.
9. Por favor nunca utilice la silla de seguridad sin la
funda y sin los protectores del arnés.
10. La instalación del niño con ropa de abrigo puede
reducir la eficacia del sistema de retención.
11. Proteja la silla de seguridad infantil del contacto
directo con la luz solar, porque la silla podría
calentarse y lastimar al niño.
12. La silla o accesorios del arnés que estén dañados
o hayan sido utilizados incorrectamente deberán
ser reemplazados.
13. No deje objetos pesados en el interior del coche,
porque en caso de accidente podrían lesionar al
niño.
14. Compruebe que la hebilla está correctamente
cerrada, porque en caso de emergencia el niño
podrá ser liberado rápidamente.
15. Los artículos rígidos y las piezas de plástico de
la silla de seguridad deben colocarse e instalarse
de forma que no puedan, durante el uso diario
del vehículo, quedar atrapados en un asiento
móvil o en una puerta del coche.
16. Es peligroso realizar cualquier tipo de alteración
o incorporación a la silla de seguridad sin
la aprobación de la autoridad competente.
Es peligroso no seguir estrictamente las
instrucciones de instalación proporcionadas por
el fabricante de la silla de seguridad para niños.
17. La silla de seguridad debe permanecer instalada
al vehículo mediante el cinturón de seguridad,
aunque el niño no esté sentado en la silla. El
niño nunca debe ser desatendido mientras
está sentado en la silla de seguridad, tampoco
cuando esté fuera del vehículo.
18. Por favor mantenga la silla de seguridad lejos de
productos corrosivos.
19. No utilice ningún punto de contacto de fijación
que no sean los descritos en las instrucciones e
indicados en la silla de seguridad.
20. Se recomienda que el dispositivo se cambie
cuando haya sido sometido a tensiones violentas
en un accidente.
21. El fabricante garantiza la calidad de sus
productos, pero no la calidad de los productos
de segunda mano u otras marcas.
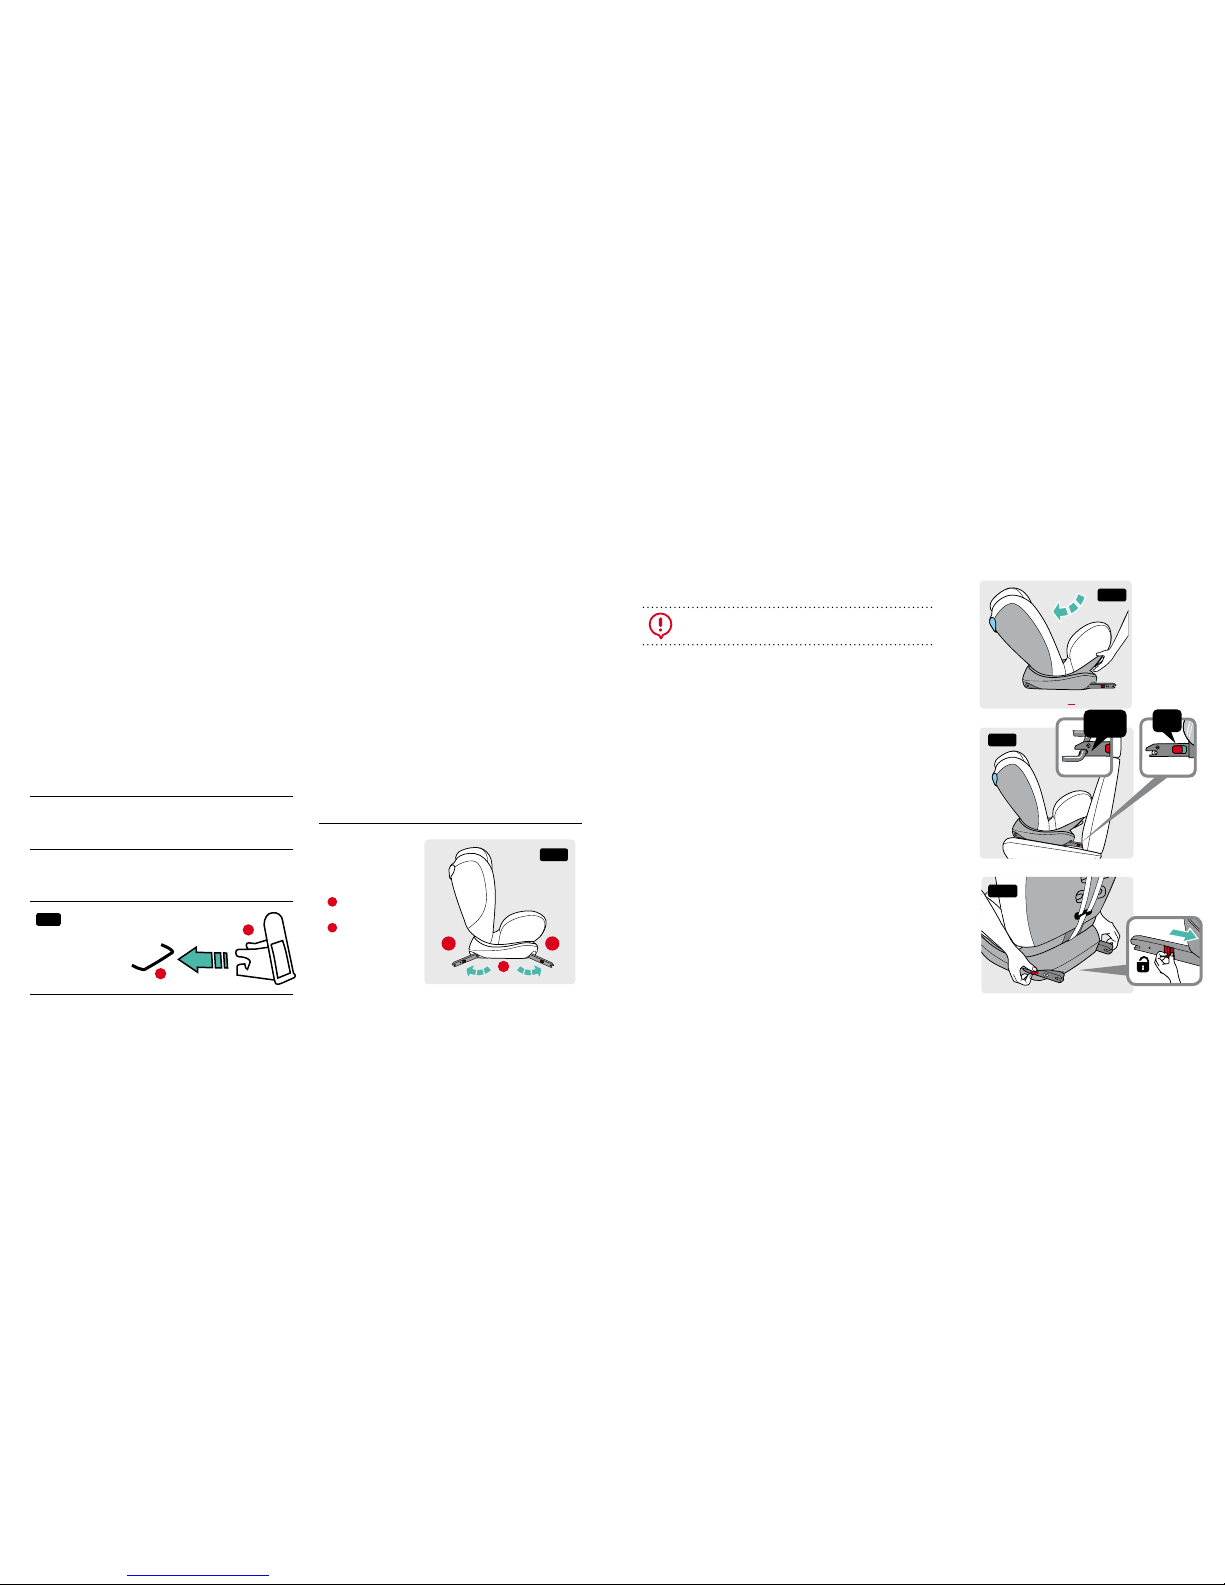
22. Las ilustraciones de las instrucciones son
meramente informativas. El sistema de retención
infantil puede presentar pequeñas diferencias
respecto a las fotografías o imágenes del manual
de instrucciones. Estas variaciones no afectan a su
homologación por la Regulación ECE 44/04.
(16) Guías del
cinturón
diagonal
(grupo 0)
(17) Ranuras de
regulación
de la altura
del arnés.
(18) Conector de
las correas
de hombro
(20) Conector de los
protectores de
hombro
(19) Brazos sist.
Isoclick Fix
(21) Botón de
desbloqueo sist.
Isoclick Fix
(11) Guía del cinturón
abdominal
(grupo 0/1/2/3)
45

2. PUESTOS DE INSTALACIÓN EN EL
VEHÍCULO
DÓNDE:
En los asientos traseros del vehículo
NO instalar en los asientos delanteros salvo en
estos casos concretos:
1. Cuando el vehículo no disponga de asientos traseros.
2. Cuando todos los asientos traseros estén ya
ocupados por menores de edad de estatura
igual o inferior a 135 centímetros.
3. Cuando no sea posible instalar en los asientos
traseros todos los sistemas de retención infantil.
1
La silla ofrece diferentes opciones de montaje.
La siguiente tabla indica los tipos de instalación
para cada grupo:
GRUPO INSTALACIÓN
SILLA
INSTALACIÓN
NIÑO
CAPÍTULO
MANUAL
0+
(0-13 kg)
Isoclick Fix +
cinturón de 3
puntos
Arnés de
5 puntos 5
1(9-18 kg)
Isoclick Fix +
cinturón de 3
puntos
Arnés de
5 puntos 7
2(15-25 kg)
Isoclick Fix +
cinturón de 3
puntos
Cinturón
del vehículo 9
3(22-36 kg)
Isoclick Fix +
cinturón de 3
puntos
Cinturón
del vehículo 9
3. USO GENERAL DE LA SILLA
3.1. Cómo utilizar la hebilla del arn
és
1. Acerque los dos cierres del broche (fig.1.1).
2. Asegúrese de hacerlo con el lado correcto
hacia arriba (fig. 1.2).
3. Encájelos antes de introducirlos en la hebilla
del arnés. Deberá oír un clic (fig.1.3).
4. Tire de la cinta de ajuste del arnés (14) para
evitar que la parte del regazo quede floja,
asegurándose de que el arnés esté tensado y
la hebilla cerrada. Abra la hebilla del arnés (7)
presionando el botón rojo (fig.1.4).
3.2. Cuidado de la hebilla del arnés
Para la seguridad del niño, es imprescindible que
la hebilla del arnés funcione correctamente. Su
mal funcionamiento suele ser consecuencia de
la acumulación de suciedad o cuerpos extraños.
Por mal funcionamiento se entiende:
• Los cierres del broche salen sólo lentamente
cuando se presiona el botón rojo.
• Loscierresdelbrocheyanoentran(sesalen
cuando los introduce en la hebilla).
• Loscierresdelbrocheencajansinqueseoigaun
clic.
• Resultadifícilinsertarloscierresdelbrocheen
la hebilla (hay una resistencia).
fig. 1 21
3 4
Cinturón de 3
puntos.
—
Cinturón de 2
puntos.
Parte del cinturón
diagonal.
Parte del cinturón
abdominal.
B
A
B
A
C
C
C
C
Punto de sujeción
ISOFIX.
C
CÓMO:
GRUPO 0/ Instalar en sentido contrario a la marcha.
GRUPO 1 / Instalar en sentido a la marcha.
GRUPO 2-3 / Instalar en sentido a la marcha.
En asientos con:
Anclajes ISOFIX (entre el asiento y el respaldo) y
cinturón de 3 puntos (cinturón del vehículo).
Atención:
Solamente puede ser utilizado en este asiento
SI el vehículo dispone de cinturón abdominal
y diagonal (3 puntos).
2
1
2
67

4. Voltee la silla y desde la parte inferior del asiento,
libere la hebilla del arnés
(7)
pasando la placa de
retención
(24)
por la ranura del asiento (fig. 6).
5. Retire la hebilla de cinturón y guárdela en la
bolsa de almacenaje.
6. Desde la parte inferior de la silla, localice las
placas de retención de las cintas del arnés
(22)
que se encuentran debajo del patín de reclinado
y tirando de la cinta, sáquelas al exterior para
poder retirar las placas (fig. 5) .
7. Tire de las cintas del arnés para retirarlas por
completo del asiento.
3.6. Retirar la funda
A) Reposacabezas.
une situado en la parte trasera de la silla (20)
o pasándolos directamente a través del ojal
correspondiente de la silla en el caso de que
estén unidos y no exista conector.
13
(13)
Botón de
ajuste del
arnés.
fig. 2
• La hebilla sólo se abre al ejercer una fuerza
extrema.
3.3. Solución
Limpie la hebilla del arnés para que vuelva a
funcionar correctamente.
3.4. Limpieza de la hebilla del arnés
1. Abra la hebilla del arnés (presione el botón rojo).
2. Desde la parte de abajo de la silla, sujete la placa
metálica
(24)
que retiene la hebilla en la base
(fig. 6).
3. Deslice la placa metálica
(24)
a través de la
ranura.
4. Retire la hebilla del arnés
(7)
.
5. Ponga la hebilla del arnés
(7)
en remojo con
agua caliente y lavavajillas líquido durante una
hora como mínimo. Aclare y séquela.
3.5. Retirar el arnés de 5 puntos y la hebilla de
seguridad
1. Destense las cintas del arnés tirando de ellas de
la parte pectoral de estas a la vez que presiona
el botón de ajuste del arnés
(13)
(fig.2).
2. Localice el conector de la cintas del arnés
(18)
y
desenganche las cintas del arnés para liberarlas
del conector y retírelas tirando de ellas desde la
parte delantera de la silla. (fig. 3 y 4).
3. Libere los protectores de hombro
(3)
desenganchándolos del conector que los
fig. 4
fig. 5
23
22 22
fig. 6 24
1. Coloque el reposacabezas en la posición más
alta.
2. Retire primero la parte de la funda de la guía
del cinturón
(2)
, y luego el resto de la funda del
reposacabezas.
B) Para quitar el arnés de 5 puntos, consulte el
punto 3.5. Retire la funda del respaldo y de la
base.
3.7. Recolocar la funda
Siga los mismos pasos en el orden inverso.
¡PRECAUCIÓN! Nunca utilice la silla de seguridad
siguiendo las instrucciones de instalación del punto
5 sin una hebilla correctamente instalada. Asegúrese
de que la placa metálica (24) esté bien sujeta.
(18
) Conector
de las cintas
del arnés.
(20)
Conector
de los
protectores
de hombro
fig. 3
18
20
89

3.9. Ajustar el reposacabezas en una
instalación con arnés de 5 puntos. Grupo 1.
Un reposacabezas correctamente ajustado (1)
garantiza una protección óptima del niño en la silla
de seguridad:
El reposacabezas debe ajustarse para que las correas
de los hombros (10) estén al mismo nivel que los
hombros del niño (fig. 10).
¡PRECAUCIÓN! Las correas de los hombros no deben
pasar por detrás de la espalda del niño ni a la altura o
por encima de sus orejas.
Las correas de los hombros se ajustan del modo
siguiente:
1. Afloje las correas de los hombros de la silla lo
máximo posible.
2. Presione el botón de ajuste del arnés a la vez que
tira de la parte pectoral de las cintas del arnés para
aflojarlas (fig. 2).
3. Tire del regulador de altura del reposacabezas
(9)
y
del reposacabezas
(1)
al mismo tiempo. Seleccione
la altura correcta de las correas de los hombros
(10)
y encájelo en la posición adecuada para el niño
soltando el regulador (fig. 9).
3.10. Ajustar el reposacabezas en una instalación
con cinturón del vehículo. Grupo 2 y 3.
Un reposacabezas correctamente ajustado garantiza
que la parte diagonal del cinturón del vehículo esté
colocada de forma óptima, ofreciendo al niño la mejor
protección posible.
fig. 8
20 18
El reposacabezas debe ajustarse de forma
que quede un espacio de dos dedos entre el
reposacabezas y los hombros del niño (fig. 10).
Para ajustar la altura del reposacabezas:
1. Tire del regulador de altura del reposacabezas
(9) y del reposacabezas al mismo tiempo. Esto
desbloquea el reposacabezas (fig. 9).
2. Ahora podrá mover el reposacabezas desbloqueado
hasta la altura deseada. Cuando suelte el regulador, el
reposacabezas quedará bloqueado en la posición elegida.
3. Coloque la silla de seguridad en el asiento del coche.
3.8. Regulación en altura del arnés
El ajuste a la altura óptima del arnés garantiza la
correcta instalación del niño en la silla. Debe de
ajustarse de modo que el arnés de la silla quede
al nivel de los hombros del niño o ligeramente por
encima, nunca por detrás de la espalda o a la altura
de las orejas (fig. 10).
1. Destense las cintas del arnés tirando de ellas de
la parte pectoral de estas a la vez que presiona
el botón de ajuste del arnés (13) (fig.2).
2. Localice el conector de la cintas del arnés (18) y
desenganche las cintas del arnés para liberarlas
del conector y retírelas tirando de ellas desde la
parte delantera de la silla. (fig. 3 y 4).
3. Libere los protectores de hombro (3)
desenganchándolos del conector que los
une situado en la parte trasera de la silla (20)
o pasándolos directamente a través del ojal
correspondiente de la silla en el caso de que
estén unidos y no exista conector.
4. Vuelva a insertar las cintas de los arneses y de
los protectores de hombro a la altura deseada
tomando como guía aproximada la fig. 7.
5. Desde la parte trasera, vuelva a enganchar las cintas en
el conector de arnés y una las cintas correspodientes
a los protectores de hombros (fig. 8).
¡PRECAUCIÓN! Compruebe que las correas del
arnés no estén retorcidas y que estén correctamente
insertadas en las ranuras de la funda.
fig.10
fig. 7
0-6 kg
6-13 kg
13-18 kg
(9)
Regulador
de altura del
reposacabezas.
fig. 9
10 11

4. Haga que el niño se siente en la silla y compruebe
la altura. Repita el proceso hasta que el
reposacabezas esté a la altura correcta.
4. TAREAS PRELIMINARES
Lea primero el capítulo correspondiente al método
de instalación que necesite (capítulos 5, 7 ó 9).
Preparación del sistema Isoclick Fix
1. Si su vehículo no está equipado con las guías de
inserción ISOFIX como estándar, acople las dos
guías de inserción (25) que se incluyen con la
silla de seguridad.
* Con la abertura hacia arriba dentro de los dos puntos
de sujeción ISOFIX (24) de su vehículo (fig.11).
CONSEJO: Los puntos de sujeción ISOFIX se
encuentran entre la superficie y el respaldo del
asiento del vehículo.
2. Coloque el reposacabezas del asiento del
vehículo en la posición más alta.
fig. 11
(26)
Guía de inserción
(25)
Punto de sujeción
ISOFIX 25
26
3. Localice los brazos Isoclick Fix (18) situados en
la base de la silla.
4. Gire para extraer ambos brazos del sistema
Isoclick Fix.
* Las guías de inserción facilitan la instalación de la silla de
seguridad con la ayuda de los puntos de sujeción ISOFIX
y evitan el daño a la tapicería del asiento. Cuando no se
utilicen, deben retirarse y guardarse en un lugar seguro.
En vehículos con respaldo abatible, es necesario retirar
las guías de inserción antes de abatir el respaldo. Los
problemas que puedan ocurrir suelen ser consecuencia
de la acumulación de suciedad o cuerpos extraños en las
guías de inserción y los mosquetones. Para solucionar
este tipo de problemas, limpie la suciedad o los cuerpos
extraños.
fig. 14
fig. 13
1 2 3 4
CLICK OK
fig. 14
fig. 15
(19)
Brazos del
sistema
Isoclick Fix.
AInstalación
grupo 1/2/3.
BInstalación
grupo 0.
fig. 12
BA
19
5. INSTALACIÓN DE LA SILLA. GRUPO 0+
Solamente GRUPO 0+. Desde 0 a los 12
meses aprox. (0 - 13 kg).
1. Asegúrese de que el arnés de cinco puntos de la silla
de seguridad esté instalado correctamente (consulte el
apartado 3).
2. Siga los pasos descritos en el apartado 3.1.
3. Siga los pasos descritos en los puntos 3.8 y 3.9.
4. Recline el asiento tirando de la palanca de reclinado
(19) hasta la posición 4 (fig. 13).
5. Asegúrese que los brazos del sistema Isoclick Fix están
desplegados para la instalación de la silla en sentido
contrario a la marcha (grupo 0) (fig. 12).
6. Coloque la silla de seguridad orientada en el sentido
contrario a la marcha sobre el asiento del vehículo.
7. Sujete la silla de seguridad con ambas manos e
introduzca los dos brazos del sistema Isoclick fix (19)
firmemente en las guías de inserción (26) hasta que
los brazos de bloqueo queden acoplados con un clic
en ambos lados. El botón rojo cambiará a parcialmente
verde en ambos lados (fig. 14).
8. Sacuda la silla para comprobar que está correctamente
anclada a los puntos ISOFIX del vehículo.
9. Retire el cojín reductor de la silla. Tome el cinturón del
vehículo y pase la parte del cinturón abdominal por las
guías de cinturón inferiores (10) continuando por encima
del asiento de la silla hasta conectar el cinturón del vehículo
en su hebilla presionando hasta oir un click (fig. 16).
12 13

10.
Tome la parte del cinturón diagonal y pasándolo
por la parte trasera del respaldo, insértelo dentro
de la guía para el cinturón diagonal (16) más
alejada a la hebilla del cinturón del vehículo (fig. 17).
11. Retire la holgura que queda tras la instalación del
cinturón de 3 puntos, tirando de la sección del
cinturón diagonal (fig. 17). Procure que quede
lo más ceñido posible a la silla. Compruebe que
el cinturón no queda doblado ni girado tras la
instalación.
12.Tome el cojín reductor y vuelva a colocarlo en su
posición original.
13. Siga los pasos del capítulo 6 asegurando al niño
con el arnés de 5 puntos.
Desinstalación del sistema Isoclick Fix
1. Para soltar los anclajes Isoclick Fix, tire del
botón de los anclajes para desbloquearlos (21) .
La silla quedará libre (fig. 15).
6. INSTALACIÓN DEL NIÑO EN LA SILLA.
GRUPO 0+
CONSEJO: Cuanto más ceñidas estén las correas
del arnés al cuerpo del niño, mayor será su
seguridad. Por eso, evite que el niño lleve ropa de
abrigo debajo del arnés.
1. Abra la hebilla del arnés (7) (fig. 18).
2. Presione el botón del regulador de arnés (13) a
(11)
Guías del
cinturón
abdominal
(grupo
0/1/2/3).
(16)
Guía del
cinturón
diagonal
(grupo 0).
(14)
Cinta de
ajuste del
arnés.
CLICK
1111
fig. 16
la vez que tira de la parte pectoral de las cintas
del arnés para aflojarlas (fig. 2). No tire de los
protectores de hombro.
3. Siente al niño en la silla de seguridad.
4. Asegúrese de que la espalda del niño está bien
apoyada sobre el respaldo de la silla de seguridad.
5. Acerque los dos cierres del broche (5) y encájelos
antes de introducirlos en la hebilla del arnés (7).
Deberá oír un clic (fig. 19).
6. Tire de la cinta de ajuste del arnés (14) para dar
la tensión y el ajuste adecuado al cuerpo del niño
(fig. 20).
¡PRECAUCIÓN! La parte abdominal del arnés debe
colocarse lo más abajo posible sobre la cadera del niño.
7. Tire hacia abajo de los protectores para los
hombros (3) para asegurarse de que estén bien
colocados.
Para la seguridad del niño, antes de cada trayecto en
coche compruebe que:
• Lasilladeseguridadestéacopladaaamboslados
mediante los brazos de bloqueo Isoclick Fix (19)
en los puntos de sujeción ISOFIX (25) y ambos
botones de seguridad estén verdes.
• Lasilladeseguridadestéfirmementeinstaladaen
el vehículo.
• Lascorreasnoesténretorcidas.
• Las correas de la silla de seguridad estén bien
ajustadas al cuerpo del niño, sin oprimirlo.
• Las correas de los hombros (10) estén
correctamente ajustadas y no estén retorcidas.
• Los protectores para los hombros (3) estén al
mismo nivel que los hombros del niño.
• Loscierresdelbroche(5) estén encajados en la
hebilla del cinturón (6).
14
click
fig. 18 fig. 19
fig. 20
16
fig. 17
ATENCIÓN Para desinstalar el sistema Isoclick
Fix siga los pasos descritos en el capítulo 5
“Desinstalación del sistema Isoclick Fix”.
14 15

7. INSTALACIÓN DE LA SILLA. GRUPO 1
Solamente GRUPO 1. Desde aprox.
9 meses a 4 años (9-18 kg)
1. Enderece el asiento tirando de la palanca de
reclinado hasta la posición 1 (fig. 21).
2. Asegúrese que los brazos del sistema Isoclick
Fix están desplegados para la instalación de la
silla en sentido a la marcha (grupo 1/2/3) (fig.
12).
3. Coloque la silla de seguridad orientada en el
sentido a la marcha sobre el asiento del vehículo.
4. Sujete la silla de seguridad con ambas manos e
introduzca los dos brazos del sistema Isoclick
fix (19) firmemente en las guías de inserción
(26) hasta que los brazos de bloqueo queden
acoplados con un clic en ambos lados. El botón
rojo cambiará a parcialmente verde en ambos
lados (fig. 22).
5. Sacuda la silla para comprobar que está
correctamente anclada a los puntos ISOFIX del
vehículo.
6. Retire el cojín reductor de la silla. Tome el
cinturón del vehículo y pase la parte del cinturón
abdominal por las guías de cinturón inferiores
(11) continuando por encima del asiento de la
silla hasta conectar el cinturón del vehículo en
su hebilla presionando hasta oir un click (fig. 23).
7. Tome la parte del cinturón diagonal y páselo
del por la parte trasera del cojín del respaldo de
click
16
Ok
2 3 4
1
fig. 21
fig. 22
(10)
Guías del
cinturón
abdominal
(grupo
0/1/2/3).
9. Retire la holgura tirando de la sección abdominal
del cinturón para que quede lo más ajustado
posible (fig. 23).
10.Compruebe que le cinturón no queda doblado ni
girado tras la instalación.
Para la seguridad del niño, antes de cada trayecto
en coche compruebe que:
•La silla de seguridad esté acoplada a ambos
lados mediante los brazos de bloqueo Isoclick
Fix (19) en los puntos de sujeción ISOFIX (25) y
ambos botones de seguridad estén verdes.
•La silladeseguridadestéfirmementeinstalada
en el vehículo.
• Lascorreasnoesténretorcidas.
• Las correas de la silla de seguridad estén bien
ajustadas al cuerpo del niño, sin oprimirlo.
fig. 23
1111
click
•Las correas de los hombros (10) estén
correctamente ajustadas y no estén retorcidas.
• Los protectores para los hombros (3) estén al
mismo nivel que los hombros del niño.
•Loscierresdelbroche(5) estén encajados en la
hebilla del cinturón (7).
8. INSTALACIÓN DEL NIÑO EN LA SILLA.
GRUPO 1
Para la instalación del niño siga los pasos
descritos en el capítulo 6.
9. INSTALACIÓN DE LA SILLA .GRUPO 2 Y 3
Solamente GRUPO 2/3. Desde 4 a 12
años aprox. (15- 36 kg).
1. Asegúrese de retirar correctamente el arnés de
5 puntos y la hebilla del arnés de la silla (consulte
el punto 3.5).
2. Siga los pasos descritos en el apartado 3.10.
3. Siga los pasos descritos de los punto 4.
4. Asegúrese que los brazos del sistema Isoclick
Fix están completamente desplegados (fig. 12).
5. Coloque la silla de seguridad orientada en
el sentido de la marcha sobre el asiento del
vehículo.
manera que quede entre el cojín y el respaldo
(fig.23).
8. Pase la parte superior del cinturón abdominal entre
el reposacabezas de la silla y el respaldo (fig. 23).
16 17

3. Coloque la parte del cinturón diagonal (27) y la
parte del cinturón de regazo (28) del lado de la
hebilla del vehículo por la guía abdominal (11) de
la silla de seguridad (fig. 24 B).
4. Pase la parte del cinturón diagonal (27) por la
guía del para el grupo 2/3 (2) del reposacabezas
hasta que esté completamente extendida en la
guía y no esté retorcida (fig. 24 A).
5. Asegúrese de que la parte diagonal del cinturón
pasa sobre la clavícula del niño y no sobre su
cuello.
¡PRECAUCIÓN! La parte del cinturón de regazo
(28) debe estar lo más abajo posible sobre las
caderas del niño a ambos lados.
CONSEJO: Si el respaldo oculta la guía, puede subir
el reposacabezas. Entonces podrá introducir la
correa diagonal del cinturón sin problemas. Vuelva
a colocar el reposacabezas a la altura adecuada,
como se indica en el punto 3.10.
CONSEJO: Puede volver a ajustar la altura del
reposacabezas en el vehículo.
¡PRECAUCIÓN! La parte diagonal del cinturón
(27) debe desplazarse transversalmente hacia
atrás. Puede ajustar el recorrido del cinturón con el
deflector regulable del cinturón del vehículo.
6. Sujete la silla de seguridad con ambas manos
e introduzca los dos brazos de bloqueo (19)
firmemente en las guías de inserción (24) hasta
que los brazos de bloqueo queden acoplados
con un clic en ambos lados.
El botón de seguridad debe verse parcialmente
verde a ambos lados.
¡PRECAUCIÓN!
Los brazos de bloqueo sólo
estarán correctamente acoplados si ambos
botones de seguridad están parcialmente verdes.
7. Sacuda la silla de seguridad para asegurarse de
que esté bien acoplada y vuelva a comprobar los
botones de seguridad para asegurarse de que
ambos estén parcialmente verdes.
10. INSTALACIÓN DEL NIÑO EN LA SILLA.
GRUPO 2 Y 3
Solamente GRUPO 2/3. Desde 4 a 12
años aprox. (15- 36 kg).
1. Siente al niño en la silla. Tire del cinturón del
vehículo y páselo por delante del niño hasta la
hebilla del cinturón del vehículo.
¡PRECAUCIÓN! No retuerza el cinturón.
2. Introduzca el broche en la hebilla del cinturón
del vehículo. Deberá oír un clic.
¡PRECAUCIÓN! La parte diagonal del cinturón no
debe dirigirse nunca hacia el deflector del cinturón
del vehículo. En ese caso, utilice la silla de seguridad
únicamente en el asiento trasero.
Para la seguridad del niño, antes de cada trayecto
en coche compruebe que:
• La silla de seguridad esté acoplada a ambos
lados mediante los brazos de bloqueo Isoclick
Fix (19) en los puntos de sujeción ISOFIX y
ambos botones de seguridad (21) estén verdes.
• Lasilladeseguridadestébiensujeta.
•La parte del cinturón abdominal pase por las
guías para el grupo 0/1/2/3 (11) a ambos lados
del cojín de la silla.
• La parte delcinturón diagonal(27) del lado de
la hebilla del cinturón del vehículo también pase
por la guía abdominal
(11)
de la silla.
• Lapartesuperiordelcinturóndiagonalpasepor
la guía para grupo 2/3
(2)
del reposacabezas.
• La parte del cinturón diagonal se desplace en
diagonal hacia atrás.
• Lascorreasesténtensasynoretorcidas.
ATENCIÓN Para desinstalar el sistema Isoclick
Fix siga los pasos descritos en el capítulo 5
“Desinstalación del sistema Isoclick Fix”.
(2)
Guía para
el cinturón
diagonal
(grupo 2/3).
(27)
Parte del
cinturón
diagonal.
(28)
Parte del
cinturón
abdominal.
(29)
Hebilla del
cinturón del
vehículo.
(11)
Guía para
el cinturón
abdominal
(grupo
0/1/2/3).
fig. 24
29
29
27
28
B
11
2
A
18 19

11. LIMPIEZA Y MANTENIMIENTO
1. Para el lavado de las cintas y partes de plástico
enjabonar con detergente neutro y agua
templada.
2. Asegúrese que no entra jabón dentro de la
hebilla o piezas metálicas.
3. No utilice productos químicos o lejía en ninguna
parte de la silla.
Si tiene alguna duda sobre el uso o colocación de este
producto o necesita cualquier pieza de repuesto, por
favor póngase en contacto con nuestro servicio de
atención al cliente.
12. GARANTÍA
1. Quedan excluidos los defectos o averías
producidas por uso inadecuado, o el
incumplimiento de las normas de seguridad
de instalación y mantenimiento descritas en
las hojas de instrucciones que acompañan los
productos.
2. Garantizada la reparación totalmente gratuita
de defectos originarios.
3. En los supuestos en que la reparación
efectuada no fuera satisfactoria y el producto
no revistiese las condiciones óptimas para
cumplir el uso a que estuviese destinado,
el titular de la garantía tendrá derecho a la
sustitución del artículo adquirido por otro de
similares características o a la devolución del
precio pagado,en los 2 años siguientes a la
fecha.
4. La garantía se considerará automáticamente
cancelada si el artículo adquirido hubiera sido
reparado o hubiera intentado repararlo una
persona no autorizada por nuestra empresa.
INSTRUCCIONES DE LAVADO:
· La funda es desmontable y
lavable a 30°, sólo se debe
secar al aire libre.
· Lavar en máquina, en frio.
· No usar lejía.
·Limpieza en seco,
cualquier disolvente
excepto tricloroetileno.
· No usar secadora.
· No planchar.
30 °C
Please read the following instructions
carefully before installing the product.
1. Only suitable if the approved vehicle has been
fitted with three-point safety belts that meet
ECE standard Nº 16 or equivalent.
2.
Under no circumstances should the safety seat
be installed in the front seat of the car opposite
the direction of travel if the car is equipped with
an active airbag.
3.
Do not use this child safety seat in passenger
seats equipped with airbags.
4. This child seat must be used WITH the harness
system for children weighing between 0 kg and
18 kg.
5. This child seat may be used WITHOUT the harness
system for children weighing between 15 kg and
36 kg.
6. Please read the instructions carefully, as
incorrect installation could result in serious
injury. If any injuries should occur as a result
of incorrect installation, the manufacturer will
accept no liability.
7.
This child restraint system complies with the rules
of Regulation ECE 44/04 and can be installed
in most vehicles equipped with 3-point seat
belts aligned to ECE Regulation 16. Anyway, you
should always test the seat in your vehicle and
with children on board before buying it, to ensure
that this model meets all your needs. Under no
circumstances shall this seat be fitted only with a
2-point lap belt.
8.
Please consult the Compatible Vehicles leaflet
attached if the manufacturer or model of your
vehicle is not included in the list,in order to
ensure the child seat’s proper installation in the
vehicle.
9. Please never use the safety seat without its
cover or without the harness protectors.
10.Fastening a child dressed in outerwear could
reduce the efficiency of the restraint system.
11. Make sure to protect the child safety seat from
direct sunlight as it could heat up and hurt the
child.
12.Child seats or harness accessories that are
damaged or have been used incorrectly must be
replaced.
13.Do not leave heavy objects inside the car, as
these may injure the child in the event of an
accident.
14.Make sure that the buckle is correctly fastened
so that the child can be quickly freed in case of
emergency.
15.The safety seat’s rigid and plastic elements
should be positioned and installed so that they
cannot be trapped by a moving seat or a door
during everyday use of the vehicle.
20 21

(1) Headrest
(2) Belt guide
(gr. 2 and 3)
(4) Cushion
(3) Shoulder
protectors
(10) Shoulder
straps
(9) Headrest
height
adjuster
(7)
H
arness buckle
(5) Buckle latch
(6)
H
arness buckle
button
(8) Crotch pad
(13) Harness
adjustment
button
(14) Harness
adjustment belt
(15) Reclining lever
(12) Base
(11) Abdominal belt
guide (groups
1/2/3)
1. OVERVIEW 2. USES IN THE VEHICLE
WHERE:
In the vehicle rear seats.
HOW:
GROUP 0 / Install rearward facing.
GROUP 1 / Install forward facing.
GROUP 2-3 / Install forward facing.
On seats with:
ISOFIX hooks (between the seat and the seat
back) and a 3-point seatbelt (car seatbelt)
Notice
The child seat must only be used in this seat IF it
has a lap and diagonal belt (3 points).
Please, do NOT install the safety seat in
forward seats except for the following cases:
1. Whenever the vehicle does not count with
rear seats.
2. When all rear seats are already occupied
by children exceeding 135 cm height.
3. When it is not possible to install all child
restraints systems in the rear seats.
2
1
3 point belt.
2 point belt.
Diagonal belt
section.
Abdominal belt
section.
B
A
B
A
C
C
C
C
ISOFIX anchoring
point
C
1
2
16.Do not disassemble, modify, or add any piece to
the child seat or harness, as this would seriously
affect its basic functioning and the safety that
the child seat provides.
17. The safety seat must remain installed in the
vehicle with the safety belt, even if the child is
not seated in the child seat. The child must never
be left unattended while seated in the safety
seat, not even outside the vehicle.
18.Keep the safety seat away from corrosive
products.
19.Do not use anchor points that are not listed in
the instruction manual and indicated on the seat.
20.The seat should be replaced after undergoing
the violent stresses associated with an accident.
21. The manufacturer guarantees the quality of
its products, but not the quality of second-
hand products or products belonging to other
companies.
22.Instruction illustrations are for informational
purposes only. The child restraint system may
contain small differences compared to the
photographs or images in the instruction manual.
These variations do not affect its certification
under ECE Regulation R44/04.
(16) Diagonal
belt guide
(group 0)
(17) Harness
height
regulation
slots
(18) Harness
strap
connector
(20) Shoulder pads
strap connector
(19) Isoclick Fix
arms
(21) Isoclick Fix
system unlock
button
(11) Abdominal belt
guide (groups
0/1/2/3)
22 23

The seat offers a number of assembly options. The
following table shows the installation types for
each group:
GROUP SEAT
INSTALLATION
CHILD
INSTALLATION
MANUAL
CHAPTER
0+
(0-13 kg)
Isoclick Fix +
3 point belt
5 point safety
harness 5
1(9-18 kg) Isoclick Fix +
3 point belt
5 point safety
harness 7
2(15-25 kg)
Isoclick Fix +
3 point belt Vehicle´s belt 9
3(22-36 kg)
Isoclick Fix +
3 point belt Vehicle´s belt 9
3. GENERAL SEAT USE
3.1. How to use the harness buckle
1. Bring the two clasps together (fig.1.1).
2. Make sure the correct side is facing up (fig.1.2).
3. Fasten the two clasps together before inserting
them into the harness buckle. You should hear a
click (fig.1.3).
4. Pull the harness adjustment belt
(14)
so that the
part of the strap that covers the lap is not loose,
ensuring the harness is taut and the buckle
closed. Open the harness buckle
(7)
by pressing
the red button (fig.1.4).
3.2. Harness buckle care
In order to ensure child safety it is essential that
the harness works correctly. If this is not the case it
is probably because of an accumulation of dirt or
foreign bodies.
Incorrect operation is understood as:
• The buckle clasps are notably slow to release
when the red button is pressed.
• Thebuckleclaspscannot beinserted(theyfall
out when they are inserted into the buckle).
• Thebuckleclaspscometogetherwithoutmaking
a click.
fig. 1 21
3 4
them directly through the corresponding holes
in the seat.
13
(13)
Harness
adjustment
button.
fig. 2
• Itbecomesdifficulttoinserttheclaspsintothe
buckle (resistance is felt).
• Thebuckleonlyopenswhenforced.
3.3. Solution
Clean the harness buckle so that it works properly.
3.4. Cleaning the harness buckle
1. Open the buckle (press the red button).
2. Hold the metal plate (23) from below in a vertical
position.
3. Slide the metal plate (23) along the slot.
4. Remove the buckle (7).
5. Steep the buckle (7) in hot water and neutral
liquid detergent for at least one hour. Rinse
and dry it.
3.5. Removing the 5-point harness
1. Loosen the harness straps by pulling them at the
point where they cover the chest while pressing
the harness adjustment button (13) (fig.2).
2. Locate the harness strap connector (17) and
unclip the harness straps, freeing them from the
connector, then remove them by pulling them
from the front of the seat (fig. 3 and 4).
3. Free the shoulder protectors (3) by unfastening
them from the connector that joins them
(located at the back of the seat) or, in the event
they are joined without a connector, by passing
(18)
Harness
strap
connector
(20)
Shoulder
pads
connector
fig. 3
18
20
24 25

4. Turn the seat over and, from the back, free the
belt buckle (7) by passing the retention plate
(24) through the slot in the seat (fig. 6).
5. Remove the belt buckle and save it in the
storage bag.
6. Take out the harness straps retention plates (22)
located in the bottom of the seat, under the
plastic white plate by pulling the strap, take it
out (24) (fig. 5).
7. Take off the harness straps by pulling them out
of the seat.
3.6. Removing the cover
A) Headrest.
fig. 4
fig. 5
22
21 21
fig. 6 23
1. Adjust the headrest to its highest position.
2. First remove the part of the cover that includes
the safety belt guide
(2)
followed by the
remainder of the headrest cover.
B) To remove the 5-point harness, see point 3.5.
Remove the back and base covers.
3.7. Putting the cover back on
Follow the same steps in reverse order.
IMPORTANT! Never use the safety seat following
the installation instructions described in point 5
without having a correctly installed buckle. Make
sure the metallic plate (24) is properly secured.
19 17
3.8. Adjusting the harness height
Proper adjustment of the height of the harness
ensures the child will be seated correctly. The
harness should be adjusted to the height of the
child’s shoulder or slightly above; never behind
the child’s back or level with the ears (fig. 10).
1.
Loosen the harness straps by pulling them
gently while pressing the harness adjustment
button
(13) (fig.2)
.
2.
Loosen the harness straps from the back of the
seat, freeing them from the harness connector
(18) (fig. 3 y 4)
.
3.
Loosen the shoulder pad straps
(3)
from the
back of the seat, freeing them from the shoulder
pad straps connector
(20)
(fig. 3 and 4)
.
4.
Pull the harness straps from the front to free
them from the seat back.
5.
Reinsert the harness straps at the desired
height using fig.
7
as a guide.
6.
Reinsert the harness straps in the connector on
the back of the seat
(fig. 8)
.
¡IMPORTANT!
ensure the straps are not twisted at any point.
fig. 8
fig. 7
0-6 kg
6-13 kg
13-18 kg
26 27

3.9. Adjustingtheheadrestinaninstallationwitha
5-point harness. Group 0 and 1.
A correctly adjusted headrest (1) ensures optimal
protection for the child in the safety seat:
The headrest should be adjusted so that the
shoulder straps (10) are at the same height as the
child’sd shoulders (fig. 10).
IMPORTANT! The shoulder straps should not be
passed behind the child’s back at or above ear level.
The shoulder straps are adjusted as follows:
1. Loosen the shoulder straps of the safety seat as
much as possible.
2. Press the harness adjustment button while pulling
the harness straps at the point where they cross the
chest until they loosen (fig. 2).
3. Pull the headrest height adjuster
(9)
and
the headrest
(1)
at the same time. Select the
correct height for the shoulder straps
(10)
and
fix them in the correct position for the child by
releasing the adjuster (fig. 9).
3.10. Adjusting the headrest in an installation
that uses the vehicle safety belt.
Groups 2 and 3.
A correctly adjusted headrest ensures that the
diagonal part of the safety belt is ideally positioned,
offering the child the best possible protection.
The headrest should be adjusted so that a space
equivalent to two fingers remains between the
headrest and the child’s shoulders (fig. 10).
To adjust the height of the headrest:
1. Pull the headrest height adjuster (11) and the
headrest at the same time. This will unlock the
headrest (fig. 9).
2. Now you will be able to move the headrest to
the desired height. When the adjuster is released
the headrest will remain locked in the chosen
position.
3. Place the safety seat on the car seat.
4. Sit the child in the seat and check the height.
Repeat the process until the correct height is
achieved.
4. TASKS PRIOR TO INSTALLATION
Please, read first the corresponding installation
method needed, following the 5, or 7 sections
description.
Preparing the Isoclick Fix system
1. If your vehicle has not been fitted with the
ISOFIX latch guides as standard, fit the two
latch guides
(25)
that came with the safety seat
(fig. 11).
* With the opening facing upwards at the two
ISOFIX securing points (24) of your vehicle (fig.11).
2. By turning the Isoclick Fix arms, extract both
arms
(18)
(fig. 12).
fig. 11
(26)
Insertion guide.
(25)
ISOFIX securing
point. 25
26
* The insertion guides facilitate the installation of the
safety seat with the aid of the ISOFIX securing points
and prevents damage to the upholstery. When not in
use they should be removed and stored in a safe place.
In vehicles with a reclining back the insertion guides
should be removed before the seat is reclined. Problems
that may arise are generally the result of accumulation
of dirt or foreign bodies in the insertion guides and the
clasps. To solve this type of problem simply clean the
part in question.
fig.10
(9)
Headrest height
adjuster. fig. 9
(19)
Isoclick Fix
arms.
AGroup 1/2/3
installation.
BGroup 0
installation. A B
19
fig. 12
28 29

5. CAR SEAT INSTALLATION. GROUP 0+
GROUP 0 only. From a 0 to 12 months
approx. (0 - 13 kg).
1. Make sure the 5-point harness of the safety seat has
been correctly installed (see section 3).
2. Follow the steps described in section 3.1.
3. Follow the steps described in points 3.8 and 3.9
4. Recline the seat fully. Pull the lever
(15)
forward and
adjust the angle of recline to position 4 without
releasing the lever. Release the lever when the seat is
in the desired position (fig. 13)
5. Make sure the Isoclick Fix arms are displayed to install
the car seat reardward facing (group 0) (fig. 12).
6. Place the seat in the back seat of the vehicle and
contrary to the direction of travel.
7. Hold the safety seat with both hands and insert the
two Isoclick Fix arms (19) firmly into the insertion
guides (26) until they fasten with a click on both
sides. The red button will partially change to green
on both sides (fig. 14).
8. Shake the seat to check that it is correctly anchored
to the vehicle’s ISOFIX points.
9. Take out the reducer cushion (4).
Pass the abdominal
strap of the seat belt through the lower seat guides
(11)
and underneath the seat. Buckle the vehicle seat
belt until you hear a click
(fig. 16).
fig. 14
fig. 13
1 2 3 4
CLICK OK
fig. 14
fig. 15
10.Pass the abdominal strap of the seat through
the upper guides (16) as shown (fig. 17).
11. T
ake up the remaining slack of the diagonal
section of the 3-point seat belt (fig. 17). and make
sure it is as tight fitting as possible. Ensure the
straps are not twisted or knotted at any point
.
12.
Place the reducer cushion in his original place.
13. Follow the steps in section 6, securing the child
with the 5-point harness.
Uninstalling the Isoclick Fix system
1. To free the Isoclick Fix anchoring, press the
Isoclick Fix system unlock buttons (21), in
order to free the seat from the vehicle ISOFIX
anchoring system (fig. 15)
6. PLACING THE CHILD IN THE SEAT.
GROUP 0
TIP: The more snugly the harness fits over the
child’s body, the better the child will be protected.
therefore avoid putting thick clothes on your child
under the belt.
1. Release the harness buckle (7) (fig. 18).
2. Press the harness adjuster button
(13)
while
pulling the part of the harness straps that cross
the chest in order to loosen them fig. 2). Do not
pull the shoulder protectors.
3. Place the child in the safety seat.
(11)
Abdominal
belt guides
(group
0/1/2/3).
(16)
Diagonal
belt guide
(group 0).
4. Make sure the child’s back rests firmly against
the back of the safety seat.
5. Bring the two clasps together (5) and join them
before inserting them into the harness buckle
(7). You should hear a click (fig. 19).
CLICK 1111
fig. 16
16
fig. 17
30 31

6. Pull the harness adjustment strap (14) in order to
tighten and adjust it correctly to the child’s body
(fig. 20).
IMPORTANT! The part of the belt the crosses the
abdomen should be placed as low as possible on
the child’s hip.
7. Pull down on the shoulder protectors (3) to
ensure they are properly in place.
For the safety of the child the following checks
should be made before every trip:
• The safety seat is fitted on both sides by the
Isoclick Fix arms (19) at the ISOFIX support points
(24) and both safety buttons are entirely green.
•Thesafetyseatisfirmlyinstalledinthevehicle.
• Thestrapsarenottwisted.
•Thesafetyseatstrapsarefirmlyfastenedaround
the child’s body, without squashing it.
•Theshoulderstraps (10) are correctly adjusted
and not twisted.
•Theshoulder protectors(3) are on a level with
the child’s shoulders.
•Theclasps(5) are correctly inserted into the belt
buckle (6).
ATTENTION! To remove the safety seat follow the
steps described in section 5 “Uninstall Isoclick Fix
system”.
7. CAR SEAT INSTALLATION. GROUP 1
GROUP 1 only. From 0 to 12
months approx. (0 - 13 kg).
1. Ensure that the seat is not in a reclined position.
Pull the lever
(15)
forward and adjust the angle
of recline to position 1 without releasing the
lever. Release the lever when the seat is in the
desired position (fig. 21).
2. Make sure the Isoclick Fix arms are displayed to
install the car seat forward facing (group 1/2/3)
(fig. 12).
3. Place the seat in the back seat of the vehicle in
the direction of travel.
4. Hold the safety seat with both hands and insert
the two Isoclick Fix arms (19) firmly into the
insertion guides (26) until they fasten with a
click on both sides. The red button will partially
change to green on both sides (fig. 22).
5. Shake the seat to check that it is correctly
anchored to the vehicle’s ISOFIX points.
6. Take out the reducer cushion (4).
Pass the
abdominal strap of the seat belt through the
lower seat guides
(11)
and underneath the seat.
Buckle the vehicle seat belt until you hear a
click
(fig. 23).
7. Pass the diagonal section of the vehicle´s belt
through the rear side of the backrest cushion
and the seat backrest.
2 3 4
1
CLICK
OK
fig. 21
fig. 22
(14)
Harness
adjust
strap.
14
CLICK
fig. 18 fig. 19
fig. 20
32 33

both locking arms (19) firmly into the insertion
guides (24) until they fasten with a click on both
sides.
The safety button should be green on both sides.
IMPORTANT! The locking arms are only correctly
fixed if both safety buttons are partially green.
7. Shake the safety seat to make sure it is properly
installed and check the safety buttons again to
make sure they are partially green.
10.
PLACING THE CHILD IN THE SEAT.
GROUP 2 AND 3
GROUP 2/3 only. From 4 to 12 years
aprox. (15- 36 kg).
1. Place the child in the seat. Pull the vehicle safety
belt and pass it in front of the child until it
reaches the vehicle seat belt buckle.
IMPORTANT!
Make sure the belt is not twisted.
2. Insert the clasp into the vehicle seat buckle. You
should hear a click.
3. Place the diagonal part of the belt (27) and the
part that crosses the lap (28) on the side of the
fig. 23
1111
CLICK
(11)
Abdominal
belt guides
(group
0/1/2/3).
8. And continuing, pass the diagonal section of
the vehicle´s belt between the backrest and the
headrest sides fig. 23).
10.
Make sure it is as tight fitting as possible. Ensure
the straps are not twisted or knotted at any point
.
For the safety of the child the following checks
should be made before every trip:
•The safety seat is fitted on both sides by the
Isoclick Fix arms (19) at the ISOFIX support
points (24) and both safety buttons are entirely
green.
•Thesafetyseatisfirmlyinstalledinthevehicle.
• Thestrapsarenottwisted.
•Thesafetyseatstrapsarefirmlyfastenedaround
the child’s body, without squashing it.
•Theshoulderstraps (10) are correctly adjusted
and not twisted.
•Theshoulder protectors(3) are on a level with
the child’s shoulders.
•Theclasps(5) are correctly inserted into the belt
buckle (7).
8. PLACING THE CHILD IN THE SEAT.
GROUP 1
To seat the child correctly follow the steps
described in section 6.
9.INSTALLING THE CHILD SEAT.
GROUP 2 AND 3
GROUP 2/3 only. From 4 to 12 years
aprox. (15- 36 kg).
1. Make sure the 5-point harness and harness buckle
have been correctly removed (see points 3.5).
2. Follow the steps described in section 3.10.
3. Follow the steps described in point 4.
4. Make sure the Isoclick Fix arms are displayed to
install the car seat (fig. 12).
5. Place the safety seat on the vehicle seat in the
direction of travel.
6. Hold the safety seat with both hands and insert
ATTENTION! To remove the safety seat follow the
steps described in section 5 “Uninstall Isoclick Fix
system”.
(2)
Diagonal belt
guide (group
2/3).
(27)
Diagonal belt
section.
(28)
Abdominal belt
section.
(29)
Vehicle’s belt
buckle.
(11)
Abdominal belt
guide (group
0/1/2/3).
fig. 24
29
29
27
28
B
11
2
A
34 35

vehicle safety seat buckle, through the abdominal
belt guide (11) of the safety seat (fig. 24 B).
4. Pass the diagonal part of the belt (27) through
the diagonal belt guide (group 2/3) (2) on the
headrest until it is fully extended and not twisted
(fig. 24 A).
5. Make sure the diagonal part of the belt passes
over the child’s collar bone and not the neck.
IMPORTANT! The part of the belt that covers the
lap (28) should rest as low as possible over the
child’s hips, on both sides.
TIP: If the seat back covers the guide you can raise
the headrest, which will allow you to insert the
diagonal section of the belt easily. You should then
reset the headrest to the correct height, as shown
in point 3.11.
TIP: You can readjust the height of the vehicle
headrest.
IMPORTANT! The diagonal section of the belt
(21)
should cross over towards the back. The path of
the belt can be adjusted using the adjustable belt
deflector on the door frame.
IMPORTANT! The diagonal part of the belt should
never point towards the vehicle belt deflector. If this
is the case the safety seat should only be used in
the back seat.
To ensure the child’s safety, the following items
should be checked before every trip:
• The safety seat is secured on both sides by
the Isoclick Fix locking arms (19) at the ISOFIX
anchoring points and both safety buttons (21)
are fully green.
• Thesafetyseatiswellanchored.
• The part of the belt that crosses the abdomen
passes through the light-red-coloured guides
(11) on both sides of the seat cushion.
• Thediagonalsectionofthebelt(27) on the side
of the vehicle belt buckle also passes through
the abdominal belt guide group 2/3 on the seat
cushion.
• Thediagonal sectionof thebeltpassesthrough
the red clip on the headrest.
• Thediagonalsectionofthebeltpassesdiagonally
towards the back.
• Thestrapsaretautandnottwisted.
11. CLEANING AND MAINTENANCE
1. Straps and plastic parts should be cleaned
using a neutral detergent and warm water.
2. Make sure soap does not enter the buckle or
other metal parts.
3. Do not use chemical products or bleach on any
part of the seat.
· The cover can be
removed and washed at
30°C. It should only be
air-dried.
· Machine wash, cold.
· Do not use bleach.
· Dry clean, any solvent
except trichlorethylene.
· Do not use a dryer.
· Do not iron.
30 °C
WASHING INSTRUCTIONS:
If you have any doubts about using or installing this
product, or you need a replacement part, please get
in touch with our customer service team.
12. GUARANTEE
1. The guarantee will not apply to defects or flaws
caused by improper use or non-compliance
with the regulations governing installation or
maintenance described in the user manual that
accompanies the product.
2. The guarantee covers the free repair of all
factory defects and flaws.
3. In the event the repair(s) carried out are
not satisfactory or the product is not in the
optimal conditions for fulfilling the use or uses
for which it was designed, the title holder of
the guarantee will be entitled to substitution
of the article purchased by one of similar
characteristics or a full refund of the cost of the
article within a period of 2 years.
4. The guarantee will be automatically revoked
if the article has been repaired, or efforts
have been made to repair it, by persons not
authorised by the manufacturer.
36 37

Leia cuidadosamente antes de instalar o
dispositivo de retenção para crianças.
1. Só é apropriado se os veículos homologados
possuírem cintos de segurança com três
pontos de fixação, homologados pelo
regulamento n.º 16 da CEPE ou norma
equivalente.
2.
Não utilize esta cadeira de segurança para
crianças em bancos de passageiros equipados
com airbag.
3. Esta cadeira infantil deve ser utilizada com o
sistema de arnês para crianças entre 9 e 18 kg.
4. Esta cadeira infantil pode ser utilizada sem o
sistema de arnês para crianças de 15 a 36 Kg.
5.
Leia cuidadosamente as instruções porque uma
instalação incorreta poderá provocar sérios
danos. Nesse caso, o fabricante não assumirá
qualquer tipo de responsabilidade.
6. Esta cadeira está em conformidade com a
Norma de homologação ECE 44/04 e pode
ser instalada na maioria dos veículos equipados
com cintos de segurança de 3 pontos de
fixação, de acordo com a Norma ECE 16. No
entanto, deve experimentar a cadeira no seu
veículo com a criança antes da compra para
ter a certeza de que o modelo cumpre as suas
necessidades. Não é permitido utilizar a cadeira
fixando-a meramente com o cinto abdominal
de dois pontos.
7.
Consulte no folheto em anexo de Veículos
Compatíveis se a marca e o modelo do seu
veículo estão incluídos na lista, para garantir a
instalação apropriada da cadeira no veículo.
8. Nunca utilize a cadeira de segurança sem a
cobertura e sem os protetores do arnês.
9. A colocação na cadeira da criança com roupas
de abrigo pode reduzir a eficácia do sistema
de retenção.
10. Proteja a cadeira de segurança para crianças
do contato direto com a luz solar, porque a
cadeira pode aquecer e queimar a criança.
11. A cadeira ou acessórios do arnês que estejam
danificados ou que tenham sido utilizados de
forma incorreta devem ser substituídos.
12. Não deixe objetos pesados dentro do carro,
porque podem magoar a criança em caso de
acidente.
13. Verifique se a fivela está bem fechada, porque,
em caso de emergência, a criança pode ser
libertada rapidamente.
14. Os itens rígidos e as peças de plástico da
cadeira de segurança devem ser colocados e
instalados de modo a não ficarem presos num
banco amovível ou numa porta do automóvel
durante a utilização diária do veículo.
15. Não tente desmontar, modificar ou acrescentar
qualquer peça à cadeira de criança ou ao
arnês porque isso afetaria seriamente as
(1) Apoio para
a cabeça
(2) Guia do cinto
diagonal (grupo
2/3)
(4) Almofada
(3) Protetores de
ombros
(10) Correias dos
ombros
(9) Regulador
de altura do
apoio para a
cabeça
(7) Fivela do arnês
(5) Broches de la
hebilla
(6) Botão da fivela
do arnês
(8) Almofada de
entre pernas
(13) Botão de ajuste
do arnês
(14) Cinto de ajuste
do arnês
(15) Alavanca de
reclinação
(12) Base
(11) Guia do cinto
abdominal
(grupo 0/1/2/3)
1. VISTA GERAL
suas funções básicas e a segurança que
proporciona a cadeira.
16. A cadeira de segurança deve permanecer
instalada no veículo através do cinto de
segurança, embora a criança não esteja
sentada na cadeira. A criança nunca deve estar
sem vigilância enquanto estiver sentada na
cadeira de segurança, nem fora do veículo.
17. Mantenha a cadeira de segurança longe de
produtos corrosivos.
18. Não utilize qualquer ponto de contacto de
fixação que não se encontrem descritos
nas instruções e indicados na cadeira de
segurança.
19. O dispositivo da cadeira deve ser substituído
após sofrer as tensões violentas de um
acidente.
20.O fabricante garante a qualidade dos seus
produtos, mas não a qualidade dos produtos
em segunda mão ou de outras marcas.
21. As ilustrações das instruvções são apenas
informativas. O sistema de retenção infantil pode
apresentar pequenas diferenças relativamente
às fotografias ou imagens do manual de
instruções. Estas variações não afetam a sua
homologação pela Regulamentação ECE
44/04.
4.
(16) Guia do cinto
diagonal
(grupo 0)
(17) Ranuras de
regulaçao
de altura do
arnês
(18) Conector
das correias
de ombro
(20) Conetor dos
protetores de
ombros
(19) Braços sist.
Isoclick Fix
(21) Botão de
desbloqueio
sist. Isoclick Fix
(11) Guía do cinto
abdominal
(grupo 0/1/2/3)
38 39
Table of contents
Languages:
Other More Car Seat manuals