Morfit Back Support WITH E-PUMP User manual
USER MANUAL
Mor fit
®Back Support
WITH E-PUMP

IMPORTANT INFORMATION
The use of any lumbar support device involves a potential risk to the
user if the device is not used properly. We therefore strongly advise
you to take the following steps when using Mort back support:
Ensure that you have read and understood the advice and
instructions in this user manual before using Mort.
If, having read this manual, you have any further queries concerning
the correct use of Mort you should view our website or contact our
team for advice before using Mort.
If you have any doubt regarding your individual needs relating to
Mort or any pre-existing condition from which you are suffering, you
should contact our team for advice or consult your own doctor or a
suitably qualied medical practitioner prior to using or continuing to
use Mort.
HEALTH AND SAFETY
Never set up Mort when driving.
If using Mort, or following any of the advice in this user manual makes your pain
worse, stop immediately and contact us or consult your healthcare practitioner.
Ensure that the horizontal strap is well clear of any side airbag ports on the seat. If
you are not 100% positive that the strap is well away from the airbag ports, do not
use the horizontal strap.
STORY
Back pain is different for everyone so any treatment should be different too. Mort
is effective because it is easy to set up and it takes the shape of YOUR back. Not
someone else’s.
For an enjoyable drive every time, Mort remembers your unique posture and can be
reshaped as many times as you like.

YOUR MORFIT®
E-PUMP
TUBE
VALVE
USB TYPE-C CABLE
VERTICAL BUNGEE STRAP
HORIZONTAL STRAP
MORFIT BACK SUPPORT
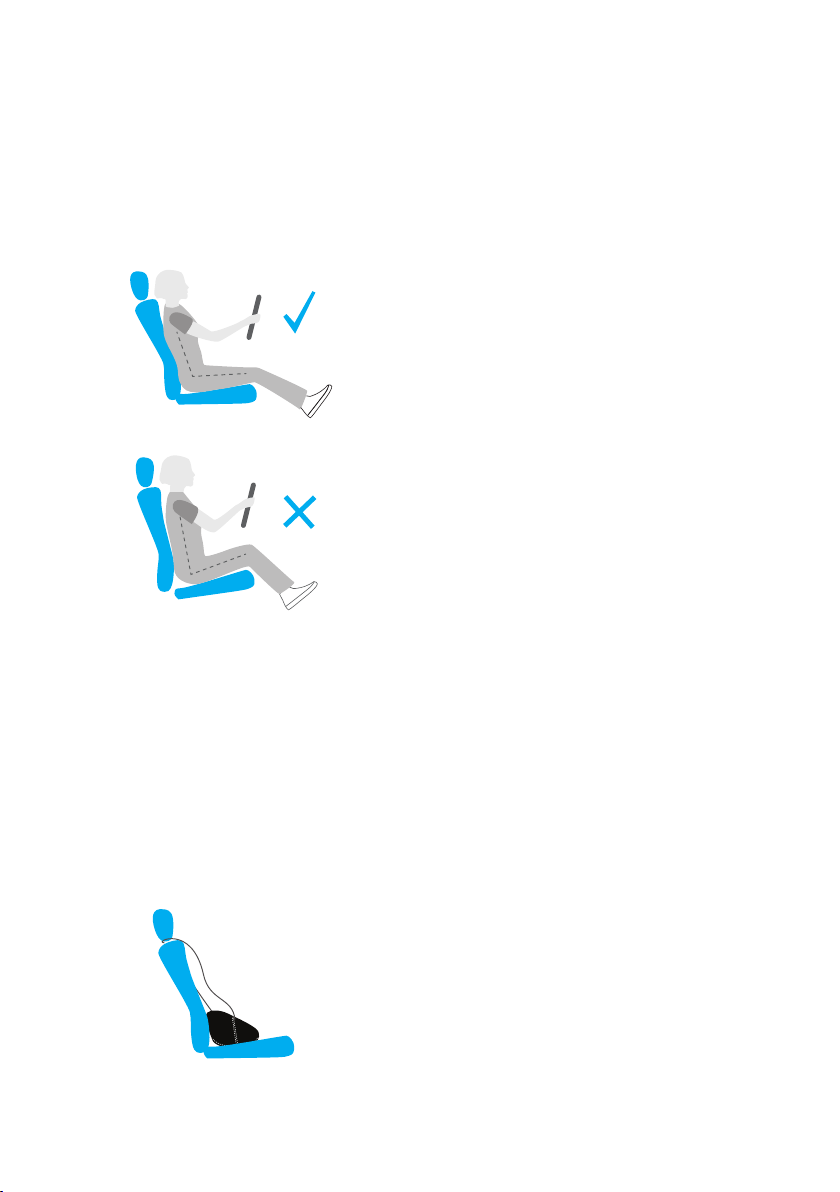
SET UP AND USER INSTRUCTIONS
1. Recline your seat-back a notch or two
from vertical. This lets the seat take some
of your weight, rather than placing it all
through your spine.
2. Adjust the seat forwards or backwards
so that there is a slight bend in your knee
when the pedals are fully depressed.
3. Important: if you have an existing in-built
lumbar support, please deactivate it,
making the lumbar support as small as
possible.
Hang bungee from back of head rest.
Make it longer than you need, as you will
adjust it after shaping Mort.
SEAT POSITION
MORFIT POSITION

Place Mort behind your back with the
lower edge of Mort at your belt line.
Sit in the seat with your pelvis as far back
as possible.
Find the tube at the back of Mort.
Connect the tube to the e-pump.
A firm push and twist of 180° is needed.
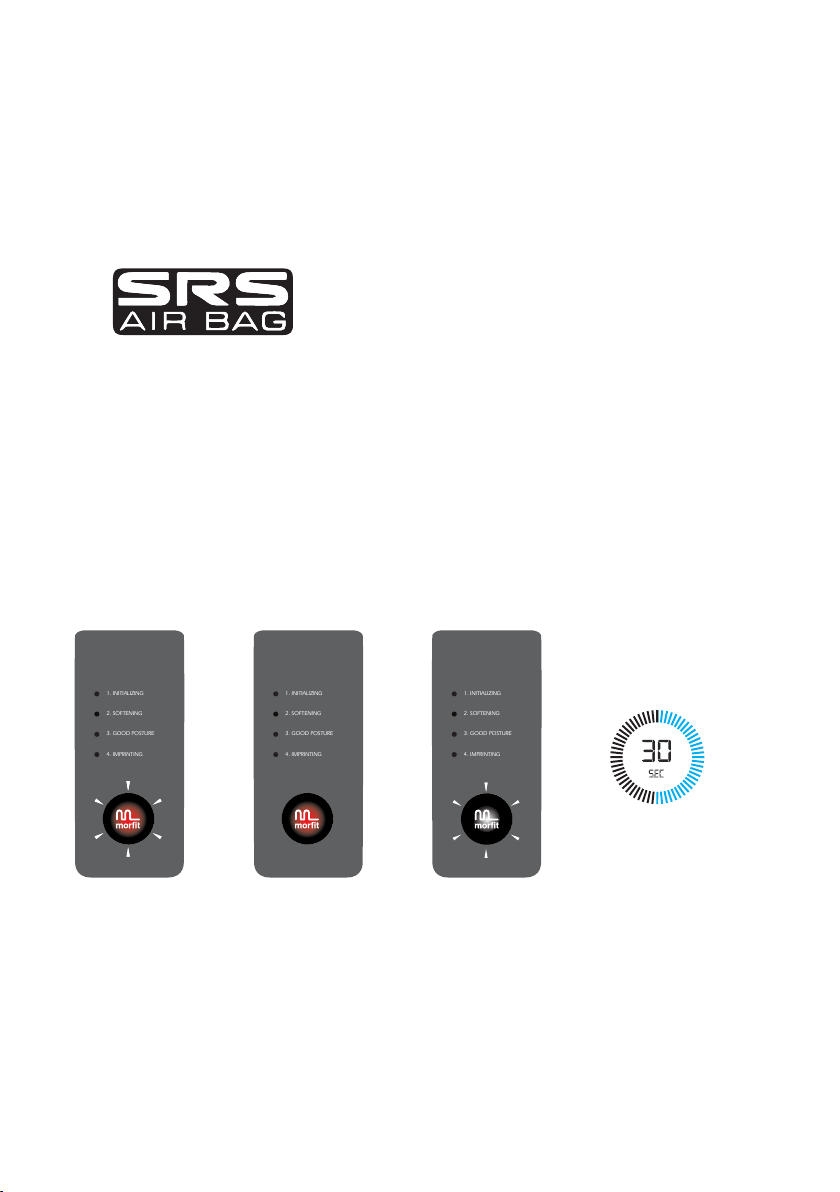
USING THE E-PUMP TO SHAPE MORFIT
Here, Mort is too low.

2. SOFTENING
Mort is SOFTENING so that it can take
your shape.
Lean slightly forwards away from Mort.
Using both hands, shake Mort up and
down for 5 seconds to distribute the
lling.
1. INITIALIZING
Press the ON button.
The ON button will light up and the
INITIALIZING light will pulse.
1. INITIALIZING
2. SOFTENING
3. GOOD POSTURE
4. IMPRINTING
ON

3. GOOD POSTURE
Sit with GOOD POSTURE.
Lean back and wriggle into Mort.
Mort is now shaping to your back.
4. IMPRINTING
Hold still with good posture.
Mort is now IMPRINTING your shape.
WHEN ALL LIGHTS TURN OFF
Mort is now shaped to your back.
Detach the tube with a twist.
Put the e-pump away until next time.
Note: first-time users generally run out
of time before lights off. No problem -
press the ON button and have another
go. You will soon become an expert.

Adjust the vertical bungee, so that Mort
hangs at the correct height.
C. AFTER SHAPING MORFIT
Attach horizontal straps* around the back
of the seat to help keep Mort in position.
(Don’t attempt this when seated - do it
from behind.)
See SAFETY WARNING*.
Store the tube behind you at the base of
your seat.
*SAFETY WARNING!
The horizontal straps are optional and do
not improve the effectiveness of Mort.
They prevent sideways movement of
Mort when getting in and out of the
vehicle.
DO NOT use Mort’s horizontal straps if
they cover any airbag ports on the side of
your seat.
To locate your airbag ports, look for an
SRS label.
D. FURTHER PUMP OPERATION
LOW BATTERY
When ON is
pressed it will
ash red and
white. Time to
recharge.
EMPTY BATTERY
When ON is
pressed it will
glow red for
3 seconds.
Recharge now.
RECHARGING
BATTERY
Plug in USB Type
C cable. The ON
button will pulsate
white. When fully
charged, the white
light is continuous.
PAUSE E-PUMP
To pause during
operation press
ON. Press ON
again to resume.
After 30 seconds
on pause, the
e-pump will turn
off.
1. INITIALIZING
2. SOFTENING
3. GOOD POSTURE
4. IMPRINTING
1. INITIALIZING
2. SOFTENING
3. GOOD POSTURE
4. IMPRINTING
1. INITIALIZING
2. SOFTENING
3. GOOD POSTURE
4. IMPRINTING

GETTING THE MOST OUT OF MORFIT
FIND THE BEST FIT
For your rst 10 trips, it’s a good idea to practice resetting Mort every time you go
on a drive. This will help you nd just the right t.
CHECK THE POSITION ON EVERY TRIP
We highly recommend that you take a second to place Mort into its exact sweet
spot, as it can move a bit when you get in and out of the vehicle.
WHEN TO RESET MORFIT
You will need to reset Mort every few weeks. If you can feel it softening, it needs
resetting.
TRANSFERRING MORFIT BETWEEN VEHICLES
Mort shapes and holds to t you and your seat. Every seat is a different shape so
you will need to reset Mort when you move it to another vehicle.
USING MORFIT IN CHAIRS
While Mort is designed to give you support in vehicles, it can be used in any type
of seat or chair. Remember to reset Mort when you move it from one seat to
another.
IF MORFIT FEELS TOO THICK
If you have an in-built lumbar support, make sure that this is as small as possible.
When Mort is taking the shape of your back (during “3. GOOD POSTURE”) wriggle
in and push rmly with your back where you want Mort to be thinner.
IF MORFIT FEELS LUMPY OR UNEVEN
Sometimes Mort can feel asymmetric or lumpy and will need a really good shake
to work properly again. If this happens, follow the steps for the ‘SOFTENING’ phase
(two lights), but this time give it a really good shake for a full 10 seconds.
If all else fails, remove Mort from the seat. Holding Mort from the top of the cover,
press ON. During the SOFTENING phase (two lights) give it a good shake. Let the
cycle nish, before putting it behind your back and following the normal set-up steps
again.
Table of contents


