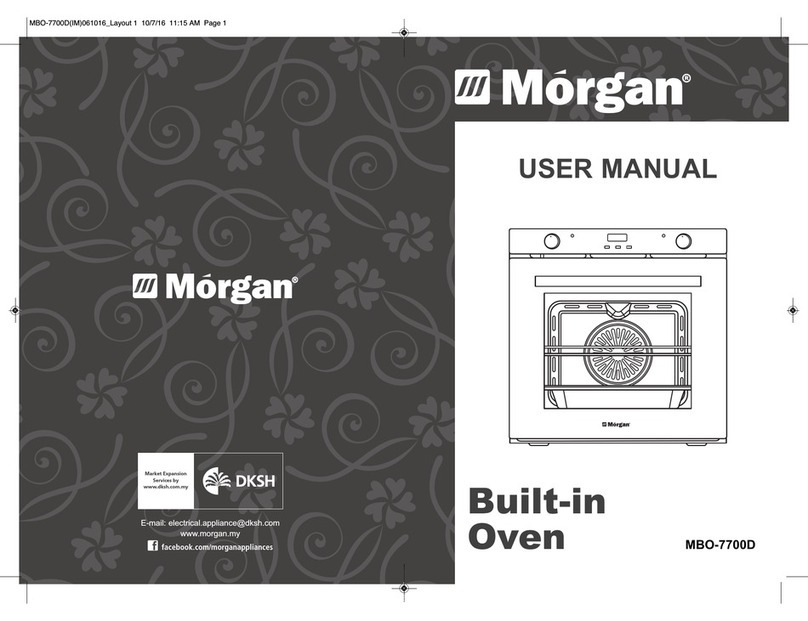
Morgan MBO-7680D User manual

E-mail: electrical.appliance@dksh.com
www.morgan.my
Market Expansion
Services by
www.dksh.com.my
facebook.com/morganappliances
USER MANUAL
Bu lt- n
Oven MB -7680D

3
SAFETY PRECAUTIONS
INSTALLATION
2
IMPORTANT SAFEGUARDS
• Please read this instruction carefully. It is advisable to keep this instruction manual in a safe place
for future reference.
• Remove all packing materials from this product before use. Do not allow children to play with
parts of the packaging.
• This appliance is designed for domestic household use and can be built into a standard kitchen
cabinet or housing unit.
• This oven must be installed in accordance with the installation instructions and all measurements
must be followed.
• Before connecting to the power supply, ensure that the unit is earthed and its voltage corresponds
to the voltage indicated on the power supply rating label.
• NOTE: All installation work must be carried out by a competent person or qualified electrician.
• This product must be earthed – if no earth feed wire is available, consult an electrician.
• NOTE: A switched fused connection unit having a contact separation of at least 3mm in all poles
should be connected in fixed wiring.
• The appliance and its accessible parts become hot during use. Young children should be kept well
away when in use.
• Care should be taken to avoid touching heating elements. The appliance surfaces will become hot
during use and retain heat after operation.
• Children less than 8 years of age shall be kept away unless continuously supervised.
• This appliance can be used by children aged from 8 years and above and persons with reduced
physical, sensory or mental capabilities or lack of experience and knowledge or they have been
given supervision or instruction concerning use of the appliance in a safe way and understand the
hazards involved. Children shall not play with the appliance. Cleaning and user maintenance shall
not be made by children without supervision.
• Do not install the appliance behind a decorative door to prevent overheating.
• Exhaust must not be discharged into a flue that is used for exhausting fumes from appliances
burning gas or other fuels.
• Never move racks or pans when they are hot. Wait until they cool.
• Never use accessories not recommended by the manufacturer as they pose a safety risk to the
user and may damage the appliance. nly use original parts and accessories.
• Do not place those baked hot oil or fat unattended on unattended areas, as it will be a fire risk.
• Do not place pans or baking trays directly on the base of the oven cavity, even if aluminium foil is
placed below them.
• Do not allow power cord or power plug to come into contact with heated areas of the appliance.
• Do not install the appliance next to curtains or soft furnishings.
Thank you for purchasing a quality M RGAN appliance. We trust that you will have
a pleasant experience with your new product. To guarantee safety and best
efficiency, please read this manual carefully and keep a copy for future reference.
SAFETY PRECAUTIONS
• Do not lift or move cooking appliances by using the oven door or handle as this may damage the
appliance or result in injuries.
• To avoid damaging the power cord, do not squeeze, bend or chafe it on sharp edges. Keep it
away from hot surfaces and open flames as well.
• If the power cord is damaged, it must be replaced by the manufacturer, its service agent or
similarly qualified persons in order to avoid a hazard.
• In the event of malfunction or appliance damage, disconnect the appliance from the power supply
and contact your authorized service agent.
• WARNING: Do not attempt to repair the appliance yourself. All repairs must be performed by
qualified personnel only.
• Do not open the appliance casing under any circumstances. Do not insert any foreign objects into
the inside of the casing.
• Keep the appliance away from hot surfaces and open flames. Always operate the appliance on a
level, stable, clean and dry surface. Protect the appliance against heat, dust, direct sunlight,
moisture, dripping and water splashes.
• Do not place objects with open flames, e.g. candles, on top of or beside the appliance
565
21
21
35
35
min585
565
30
30
560
600
560
500
600
600
555
20
595
540
570
595
555
20
595
540
570
595
BEFORE INSTALLATION
• The appliance should be installed as built-in into a cabinet. It should be keep safety distance with
appliance and the kitchen walls.
Notes for installation (values in mm):
• Surfaces, synthetic laminates and adhesives used must be
heat resistant(100ºC minimum),
and neighboring unit fronts up to 70ºC.
• Kitchen cabinets must be set level
and fixed. A gap of 5mm is required
between the appliance and
surrounding unit fronts.
• If there is a drawer beneath the oven,
a shelf must be installed between
oven and drawer.
Installation
Met od 1
Installation
Met od 2

4
INSTALLATION
5
GENERAL NOTES
ACCESSORIES
▲ MATERIAL DAMAGE!
The door and/or handle must not be used for lifting or moving the appliance.
▲ For installation the appliance must be connected in accordance with all local gas and/or electrical
regulations.
▲ Carry the appliance with at least two persons.
▲ Use the slots or wire handles located at both sides to move the appliance.
POWER SUPPLY CONNECTION
• This appliance must be earthed.
• The manufacturer shall not be held responsible for any damage caused by using the appliance
without an earthed socket. Risk of electric shock, short circuit or fire by unprofessional installation!
The appliance may be connected to the power supply only by an authorized qualified person and
the appliance is only guaranteed after correct installation.
• Risk of electric shock, short circuit or fire by damage of the power cable! The power cable must
not be clamped, bent or trapped or come into contact with hot parts of the appliance. If the power
cable is damaged, it must be replaced by a qualified electrician.
• The power supply must correspond to be data specified on the rating plate of the appliance. The
appliance mains cable must correspond to the specifications and the power consumption.
WARNING! Risk of electric shock!
Before starting any work on the electrical installation, please disconnect the
appliance from the power supply.
INSTALLATION
1. Slide the oven through the cabinet aperture, align and secure.
2. Install the oven with the 2 screws and washers as indicated in the figure.
FINAL CHECK
1. Connect the appliance to the mains supply and switch on the mains supply.
2. Check function.
1
2
3
4
5
• This appliance is exclusively for domestic use only.
• Use the oven to cook food only.
• Before cooking, remove all oven accessories inside the appliance.
• Pre-heat the oven to the cooking temperature before using it.
• Place the cooking trays in the center of oven and leave space in between when using more than
one,so that the air can circulate.
• Do not put oven trays on the base of the oven or cover it with aluminium foil. This will cause
thermal accumulation. The cooking and roasting times will not coincide and the enamel may be
damaged.
• Try to open the oven door as little as possible to see the food (the oven light remains on during
cooking).
• Exercise caution when opening the door to avoid contact with hot parts and hot escaping steam.
• The accessories supplied with your appliance are suitable for making many meals. Ensure that
you always insert the accessories into the cooking compartment the right way round.
• There is also a selection of optional accessories, with which you can improve on some of your
favorite dishes, or simply to make working with your oven more convenient.
INSERTING ACCESSORIES
• You can insert the accessories into the cooking compartment at 5 different levels.
• Always insert them as far as possible so they do not touch the door panel.
• The accessories can be detached approximately halfway until they lock in place. This allows
dishes to be removed easily.
• NTE: The accessories may deform when they become hot. They will regain their original shape
once they cool down again and will not affect performance.
1
2
3
4
5
1
2
3
4
5

7
6
ACCESSORIES PARTS IDENTIFICATION
SPECIFICATIONS
OVEN PAN
• Ideal for baking moist cakes, pastries, frozen meals and
large roasts.
• Can also be used to catch dripping fats when grilling
directly on the wire rack.
OVEN DEEP PAN (Optional)
• Ideal for pastries, large roasts, juicy dishes, and for
collecting dripping fats while grilling.
WIRE RACK
• Ideal for roasting and for placing the food to be baked,
roasted or cooked in casserole dishes to the
desired rack.
SIDE SHELF
• 12345 select from 5 different height positions. For removable side shelf,
adjust from 4 different height positions for baking.
ROTISSERIE
• Ideal for grilling whole chickens and large pieces of food that need
to be continuously turned over.
• Insert food on the rotating shaft while
attaching food with 2 forks of the rotisserie.
• Then insert one end of the rotisserie without handle sleeve into the sleeve of the rotating motor at
the back of the oven.
• Place the other end of the rotisserie into the groove of the rotating bracket.
• Finally, adjust the cooking setting of the oven, start the oven cooking.
CLEANING THE ACCESSORIES
• Before you use the accessories for the first time, clean them thoroughly with hot soapy water and
a soft dish cloth.
1
2
3
4
5
1
2
3
4
10 5
6
7
8
9
Model MB -7680D
Rated Voltage / Frequency 220-240V~ 50Hz
Rated Wattage 2300W
Capacity 70L
1. Control Panel
2. Wire rack
3. Tray
4. Door
5. Handle
6. Fan Motor (behind steel plate)
7. Lamp
8. Grill heating element
9. Side shelf
10. Rotisserie set

9
CONTROL PANEL
8
CONTROL PANEL
Note: Depending on the specific model number, individual details may differ.
FUNCTI N SELECT R
Use the function selector to set desired heating.
• This appliance features 8 grill functions.
( ) DEFR ST
• The fan runs without heat to reduce the defrosting time of frozen foods. The time required to
defrost the food will depend on the room temperature, the quantity and type of food.
( ) C NVENTI NAL VEN (top and lower element)
• This cooking method provides traditional cooking, with heat from the top and lower elements. This
function is suitable for roasting and baking on one shelf only.
( ) FAN VEN
• This cooking method uses the circular element while heat is distributed by the fan. This results in
a faster and more economical cooking process. The fan oven allows food to be cooked
simultaneously on different shelves, preventing the transmission of smells and tastes from one
dish onto another.
( ) HALF GRILL
• This cooking method utilises the inner part only of the top element, which directs heat downwards
onto the food. This function is suitable for grilling small portions of bacon, toast and meat etc.
( ) FULL GRILL / R TISSERIE
• This cooking method utilises the inner and outer parts of the top element, which directs heat
downwards onto the food. This function is suitable for grilling medium or large portions of
sausages, bacon, steaks, fish or grill with rotisserie set etc.
( ) FAN AND GRILL
• This cooking method utilises the top element in conjunction with the fan, which helps to provide a
quick circulation of heat. This function is suitable where quick browning is required and “sealing”
the juices in, such as steaks, hamburgers, some vegetables etc.
ºC
Power Lamp Heating Lamp
Timer Temperature SelectorFunction Selector
( ) FAN AND B TT M ELEMENT
• This cooking method utilises the bottom element in conjunction with the fan, which helps to
circulate the heat. This mode is ideal for foods requiring bottom and quick heating,such as
pizza,etc.
( ) ENERGY SAVING GRILLING M DE
• This cooking method works with the top outer ring and the bottom heating element, which is
suitable for slow heating food. The temperature of the oven heating process rises slowly, so that
the heat penetrates into the food sufficiently, reducing the excess heat consumption.
DIGITAL TIMER C NTR L
1. CONTROL PANEL
1.1 Function icon instruction
2. TIMER WORKING STATUS
Switching the timer status: Standby→Select function→Working status.
Stand-by status:
• After connected to the power supply, the display screen displays the system time, the decimal
point symbol flashes. This is the status before entering cooking function.
• If standby mode exceeds 10 seconds without any operation, the display brightness will dim.
• Press any key to recover to the original brightness.
Select Function status:
• Long press program button under standby status for display screen to show system time.
• This is the status when oven in use symbol and decimal point symbol are illuminated.
A
U
T
O
A
U
T
O
1
4
2
5
3
Minus button
Plus button / audible signal selecting key
Program button
Icons Function
1.2 Display screen icon instruction
“AUT ” function symbol
ven in use symbol
Decimal point symbol
Clock symbol
Display the time, can display system
time, clock and cooking time
Icons Function
1
2
3
4
5

11
10
CONTROL PANEL
Working status:
• After completing any one of the system time, clock, cooking time or cooking end time, the display
screen will show and illuminate system time.
Status switching diagram refer to below:
3. TIMER FUNCTION MODE SWITCHING
• Long press program button ( ) for 3s enter to system time setting status.
• If no operation is detected after 5s, system time, oven in use symbol ( ) and decimal point
symbol ( ) will illuminate. Press the program button ( ) for circularly switch to the oven
timer function.
• The operation flow and corresponding functional sequence are as follows:
4. OPERATION INSTRUCTIONS
4.1 Power on
• For the first time, the buzzer will sound once to denote that the timer is entering into standby
mode. The clock shows the time of the system and starts the timing. Power-on displays as “0·00”,
the display screen displays the system time, the decimal point symbol ( ) is flashing,1 second
1 time (see Pic 1 below). Push ( ) to select from 3 notification tones. Default is the second ring
tone. Press ( ) again to adjust notification tone.
CONTROL PANEL
Standby Working
Function
to be
selected
Long press
program button
Long press
program button
Program button,
plus button,
minus buttton
Cooking finished or long press
program button
Status switc ing diagram
M
System
time
display
System
time
setting
Alarm
function
setting
Semi
automatic
function
setting
Automatic
function
setting
M M
MM
Timer function mode switc ing diagram
(Pic 1)
Power-on default clock diagram (standby state)
4.2 Start up and time setting
• When the display is flashing, press ( ) for 3 seconds to start up the oven. The oven in use
symbol ( ) will illuminate and decimal point symbol ( ) flickers. When decimal point symbol
( ) flickers, press ( ) or ( ) to set the system time. Release button and wait for 5 seconds
for decimal point symbol ( ) to stop flickering and confirm setting (see Pic 4). To reset time
setting, push ( ) once (see Pic 3). The decimal point symbol ( ) will flicker to indicate timer
reset.
• Press button ( ) again for 3 seconds, oven is turned off and returns to standby status. The
display in (Pic 2) will flicker.
NOTE 1: System time setting range is 0:00 – 23:59.
NOTE 2: Short press to set the time for each timer function of the timer or long press ( ) and
( ) to increase or decrease by 1 minute or reduce 1 minute.
4.3 Alarm clock setting function
• In standby mode when the display shows the system time, the oven in use symbol ( ) and
decimal point symbol ( ) will be on. Press ( ) twice, then the clock icon ( ) flickers, and
the screen display changes to the alarm clock time (First set default display “0·00”), alarm clock
time and decimal point symbol ( ) always display (see Pic 5). When the alarm clock icon ( )
flickers, Press ( ) or ( ) to set the clock. Alarm clock will be as (Pic 6) (Set 10 minutes).
• After choosing the time , lift the finger off the buttons and wait for 5 seconds, then the alarm clock
icon ( ) stops twinkling and changes to always bright, display screen shows system time, oven
in use symbol ( ),decimal point symbol ( ) and system time keep bright. It means time is
well set. (See Pic 7)
(Pic 2)
Clock setting state diagram
(second icon flickering)
(Pic 3)
Feature to be selected state
diagram (second icon
always on)
(Pic 4)
System time well set diagram
(Pic 5)
Alarm clock setting initial state
(alarm clock icon flickering)
(Pic 6)
Alarm clock set
(alarm clock icon flickering)
(Pic 7)
Alarm clock working status diagram
(alarm clock icon always brig t)

• Whenever user wants to adjust the clock, in the working status, push ( ) two times, when user
sees the alarm clock icon ( ) twinkles, it will shows the set clock or the time left, and user can
adjust the clock again. After setting is done, the display will change back to system time.
• For example, set the clock 10 minutes. After10 minutes, display screen shows system time, oven
in use symbol ( ), decimal point symbol ( ) and system time keep bright, the alarm clock
icon ( ) twinkles, buzzer will prompt the user for 5 minutes, reminding the user that the alarm
clock time is over. (Like Pic 8) Pressing any key can stop the buzzer and extinguish alarm icon
( ). (Like Pic 9)
NOTE: Alarm clock time setting range is 0:00 – 23:59.
4.4 Cooking time setting function
• In standby mode, press button ( ) 3 times, the “AUT ” and oven in use icons ( ) will flicker.
The screen shows the cooking time (First set default display “0·00”) cooking time and decimal
point symbol ( ) will be on (see Pic 10). When “AUT ” and oven in use symbol icons ( )
flicker, set cooking time by pressing ( ) or ( ). See Pic 11 for set cooking time diagram
(Set 30 minutes).
• After selecting the time, release the buttons and wait for 5 seconds. The “AUT ” and oven in use
symbol icons ( ) will stop flickering and be always on indicating time has been set. To adjust
the timer, in standby mode, push ( ) thrice. When “AUT ” and oven in use symbol icons ( )
flicker, it will show the set timer or the time left, and the timer can be adjusted again. After setting
is done, the display will change back to system time, decimal point symbol ( ) and system time
will be always on (see Pic 12).
(Pic 8)
Alarm clock time over diagram
(alarm clock icon flickering)
(Pic 9)
Cancel alarm clock icon display diagram
(After alarm clock over)
A
U
T
O
(Pic 10)
Cooking time setting initial state
A
U
T
O
(Pic 12)
Cooking time working status
(All t e icons always brig t)
A
U
T
O
(Pic 11)
Cooking time well set state
13
12
CONTROL PANEL CONTROL PANEL
• For example, set the timer 30 minutes. After 30 minutes, display screen shows system time, oven
in use symbol icon ( ) disappears, system time will be always on, decimal point symbol ( )
and “Auto” function symbol flickers, buzzer will prompt the user for 5 minutes, reminding the user
that cooking time is over (see Pic 13). Pressing any key to stop the buzzer and deactivate “Auto”
function symbol (see Pic 14).
NOTE 1: Cooking time setting range is 0:00-10:00.
NOTE 2: If cooking time is not set after power on, the appliance will automatically shut down after 10
hours on standby, without buzzer reminding any functions.
4.5 Cooking end time setting function
• In standby mode, press button ( ) 4 times, the “AUT ” and oven in use symbol icons ( ) will
flicker, display screen shows cooking end time (the first setting shows the current system time by
default), cooking end time and decimal point symbol ( ) will be always on (see Pic 15). For
example, when display time is 0:00 the “AUT ” and oven in use symbol icons ( ) flicker,
cooking end time can be set by pressing ( ) or ( ). See Pic 16 for set time (assuming
cooking end time is 0:30).
• After choosing the time, release buttons and wait for 5 seconds, the “AUT ” and oven in use
symbol icons ( ) will stop flickering and change always on. Display screen will show system
time, decimal point symbol ( ) and system time will be always on denoting time has been set
(see Pic 17).
• To adjust the timer in standby mode, push ( ) 4 times. When the “AUT ” symbol icon flickers,
it will show the set cooking end time, which can be adjusted again. After setting is done, The
display will change back to system time.
A
U
T
O
(Pic 13)
Cooking time over diagram
(All t e icons flickering)
(Pic 14)
Cancel “Auto” function symbol display
diagram (After cooking time over)
A
U
T
O
(Pic 15)
Cooking end time setting initial state
A
U
T
O
(Pic 16)
Cooking end time well set state
A
U
T
O
(Pic 17)
Cooking end time working
status (All t e icons always on)
A
U
T
O
(Pic 18)
Cooking finis ed diagram
(All t e icons flickering)
(Pic 19)
Cancel “Auto” function symbol
display diagram
(After cooking finis ed)

15
14
CONTROL PANEL CONTROL PANEL
BEFORE FIRST USE
ENERGY SAVING TIPS
• For example, the system time is 0:00 (pic 19). Set cooking end time 0:30 (pic 20). When the time
reaches 0:30, display screen shows system time, oven in use symbol ( ) disappears. System
time will always be on, decimal point symbol ( ) and “Auto” function symbol flicker, buzzer will
prompt the user for 5 minutes, reminding the user that the cooking is finished (see Pic 18). Press
any key to deactivate the buzzer and extinguish “Auto” function symbol (see Pic 19).
NOTE: Cooking end time is beyond current system time plus cooking time, and within 23:59.
4.6 Cooking reservation function
In standy mode, cook ng t me can be reserved and set when to have the d sh ready.
• First, press button ( ) 3 times, the “AUT ” and oven in use symbol icons ( ) will flicker. The
screen shows the cooking time (First set default display “0·00”). When the icon “AUT ” and oven
in use symbol ( ) flickers, cooking time can be set by pressing ( ) or ( ).
NOTE: Cooking time setting range is within 10 hours.
• Second, press ( ) again. When the “AUT ” symbol flickers, reserved time can be set by
pressing ( ) or ( ). After selecting time, release the button and wait for 5 seconds. The
“AUT ” icon will stop flickering, denoting reserved time has been set. To adjust the reserved time,
press ( ) 3 times to adjust the cooking period, or press ( ) 4 times to adjust the end time.
After setting is done, the display will change back to system time.
• For example, the system time is 0:00. First, set cooking time 30 mins (see Pic 21).
• Second, set cooking end time 1:00 (see Pic 22). ven will be in standby mode. When the time
reaches 0:30, the oven will automatically begin cooking for 30 mins and will stop at the set time
1:00.
• Display screen will show system time, oven in use symbol ( ) disappears, system time will be
always on, decimal point symbol ( ) and “Auto” function symbol will flicker, buzzer will prompt
the user for 5 minutes, reminding the user that the cooking is finished (see Pic 25). Press any key
to stop the buzzer and deactivate “Auto” function symbol (see Pic 26).
A
U
T
O
(Pic 20)
Cooking time well set diagram
A
U
T
O
(Pic 21)
Reservation function setting initial state
A
U
T
O
(Pic 22)
Reservation function set state
A
U
T
O
(Pic 23)
Reservation function start state
A
U
T
O
(Pic 24)
Cooking function start diagram
A
U
T
O
(Pic 25)
Cooking function end diagram
(Pic 26)
Cancel “Auto” function symbol display diagram
(After cooking finis ed)
4.7 Selecting the audible notification
The aud ble not f cat on has 3 tones. To adjust the s gnal you should proceed as follows:
• Under standby mode, when display screen shows system time, decimal point symbol ( ) will
flicker, audible notification can be adjusted by pressing the plus button to select from the 3
notification tones. Press once to confirm selection. Default notification tone is the second tone.
Thermostat control knob
• The oven thermostat control knob sets the required temperature of
the oven. It is possible to regulate the temperature within a range of
50 – 250ºC.
• Turn the control knob clockwise.
HEATING UP THE OVEN
• To remove new appliance odors, heat up the oven when it is empty and closed.
• An hour of Top/bottom heating at 250°C is ideal for this purpose.
• Ensure that no packaging remnants have been left in the cooking compartment.
• Use the function selector to set Top/bottom heating.
• Set the temperature selector to 240°C. After an hour, switch off the oven by turning the function
selector to the off position.
The following information will help you to use your appliance in an environment-
friendly way, and to save energy:
• Use dark coloured or enamel coated cookware in the oven since the heat transmission will be
better.
• While cooking your dishes, perform a preheating operation if it is advised in the user manual or
cooking instructions.
• Do not open the door of the oven frequently during cooking.
• Try to cook more than one dish in the oven at the same time, whenever possible. You can cook
by placing two cooking vessels onto the wire grill.
• Cook more than one dish one after another as the oven is already be hot.
• Save energy by switching off the oven a few minutes before the cooking time. Do not open the
oven door.
• Defrost frozen dishes before cooking them.
0
50
100
150
200
250

17
16
OPERATING INSTRUCTIONS TROUBLESHOOTING
General information on baking, roasting and grilling
WARNING: Risk of scalding by hot steam! Exercise caution when opening the oven door as hot
steam may escape.
BAKING TIPS
• Use non-stick coated appropriate metal plates or aluminum containers or heat-resistant silicone
moulds.
• Make best use of the space on the rack.
• It is recommended to place the baking mould in the middle of the rack.
• Keep the oven door closed.
ROASTING TIPS
• Seasoning with lemon juice and black pepper will improve the cooking performance when cooking
a whole chicken, turkey or a large piece of meat.
• Meat with bones takes about 15 to 30 minutes longer before it is cooked than a roast of the same
size without bones.
• Calculate about 4 to 5 minutes cooking time per centimeter height of the meat.
• Allow meat to rest in the oven for about 10 minutes after the cooking time. The juice will be better
distributed all over the roast and does not run out when the meat is cut.
• Fish in a fire-resistant dish should be placed on the rack at the medium or lower level.
GRILLING TIPS
• Grilling is ideal for cooking meat, fish and poultry and will achieve a nice brown surface without it
drying out too much.
• Flat pieces, meat skewers and sausages are particularly suited for grilling as are vegetables with
a high water content such as tomatoes and onions.
PR BLEM P SSIBLE CAUSES S LUTI N
If the pr blem has n t been s lved:
•Separate appliance from the power supply (deactivate or unscrew fuse
•Contact the after-sales service agent.
•Do not attempt to repair the appliance yourself. here are no user-servicable parts inside the appliance.
Oven not working
Lamp not working
Interrupt electrical current Check kitchen light or other appliances are working
Breaker malfunction Check if your breaker is working
Forgot to push the timer
function
Reset the timer function
Defective lamp Replace lamp
No power supply Check power supply
Oven stops suddenly
during operation
Oven not heating
Water leaks from the
glass door during
operation
Oven not functioning but
the motor is cool and still
operating
Power outage/interruption Check kitchen light or other appliances are working
emperature controller not set Set the temperature
No power supply Check the power supply
Damaged heating element Replace heating element
Normal close thermostat
protective
Check if the cooling fan is working. If yes, closed thermostat
needs replacement
imer not set (for selected
models only)
Set up the timer
Blown door seal Replace door seal
Damaged hinge Replace hinge
Oven used for long time so
cooling needs longer time
Put your hand to the air vents. If hot air is present, it is normal
Malfuctioning normal open
thermostat
If the air temperature from the outlet is room temperature,
replace normal open thermostat

19
18
BAKING AND GRILLING TIPS BAKING AND GRILLING TIPS
BAKING TIPS
• How to establish whether sponge cake is baked through. Approximately 10 minutes before the
end of the baking time specified in the recipe, stick a cocktail stick into the cake at the highest
point. If the cocktail stick comes out clean, the cake is ready.
• Use less liquids next time if the cake collapses or set the oven temperature 10 degrees lower.
bserve the specified mixing times in the recipe.
• The cake has risen in the middle but is lower around the edge. Do not grease the sides of the
spring form cake tin. After baking, loosen the cake carefully with a knife.
• The cake goes too dark on top. Place it lower in the oven, select a lower temperature and bake
the cake for a little longer.
• The cake is too dry. When it is done, make small holes in the cake using a cocktail stick. Then
drizzle fruit juice or an alcoholic beverage over it. Next time, select a temperature 10 degree
higher and reduce the baking time.
• The bread or cake (e.g., cheesecake) looks good, but is soggy on the inside (sticky, streaked with
water). Use slightly less liquids next time and bake for slightly longer at a lower temperature. For
cakes with a moist topping, bake the base first. Sprinkle it with almonds or bread crumbs and then
place the topping on top. Please follow the recipe and baking times.
• The cake is unevenly browned. Select a slightly lower temperature to ensure that the cake is
baked more evenly. Bake delicate pastries on one level using Top/bottom heating. Protruding
greaseproof paper can affect the air circulation. For this reason, always cut greaseproof paper to
fit the baking tray.
• The bottom of a fruit cake is too light. Place the cake one level lower the next time.
• The fruit juice overflows. Next time, use the deeper universal pan, if you have one.
• Small baked items made out of yeast dough stick to one another when baking. There should be a
gap of approx. 2 cm around each item. This gives enough space for the baked items to expand
well and turn brown on all sides.
• Baking on several levels. The items on the top baking tray are darker than that on the bottom
baking tray. Always use 3D hot air to bake on more than one level. Baking trays that are placed in
the oven at the same time will not necessarily be ready at the same time.
• Condensation forms when you bake moist cakes. Baking may result in the formation of water
vapour, which escapes above the door. The steam may settle and form water droplets on the
control panel or on the fronts of adjacent units. This is natural process.
GRILLING TIPS
• When grilling, preheat the oven for approx. 4 minutes, before placing the food into the cooking
compartment. Always grill with the oven door closed.
• Wherever possible, ensure the pieces of food for grilling are of equal thickness. This will allow
them to brown evenly and remain succulent and juicy.
• Turn the food you are grilling after 2⁄3 of the time.
• Do not add salt to steaks until they have been grilled.
• Add in a little liquid if the meat is lean. Cover the base of the ovenware with approx. 1/2cm of
liquid.
• Add liquid generously for pot roasts. Cover the base of the ovenware with approx. 1–2 cm of
liquid.
• Place the food to be grilled directly on the wire rack. If you are grilling a single piece, the best
results are achieved by placing it in the centre of the wire rack. The universal pan should also be
inserted at level 1.The meat juices are collected in the pan and the oven is kept cleaner.
• When grilling, do not insert the baking tray or universal pan at level 4 or 5.The high heat distorts it
and the cooking compartment can be damaged when removing it.
• The grill element switches on and off continually. This is normal. The grill setting determines how
frequently this will happen.
• When the roast is ready, turn off the oven and allow it to rest for an additional 10 minutes. This
allows better distribution of the meat juices.
• Place whole poultry on the lower wire rack breast-side down. Turn after 2⁄3 of the specified time.
• For duck or goose, pierce the skin on the underside of the wings. This allows the fat to run out.
• Turn the pieces of fish after 2⁄3 of the time, whole fish does not have to be turned. Place the
whole fish in the oven in its swimming position with its dorsal fin facing upwards. Placing half a
potato or a small ovenproof container in the stomach cavity of the fish will make it more stable.
• How to tell when the roast is ready. Use a meat thermometer (available from specialist shops) or
carry out a “spoon test”. Press down on the roast with a spoon. If it feels firm, it is ready. If the
spoon can be pressed in, it needs to be cooked for a little longer.
• Check the shelf height and temperature if the roast is too dark or the crackling is partly burnt.
• The roast looks good but the juices are burnt. Next time, use a smaller roasting dish or add more
liquid.
• The roast looks good but the juices are too clear and watery. Next time, use a larger roasting dish
and use less liquid.
• Steam rises from the roast when basted. This is normal because most of the steam escapes
through the steam outlet. It may settle and form condensation on the cooler switch panel or on the
fronts of adjacent units.
21
20
CARE & CLEANING CARE & CLEANING
• The oven should be cleaned after every use. When cleaning the oven the lighting should be
switched on to enable you to see the surfaces better.
• Wash the oven chamber with warm water and a small amount of washing-up liquid.
• After cleaning the oven chamber wipe it dry.
• Never clean the oven surfaces by steam cleaning.
• Wash the oven cavity with warm soapy water and sponge or soft cloth. Do not use abrasive
cleaners.
• Stains on the bottom of the oven are usually from food splashes or spilt food during the cooking
process. These could be food cooked at an excessively high temperature or being placed in
cookware that is too small.
• Select the proper cooking temperature and function for the food to be cooked. Ensure that the
food is placed in a proper sized dish and use the drip tray where appropriate.
• uter parts of the oven should only be cleaned with warm soapy water, using either a sponge or
soft cloth. Do not use abrasive cleaners.
• When using an oven cleaner, check with the manufacturer of the cleaner whether that it is suitable
for use on your appliance.
• There manufacturer will not be liable for any damage caused to the appliance by a cleaning
product.
• Do not use abrasive cleaning cleaners to clean the glass front panel.
TO CLEAN THE SIDE WALLS AND OVEN DOOR
• Detach the left and right side-shelves by pushing the bottom of shelves and pull to the sides at
the same time, push up the side shelves and rotate up to level, and pull out the rack.
• After cleaning left and right sides, install by following the opposite steps as above.
DETACHING AND ATTACHING THE OVEN DOOR
The oven door and door panels can be detached for cleaning purposes.
• Fully open the door.
• Fold up the right and left side of locking rod. (picture A)
• Close the door, hold on both left and right sides of the door. Close the
door again, move it upwards and downwards and detach.
INSTALLING THE OVEN DOOR
Follow the opposite order of door disassembly
• ensure both hinge plugs are inserted into the slots directly.
• Both sides of hinge rivet must interlock.
• When opening the door, spread down the locking rod (picture B)
If the door accidentally drops or the hinges locks
suddenly, do not push you hand into the hinges.
Please call your after sales service agent.
(picture A)
(picture B)
REMOVE AND INSTALLING DOOR PANEL
Removal
• Remove oven door, put it on a piece of cloth.
• Using one hand to push the outer glass, the other hand to pull
the inner glass, hold the glass then pull to detach the glass.
WARNING
• Scratches on the glass may lead to cracks.
• Do not use sharp objects or abrasive cleansers to clean the glass.
Installation
• Insert the inner glass into the glass pressure groove.
• Align both right and left sides to the card slot and push the glass to its original place.
• Put on the oven door.
REMOVE AND INSTALL SIDE SHELVES
Remove the side shelves to clean the sides of the
oven
• Push the shelf downwards and pull it out (picture D).
• Lift up the side shelf to level and pull it out.
• Do not use the oven if the oven door is not correctly
assembled.
REPLACING THE OVEN LAMP
If the bulb in the oven light fails, it must be replaced.
• Switch off the circuit breaker in the fuse box.
• Place a tea towel in the oven when it is cold to prevent damage.
• Unscrew the glass cover by turning it anti-clockwise.
• Replace the bulb with one of the same type.
• Screw the glass cover back in.
• Remove the tea towel and switch on the circuit breaker.
REGULAR INSPECTIONS
It is recommended to:
• Carry out periodic inspections of the control elements and cooking units of the cooker.
• Contact your service agent for a technical inspection after the expiry of your warranty at least
once every two years.
CAUTI N!
All repairs and regulatory activities should be carried out by the
appropriate service centre or by an appropriately authorized fitter.
(picture C)
(picture D)

23
22
TEST DISHES CARE FOR THE ENVIRONMENT
The test dishes shown here will help you with heating type and temperature best
suited for your dishes. You can find information about the appropriate accessories
and its insertion height, as well as tips on cooking containers and methods of
preparation.
INSTRUCTIONS:
A. The values in the table can always apply to the dishes place in the cold and empty oven. nly
pre-heat the oven when it states in the table below. Do not lay the oil-proof paper onto the
accessories before pre-heat is completed.
B. The baking parameters given in Tables are approximate and can be corrected based on your own
experience and cooking preferences.
C. Please use the accessories provided. Before cooking, check that any accessories that are not
required are removed from the oven.
D. Wear oven mitts when removing the accessory or ovenware from the appliance.
BAKING AND GRILLING TABLE
FOODS ACCESSORY HEATING RACK PLACE TEMPERATURE HEATING TIME
FUNCTION (°C) (MINUTES)
Cake Round model 2nd layer 140-160 30-45
Bake Pan 2nd layer 180-200 10-20
Bread Bake Pan 3rd layer 170-190 10-20
Bake Pan 3rd + 1st layer 160-180 10-20
hin Pizza (cold) Bake Pan 2nd layer 190-210 15-25
Deep Pizza (cold) Bake Pan 2nd layer 180-200 20-30
Bake Pan + Rack 3rd +1st layer 170-190 25-35
Bread Piece (9 piece) Rack 3rd layer 160-170 10-15
Rack 3rd + 1st layer 160-180 15-25
Sausage Rack 3rd layer 160-180 10-15
Ribs Rack 3rd layer 200-220 20-35
Pork Bake Pan 2nd layer 190-210 70-85
Bake Pan 1st layer 180-200 55-70
Beef Steak (3cm thickness) Bake Pan 2nd layer 190-210 20-35
Small Whole Chicken (1.2Kg) Rack 2nd layer 200-220 50-60
Whole Chicken (1.6Kg) Rack 2nd layer 190-210 50-60
Small Chicken Pieces (150g) Rack 3rd layer 200-220 30-40
Whole Goose (3.5Kg) Rack 2nd layer 170-190 60-70
Big Piece of Mutton with Bake pan 2nd layer 170-190 60-70
Bone(1.2Kg)
Whole Fish (1.0Kg) Rack 2nd layer 200-220 30-40
Whole Fish (1.5Kg) Rack 2nd layer 180-200 40-50
N TE: Before discarding an old appliance, switch off and disconnect it from the
power supply. Cut off and render any plug useless. Cut the cable off directly behind
the appliance to prevent misuse. This should be undertaken by a competent person.
This appliance is marked according to the European directive 2002/96/EC on Waste electrical and
Electronic Equipment (WEEE). By ensuring this product is disposed of correctly, you will help prevent
potential negative consequences for the environment and human health, which could otherwise be
caused by inappropriate waste handling of this product.
The symbol on the product or on the documents accompanying the product
indicates that this appliance may not be treated as household waste. Instead it shall be handed over
to the applicable collection point for the recycling of electrical and electronic equipment.
Disposal must be carried out in accordance with local environmental regulations for waste disposal. For
more detailed information about treatment, recovery and recycling of this product, please contact your
local city office or local waste management office.
The packaging materials that we use are environmentally friendly and can be recycled. Please discard
all packaging material with due regard for the environment.
Table of contents
Other Morgan Oven manuals

Morgan
Morgan MEO-LUX100L User manual

Morgan
Morgan MEO-602RC User manual

Morgan
Morgan MEO-HC26C User manual

Morgan
Morgan MEO-GLAMO 120RC User manual

Morgan
Morgan MBO-7700D User manual

Morgan
Morgan MEO-1002RC User manual

Morgan
Morgan MEO-HC70RC User manual

Morgan
Morgan MEO-Imperium25 User manual

Morgan
Morgan MEO-GLAMO 23B User manual

Morgan
Morgan MEO-HC52RC User manual
Popular Oven manuals by other brands

Siemens
Siemens HB301 0K Series instruction manual

Hotpoint Ariston
Hotpoint Ariston MB 91.3 IX / HA operating instructions

AEG
AEG COMPETENCE D2160-1 operating instructions

GE
GE Profile PT920DR Dimensions and installation information

Moffat
Moffat MS 61 OPERATING AND INSTALLATION Manual

Electrolux
Electrolux FR53G user manual