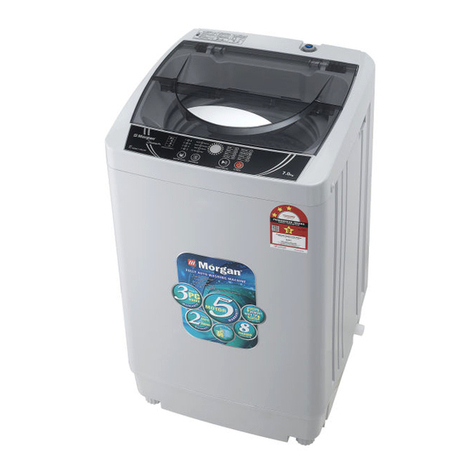
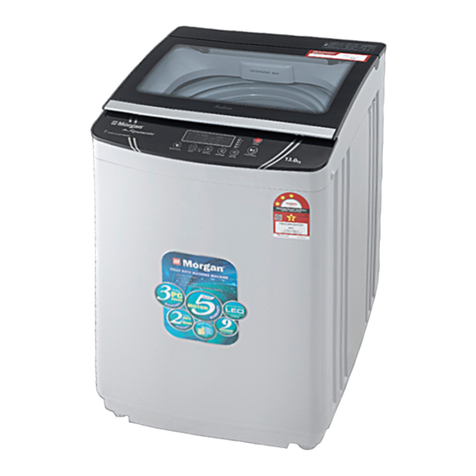
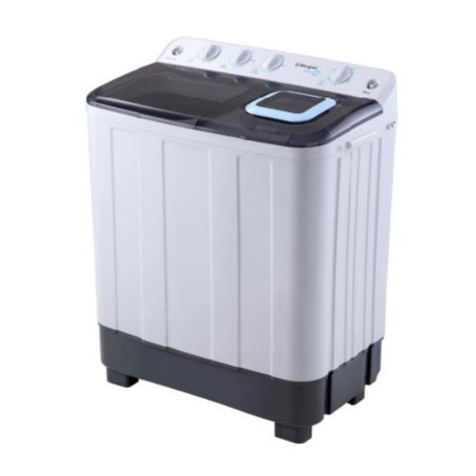
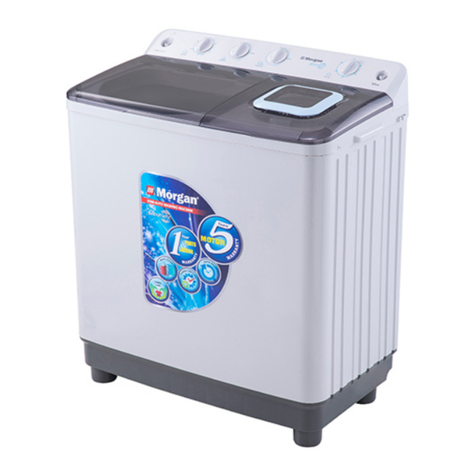
Morgan MWM-1370SA User manual

E-mail: electrical.appliance@dksh.com
www.morgan.my
Market Expansion
Services by
www.dksh.com.my
facebook.com/morganappliances
SER MAN AL
MWM-1370SA
Semi-Auto
Washing
Ma hine
MWM-1370SA(IM)160818.qxp_Layo t 1 8/27/18 10:03 AM Page 1

3
SAFETY PRECAUTIONS
2
The product belongs to I class appliance. Be sure to comply with the following to
prevent damage to body and property.
• Do not wash clothing with waterproof materials such as raincoat, down
jacket or car cover. If in doubt, always refer to the clothing label to ensure it
is machine-wash friendly.
• Do not wash clothes that have been immersed in volatile substances such
as gas.
Handling the product without observing the instructions that accompany a "Warning" symbol
may result in serious injury or death.
Failure to observe the instructions that accompany this “Caution” symbol can result in injuries
to person or damage to property.
Indicates "prohibited" actions that must not be performed
• Do not install the machine in the bathroom where it is damp
and may pose an electrical/fire hazard.
• Do not install the machine where it is difficult to drain water.
• Do not put wet clothing on the machine especially on the
control panel.
• Do not attempt to repair/modify the machine yourself.
• Do not use water hotter than 50ºC as plastic parts may be
deformed or damaged, and this may result in electric shock or fire.
• Do not place heavy objects on the washing machine.
• Keep the appliance away from the direct sunlight and other
heat sources.
• Ensure a distance of at least 5cm between the machine and the
wall.
• This appliance is not intended for use by persons (including
children with reduced physical, sensory or mental capabilities, or
lack of experience and knowledge, unless they have been given
supervision or instruction concerning use of the appliance by a
person responsible for their safety.
• Do not allow children to climb or play on the machine.
• Do not insert your hand into the machine while it is operating. It is dangerous even if it is operating
at a slow speed.
• Do not allow children to play with packaging materials that came along with the machine.
• Exercise caution when opening the top lid as the angle between it and the horizontal plane is over
60º when open.
SAFETY PRECAUTIONS
• The washing machine should not be placed on a carpet as it requires air to
circulate freely below it. Do not place the machine on a high platform to
prevent it from falling.
• Do not pull or excessively bend/twist/stretch the power cord. Do not hook
the power cord over a metal object or place a heavy object on the power
cord to avoid an electric shock or fire hazard.
• If the power cable or power plug is damaged or the socket becomes loose,
have them repaired or replaced by an authorised service personnel to
prevent an electrical hazard.
• Always unplug the appliance and turn off the water when moving or cleaning
the washing machine, or when not in use.
• When the wash program is completed, turn off the water and unplug the
power cable from the power outlet.
• Do not attach or detach the power plug with wet hands.
• Insert the power plug into the power socket with a 220-240V single-phase
three-stage A/C power.
• N TE: The power plug must be a single special socket that meets national
compulsory certification of qualified products.
• This appliance must be earthed and kept away from underground water pipe and
cable.
MWM-1370SA(IM)160818.qxp_Layo t 1 8/27/18 10:03 AM Page 2
5
USING THE DRAINAGE HOSEPARTS IDENTIFICATION
TECHNICAL SPECIFICATIONS
4
1. Wash timer
2. Water inlet
3. Control panel
4. Wash tub cover
5. Wash tub
6. Change-over switch for
water flow
7. Spin cover
8. Spin timer
9. Spin tub inner cover
10. Spin tub
11. Pulsator
12. power cable
13. Drainage hose
Model MWM-1370SA
Rated Voltage / Frequency 220-240V~ 50-60Hz
Wash Rated Wattage 350W
Spin Rated Wattage 160W
Capacity 7.0kg
Max. water presure permitted in the water inlet 0.2Mpa
Min. water presure permitted in the water inlet 0.02Mpa
Please install the washing machine as specified which is important to your safety.
USING THE DRAINAGE HOSE
1. Ensure that the drainage hose is straightened
and not twisted.
2. The height of the drainage hose should not
exceed 10cm to prevent leakage or
obstructions. If drainage takes a long time,
some water will remain in the machine.
3. Do not extrude the drainage hose to ensure
that it drains smoothly.
4. Cut the drainage hose at the middle. If it is too
long, cut it in a bevel angle to ensure that it
drains smoothly.
5. Purchase a new drainage hose if you need
longer hose.
6. Ensure that the inner diameter of the drainage
hose is not less than 30mm and the length
should not exceed 1.5m.
CHANGING THE DIRECTION OF THE DRAINAGE HOSE
1. Place the machine on a soft and stable surface material.
2. Remove the drainage hose from the cabinet hook (pic 1)
3. Detach the drainage hose from the base crevice and insert it into the other end (pic 2).
4. Attach the drainage hose onto the hook at the other end and adjust the machine.
<10cm
≤1.5m
≥ø30mm
Hanging
Hole
NipSoft Surface
Material
Hanging
Hole
Nip
S
(pic 1)
(pic 2)
MWM-1370SA(IM)160818.qxp_Layo t 1 8/27/18 10:03 AM Page 3

7
6
WATER INLET HOSE INSTALLATION
It is important to install only new water inlet hose sets supplied by the
manufacturer. Do not reuse used water hose sets.
NOTE:
• Install only water inlet hose sets according to the specified model.
• Insert the water inlet hose into the water inlet mouth of the
control panel (refer to illustration: “control panel”).
WATER SELECTOR
• Select water level according to the laundry weight –
high / middle / low
LINT FILTER B INSTALLATION
• Insert the bottom of the Lint Filter B into the crevice
correctly.
• Press the top of the filter to secure it.
PREPARATION BEFORE WASHING SORTING
Injection
Nozzle
Inlet Pipe
Fit into the water pipe
• Care Label: Sort the laundry into cottons, mixed fibres,
synthetics, silks, wools, and rayon.
• Before washing, empty small objects from all pockets such as
coins, keys etc., as these could damage the drainage pump.
• Knot the long band, fasten the buttons and close the zippers.
• Turn and reverse the clothes with buttons to prevent noise
during washing.
• Do not overload the machine. Load the laundry loosely.
ADDITIONAL NOTES
• Make sure laundry is washable.
• Colour: Separate whites from colours
• Immerse non-absorbable laundries by hand.
• Before washing, pre-treat the sleeves, collars, dress hems, and pockets by brushing with detergent.
• In some cases, it may help to soak the stain before washing with a special pre-soak product or
biological detergent.
• Do not mix clothes immersed with chemicals into the machine directly.
• Wash small items such as handkerchiefs, ribbons, and socks using a laundry net or a pillow case.
USING DETERGENT
DETERGENT
The type of detergent depends on the type of fabric (cotton, synthetic, delicate
items, wool), colour, wash temperature, and degree of soiling. Always use “low
suds” laundry detergent, which is designed for automatic washing machines.
1. Dissolve detergent in the machine directly (not suitable for pre-set program).
2. Add detergent and run for 30 seconds to dissolve it completely.
3. Place laundry into the wash tub and select suitable water level.
HOW TO DISSOLVE DETERGENT IMMEDIATELY
1. Prepare warm water in a container.
2. Pour detergent into container while stirring to fully dissolve it.
3. Refer to the detergent application instructions for appropriate amounts.
4. It is recommended to use “low suds” detergent for best results.
USING BLEACH
1. Fill water to the desired level, dilute the bleach in a container, and pour it slowly into the washing tub.
2. Do not use bleach for coloured laundry
3. Do not pour bleach directly onto laundry.
4. Refer to the manual for the usage and quantity of the bleach.
5. Always dissolve powdered bleach before use.
MWM-1370SA(IM)160818.qxp_Layo t 1 8/27/18 10:03 AM Page 4

OPERATION STEPS OPERATION STEPS
98
1. BEFORE WASHING
3. WASHING
• Fill water to the desired level.
• Add washing powder and then run for 30 seconds to dissolve it completely.
• Place laundry and add water to the ideal water level.
• Select water speed according to the laundry.
• Select the washing time accordingly.
• After washing, select the “drain” function.
2. WASHING ORDER
If the time set is within 2 minutes, the
timer should be set for more than 6
minutes first before adjusting it back to
2 minutes.
Connect water inlet hose
Ensure chip filter is
installed
Connect to
power supply
Lay down the drainage hose
If the required time is set for 1 minute, it is suggested to set
the timer for 2 minutes before adjusting it back to 1 minutes
to extend the life of the timer.
Rotate the charge-over
switch firmly
4. FIRST SPIN PROCESS
1. Place laundry into the spin tub loosely and evenly.
2. Spin
– Press the gland
– Close the spin cover
– Spin for 1-2 minutes
3. Spraying spin
– pen the spin cover
– Place the inlet hose into the water inlet mouth and turn on water tap to spray on the
laundry to remove excess suds.
– Close the spin cover and spin for 1-2 minutes
5. RINSE PROCESS
1. Place laundry into the spin tub loosely and evenly and select the ideal washing speed selection.
2. Stored rinse (repeated spin 2-3 times & rinse):
– Fill water to the desired level.
– Adjust wash timer to 2-3 minutes for rinsing. Select “soft” when done.
6. SECOND SPIN PROCESS
1. Place laundry into the spin tub loosely and evenly
2. Place the gland correctly and close the spin cover
3. Select the desired spin time according to the laundry. If there is noise during spinning, pause the
operation and adjust laundry evenly.
NOTES:
• During the spinning, water will be drained 1 minute during the process. The process will be paused
if there is excess water inside the spin tub.
• The spinning process will pause if the spin cover is opened. Close the spin cover to continue the
process.
Correct CorrectDetergent
offset
No gland
MWM-1370SA(IM)160818.qxp_Layo t 1 8/27/18 10:03 AM Page 5

CARE & MAINTENANCE TROUBLESHOOTING
1110
Periodic care and maintenance keep the washing machine clean to prevent
deteriorated performance and to preserve its life cycle.
Note:
• Turn the tap off after washing and discharge the drainage hose.
• Before proceeding with cleaning, detach the power cable from the power supply.
• Hang the power cable and drainage hose up.
LINT FILTER CLEANING
• The use of the lint filter is a must during washing and should be cleaned after every use.
• Ensure that the lint filter is inserted correctly to prevent it from falling off.
CLEANING STEPS
1. Press the two buckles to detach the lint filter (see illustration 1)
2. Clean the filter (see illustration 2)
3. Attach the lint filter into its original position (see illustration 3)
If you encounter a problem with the washing machine, first check the table below
and check the possible causes.
PROBLEM POSSIBLE CAUSES
Washing machine not working • Machine not connected to power supply.
• Power cable not inserted correctly.
• Pulsator malfunction
(Please contact our after-sales service centre)
Clothes spin away from the spinning tub Please contact our after-sales service centre to avoid further
drainage problems.
Machine unable to drain Drainage hose bent or blocked.
Noisy during wash Hard objects inside the washing tub.
Excessive noise & vibration • Machine not balanced.
• Laundry overloaded.
• Laundry not spread evenly.
Water inside drainage hose & machine This is normal as part of our factory test & quality check
procedure.
Water droplets on the tub surface This is normal when ambient temperature is higher than
normal water temperature
Water drains out immediately • Make sure drainage hose is not obstructed.
• Water level may have exceeded the overflow level.
• Use neutral detergent when the machine is dirty.
• Do not use cleanser, volatile chemical materials to clean the machine, which will damage plastic parts
and the exterior.
• Do not spray water directly at the machine.
• Detach the water inlet hose when cleaning.
• Do not store water in the tub for long periods of time.
• Drain water completely.
• Unplug it from the power supply after using and hang the
power cable in the correct position.
• Clean the exterior cabinet of the appliance with a clean, soft cloth.
illustration 1 illustration 2 illustration 3
MWM-1370SA(IM)160818.qxp_Layo t 1 8/27/18 10:03 AM Page 6
Table of contents
Other Morgan Washer manuals

Morgan
Morgan MWM-13 Aquamarine User manual

Morgan
Morgan MWM-Vagor 11 User manual

Morgan
Morgan MWM-11 Sapphire User manual

Morgan
Morgan MWM-B1270SA User manual

Morgan
Morgan MWM-Rena 7FA User manual

Morgan
Morgan MWM-1310SA User manual

Morgan
Morgan MWM-Vagor 13 FA User manual

Morgan
Morgan MWM-1312SA User manual

Morgan
Morgan MWM-680FA User manual

Morgan
Morgan MWM-7 Zircon User manual