manuals.online logo
Brands
  1. Home
  2. •
  3. Brands
  4. •
  5. Morningstar
  6. •
  7. Controllers
  8. •
  9. Morningstar SunSaver SS-6 User manual

Morningstar SunSaver SS-6 User manual

Quick Start Guide
14
Specifications:
Battery Type Selection:
SS‐6/6L
NominalSystemVoltage 12V
BatteryVoltageRange 6Vto15V
MaximumSolarInputVoltage 30V
MaximumSolarCurrent 6.5A
MaximumLoadCurrent 6A
©2021MorningstarCorporation.AllRightsReserved. MP‐003293SS‐PWM(Gen3)QSG(3/4/2021)RevC01
In the Box:
Mounting
Screws(x4)
Tools Required:
—#2PhilipsScrewdriver
—3/16(5mm)&3/32"(2.5mm)FlatheadScrewdriver
—Drillwitha3/32"(2.5mm)bit
—Multimeter
Important Safety Information:
WARNING: Shock Hazard
TheSunSaversolarcontrollermustbe
installedbyaqualifiedtechnicianin
accordancewiththeelectrical
regulationsofthecountryofinstallation.
WARNING: Shock Hazard
ThisunitisnotprovidedwithaGFDI
device.Thischargecontrollermustbe
usedwithanexternalGFDIdeviceas
requiredbytheArticle690ofthe
NationalElectricalCodeforthe
installationlocation.
IMPORTANT: READtheSunSaver
InstallationManualforsafetyand
regulatoryinformation,instructionson
configurationandoperation,and
warrantyinformation.
Scan QR Code to go
directly to the
SunSaver Installation
Manual and warranty
information online.
Contact Information:
TechnicalSupport:Support.morningstarcorp.com
Phone:1‐215‐321‐4457
SunSaverSolarChargeController
WarrantyRegistration:https://www.morningstarcorp.com/product‐registration/
BatterySelectJumper
INSERTED
Battery
Select
Jumper
REMOVED
SOLAR CONTROLLER
SS‐10/10L
6Vto15V
10A
10A
SS‐20L
20A
20A
BATTERY SET POINTS
Set Point
AbsorptionVoltage
FloatVoltage
TimeuntilFloat
EqualizeVoltage
12-volt
14.1V
13.7V
3hours
N/A
EqualizeDuration(hours)
EqualizeCalendar(days)
MaximumRegulationVoltage*
N/A
N/A
LowVoltageDisconnect(LVD)
LowVoltageReconnect(LVR)
HighVoltageDisconnect(HVD)
HighVoltageReconnect(HVR)
StartupLVD
InstantLVD
24-volt
29.2V
27.4V
29.8V
*Nottemperaturecompensated.15V@12Vnominal,30V@24Vnominal.
12-volt
14.6V
13.7V
14.9V
3hours
28days
24-volt
28.2V
27.4V
15.0V30.0V15.0V30.0V
AbsorptionDuration 3hours
Sealed Flooded
11.5V23.0V11.5V23.0V
12.6V25.2V12.6V25.2V
14V28V14V28V
11.7V23.4V11.7V23.4V
10.0V20.0V10.0V20.0V
15.3V 30.6V15.3V30.6V
30V60V
12V24V12V24V
30V60V
6Vto30V 6Vto15V 6Vto30V
For Sealed Batteries: For Flooded Batteries:
IMPORTANT:
PulseWidthModulation(PWM)Chargingversus
SlowSwitchingCharging
SeetheSunSaverInstallationManualfordirections
forchangingtheregulationfromPulseWidth
Modulation(PWM)chargingtoSlowSwitching
charging.
SlowSwitchingregulationlimitstheswitching
frequencyto10hz.(maximum),whichcan
eliminatenoiseissuesinsomesystems.
PWMchargingisselectedbydefault.
To Install the Terminal Cover (requiredbyUL/ETLlistedsystems):
1. Removethetwolowerscrewsfrom
thefaceplate.
2. AligntheTerminalCoverover
theholes.
3. InsertthescrewsremovedinStep1and
hand‐tightenusingcarenottoover‐tighten.
IMPORTANT:
TheSunSaverchargingalgorithmiscompatible
withlead‐acidorNiCdbatteries.NiMH,Li‐ion,
andotherbatterychemistriesarenotcompatible
withtheSunSaverchargingalgorithm.
TerminalCover
SS‐6
SS‐6L*
SS‐10
SS‐10L*
SS‐20L*
SunSaver Models:
*Automatic Load Control:
LoadControlautomaticallydisconnects
and reconnects system loads based upon
the Low Voltage Disconnect (LVD) and
Low Voltage Reconnect (LVR) voltage
thresholds.
The LVD and LVR thresholds are listed on
Page 4 of this Quick Start Guide.
ThisfeatureisexclusivetomodelsSS‐6L,
SS‐10L,andSS‐20Lonly.
LEGEND
32
SunSaver Solar Controller
Quick Start Guide
(+)
(–)
(+) (–)
Solar Disconnect*
(PV GFP required per
NEC 690)
Photovoltaic (PV) Array
Battery / Battery Bank
Battery
Disconnect*
DC Load
Disconnect*
Power UP Sequence:
1. ConnectBattery/BatteryBank.
2. ConnectSolar.
Power DOWN Sequence:
1. DisconnectSolar.
2. DisconnectBattery/BatteryBank.
Mounting:
#2
Minimum Clearance Requirements:
CAUTION: Equipment Damage
DonotexposetheSunSaverCCtoweather.Locatein
adry,protectedareatopreventequipmentdamage.
Ensuretheminimumclearancerequirementsare
followedtoprovideadequateventilationandprevent
theunitfromoverheating.
IMPORTANT: Exampleonly.Actualwiringmayvary.READthe
SunSaverInstallation,Operations,andMaintenanceManualformandatory
safetyrequirements.Allconfigurationmustcomplywithlocalandnational
electriccodes.Consultyourlocalelectricauthoritytoensurecompliance.
Negative (–)
Positive (+)
Ground
SeetheMorningstarPVStringCalculatorat:
http://string‐calculator.morningstarcorp.com/
Component
LoadTerminals
WireSize
(Solid)
#10AWG
5.2mm2
(Maximum)
ToolRequired
3/16"(5mm)
FlatheadScrewdriver
BatteryTerminals
WIRING AND TORQUE REQUIREMENTS
Torque
(Maximum)
10.6in‐lbs.
(1.2Nm)
SolarTerminals
Securinghardware
notshown.
WARNING: Explosion Hazard
NeverinstalltheSunSaverinanenclosurewithvented/
floodedbatteries.Batteryfumesareflammableand
willcorrodeanddestroytheSunSavercircuits.Ensure
sufficientventilation.
Step 1: Choose Mounting Location
LocatetheSunSaveronaverticalsurfacewithin10feet(3m)ofthebattery
bankthatisprotectedfromdirectsun,hightemperatures,andwater.
Step 2: Check for Clearance and Ventilation
PlacetheSunSaverinthelocationwhereitwillbemounted.
Verifythatthereissufficientroomtorunwiresandthat
thereisampleroomaboveandbelowthecontrollerforairflow.
Step 3: Mark Holes
Useapencilorpentomarkthefour(4)mounting
holelocationsonthemountingsurface.
Step 4: Drill Holes
Removethecontrolleranddrill3/32”(2.5mm)
holesinthemarkedlocations.
Step 5: Secure Controller
Placethecontrolleronthesurfaceandalignthemountingholes
withthedrilledholesinstep4.Securethecontrollerinplace
usingtheMountingscrews(included).
3/32"(2.5mm)
Battery(+) Battery(—)
2
WireSize
(multistrand)
#10AWG
5.2mm2
(Maximum)
WireSize
(finestrand)
#10AWG
5.2mm2
(Maximum)
Recommended
Orderof
Installation
1
2
3
4
4
DC Load(s)*
Communications
Security Lighting Industrial
Residential
PrimarySystem
Ground
3 1
2"(51mm)
FusesorDisconnects
*Fuseorbreakersizingmustbebasedonrequiredwireampacity.
Ifusingafuse,doNOTinsertthefuseinthefuse‐holderuntilafterallthe
otherconnectionshavebeencompleted.
(+)
(–)
12VdcModule 12VdcModule
30VocMax@12Vbattery/
60Voc@24Vbattery
StatusLED BatterySOCLEDs
IMPORTANT:
ArrayVoltageshouldNEVERexceed
themaximuminputvoltage.
BATTERY STATE-OF-CHARGE (SOC) LED
Green
Green
Green
Green
Indication Battery
Status
SOC
LED
FastFlashing(2Flash/sec)
MediumFlashing(1Flash/sec)
SlowFlashing(1Flash/2sec)
ONSolid
EqualizeCharge
Absorption
Charge
FloatCharge
NearlyFull
Load
Status
LoadON
LoadON
LoadON
LoadON
Yellow
Red
Red
ONSolid
Flashing(1Flash/sec)
ONSolid
HalfFull
BatteryLow
BatteryEmpty
LoadON
LVDWarning
(LoadON)
LVD(LoadOFF)
WARNING: Shock Hazard
Fuses,circuitbreakers,anddisconnectswitchesneveropengrounded
systemconductors.OnlyGFDIdevicesarepermittedtodisconnect
groundedconductors.
WARNING: Shock Hazard
Testbetweenallterminalsandgroundbeforetouching.
PoweroraccessoryterminalsareNOTelectricallyisolatedfromDCinput
andmaybeenergizedwithhazardoussolarvoltage.
IMPORTANT:
Ensurethereisonly1DCNegative‐to‐GroundBondintheentiresystem.
4
2"(51mm)
STATUS LED
None
Green
Red
Red
Indication Operating
State
Color
OFF(withheartbeat1)
ONSolid(withheartbeat2)
Flashing
ONSolid(withheartbeat2)
Night
Charging
Error
CriticalError
¹heartbeatindicationflickerstheStatusLEDON brieflyevery5seconds
2heartbeatindicationflickerstheStatusLEDOFF brieflyevery5seconds
(12-volt or 24-volt*)
*SunSaverModelDependent
4
WARNING: Shock Hazard
ThesolarPVarraycanproduceopen‐circuit
voltagesinexcessof40Vdcwheninsunlight.
Verifythatthesolarinputbreakeror
disconnecthasbeenopened(disconnected)
beforeinstallingthesystemwires.
None NoLEDsON BatteryMissing LoadOFF

Other manuals for SunSaver SS-6

1

This manual suits for next models

4

Other Morningstar Controllers manuals

Morningstar ProStar-15 User manual

Morningstar

Morningstar ProStar-15 User manual

Morningstar TriStar Professional TS-60M User manual

Morningstar

Morningstar TriStar Professional TS-60M User manual

Morningstar SunGuard User manual

Morningstar

Morningstar SunGuard User manual

Morningstar SunSaver Duo SSD-25RM User manual

Morningstar

Morningstar SunSaver Duo SSD-25RM User manual

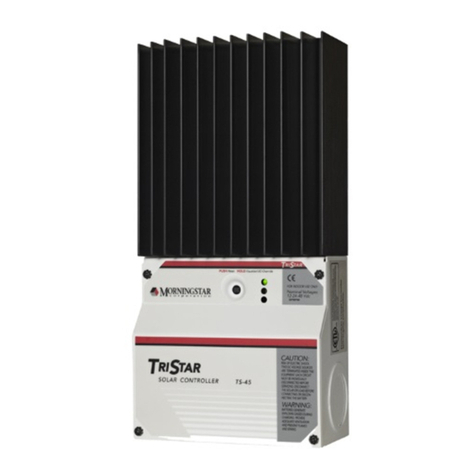
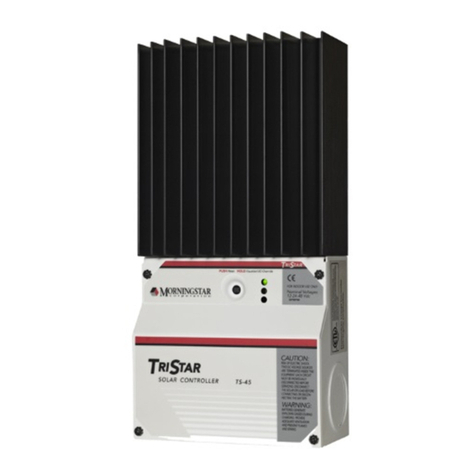
Morningstar TriStar TS-45 User manual

Morningstar

Morningstar TriStar TS-45 User manual

Morningstar ProStar PS-15 User manual

Morningstar

Morningstar ProStar PS-15 User manual

Morningstar PROSTAR-12 User manual

Morningstar

Morningstar PROSTAR-12 User manual

Morningstar SUNSAVER MPPT SS-MPPT-15L User manual

Morningstar

Morningstar SUNSAVER MPPT SS-MPPT-15L User manual

Morningstar SunSaver-10 User manual

Morningstar

Morningstar SunSaver-10 User manual

Morningstar SUNSAVER DUO User manual

Morningstar

Morningstar SUNSAVER DUO User manual

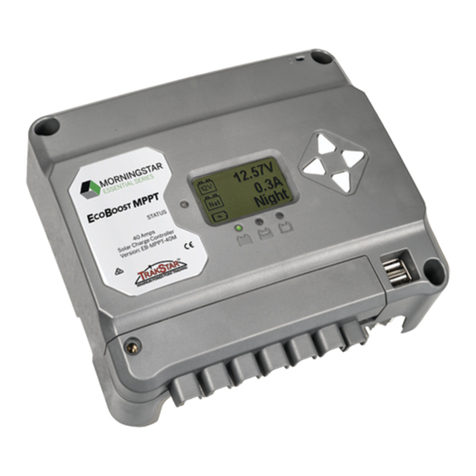
Morningstar ProStar MPPT Series User manual

Morningstar

Morningstar ProStar MPPT Series User manual

Morningstar SUNSAVER MPPT SS-MPPT-15L User manual

Morningstar

Morningstar SUNSAVER MPPT SS-MPPT-15L User manual

Morningstar TRISTAR TS-MPPT-60-600V-48-DB User manual

Morningstar

Morningstar TRISTAR TS-MPPT-60-600V-48-DB User manual

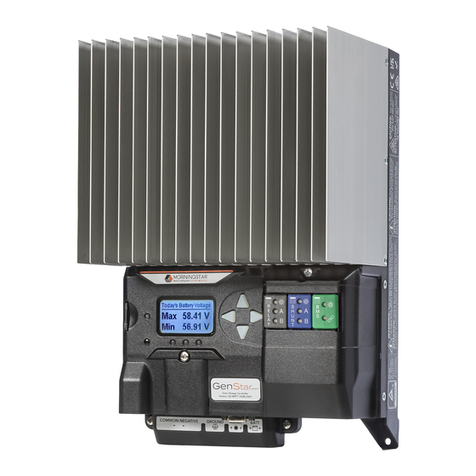
Morningstar REAKSTAR GenStar GS-MPPT-60M-200V User manual

Morningstar

Morningstar REAKSTAR GenStar GS-MPPT-60M-200V User manual

Morningstar ProStar PS-30M-PG User manual

Morningstar

Morningstar ProStar PS-30M-PG User manual

Morningstar EC-10 General instructions

Morningstar

Morningstar EC-10 General instructions

Morningstar ProStar MPPT TRAKSTAR PS-MPPT-15 User manual

Morningstar

Morningstar ProStar MPPT TRAKSTAR PS-MPPT-15 User manual

Morningstar SHS-6 User manual

Morningstar

Morningstar SHS-6 User manual

Morningstar SUNSAVER SS-10-12V User manual

Morningstar

Morningstar SUNSAVER SS-10-12V User manual

Morningstar TriStar TS-60 User manual

Morningstar

Morningstar TriStar TS-60 User manual

Morningstar SunLight-10 User manual

Morningstar

Morningstar SunLight-10 User manual

Morningstar SunSaver Series Guide

Morningstar

Morningstar SunSaver Series Guide

Morningstar SunSaver SS-6 User manual

Morningstar

Morningstar SunSaver SS-6 User manual

Morningstar ProStar MPPT Series User manual

Morningstar

Morningstar ProStar MPPT Series User manual

Popular Controllers manuals by other brands

iNels RFWB-20/G quick start guide

iNels

iNels RFWB-20/G quick start guide

MULTISPAN UTC-3203 operating manual

MULTISPAN

MULTISPAN UTC-3203 operating manual

Becker Centronic Series Assembly and operating instructions

Becker

Becker Centronic Series Assembly and operating instructions

Schischek InMax Series Installation

Schischek

Schischek InMax Series Installation

Bardac PLX product manual

Bardac

Bardac PLX product manual

Genie KB-200/IP user manual

Genie

Genie KB-200/IP user manual

Siemens Simatic S7-1500 manual

Siemens

Siemens Simatic S7-1500 manual

Siemens RWF40 Series Installation, use and maintenance instructions

Siemens

Siemens RWF40 Series Installation, use and maintenance instructions

Sam RGLF-2 user manual

Sam

Sam RGLF-2 user manual

OSEE GoStream Deck user manual

OSEE

OSEE GoStream Deck user manual

Omnitronic 80711322 user manual

Omnitronic

Omnitronic 80711322 user manual

Omron NJ501-1300 user manual

Omron

Omron NJ501-1300 user manual

Bosch Rexroth IndraDrive CsDrive System with HCS01 instruction manual

Bosch

Bosch Rexroth IndraDrive CsDrive System with HCS01 instruction manual

RGBlink G3 NET 2K quick start

RGBlink

RGBlink G3 NET 2K quick start

RESEARCH CONCEPTS RC2000C manual

RESEARCH CONCEPTS

RESEARCH CONCEPTS RC2000C manual

Hihome WZB-FLOW instructions

Hihome

Hihome WZB-FLOW instructions

SIGMAKOKI OptoSigma PGC-04-U manual

SIGMAKOKI

SIGMAKOKI OptoSigma PGC-04-U manual

Hunter SpectraProbe XE Hardware user manual

Hunter

Hunter SpectraProbe XE Hardware user manual

manuals.online logo
manuals.online logoBrands
  • About & Mission
  • Contact us
  • Privacy Policy
  • Terms and Conditions

Copyright 2025 Manuals.Online. All Rights Reserved.