6 Morton®Water Softener Installation & Operation Manual
=The water softener requires a minimum water flow of 3 gallons per minute at the inlet. Maximum allowable inlet
water pressure is 125 psi. If daytime pressure is over 80 psi, nighttime pressure may exceed the maximum. Use
a pressure reducing valve if necessary (Adding a pressure reducing valve may reduce the flow). If your home is
equipped with a back flow preventer, an expansion tank must be installed in accordance with local codes and
laws.
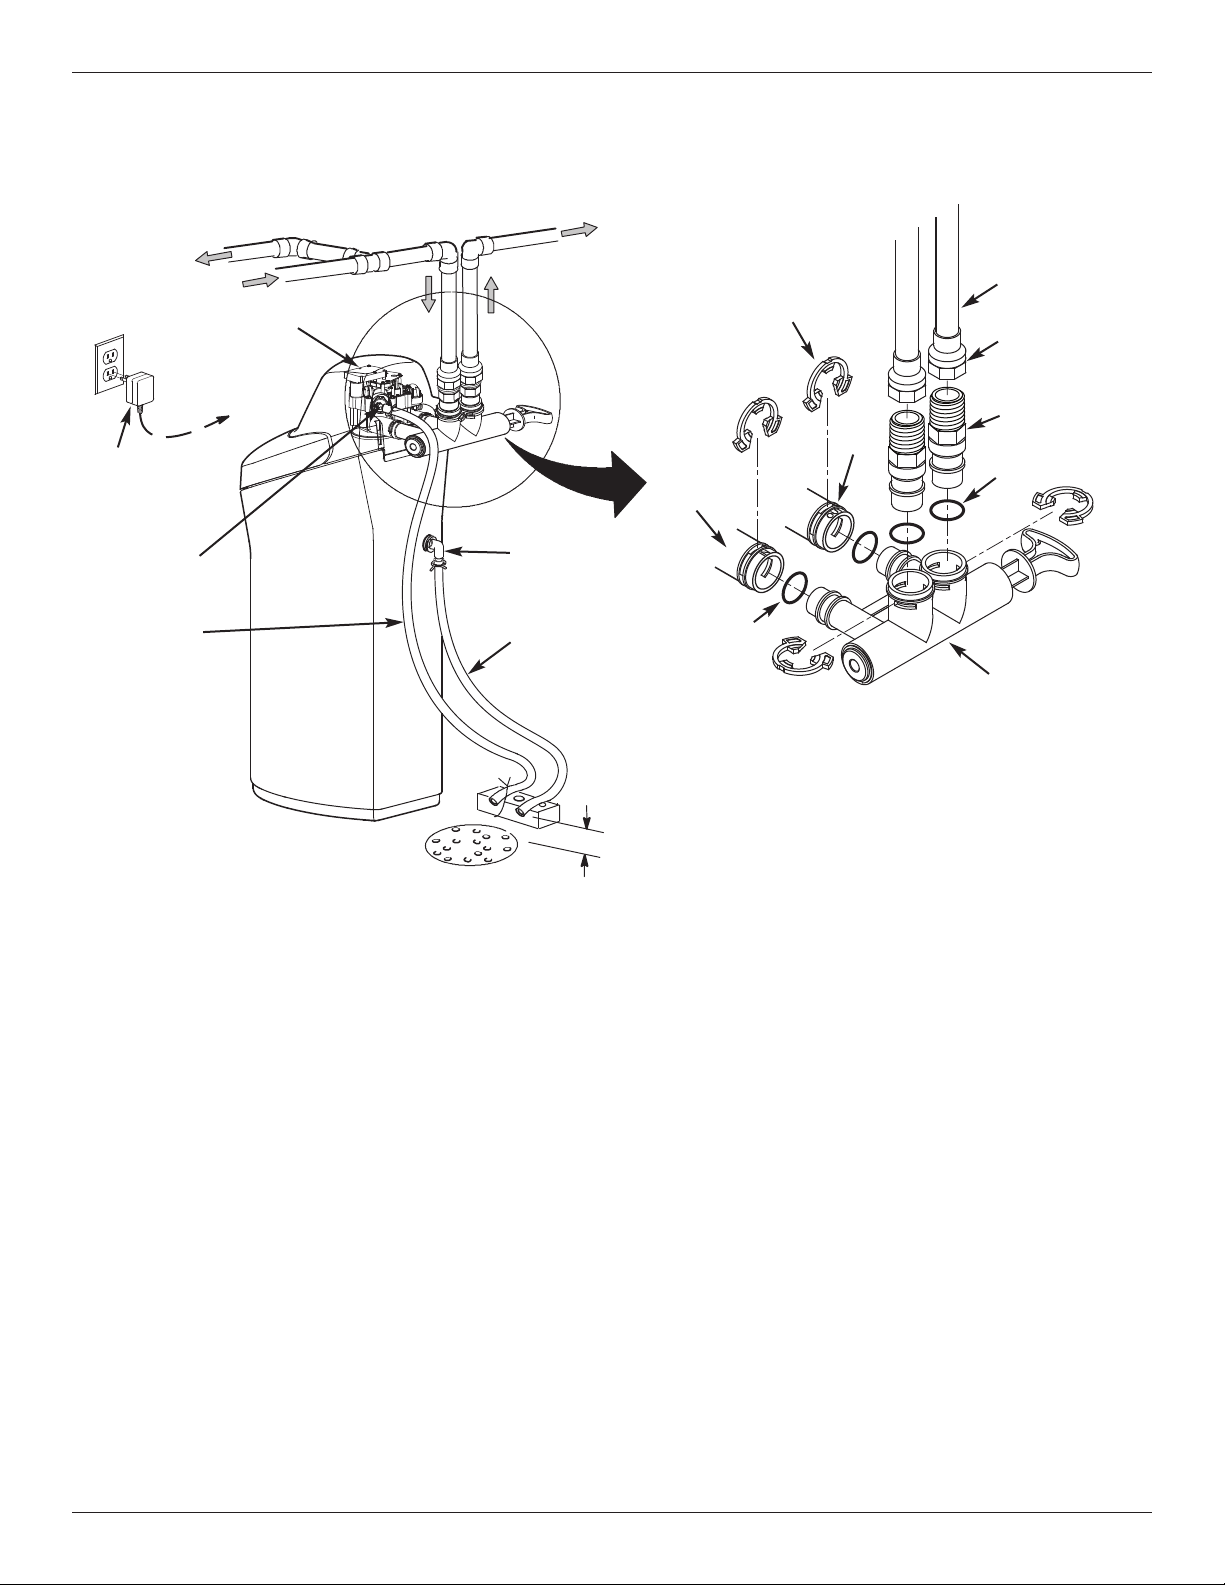
=The water softener works on 24V D electrical power, supplied by a direct plug-in power supply (included). Be
sure to use the included power supply and plug it into a nominal 120V, 60 Hz household outlet that is in a dry
location only, grounded and properly protected by an overcurrent device such as a circuit breaker or fuse.
=Do not use this system to treat water that is microbiologically unsafe or of unknown quality without adequate dis-
infection upstream or downstream of the system.
European Directive 2002/96/E requires all electrical and electronic equipment to be disposed of accord-
ing to Waste Electrical and Electronic Equipment (WEEE) requirements. This directive or similar laws are
in place nationally and can vary from region to region. Please refer to your state and local laws for prop-
er disposal of this equipment.
Bef re Y u Start
Water C nditi ning Inf rmati n
ron
Iron in water can cause stains on clothing and plumb-
ing fixtures. It can negatively affect the taste of food,
drinking water, and other beverages. Iron in water is
measured in parts per million (ppm). The total* ppm of
iron, and type or types*, is determined by chemical
analysis. Four different types of iron in water are:
=Ferrous (clear water) iron
=Ferric (red water) iron
=Bacterial and organically bound iron
=olloidal and inorganically bound iron (ferrous or
ferric)
Ferrous (clear water) iron is soluble and dissolves in
water. This water softener will reduce moderate
amounts of this type of iron (see specifications).**
Ferrous (clear water) iron is usually detected by taking
a sample of water in a clear bottle or glass.
Immediately after taking, the sample is clear. As the
water sample stands, it gradually clouds and turns
slightly yellow or brown as air oxidizes the iron. This
usually occurs in 15 to 30 minutes.
When using the softener to reduce Ferrous (clear
water) iron, add 5 grains to the hardness setting for
every 1 ppm of Ferrous (clear water) iron. See "Set
Water Hardness Number" section.
Ferric (red water), and bacterial and organically bound
irons are insoluble. This water softener will not
remove ferric or bacterial iron. This iron is visible
immediately when drawn from a faucet because it has
oxidized before reaching the home. It appears as
small cloudy yellow, orange, or reddish suspended
particles. After the water stands for a period of time,
the particles settle to the bottom of the container.
Generally these irons are removed from water by filtra-
tion. hlorination is also recommended for bacterial
iron.
olloidal and inorganically bound iron is of ferric or fer-
rous form that will not filter or exchange out of water.
This water softener will not remove colloidal iron. In
some instances, treatment may improve colloidal iron
water. olloidal iron water usually has a yellow
appearance when drawn. After standing for several
hours, the color persists and the iron does not settle,
but remains suspended in the water.
Sediment
Sediment is fine, foreign material particles suspended
in water. This material is most often clay or silt.
Extreme amounts of sediment may give the water a
cloudy appearance, and may require a sediment filter
be installed upstream of the water softener.
* Water may contain one or more of the four types of
iron and any combination of these. Total iron is the
sum of the contents.
** apacity to reduce clear water iron is substantiated
by laboratory test data.