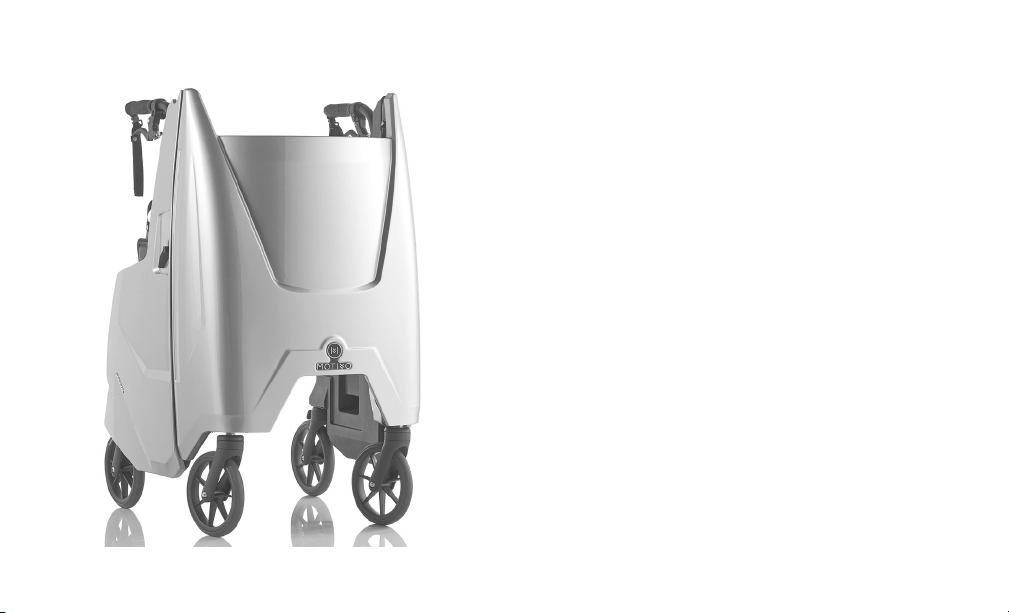
Motivo Tour User manual

Tour Owner’s Manual

Welcome to Motivo
From all of us at Motivo, thank you for
purchasing the Tour. At Motivo, we are
committed to producing exceptional
independence enabling products that help
enhance people’s lives. We are very pleased
you have chosen the Tour and invite you
to connect with us and other Tour users at
www.facebook.com/motivolife.
The following owner’s manual provides
details on how to safely and effectively use
your Tour and all its integrated features. If
you have any questions, more information
can be found at www.motivolife.com. You
can also reach customer support via email at
support@motivolife.com, as well as by phone
at (414) 235-9409.

2
WARNING & SAFETY INSTRUCTIONS
• DO NOT use your Tour without first completely reading this owner’s manual. If
you are unable to understand any portion of the owner’s manual, please contact
Motivo, your dealer, or healthcare professional before attempting to use your
Tour. Failure to understand may result in personal injury or damage.
• You MUST be able to support the majority of your weight when using the Tour.
Please seek advice from your healthcare professional to determine if the Tour is
appropriate for you to use and the proper adjustment and usage of your Tour.
• DONOTusetheTourasawheelchairortransportdevice.TheTouris
NOTintendedforpropellingwhileseated.Seriousinjurycanoccur.
• ALWAYS observe the Tour’s 300 lb (136 kg) weight limit. The weight limit is the
combined weight of the user and items placed in the storage area, on the tray,
or otherwise attached to the Tour. The tray weight limit is 8 lb (3.6 kg) and the
storage compartment is 10 lb (4.5 kg). The seat weight limit is 300 lb (136 kg).
• DO NOT put more than 5 lb (2.3 kg) on the storage door when open or use it as
a seat.

3
• ALWAYS make sure both side latches are fully secured before use.
• Parking brakes MUST BE LOCKED before using the seat.
• ONLY use seat when secured on the locking post. DO NOT use the seat when the
Tour is on an uneven surface or incline.
• DO NOT use the Tour on stairs, escalators, soft ground, uneven surfaces, steep
inclines, slippery surfaces, moving walkways or in the shower.
• ALWAYS check to ensure handles are secure, handle grips do not twist, there is
nothing hindering the movement of the wheels/casters, and the brakes are operating
properly before use.
• All four wheels MUST remain in contact with the ground at all times during use.
• DO NOT hang anything other than a cane or Motivo certified accessories from
your Tour. Hanging items from the Tour can make it unstable and cause it to tip. To
accommodate a cane, there are special notches designed into the top of the Tour.

4
2. Using the RIGHT handle, FULLY
unfold the RIGHT side. Press down
on the RIGHT side lever until it
locks.
Unfolding Your Tour
1. Pull the black strap to release the
Velcro® style closure.
WARNING: Pinch points exist between the front and side panels.
Make sure hands and body are clear of all pinch points.
LOCK

5
3. Using the LEFT handle, FULLY
unfold the LEFT side. Press down
on the LEFT side latch lever until
it locks.
4. Squeeze handles towards each
other to make certain latches
are FULLY engaged before use. If
panels fold in, repeat steps 2-4.
LOCK

6
2. Pull down FULLY on each parking
brake strap to engage the parking
brakes. Verify rear wheels do not
rotate before sitting.
How to Operate the Brakes
1. Squeeze both hand brake levers
to slow the Tour down or stop the
Tour temporarily.

7
The brakes can also be used as a
drag brake, meaning the brakes are
partially engaged to slow the rotation
of the wheels, such as when going
down a ramp or incline.
1. To activate, partially pull down on
each of the brake straps to the
desired resistance on the wheels.
2. Push on the thumb lever at the end
of each handle to release the drag
brake.
3. Push on the thumb lever at the
end of each handle to release the
parking brakes.
Drag Brake Feature

8
1. To keep the Tour from rolling, set
parking brakes (pg. 6). Complete
steps 1-3 for each handle. Start by
releasing the handle locking clamp
at the base of the handle.
Adjusting the Handle Height
2. Refer to Height Guide (pg. 9) to
determine height setting. Slide the
handle up until the silver rivet aligns
with the selected mark. DO NOT
set handle above 38" (96.5 cm).

9
3. Close handle locking clamp FULLY
to secure. Apply downward
pressure on the handle, also
attempt to rotate. If handle is not
locked, repeat steps 1-3.
Above measurements are from
the ground to the top of the grip.
ALWAYS consult your healthcare
professional to determine proper
adjustment and usage of the Tour.
Height Guide
38” (96.5 cm)
33” (83.8 cm)
37” (94.0 cm)
35” (88.9 cm)
31” (78.7 cm)
36” (91.4 cm)
34” (86.4 cm
32” (81.3 cm)

10
2. Pull the seat straight up and FULLY
out of its storage compartment.
When it stops, rotate down.
1. Activate both parking brakes
FULLY before using the seat. Make
sure tray is folded and storage
door is closed (pg. 12-13).
Using & Storing the Seat
WARNING: Be careful of pinch points when unfolding and folding the seat.

11
4. To store, lift seat up off of the
locking post, rotate until straight
up and down, then slide seat back
into its storage compartment.
3. Align the locking post on the LEFT
side ledge with the corresponding
receiver on the seat. ONLYuse
seatwhensecuredonthe
lockingpost.
SECURED
UNSECURED

12
2. To fold, rotate the tray up and
press to fasten the Velcro style
closure. Cup holder may be
removed for cleaning.
1. To unfold, pull up on the top half of
the tray and rotate open. The tray
weightlimitis8lb(3.6kg).
Unfolding & Folding the Tray
WARNING: Be careful of pinch points when folding and unfolding the tray.
Use caution when transporting hot beverages.

13
2. To close, push up on the storage
door until it latches.
Opening & Closing the Storage Compartment
1. Using the hand opening, pull to
open. Compartment weightlimit
is10lb(4.5kg).DO NOT put
more than 5 lb (2.3 kg) on the
storage door when open or use as
a seat.

14
2. Fold in the left side. Toclose
securely,alwaysfoldtheLEFT
sideinFIRST.Next, release the
RIGHT side by pulling up on the
RIGHT side lever to unlock.
1. Before folding, turn the Tour
slightly to rotate the front wheels
to one side. Then, release the
LEFT side by pulling up on the
LEFT side lever to unlock.
Folding Your Tour
UNLOCKUNLOCK UNLOCK

15
3. Fold the RIGHT side in and secure
the folded Tour with the Velcro
style closure.
Transporting Your Tour
WARNING: Pinch points exist between the front and side panels.
Make sure hands and body are clear of all pinch points.
1. To transport, fold the Tour, secure
closure, and with folded sides facing
you pick up using the carrying
handle inside the RIGHT hinge.

16
Adjusting the Brake Tension
1. Standing inside the Tour, loosen the locking
nut by turning it clockwise.
2. For more tension and to move the brake shoe
closer to the rear wheel, turn the knurled cap
clockwise. For less tension and to move the
brake shoe away from the rear wheel, turn
the knurled cap counterclockwise.
3. When the tension is set, tighten the locking
nut against the brake lever body to secure
turning it counterclockwise.
DO NOT use if brakes are not properly
adjusted. When properly adjusted, the brakes
will prevent the rear wheels from rotating
and when the brakes are released the rear
wheels will rotate freely.
KNURLED CAP
LOCKING NUT
BRAKE SHOE

17
Applying Graphics (optional accessory)
2. Push any air bubbles to the
outer edges as you go. Repeat
steps 1-2 for each side graphic.
TIP: Use a credit card to smooth as
you go and push any air bubbles out
to the outer edges.
1. Peel graphic from backing. Apply
slowly, aligning graphic edge with
corresponding shape on the Tour.
TIP: Evenly mist Tour surface with
glass cleaner before applying to allow
temporary repositioning. Let dry.

18
• The Tour is designed for indoor and outdoor use.
• Periodically inspect the wheels for tightness, wear, and damage.
• Before use, make sure that the wheels rotate freely and are free of hair, lint,
and debris.
• Regular inspection of parts including hardware, brackets, and plastics, for
deformation, corrosion, breakage, wear or compression is recommended.
• Regular cleaning of the Tour is recommended. Wipe all surfaces, including
cushions, with a damp cloth and wipe surfaces dry before use. DO NOT use
harsh chemicals or solvents.
• DO NOT clean cushions in a washing machine.
• ONLY use certified Motivo replacement parts and accessories.
General Maintenance & Care

19
LIFETIME LIMITED WARRANTY
Motivo,Inc. warrantsthe Tour forlifetime againstdefects inmaterial
and workmanship except for wear and tear items that have a one-
yearlimitedwarrantyfromdateofpurchaseincludingbutnotlimited
to handle grips, seat cushions, wheel assembly, brake cables, latches,
levers,handleclamps,andstraps.
EXCLUSIVE REMEDY
The exclusive remedy for the above warranty shall be repair or replacement
of defective parts within the warranty period. If within such warranty period
the Tour shall be proven to be defective, it shall be repaired or replaced,
at Motivo’s option, with refurbished or new parts. This warranty does not
include any labor or shipping charges incurred in replacement part installation
or repair of the Tour. Repairs shall not extend this warranty. Coverage for
repaired products shall end when this limited warranty terminates. Motivo’s
sole obligation and your exclusive remedy under this warranty shall be limited
to such repair and/or replacement. For warranty service, please contact the
dealer where purchased or if you bought the product directly from Motivo,
please contact Motivo directly at www.motivolife.com.
Other manuals for Tour
1
Table of contents
Other Motivo Mobility Aid manuals
Popular Mobility Aid manuals by other brands

COMPASS HEALTH
COMPASS HEALTH PROBASICS manual

HEPRO
HEPRO Gripo instruction manual

Heartway Medical Products
Heartway Medical Products EV Rider TranSport EZ Fold S19M user manual

human care
human care Svea 53211 Low user manual

Breezy
Breezy BE07889T user guide

Invacare
Invacare 6681-5 Assembly, installation and operating instructions

Invacare
Invacare Court-Side Glides 6281JR Assembly, installation and operating instructions

MGI
MGI Superlite SL300 instruction manual

Vitea Care
Vitea Care CARTER Instructions for use

Graham Field
Graham Field LUMEX 6130 manual

Comodita
Comodita Tipo stand up user guide

AMF-BRUNS
AMF-BRUNS Easy-Ramp Brief operating instructions