Motocaddy CUBE User manual

REGISTERONLINE
www.motocaddy.com/warranty
CUBE / CUBE CONNECT Push Trolley
Instruction Manual

Page 2
Locating your Serial Number / Information about CUBE CONNECT
Locating your Serial Number
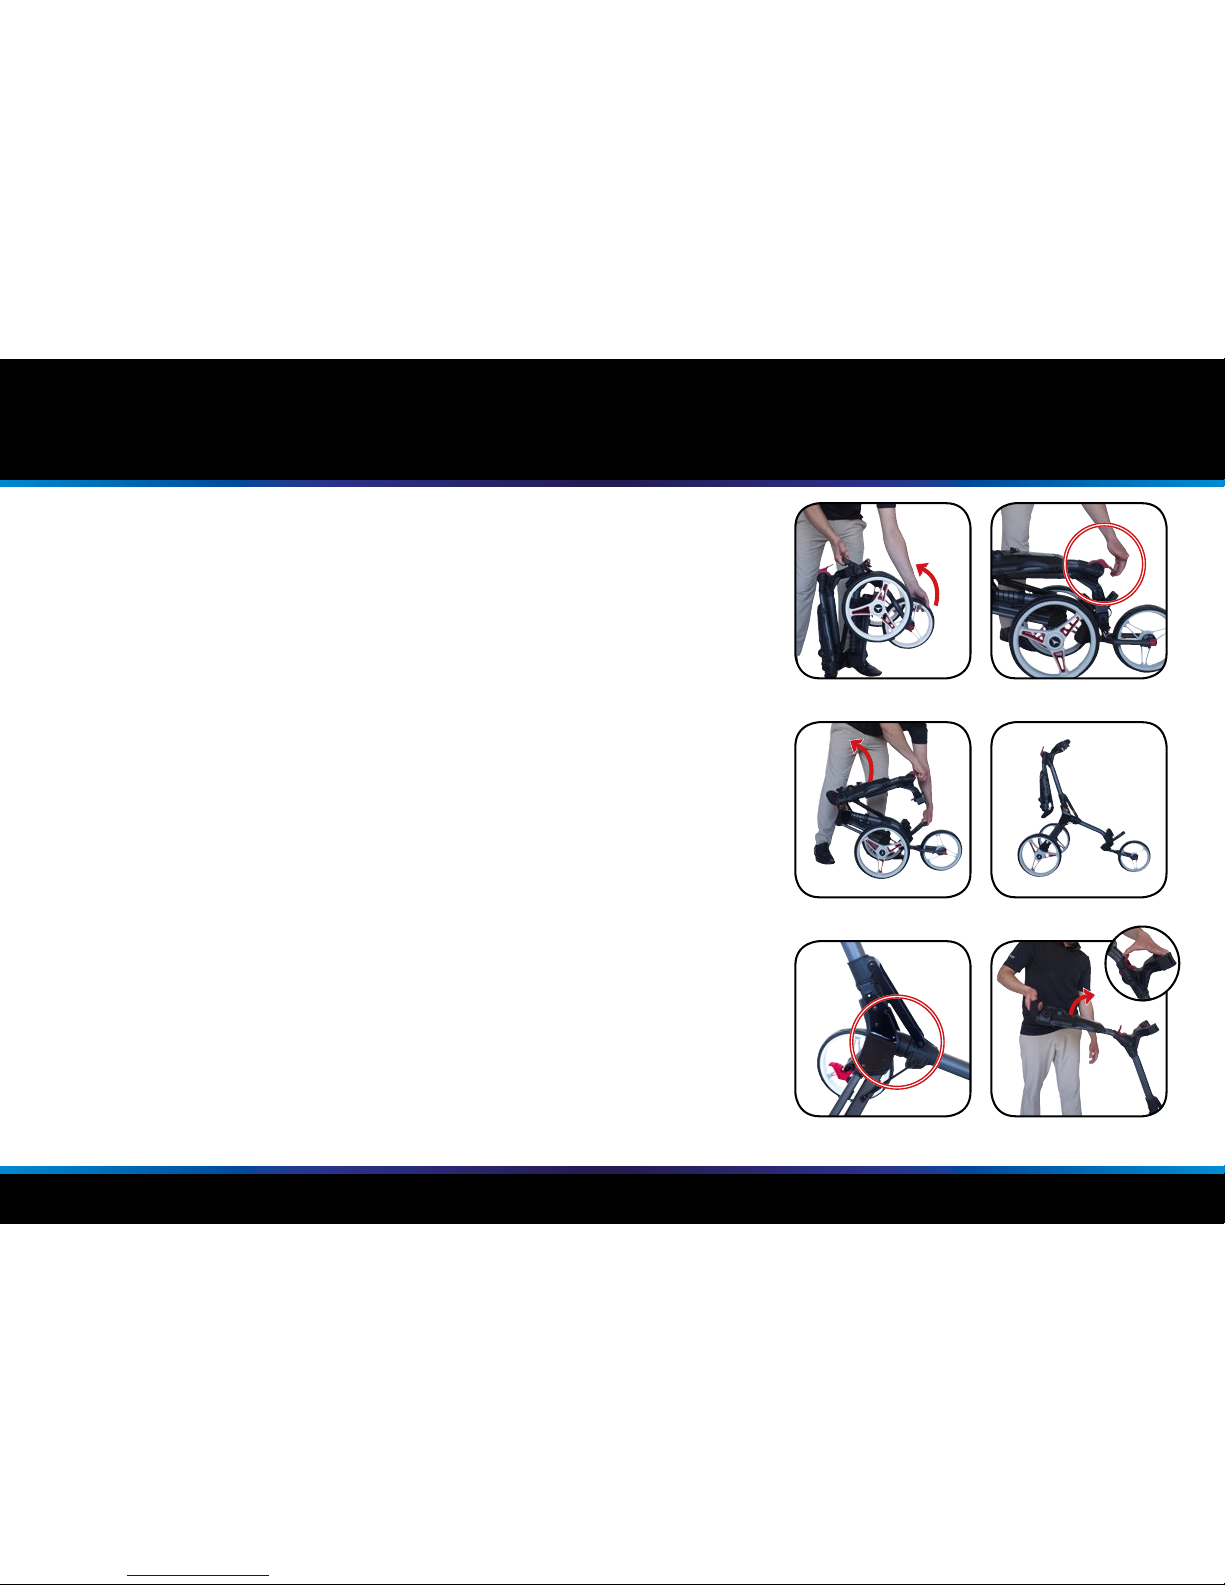
The serial number for the Motocaddy CUBE / CUBE CONNECT push trolley is located inside the accessory compartment on the
handle. This number is required when registering your warranty online and should be kept handy for future use.
The same number should also be on the box received with your trolley. Please ensure you keep hold of the packaging in case
you need to return your trolley for any reason. A proof of purchase must also be kept in case your trolley requires servicing
during its warranty period.
Please keep a record of your trolley serial number here for future reference
MCC
Information about CUBE CONNECT
For instructions covering the CUBE CONNECT smart features, please refer to the accompanying Motocaddy CONNECT Smart
Display Instruction Manual.
To power on the CUBE CONNECT Smart Display, hold down the middle button until it initialises and displays “SEARCHING OPEN APP”.
To power off, hold down the middle button for ve seconds.
In order to preserve battery life, we recommend powering off the Smart Display after use.
The CUBE CONNECT Smart Display is powered by a Motocaddy long-life battery. When battery capacity is low, “Please Replace
Battery” will be shown. Press any button to power the display off. For replacement batteries, please visit www.motocaddy.com
or contact your local Motocaddy stockist.

Page 3
Attaching the Wheels / Adjusting the Front Wheel Alignment
Fig 1
Fig 2
Fig 3
Attaching the Rear Wheels
The Motocaddy CUBE / CUBE CONNECT has no denitive left or right wheel.
To attach the wheels, slide the release button down (g. 1) and push the wheel axle into the housing (g. 2).
Adjusting the Front Wheel Alignment
In the unlikely event that your trolley is not tracking in a straight line, the alignment of the front wheel
can be adjusted to rectify the fault. This problem can be caused by a number of factors including a
slightly loose bag support or an unevenly packed golf bag. Should you wish to alter the alignment of
the front wheel you will require a Phillips screwdriver to follow these simple steps:
1. There are two screws on either side of the housing that are used to realign the wheel (g. 3)
2. If your trolley is veering to the right, turn the left screw counter clockwise and the right screw clockwise
3. If your trolley is veering to the left, turn the right screw counter clockwise and the left screw clockwise
This procedure can be carried out until you are happy the trolley is moving in a straight line (please
note you may only need to adjust one screw at a time).
NB : These instructions are based on positioning yourself in front of the trolley looking at the wheel.

Page 4
Unfolding your Trolley
1. Lift the trolley using the carry handle (located within the lower bag support)
and pull the front wheel up (g. 1) and towards you until fully extended
2. Place the trolley on the oor with all three wheels touching the ground.
You may want to hold the handle to stop it tipping backwards
3. Pull the locking lever upwards to release the folding lock (g. 2)
4. Place one hand on the carry handle and use the locking lever to pull the
frame upwards (g. 3) until it is fully extended (g. 4) and the central spring
is no longer visible (g. 5)
5. Lift the handle to the desired height and resecure the lever to lock (g. 6)
Adjusting the Handle Height
To adjust the handle height, release the locking lever and move the handle
into the desired position (g. 6). Resecure the lever once you have selected the
required handle height.
Unfolding your Trolley / Adjusting the Handle Height
Fig 4Fig 3
Fig 6Fig 5
Fig 1 Fig 2

Page 5
Folding your Trolley
It may be easier to engage the parking brake before folding your trolley.
1. Release the locking lever and gently lower the handle (g. 1)
2. Place one hand on the carry handle and push the upper bag support down
towards the front wheel (g. 2) until it passes the lower bag support
3. Resecure the locking lever to engage the folding lock (g. 3)
4. Lift the trolley using the carry handle and push the front wheel down and
underneath the trolley (g. 4)
NB : Always ensure the carry handle is used to lift your trolley when folded
(g. 5). Lifting the trolley in any other position may cause the frame to unfold
and could lead to injury.
It is recommended to stand the trolley on its carry handle when folded in order
to prevent damage to the trolley handle (g. 6).
Fig 3
Fig 6Fig 5
Fig 2
Fig 1
Fig 4

Page 6
Using the Upper and Lower Bag Supports
Fig 2
Fig 1
Using the Upper Bag Supports
The upper bag support straps are secured using the following steps:
1. Stretch the elasticated strap around the bag and loop the rounded bar underneath the hook (g. 1)
2. Position the two placement straps centrally on your golf bag (g. 2)
Using the Lower Bag Supports
This Motocaddy trolley is tted with the EASILOCK™ bag attachment system.
If you are using an EASILOCK™ compatible golf bag please follow these simple instructions:
1. Remove the two pre-tted lower bag straps by depressing the rear button and sliding (g. 3)
2. Match up the indicating line on the golf bag with the line on the lower bag support
3. Lower the bag until the pins lock in position. You should hear a small click
If you are using a non-EASILOCK™ golf bag, please use the following instructions:
1. Stretch the elasticated strap around the bag and loop the rounded bar underneath the hook
2. Position the two placement straps centrally on the base of your golf bag
Please ensure all straps are hooked in place securely before releasing. Failure to do so could result
in injury to the user.
Fig 3

Page 7
Adjusting the Bag Supports / Using the Parking Brake
Adjusting the Bag Supports
The bag support straps are manufactured from elasticated material to allow your golf bag to be held
tightly in place.
The strap should be adjusted to be reasonably tight around the golf bag:
1. Unclip the elasticated straps from the housing by pulling outwards in the direction shown (g. 1)
2. Move the bar as required to tighten or loosen the strap tting. Pulling the bar downwards will
tighten, pushing it upwards will loosen (g. 2)
3. Ensure that the straps are clipped back into the housing before use
Using the Parking Brake
To apply or release the foot brake press down on the pedal (g. 3).
The foot brake is designed to be used as a parking brake (like a hand brake of a car or foot brake on
a pram). When applying the brake, please ensure that the trolley has completely stopped moving.
WARNING: Attempting to apply the brake whilst the trolley is still in motion may cause damage
to the trolley and could invalidate the warranty.
Always ensure that the parking brake has been disengaged before attempting to set off again.
Fig 1
Fig 2
Fig 3

Motocaddy Ltd, Units 15 - 18 Stansted Distribution Centre,
Start Hill, Great Hallingbury, Hertfordshire, CM22 7DG, United Kingdom
t: +44 (0)1279 712 370 e: info@motocaddy.com w: www.motocaddy.com
We are dedicated to protecting the environment and encourage the recycling of Motocaddy products through a free
collection and disposal service. To nd out more or to locate your nearest Motocaddy recycling point, please contact
us through our website.
MC.18.52.002 EASILOCK™ Patent (GB) - GB2519073
This manual suits for next models
1
Table of contents
Other Motocaddy Outdoor Cart manuals
Popular Outdoor Cart manuals by other brands

Graco
Graco LineDriver ES Operation - repair - parts

Fisher-Price
Fisher-Price Side-by-Side Wagon instructions

Compac
Compac WD1500 instruction manual

Lifetime
Lifetime 6520 Assembly instructions and owner's manual

Home Storage Space
Home Storage Space 4 Tier Rolling Cart With Bamboo Cutting Board... Assembly instructions

United States Stove
United States Stove LC-37 instructions