Motocaddy M5 GPS User manual

EN
REGISTERONLINE
www.motocaddy.com/warranty
Visit www.motocaddy.com/instructions for other Motocaddy instructions including translations
Distance Measurement Device (DMD) features are legal to use when local USGA and R&A
rule 14-3 is in effect. Always check local and competition rules prior to commencing play
IMPORTANT: Scan the QR code to ensure
that your M5 GPS software remains up to
date and performance is always optimised
M5 GPS / M5 GPS DHC Electric Trolley
Instruction Manual

Page 2
Contents
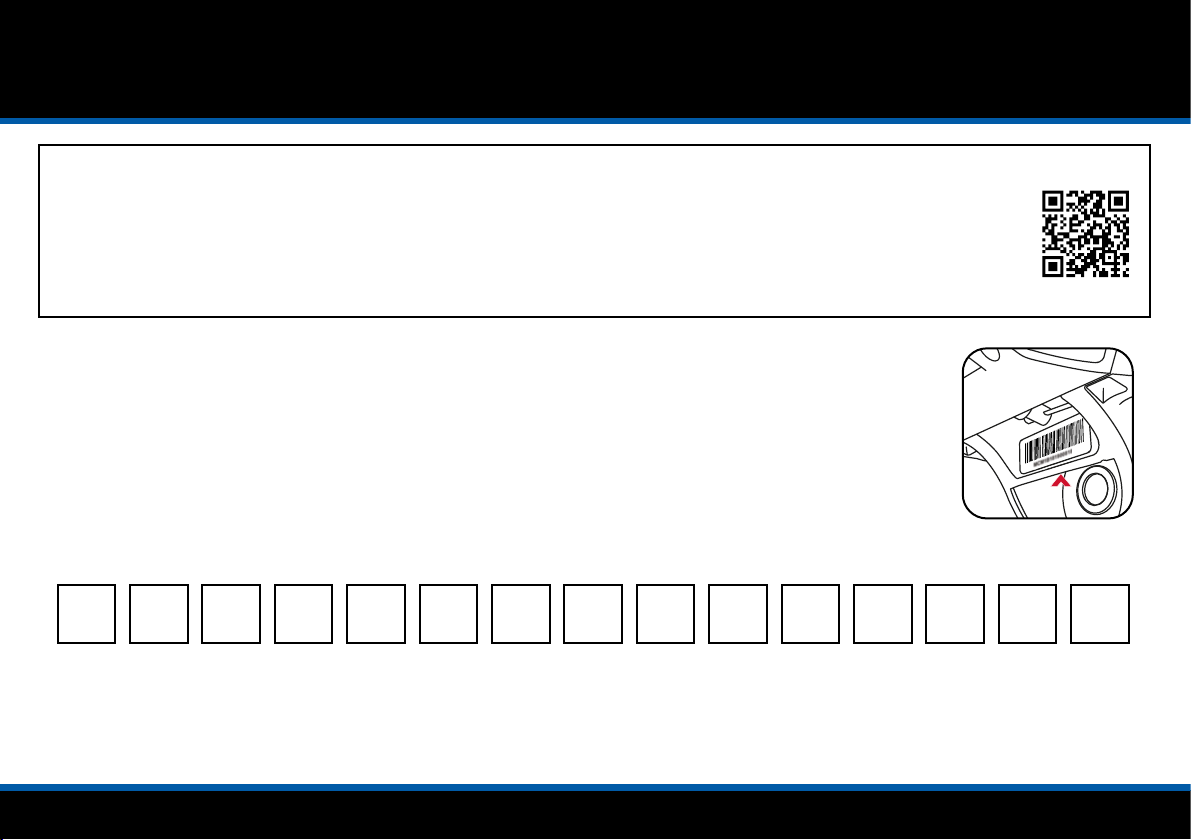
Registration / Serial Number / Information about DHC.........3
Safe Use / Trolley Care.................................................................4
Trolley Care / Battery Care & Advice..........................................5
Charging Instructions / Lithium Battery Care ..........................6
Lithium Battery Care .....................................................................7
Attaching the Wheels / Inverting the Wheels...........................8
Front Wheel Alignment.................................................................9
Unfolding your Trolley................................................................ 10
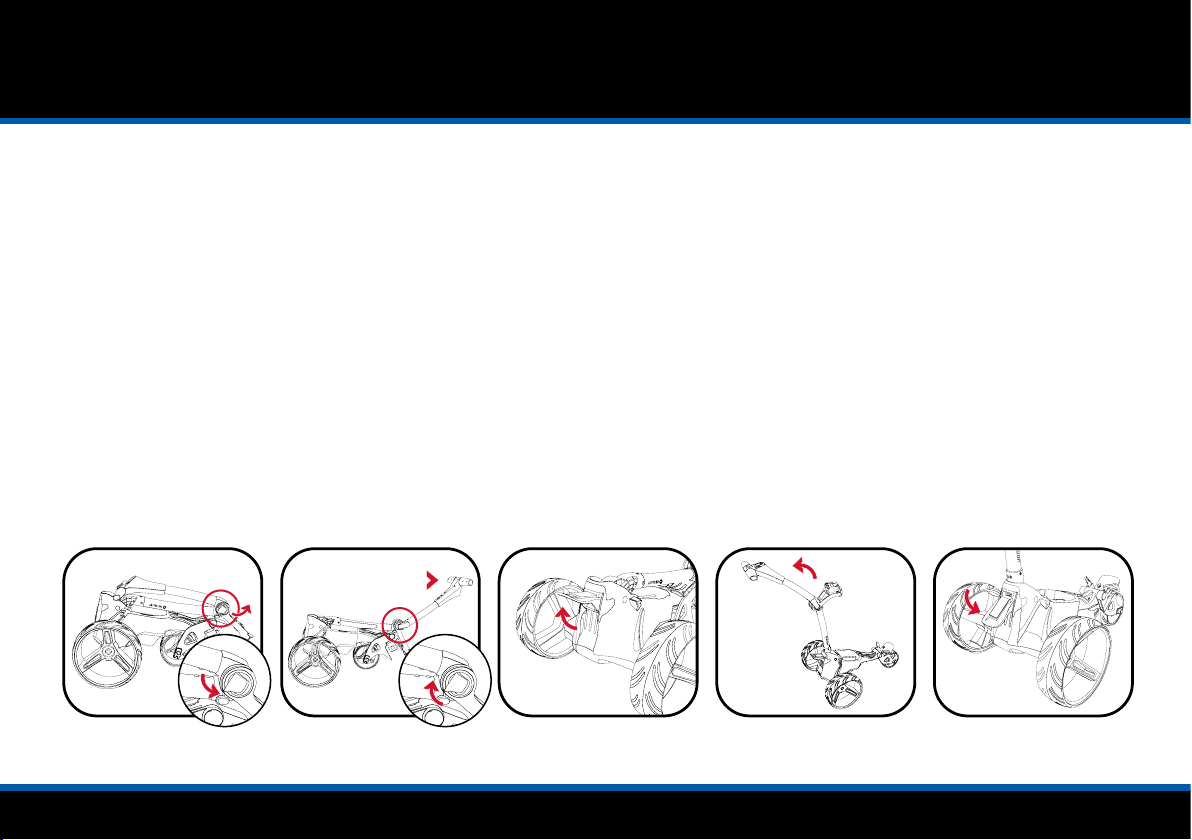
Folding your Trolley.................................................................... 11
Upper & Lower Bag Supports................................................... 12
Adjusting the Bag Supports...................................................... 13
Equipment Overview.................................................................. 14
Starting, Stopping & Changing Speed / Battery Meter........ 15
USB Charging / Clock ................................................................ 16
Adjustable Distance Control..................................................... 17
Introduction to GPS Mode / Using GPS Mode...................... 18
GPS Mode Overview .................................................................. 19
Dynamic Pin Location / Hole Advancement ......................... 20
Hazard Information.................................................................... 21
Shot Measurement / Units of Measure.................................. 22
Round Timer / Tee Selection.................................................... 23
Score Tracking / Ending your Round ...................................... 24
AED Locator & CPR Instructions ............................................. 25
Connecting to WiFi / Firmware Updates................................ 26
Course Updates .......................................................................... 27
Smartphone Notications / Motocaddy App Installation..... 28
Enabling Bluetooth / Pairing your Phone............................... 29
Notication Settings / Notication Stacking......................... 30
Language Settings / Competition Mode................................ 31
Factory Reset / Demo Mode .................................................... 32
Introduction to DHC / Parking Brake ...................................... 33
FCC Statement............................................................................ 34
Declaration of Conformity......................................................... 35

Page 3
Software Updates / Locating your Serial Number / Information about DHC
Locating your Serial Number
The serial number for this M-Series trolley is located on the trolley underside next to the motor (g. 1).
This number is required when registering your warranty online and should be kept handy for future use.
The same number should also be on the box received with your trolley. Please ensure you keep hold of the
packaging in case you need to return your trolley for any reason. A proof of purchase must also be kept in
case your trolley requires servicing during its warranty period.
Fig 1
IMPORTANT - Software Updates
The M5 GPS has been developed to include WiFi powered, Over the Air (OTA) course and system updates.
It is recommended that you always use the latest rmware version to enable you to take advantage of new features
and system improvements. You can register your email address to join our dedicated M5 GPS mailing list by scanning
the QR code or visiting www.motocaddy.com/m5gps.
Please keep a record of your trolley serial number here for future reference:
MCM
Information about DHC (Downhill Control) models
The information in this instruction manual applies to both standard and DHC electric trolley models. For DHC specic functionality,
please turn to page 33.

Page 4
Safe use of your Trolley / Trolley Care
Safety cut-out
This Motocaddy trolley is tted with a timed safety cut-out feature. Once started the trolley will automatically cut power to the
motor after ten minutes to prevent any possible damage to the trolley. Pressing the 'On/Off' button will restart the trolley.
Safe use of your Trolley
Motocaddy trolleys are designed for the transportation of golf bags and clubs contained within. Using the trolley for any other
purpose may cause damage to the trolley and cause harm to the user.
• Do not attempt to transport any other equipment
• The trolley is not designed for the transportation of people
• Do not use the trolley to assist you when going up hills
• Submerging the trolley in water (e.g. a lake) is likely to cause damage to the trolley
• Do not operate the trolley whilst under the influence of drugs or excessive amounts of alcohol
• All batteries must be disconnected from the trolley before folding, storage and transportation
Caring for your Trolley
Although your Motocaddy trolley has been weatherproofed, please follow these simple guidelines to help protect your trolley:
• Do not store your trolley outside
• Try to minimise exposure to rain as much as possible with an umbrella during heavy rainfall
• Wipe excess water from the trolley prior to storage
• Never use a pressure washer to clean your trolley. To prevent water damage, wipe down with a damp cloth
• Avoid using high pressure air hoses near moving components
• Avoid exposure to items which may scratch, damage or exert excessive force on the LCD display

Page 5
Trolley Care / Battery Care & Advice
This Motocaddy trolley is designed to require very little maintenance. We do however recommend giving your trolley regular
checks to ensure:
• There is no build up of excess mud and dirt
• The front wheel nut is on tightly and quick release lever is clamped down
• The front wheel is not clogged up and turns freely
Only original Motocaddy parts should be used when repairing your trolley.
Battery Care & Advice
All batteries must be charged as soon as possible after each use. Leaving batteries discharged for long periods of time will affect
the battery life.
Please ensure that only batteries supplied by Motocaddy are charged with Motocaddy chargers. Cyclic battery chargers are
designed specically in accordance with the battery manufacturer’s requirements. The Lithium battery charger MUST NOT be
used to charge any other battery and is designed for use with Motocaddy Lithium batteries only.
The charger should only be connected to an earthed socket outlet; the battery charger should only be opened and maintained by
authorised personnel. Unauthorised opening will invalidate your warranty.
The battery must be stored and charged on a dry non-carpeted surface and charged at temperatures ranging between 10°C and
30°C. Charging above or below these temperatures is not recommended as it can reduce the battery capacity.
When connecting your battery to the trolley, please ensure that the connections match up black to black and grey to grey.

Page 6
Charging your Lithium Battery / Lithium Battery Care
Charging your Lithium Battery
1. Unplug the Lithium battery from the trolley. This should always be performed before folding the trolley to avoid damage
to the battery and/or trolley
2. Plug the charger into your mains supply
3. Attach the battery cable to the charger matching black to black and grey to grey
4. When the charging LED indicator has turned green, the battery is fully charged and ready to be used
RED - Battery charging GREEN - Battery fully charged and ready to be disconnected
5. The charging process will take between 3 to 5 hours depending on the depth of discharge
(Please be aware that this may take longer for the rst few charges)
6. Once charging is complete please disconnect the charger from the mains power supply
7. Finally disconnect the charger from the battery
If you connect the battery to the charger and the LED goes out, this is likely to indicate that the battery is fully charged.
Please double check the battery on the trolley to ensure that it is fully working.
Caring for your Lithium Battery
• Try to avoid getting the battery too wet (i.e. do not submerge the battery, avoid deep puddles and do not clean
your trolley whilst the battery is still in the battery tray)
• Dropping the battery may cause damage to the internal cells
• Do not lift or carry the battery by the cable
• Use a damp cloth to clean off any dirt

Page 7
Lithium Battery Care
Recommendations for hibernation of Lithium Batteries during winter months
If for any reason your Lithium battery is not going to be used for lengthy periods, e.g. 3 months over the winter, it is advised to
store the battery half charged. To do this simply use the battery for a round of golf as usual and charge it for 1.5 hours at the end
of the round. Before the battery is used again, recharge it (top it up) prior to use.
We recognise that extended absences are not always planned in advance, however when it is likely that you will not be using your
battery for a period of time it is good practice to follow these steps to extend the life of your Lithium battery. Please ensure that the
charger is ALWAYS disconnected from the battery after charging.
Battery Management System (BMS)
Motocaddy Lithium batteries are tted with a comprehensive battery management system (BMS) to protect the battery from
excessive abuse, high currents, deep discharge and overcharge. When the battery is delivered there may be no output as the BMS
is designed to maximize safety whilst shipping. Please ensure that the battery is fully charged prior to connecting it to your trolley
as this will activate the BMS and effectively ‘switch-on’ the battery. From time to time, at deep discharge or long term storage the
BMS may switch-off the battery. A full battery charge will rectify this problem.
Motocaddy golf trolleys are designed to work with the BMS system installed in the Lithium batteries and the voltage meter is
also synchronised to work in conjunction with the battery. If for any reason the voltage on the battery falls below the low battery
warning on the trolley, then the BMS may disable the battery to protect it. Again if this occurs please recharge fully. Please be
aware that Lithium batteries tend to ‘drop off’ quickly at the end of the cycle so it is not advisable to attempt to play excessive
holes as the BMS will activate for protection purposes.

Page 8
Attaching the Wheels / Inverting the Wheels
Attaching the Wheels
There is a left and a right wheel and it is important that you attach them on the correct side,
otherwise the trolley will not move. There is an “L” and “R” on the inside of the wheel on the
central hub. Left and Right sides are determined when stood behind the trolley at the handle.
DHC trolley models do not have a specic left and right wheel.
To attach the wheels follow these simple steps:
1. Push the quick release button in towards the centre of the wheel
2. Slide the wheel onto the trolley axle as far as it will go (onto the inner groove)
3. Once in position, release the button and pull the wheel outwards slightly to lock
4. An audible ‘click’ will conrm the wheel is in the correct position
The outer groove can be used as a “free wheel” option if you run out of battery power.
To check you have attached the wheels correctly onto the inner groove, you will nd they
only rotate freely in one direction (not applicable to DHC models).
Inverting the Wheels
The wheels can be inverted to reduce the trolley width for transportation and storage.
1. Push and hold the quick release button while sliding the wheel off the axle
2. Flip the wheel over, push and hold the button, then slide onto the axle
3. Release the button and pull the wheel out slightly until it engages with the free wheel groove
Left Right

Page 9
Front Wheel Alignment
Adjusting the Front Wheel Alignment
In the unlikely event that your trolley is not tracking in a straight line, the alignment of the front wheel can
be adjusted to rectify the fault. This problem can be caused by a number of factors including a slightly
loose bag support or an unevenly packed golf bag.
To alter the alignment of the front wheel, follow these simple steps:
1. Lift the quick release lever positioned on the front wheel housing and loosen the wheel nut (g. 1)
2. There are two small metal dials on either side of the housing that are used to realign the wheel (g. 2)
3. If your trolley is veering to the right, you will need to turn the left hand dial clockwise and the right
hand dial anti-clockwise
4. If your trolley is veering to the left, you will need to turn the right hand dial clockwise and the left hand
dial anti-clockwise
5. Tighten the wheel nut and push down the lever to lock the wheel back into place (g. 3)
This procedure can be carried out until you are happy the trolley is moving in a straight line
(please note you may only need to adjust one dial at a time).
These instructions are based on positioning yourself in front of the trolley looking at the wheel.
Fig 2
Fig 3
Fig 1

Page 10
Unfolding your Trolley
Fig 1 Fig 2 Fig 3 Fig 4 Fig 5
Unfolding your Trolley
We recommend unfolding your trolley once the wheels have been un-inverted and reattached (see page 8).
1. Lift the upper bag support slightly and release the upper latch (g. 1)
2. Unfold the handle and re-secure the latch (g. 2)
3. Release the lower latch (g. 3)
4. Lift the trolley handle up into position (g. 4). The front wheel will automatically unfold
5. Re-secure the lower latch and ensure the auto-open stand is folded away (g. 5)

Page 11
Fig 1 Fig 2 Fig 3 Fig 4 Fig 5
Folding your Trolley
1. Release the lower latch (g. 1). The auto-open stand will also be activated
2. Fold the frame forward until fully extended (g. 2). The front wheel will automatically fold underneath
3. Release the upper latch and fold the handle back until the trolley is fully folded (g. 3)
4. Re-secure both latches. If you wish to stand the trolley upright, leave auto-open stand out. Remember to ensure the
auto-open stand is pushed down if not being used (g. 4)
5. The wheels can be inverted to reduce the trolley width for transportation and storage (g. 5). See page 8 for details
Please ensure the auto-open stand is folded away when not in use to prevent damage.

Page 12
Upper & Lower Bag Supports
Fig 3
Fig 2
Fig 1
Upper Bag Supports
The upper bag support straps are secured using the following steps:
1. Stretch the elasticated strap around the bag & loop the rounded bar underneath the hook (g. 1)
2. Position the two placement straps centrally on your golf bag (g. 2)
Lower Bag Supports
This Motocaddy trolley is tted with the EASILOCK™ bag attachment system.
If you are using an EASILOCK™ compatible golf bag please follow these simple instructions:
1. Remove the two pre-tted lower bag straps by depressing the rear button and sliding (g. 3)
2. Match up the indicating line on the golf bag with the line on the lower bag support
3. Lower the bag until the pins lock in position. You should hear an audible ‘click’
If you are using a non-EASILOCK™ golf bag, please use the following instructions:
1. Stretch the lower bag strap around the bag base & loop the rounded bar underneath the hook
2. Position the two placement straps centrally on the base of your golf bag
Please ensure all straps are hooked securely before releasing. Failure to do so could result in injury.

Page 13
Adjusting the Bag Supports
The bag support straps are manufactured from elasticated material to allow your golf bag to be held
tightly in position.
The strap should be adjusted to be reasonably tight around the golf bag:
1. Unclip the elasticated straps from the housing by pulling outwards in the direction shown (g. 1)
2. Move the bar as required to tighten or loosen the strap tting. Pulling the bar downwards will
tighten, pushing it upwards will loosen (g. 2)
3. Ensure that the straps are clipped back into the housing before use (g. 3)
Fig 3
Fig 2
Fig 1

Page 14
Equipment Overview
1. LCD Touchscreen Display
2. USB Charging Port (under handle)
3. Upper Bag Support
4. Upper Release Latch
5. Battery Connector
6. Battery
7. Battery Tray
8. EASILOCK™ Lower Bag Support
9. Front Wheel
10. Motor (under Battery Tray)
11. Front Wheel Alignment Adjusters
12. Rear Wheel Release Button
13. Rear Wheels
14. Auto-Open Stand
15. Lower Release Latch
Equipment Overview
1
3
4
13
8
6
10
9
12
7
11
5
2
14
15

Page 15
Starting, Stopping & Changing Speed / Battery Meter
Starting, Stopping & Changing Speed
The main 'On/Off' button is used to start and stop the trolley, whilst also
controlling the speed, which can be adjusted while the trolley is stationary or
in motion. The trolley has 9 speed settings (1 to 9) with 1 being the slowest
and 9 the fastest.
To increase the speed, rotate the speed dial clockwise, or anti-clockwise to
decrease the speed, you will notice the number of green bars surrounding the
speed indicator increases and decreases with the number.
To start the trolley, simply select your required speed setting and press the
'On/Off' button. The trolley will smoothly accelerate until it reaches the selected
speed and the speed indicator will change from white to green to indicate that
the trolley is under power.
To stop the trolley, simply press the 'On/Off' button again - there is no need to
reduce the speed setting. The speed indicator will return to white.
Battery Meter
The M5 GPS includes an on-screen battery meter in the top right corner which provides an indication of remaining battery capacity.
The battery bar is green when fully-charged. The bar will gradually reduce while turning amber and then red as battery capacity reduces.
If battery capacity gets low, a red 'low battery' warning icon will appear in the speed indicator. Press the 'On/Off' button to continue
using the trolley. It is recommended to disable Bluetooth, stop USB charging and limit GPS usage until the battery has been charged.

Page 16
USB Charging / Clock
USB Charging
This trolley features a USB charging port designed to charge USB powered devices during your round.
Simply remove the covering cap and plug a USB cable into the charging port located on the underside of
the handle. The device will continue charging while the cable is attached and the battery is connected.
The rate of charge will be slower than a mains AC charger and similar to plugging the device into a PC.
The USB charger takes power from the main trolley battery and continuous charging will reduce the
battery capacity between charges. The trolley is designed to disable the USB charging port when the
battery capacity reaches a preset level.
Clock Settings
The M5 GPS includes a clock which is visible on the Home (g. 1) and GPS mode (g.2 ) screens.
The clock will set automatically each time the trolley is turned on and either has a strong enough GPS
signal or connects to a WiFi network.
It is possible to change the clock format and time zone settings. Starting on the Home screen,
select “Settings” and then “Time” from the settings menu. You will then have the option to change
the following options:
• Format (12 hour / 24 hour)
• Time Zone (GMT +/- 12 hours)
• Daylight Savings Time (On / Off)
Please be aware that the clock will only be displayed when an accurate time signal has been received.
Fig 1 - Home Screen - Clock
Fig 2 - GPS Mode - Clock

Page 17
Fig 2 - GPS Mode - ADC
Adjustable Distance Control
This trolley features an easy to use Adjustable Distance Control (ADC) function which will allow you to
send your trolley ahead of you from 5 - 60 yards or metres.
1. While stationary, select the speed that you wish your trolley to start
2. Hold down the 'On/Off' button for 2 seconds
3. The ADC settings box will appear and indicate ‘15 YARDS/METRES' (g. 1 & g. 2)
4. Rotate the 'On/Off' button clockwise to increase the distance and anti-clockwise to decrease
5. Press the 'On/Off' button to start the trolley moving
Whilst the trolley is running under ADC mode, the Motocaddy symbol will be displayed within the ADC
settings box and rotate until the desired distance is reached (g. 3). The trolley can be stopped by
pressing the 'On/Off' button once. DHC models will automatically apply the parking brake once the
trolley has reached the desired distance and stopped.
In the unlikely event that your trolley fails to register distance whilst in ADC mode, the trolley will cut
power to the motor to prevent the trolley from travelling too far. The trolley can be reset by pressing
the 'On/Off' button once, thereby allowing you to continue to use the trolley with ADC disabled until
you are able to contact our Technical Support team.
Fig 1 - Home Screen - ADC
Fig 3 - GPS Mode - ADC Moving

Page 18
Introduction to GPS Mode / Using GPS Mode
Introduction to GPS Mode
The M5 GPS trolley is pre-loaded with over 40,000 worldwide courses and includes front, middle and
back of green distances, along with hole information, hazards, score tracking, shot measurement
and round timer.
IMPORTANT : Distance Measurement Device (DMD) features are legal to use when local USGA
and R&A rule 14-3 is in effect. Always check local and competition rules regarding the use of DMD
and Push Notications prior to commencing play.
Using GPS Mode
It is really simple to start a round in GPS mode:
1. From the Home screen select “Play Golf” (g. 1)
2. The trolley will display “Searching” while it acquires an accurate GPS location (g. 2)
3. A list of local courses will be displayed, with the nearest at the top (g. 3)
4. Select the course you wish to start playing
It is also possible to select an alternative course from the settings menu within the GPS mode.
Please be aware that the Round Timer and Score Tracking will be reset when a course is changed.
Fig 1 - Home Screen - Play Golf
Fig 2 - Course Search
Fig 3 - Course Selection

Page 19
GPS Mode Overview
GPS Mode Overview
1. Green Map
2. Back Distance
3. Middle Distance / Dynamic Pin Distance
4. Front Distance
5. Settings Menu
6. Hazards Information
7. Speed Indicator
8. Shot Measurement
9. Scorecard
10. Previous Hole
11. Next Hole
12. Battery Indicator
13. Round Timer
14. Clock
15. AED Locator
16. Par / Stroke Index
17. Hole Number
17 16 15
14 13 12
1110
2
3
4
1
5 6 7 8 9

Page 20
Dynamic Pin Location / Hole Advancement
Dynamic Pin Location
The M5 GPS allows you to move the location of the pin to give a more accurate distance measurement.
Touch the point on the green that you want to move the pin to and the centre distance will update (g. 1).
Hole Advancement
The M5 GPS will automatically advance to the next hole when you move towards the next tee.
It is also possible to change the hole manually using one of the following methods:
• Using the left and right arrows (g. 2a)
• Touching the hole number in the top left corner (g. 2b) and selecting the required hole
• Selecting “Select Hole” from the GPS menu and tapping the required hole (g. 3)
Please be aware that holes will advance sequentially from the 1st hole onwards. If you are commencing
play at a different location, you will need to manually advance to the required hole.
Fig 2 - GPS Mode - Hole Advance
Fig 3 - Select Hole
Fig 1 - GPS Mode - Pin Location
AA
B
This manual suits for next models
1
Table of contents
Other Motocaddy Outdoor Cart manuals
Popular Outdoor Cart manuals by other brands

Vermont Castings
Vermont Castings 085-3783-6 Assembly and user's manual

Black Diamond Equipment
Black Diamond Equipment BD-YC6004P Assembly guide

Sulkys
Sulkys Cavalettie user manual

König & Meyer
König & Meyer 13490 Setup instructions

Cub Cadet
Cub Cadet CC-4048PS-ATV manual

Easylife
Easylife EL5185 instruction manual