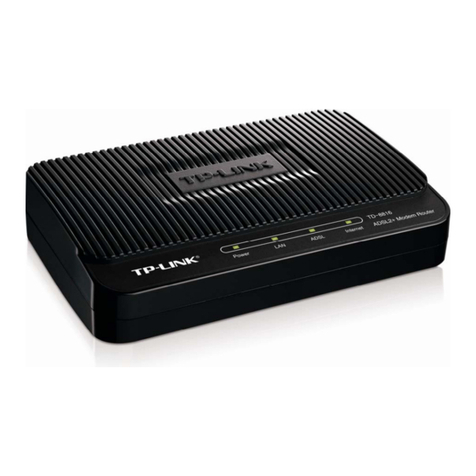
movistar Home Station ADSL User manual

Home Station
ADSL
Freedom in a
box.
Installation Guide

2

3
(7) Advanced Settings CD (8) Warranty card
(1) Home Station ADSL
(2)Power adapter(3) Two simple microfilters
(4) One double microfilter
with ADSL and Phone exit (6) Ethernet Cable
In this guide it is detailed the start up process of your Internet connection. You will
be able to enjoy your connection in an easy, simple and quick way. Follow its
indications step by step.
The advanced settings CD includes a video in electronic format with a
graphic and detailed explanation of your Internet startup process. (Ayuda-
Grafica.exe)
Package Contents
Home Station
ADSL
(4) Phone cable

4
Start using your ADSL...
1. Microfilters installation
Connect a microfilter between each
phone terminal (telephones, fax..) and
the telephone socket.
Connect the microfilter with double
outlet (4) to the selected telephone
socket where the router will be
connected and the telephone to the
outlet labeled as (or TELÉFONO),
as shown in the figure.
For the rest of telephone sockets where
there is a phone terminal connected,
you will just have to connect a
microfilter (3).
2. Phone line connection
Connect the grey phone line cable to
the free outlet of the microfilter with
double outlet (4) labeled as (or
ADSL) and to the ADSL connector of
the Home Station ADSL labeled as
ADSL.
3. Power Adapter Connection
Plug the Power adapter (2) into the
mains supply and into the 12V-1A
connector of the Home Station ADSL.
More information at User Manual on Advanced Settings CD.

5
4. Switching on the router
ON
Turn the Home Station ADSL on by pressing the Power button on the back of the
router to its ON position. Wait a few minutes to reach the LEDs status shown below.
Routers provided by Movistar are optimized to establish Internet connection
without additional installations or configurations.
IMPORTANT: Movistar can make a remote update of your equipment to
offer you a better service, specially in the initial installation. During this
update process, all the LEDs will blink in green color one after another
starting from the left (back to start rotating mode until it was completely
finish the software update of the device).
After about 6-8 minutes, all the LEDs will be on the same situation of the figure on
the top of this page and you can start to work as usually with your device.
Warning: Don't turn off your Home Station ADSL or disconnect it
from power supply while this upgrade is being done, it could
damage your equipment.
ON
OFF
Status
LED
Power Steady Green
Description
Router correctly switched on
Ethernet Off No Ethernet connection is established
Wifi connection is activated
Wif
i Green
WPS Off WPS connection status
3G Off For future use.
ADSL Green Connectivity established with central. It will blink in
green while connection is established.
Internet Green Router has obtained an IP Address. It will blink in
green when there is traffic.
More information at User Manual on Advanced Settings CD.

6
Start using your ADSL...
5. Connecting the router with your computer. Two options are avilable
You may either connect your computer to the router with an Ethernet cable if
they are close enough or by means a wireless network. Furthermore, you
can simultaneously have some equipments connected to the
router using the Ethernet cable and others,
as laptops, through the wireless network.
A. Connection with Wireless network
You can use the wireless network if your
computer has a wireless adapter
installed or it is integrated into your
equipment.
Wifi network is enabled by default in
your router.
If the Wifi network is not activated (Wifi
LED switched off), you should press the
Wifi/WPS button in the router back side
within 5 seconds.
Next step is to configure the computers
on your wireless network in accordance
with the parameters of your wireless
router.
Default configuration parameters of
your wireless network are shown on the
label at the bottom of your router
If you have an external
wireless device (PCMCIA
orUSB adapter), install
it with the help of the
CD provided with it.
If you have a wireless device already
integrated into your computer, make
sure that it is enabled with the help of
your operating system.
More information at User Manual on Advanced Settings CD.

7
WPS Connection
Your Home Station ADSL is compatible
with WPS for setting up a secure
wireless network. By default, WPS
function is enabled on the router.
You should take into account that, to
use this method of wireless association,
your wireless client (equipment that will
connect to the router) must support
WPS. Otherwise, use the procedure in
"Connection using Windows wireless
client"
Press Wifi/WPS button located at the
back side of the router until the WPS
LED was switched on in green color.
Press the WPS button on the wireless
client (check wireless adapter User
Manual to use this option), while WPS
light indicator of the router was
switched on in green color.
You have 2 minutes to do the
association between the client and the
router, otherwise, router will prevent
the WPS association and it will not
register any WPS wireless client
Connection using Windows wireless
client
To configure your wireless device in
Windows XP SP2, Vista orWindows 7
you can use the wireless client
management application. For Windows XP
SP2 orVista by pressing with the
secondary (right) mouse button at
wireless connection icon on the
wireless network connection icon on
your System tray (near to the clock)
selecting "View available wireless
networks". For Windows 7 press with
the main (left) button ion the same icon.
For other OS, check the wireless client
help manual.
Search the available wireless networks.
You can update this list with the button
"Refresh network list" or by clicking the
button.
More information at User Manual on Advanced Settings CD.

8
Select the network whose identifier
(SSID) is the one that appears on the
label of the router and click on Connect.
Enter the security key that appears
on the label of the router.
IMPORTANT. Wireless Security Key
for the router is of WPA-PSK type and it
is in alphanumeric format. Be careful of
introduce this security key as it appears
on the label.
Connect to the wireless network by
pressing the button Connect (orAccept
in Windows 7).
B. Connection using Ethernet Cable
Connect the yellow Ethernet cable (6)
to the Ethernet card of your PC and to
one of the connectors of your Home
Station ADSL labeled as Eth 1 a 4
More information at User Manual on Advanced Settings CD.
Check to make sure that the wireless
net-work connection icon for the
system tray indicates that the
connection has been correctly
established.

9
Switch the PC on. Ethernet LED
indicator will light up in green after a
few seconds. This LED will blink in green
when trasferring data.
It will be also switched on the light
indicator on the back side of the router
corresponding with the port where it
was connected the Ethernet cable:
More information at User Manual on Advanced Settings CD.

10
Congratulations, now you can access Internet
using your ADSL!
Open your browser, go to the web address www.movistar.es and start
surfing Internet.
If you are not able to access, check the Troubleshooting section in this
guide for most frequent problems.
Active your free email accounts and your website with the hired
Internet Access Service.
Once you have accessed to www.movistar.es, you can activate your email
account. After typing your default user (user) and contraseña (password) provided
with the data service letter or calling to 900 50 20 10 from the telephone line
where you have installed the ADSL service, you will access a website where you
can activate your email accounts and publish your personal web pages.
Protect your PC
Once you are connected to the ADSL service it is highly recommended to protect
your PC against Internet attacks or intrusions. If you want to do so, you can hire
these services (Antivirus PC, Anti-Intrusion PC, PC Security Pack...)
www.movistar.es, calling 1004 orthrough your usual channel.
More information at User Manual on Advanced Settings CD.

11
Advanced Settings CD
CD is not necessary for your ADSL Installation.
On the CD you can find additional information to help your with the
emerging needs about your ADSL Internet connection.
"Ayuda Conexión": Graphic help to guide you along the start up process of your
Internet connection and the advanced configuration of the ADSL service. This help
is in Spanish language.
"Acceso Portal configuración Web": Although equipment supplied by Movistar
doesn't require any additional configuration, if you wish to, you can change
advanced parameters when you are connected to the "Home Station".
"Ver Documentación": If you select this option, you will be redirected to the list of
documents with more detailed information about additional tools and other issues
related to your Internet connection.
More information at User Manual on Advanced Settings CD.
Ayuda Conexión
Acceso Portal configuración Web
Ver documentación
Salir

12
Advanced settings options
There are different ways to configure advanced options in your Home Station ADSL:
• By using the web portal of the router, accesing with your browser to the address
asociated to the device, by default, it is http://192.168.1.1.
• Using the remote configuration Portal (1) accessible through the address
www.movistar.es/configuramirouter.
More information about the web portal of the router and Remote Configuration Portal
on the manuals included at advanced settings CD.
(1) Available depending on equipment's model.
More information at User Manual on Advanced Settings CD.

13
Solutions to Frequent Problems (FAQ)
Problem CauseSolution
Connection is
dropped when
the phe is off
hook
There is no
microfilter between
the phone and the
phone socket
Check there is a microfilter installed
between each phone device (phones,
faxes...) and services using the
telephone line (alarms, etc) and the
phone socket (see step 1 of
section"Start using your ADSL" of this
guide.
Ethernet LED
is not
switched on
Ethernet cable is not
properly connected
(this is only a
problem if you have
decided to connect
by cable and not by
wireless).
Check that the Ethernet cable is
correctly connected to the Ethernet
connector and to the Ethernet card of
your computer or laptop (see step 4
of section "Start using your ADSL") or
replace cable by a new one if
necessary.
ADSL LED is
not switched
on steady
green
Phone line cable is
not correctly
installed
Check that telephone line cable is
correctly connected to the ADSL
connector and to the outlet of the
double microfilter marked as
"ADSL"(see step 1 of section "Start
using your ADSL” on this guide).
I don't have
an icon for
wireless client
in Windows
Your wireless client is
not correctly installed
or configured.
Make sure that you have a wireless
client correctly installed and enabled
(either USB or integrated). More
information in the manual of the
device.
More information at User Manual on Advanced Settings CD.

14
Telephone
calls are
interrupted or
it is heard too
much noise .
There is no
microfilter between
the phone and the
phone socket
Check there is a microfilter installed
between each telephone device
(phones, faxes...) and services using
the telephone line (alarms, etc) and
the phone socket (see step 1 of
section "Start using your ADSL..." of
this guide)
You have more
than 3 microfilters
simultaneously
installed. This
affects the quality
of the phone
service.
Disconnect some of the phone
devices (telephones, faxes…) or
services using the telephone line
(alarms, etc.).
Wireless client
management
application
does not show
among the
available
networks the
one
corresponding
to my router
(the one in the
label).
Wireless network
is disabled in the
router.
Check that wireless network of
your router is enabled: Wifi LED
must be switched on in green color.
If it is not, press for 4 seconds the
button Wifi/WPS
Problem CauseSolution
More information at User Manual on Advanced Settings CD.

15
Problem CauseSolution
I cannot
access
Internet
A firewall installed in
your equipment is
preventing the
connection.
Check that you don't have a
Firewall preventing connections to
internet. Configure your firewall to
enable web browsing, following the
manufacturer instructions.
You have hired
static IP addressing
instead of dynamic
Review the documentation included
in the box for specific instructions on
this case. Also read section 5
"Advanced configuration" in the
User Manual included in the
documentation CD.
TCP/IP protocol is
not correctly
installed for the
network driver
used.
You must be sure that TCP/IP is
correctly installed for the network
driver to which the router is
connected. Check the guide of
Ethernet Card and TCP/IP protocol
included at the advanced options CD.
Computer is not
getting a correct IP
address, default
gateway or DNS
Server through DHCP
because computer
and the router are not
simultaneously
turned ON
It is recommended to restart
both devices, first the router
and then the computer.
It is not correctly
indicating the SSID
of your wireless
network when you
Check you are using the same network
identifier (SSID) in all the network.
Remember it is case sensitive.
are trying to connect
More information at User Manual on Advanced Settings
CD.

16
I cannot
connect to the
router's
wireless
network
Problem Cause
You have not
correctly configured
the encryption used
in the wireless
network when
connecting to it.
Solution
Check you are using the same
encryption type and the same key in
all your network elements.
Remember, if you use WEP encryption,
you should select and configure the
key 1 in the configuration of the
wireless clients.
TCP/IP wireless
client properties are
not configured to
receive IP through
DHCP.
Check that TCP/IP properties of the
network driver of your wireless client
is configured to receive the IP
dynamically (by DHCP). Refer to the
assistance of your operating system.
Wireless
network
connection is cut
off frequently.
The quality of
the connection
is not good
There are
interferences with
other existing
wireless networks.
Put the router away from sources of
interference. If there is interference in
that channel, select a different one. If
there are other wireless networks
operating in the same area, we
recommend to set the networks with
5 channels of separation, or choose
the least impact causing ( least
saturated channel, i.e. channel where
theare are fewer wireless networks)
See manual "Wireless networks
recommendations included in the
advanced options CD)
Wireless network
signal is weak
because the router
is located in a not
very accesible place
or it is very far.
Place the wireless router in a clear
site. Remember it is advised there
must not be many obstacles
between router and computers.
Avoid wood or concrete walls. If
there are still coverage problems,
move the position of the antenna
but allways keep them in parallel.
More information at User Manual on Advanced Settings CD.

17
See the User Manual on Advanced Settings CD for futher details.
If your don't find the solution to your problem, you will find information about
customer care service on the next section.
8. Customer Care
Customer Care service is available via telephone as well as via Internet. For
further information, please, refer to chapter 6 in the User Manual.
All the information about ADSL can be found in the "Internet" section at
movistar.es
www.movistar.es/adsl
(*) Additionaly, for any Warranty/Maintenance question, you may contact the
phone numbers mentioned above.
Movistar Technical Customer Care Centers
Home users: 1004
Enterprises and professionals: 900 10 10 10
Telefónica de España S.A.U., Gran Vía 28, Registro Mercantil: Hoja M-213180, Folio 6, Tomo 13170, Inscripción 1ª, C.I.F.: A-82018474.
Empresa adherida al Sistema Arbitral de Consumo.

18
Additional Information
We thank you the trust placed in
Movistar to adquire one of our devices
and we inform you that, for any
clarification, query or complaint, you
can call for free:
·Personal care line (1004)
·
Care center for
professionals and
business (900 10 10 10)
·Business care center
(900 12 09 00)
Where you will be attended by our
consultants or, if you prefer, visit
Movistar web page:
www.movistar.es
For information about after-sales
service, see the warranty card of the
router.
Finally, for written complaints
regarding this sale, please contact
Telefónica de España S.A.U, Gran Vía
28, 28013 Madrid
Environmental recycling
Never dispose of this Home Station
ADSL with your usual household
waste. Ask your local authorities
about the available possibilities for
proper disposal of it so that no
damage is caused to the
environment. Always comply with the
applicable legal standards currently in
force.
All offenders will be penalised
or otherwise punished by Law.
Cross symbol on the
container printed on
the device, means that
when the equipment
has reached the end of
its useful service life, it
must be taken to a
special collection
centre and it must be
processed separately
from household waste.
More information at User Manual on Advanced Settings CD.
Telefónica de España, S.A.U
informs

19
More information at User Manual on Advanced Settings CD.
Declaration of Conformity
DECLARACION DE COMFORMIDAD
Hereby declare under our sole responsibility that the product:
Device: HOME STATION ADSL OBSERVA TELECOM BHS-RTA
Brand: Telefónica
Manufacturer: OBJETIVOS Y SERVICIOS DE VALOR AÑADIDO, S.L. (OBSERVA TELECOM)
Manufacture Country: China
Model: BHS-RTA
It complies with the technical specifications that are applicable on the day of the date by R & TTE Directive
1999/5/EC of the European Parliament and Council of March 9, 1999, transposed into Spanish law by
RD1890/2000, of November 20, 2000 and in particular:
EN 300 328 V1.7.1. Electromagnetic compatibility and Radio spectrum Matters (ERM);
Wideband transmission systems; Data transmission equipment operating in
the 2,4 GHz ISM band and using wide band modulation techniques;
Harmonized EN covering essential requirements under article 3.2 of the
R&TTE Directive
EN 301 489-1 V1.8.1 Electromagnetic compatibility and Radio spectrum Matters (ERM); Electro
Magnetic Compatibility (EMC) standard for radio equipment and services;
Part 1: Common technical requirements
EN 301 489-17 V2.1.1 Electromagnetic compatibility and Radio spectrum Matters (ERM); Electro
Magnetic Compatibility (EMC) standard for radio equipment; Part 17:
Specific conditions for Broadband Data Transmission Systems
EN 60950-1:2006 Information technology equipment – Safety
EN 62311(2008-11)
Assessment of electronic and electrical equipment related to human
exposure restrictions for electromagnetic fields (0 Hz - 300 GHz).
EN 50385:2002 Product standard to demonstrate the compliance of radio base stations and
fixed terminal stations for wireless telecommunication systems with the
basic restrictions or the reference levels related to human exposure to radio
frequency electromagnetic fields (110 MHz - 40 GHz) - General public.
It also complies with ErP 2009/125/EC Energy Efficiency Directive and its Regulation 278/2009 about
ecodesign requirements for energy related products.
It is also in accordance with Royal Decree RD-208 / (Directive 2002/95) on electrical and electronic
equipment and waste management.
Madrid, 4 de Abril del 2013,
Fdo. Vicente Fernández Bueno. Director General
This device is ready to be connected to the analogue network of Telefonica de España, S.A.U, with access to ADSL
service and its use is authorized only in Spain.
Observa Telecom
Company Name:OBJETIVOS Y SERVICIOS DE VALOR AÑADIDO, S.L. (OBSERVA TELECOM)
Address: C/Monte Esquinza 28, 1º Dcha. 28010. Madrid
Telephone: 902 367 132
C.I.F.: B-83488676

20
Glossary
ADSL:
Asymmetric Digital Subscriber Line. It is
a diginal line for accessing Internet at
high Speed.
Antivirus:
Application to detect and remove any
computer virus and other malicious
programs.
Ethernet Cable :
Cable used to transmit data at high
speed in Local Area Networks(LAN).
WEP key:
A key which is used to authenticate a
user who connects to a wireless
network that uses this type of
encryption (WEP). It permits encrypting
of sent data..
Wireless client:
Hardware orsoftware element used to
connect to a computers' network
without use of any cable for that
purpose.
Firewall:
Hardware orsoftware element used at a
computers' network to control and
manage the communications, allowing
or rejecting them following the network
policies defined by the organization that
manages the network. It can block the
Internet Connection Establishment.
DHCP (Dynamic Host Configuration
Protocol):
Protocol which allows the network
equipments to obtain their IP
configuration parameters automatically.
Dynamic/Static Addressing:
It indicates how Movistar assigns the IP
address to your line. If every time that
your wireless router starts a session it is
assigned an IP address, it indicates that
your service includes dynamic
addressing, which is the default type of
addressing. However, if you are always
assigned the same IP address, then,
your IP addressing service is fixed
of static.
DNS (Domain Name System):
Domain Name System. Server to
translate a domain name (the name of
a machine) into its corresponding IP
address.
Encryption or cryptography:
Science that enables one to encode and
decipher information using techniques
that make it possible to exchange
messages in a safe and secure way in
orden it can only be readed by the persons
whom they are addressed.
Web Space:
This service allows the user to offer his
or her own web sites or documents so
that they will be accesible on the
Internet.
Other manuals for Home Station ADSL
1
Table of contents
Other movistar Network Router manuals

movistar
movistar Xavi 7968 User manual

movistar
movistar Home Station VDSL2 User manual
movistar
movistar WLD71-T3 User manual

movistar
movistar ASL26555 User manual

movistar
movistar Home Station ADSL User manual

movistar
movistar Home Station Fibra Optica User manual
movistar
movistar Zoovel Z-201 User manual
movistar
movistar P.DG A4001N User manual
