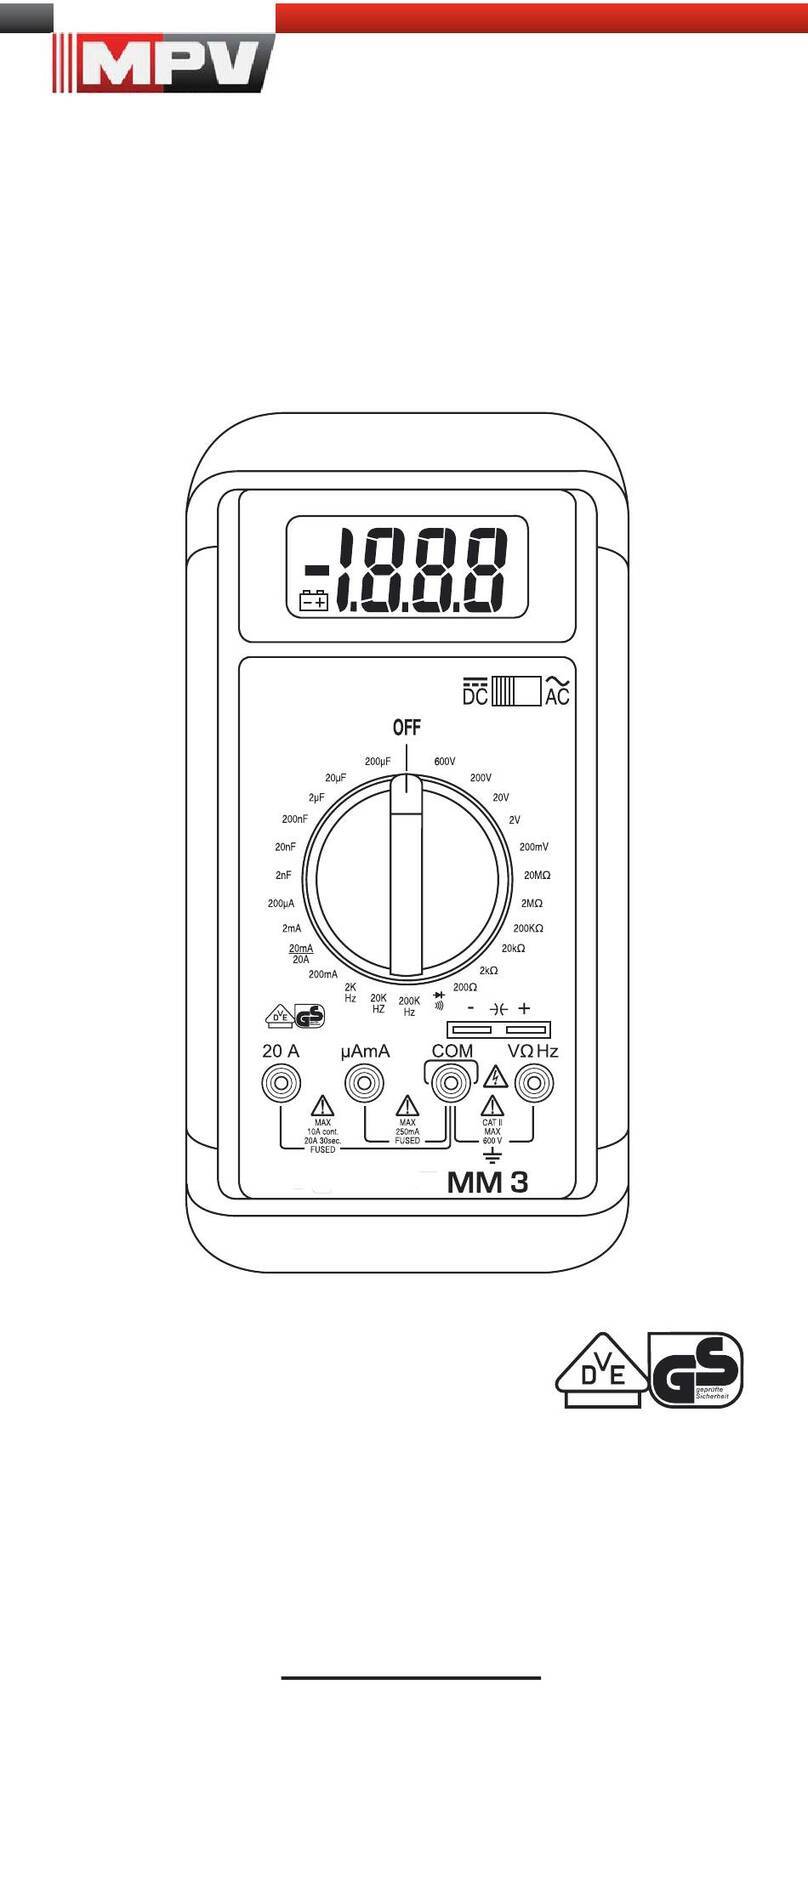
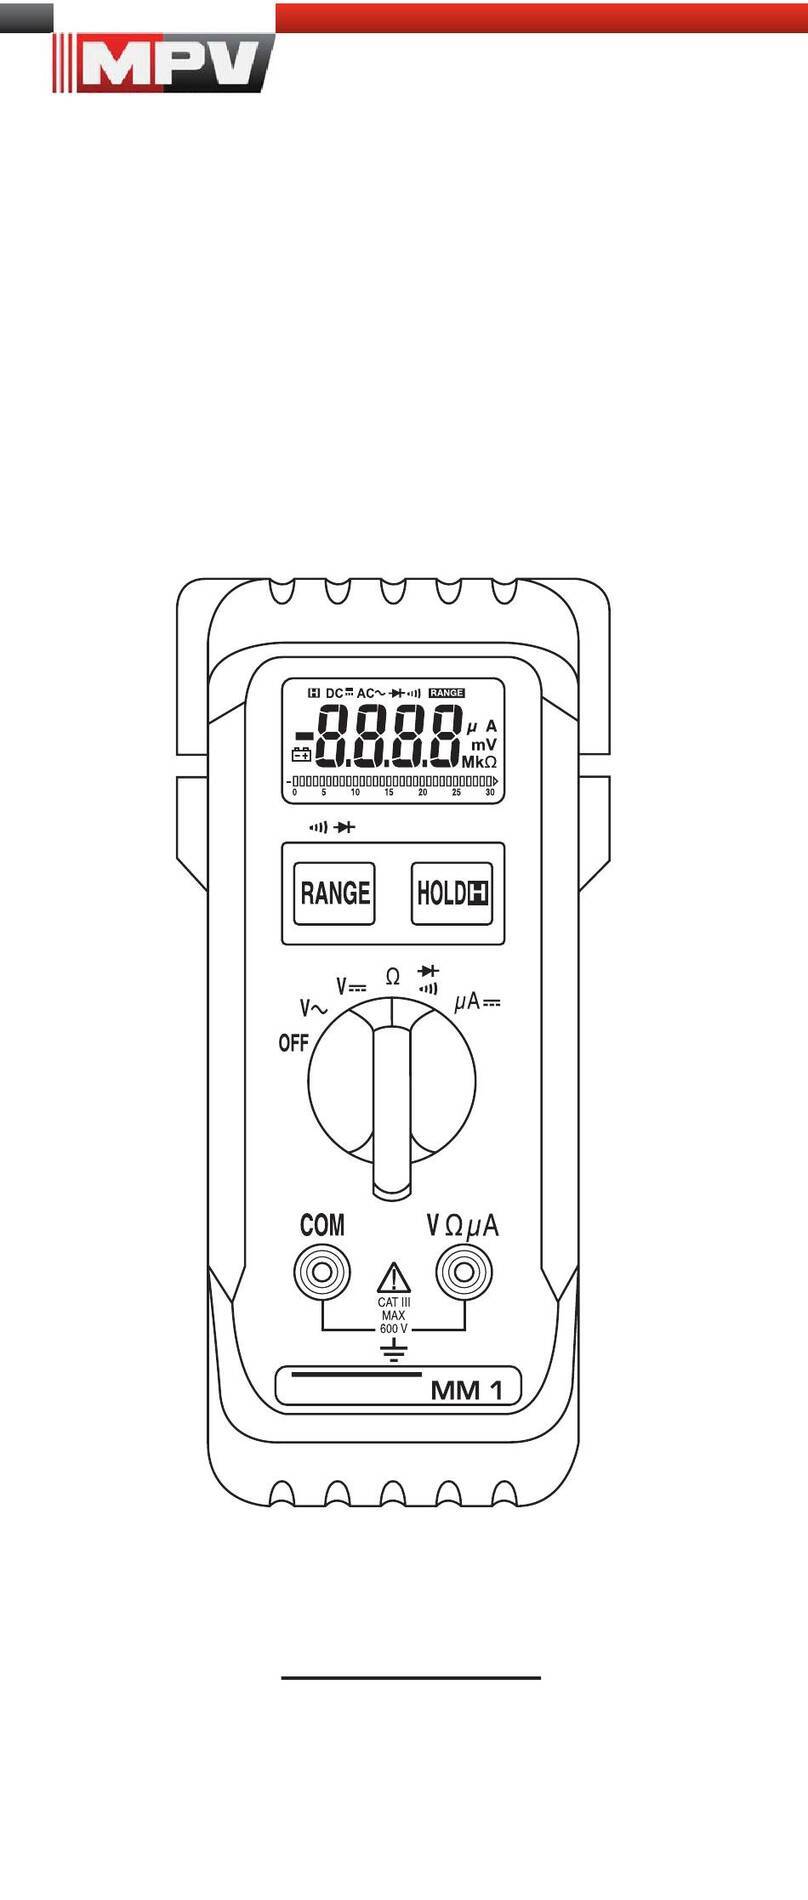
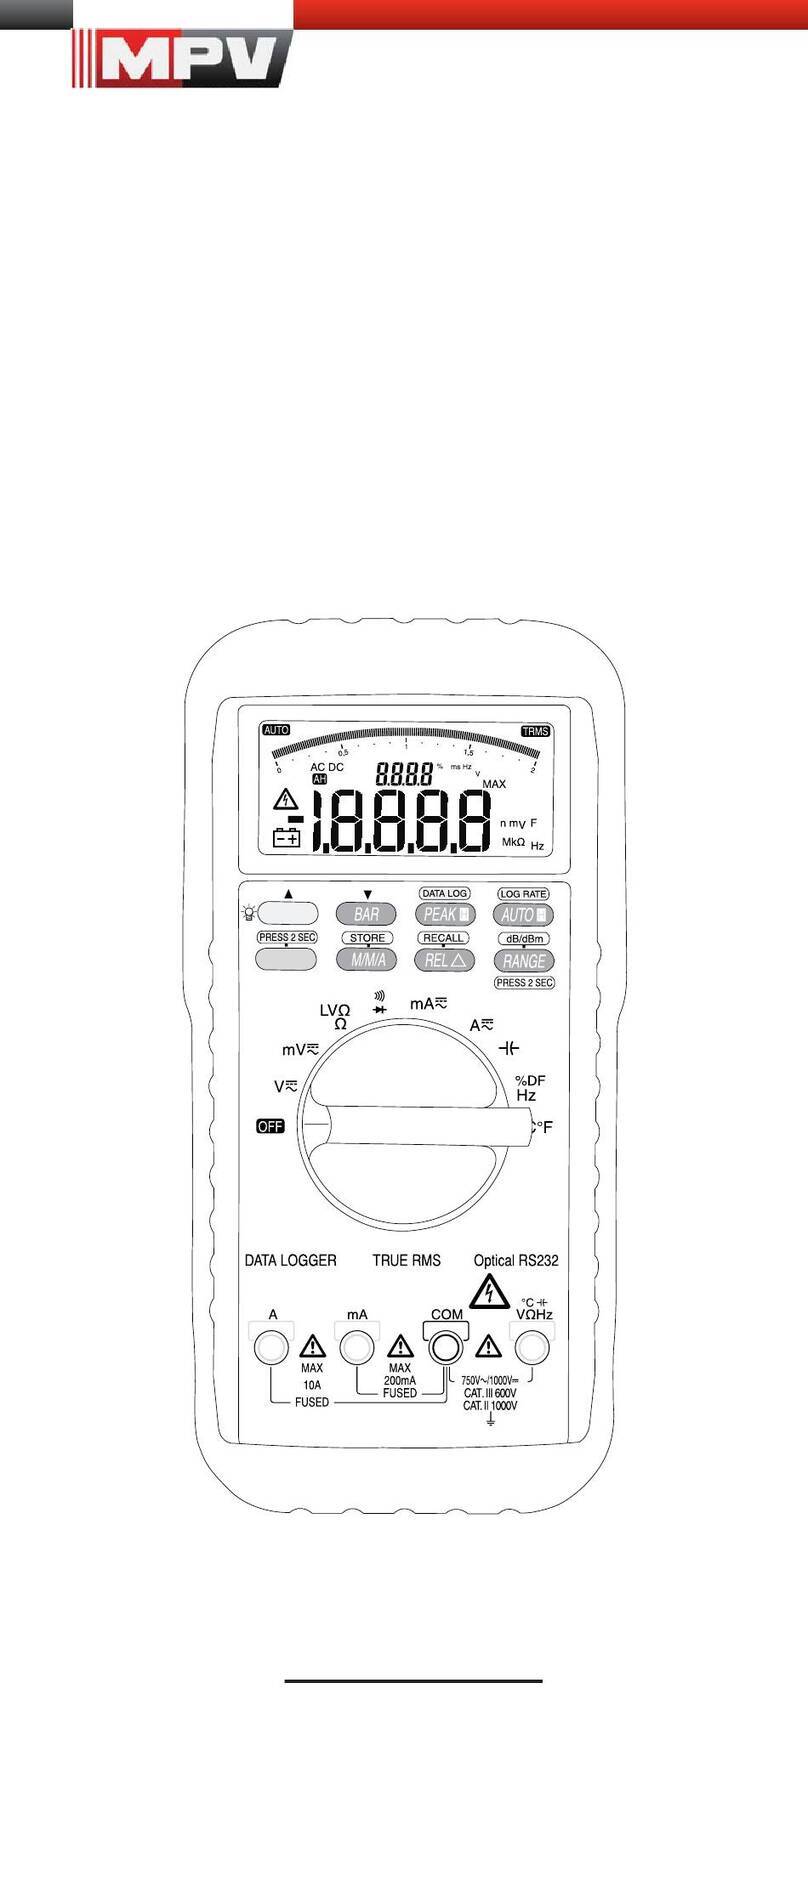
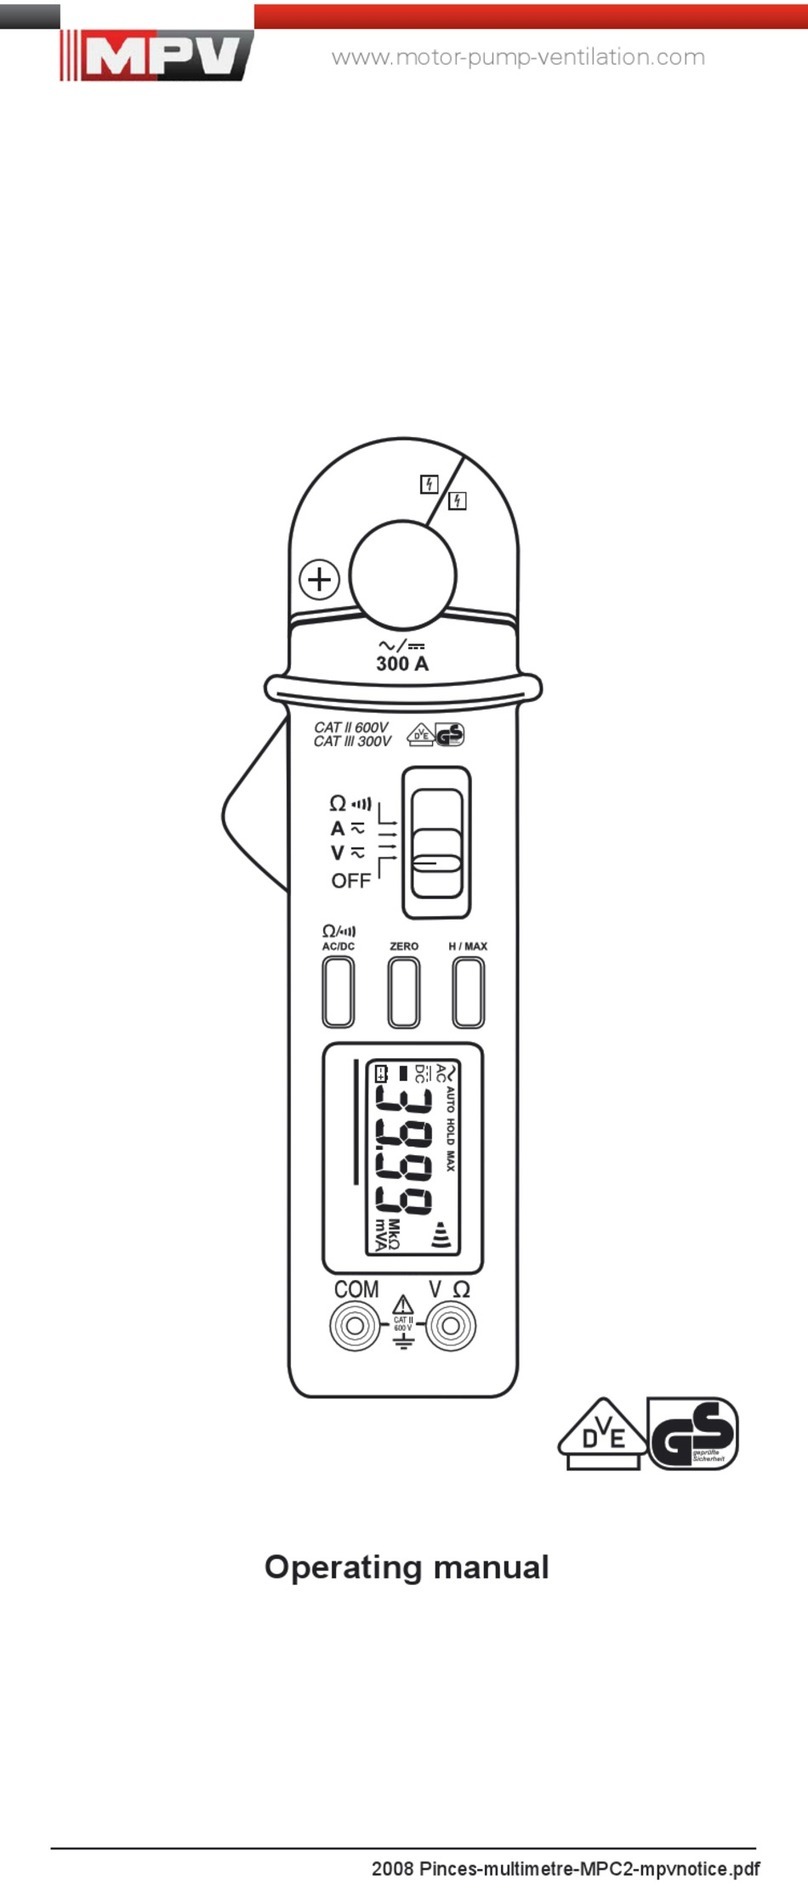
MPV MN1-3 User manual

RANGEMAX/MIN HOLDVoltSensor
MM 1-3
V
V
OFF
Hz A
A
°C
°F
Hz
A
MAX
10A
FUSED
HOLDAUTO
MAX
MIN
nm
F
www.motor-pump-ventilation.com
8VHUVPDQXDO
0XOWLPHWUH01PSYQRWLFHSGI

M11-3
Bild 1c: Gerätefrontseite
Fig. 1c: Front tester panel
Fig. 1c: Panneau avant de l‘appareil
Fig. 1c: Parte frontal del equipo
obr. 1c: Přední strana přístroje
figur 1c: Apparatforside
σχήμα 1c: Μπροστινή όψη
1 ábra: Elölnézet
ill. 1c: Lato anteriore apparecchio
Fig. 1c: Voorzijde van het apparaat
Rys.1c: Panel przedni przyrządu
Imaginea 1c:
Partea frontală a aparatului
рис. 1c. Вид спереди мультиметра
Resim 1c: Cihaz ön yüzü
RANGEMAX/MIN HOLDVoltSensor
MM 1-3
V
V
OFF
Hz A
A
°C
°F
Hz
A
MAX
10A
FUSED
HOLDAUTO
MAX
MIN
n
mF
6
5
8
8
J
K9
LM
0XOWLPHWUH01PSYQRWLFHSGI

Bild 2: Gleichspannungsmessung
Fig. 2: Direct voltage measurement
Fig. 2: Mesure de tension continue
Fig. 2: Medición de tension contínua
obr. 2: Měření stejnosměrného napětí
figur 2: Jævnspændingsmåling
σχήμα 2: Μέτρηση συνεχούς ρεύματος
2. ábra: Egyenfeszültség mérés
ill. 2: Misura tensione continua
Fig. 2: Meten van gelijkspanning
Rys.2: Pomiar napięcia stałego
Imaginea 2: Măsurarea tensiunii continue
рис. 2.
Измерение напряжения постоянного тока
Resim 2: Doğru Gerilim Ölçümü
Bild 3: Wechselspannungsmessung
Fig. 3: Alternating voltage measurement
Fig. 3: Mesure de tension alternative
Fig. 3: Medición de tensión alterna
obr. 3: Měření střídavého napětí
figur 3: Vekselspændingsmåling
σχήμα 3: Μέτρηση αναλλασσόμενου ρεύματος
3. ábra: Váltakozó feszültség mérés
ill. 3: Misura tensione alternata
Fig. 3: Meten van wisselspanning
Rys.3: Pomiar napięcia przemiennego
Imaginea 3: Măsurarea tensiunii alternative
рис. 3.
Измерение напряжения переменного тока
Resim 3: Alternatif Gerilim Ölçümü
Bild 4: Gleichstrommessung
Fig. 4: DC current measurement
Fig. 4: Mesure de courant continu
Fig. 4: Medición de corriente contínua
obr. 4: Měření stejnosměrného proudu
figur 4: Jævnstrømsmåling
σχήμα 4: Μέτρηση συνεχούς ρεύματος
4. ábra: Egyenáram mérés
ill. 4: Misura corrente continua
Fig. 4: Meten van gelijkstroom
Rys.4: Pomiar prądu stałego
Imaginea 4: Măsurarea curentului continuu
рис. 4.
Измерение величины постоянного тока
Resim 4: Doğru Akım Ölçümü
Bild 5: Wechselstrommessung
Fig. 5: AC current measurement
Fig. 5: Mesure de courant alternatif
Fig. 5: Medición de corriente alterna
obr. 5: Měření střídavého proudu
figur 5: Vekselstrømsmåling
σχήμα 5: Μέτρηση εναλλασσόμενου ρεύματος
5. ábra: Váltakozó áram mérés
ill. 5: Misura corrente alternata
Fig. 5: Meten van wisselstroom
Rys.5: Pomiar prądu przemiennego
Imaginea 5: Măsurarea curentului alternative
рис. 5.
Измерение величины переменного тока
Resim 5: Alternatif Akım Ölçümü
RANGEMAX/MIN HOLDVoltSensor
MM 1-3
V
V
OFF
Hz A
A
°C
°F
Hz
A
MAX
10A
FUSED
HOLDAUTO
MAX
MIN
n
m
F
RANGEMAX/MIN HOLDVoltSensor
MM 1-3
V
V
OFF
Hz A
A
°C
°F
Hz
A
MAX
10A
FUSED
HOLDAUTO
MAX
MIN
n
m
F
RANGEMAX/MIN HOLDVoltSensor
MM 1-3
V
V
OFF
Hz A
A
°C
°F
Hz
A
MAX
10A
FUSED
HOLDAUTO
MAX
MIN
n
m
F
RANGEMAX/MIN HOLDVoltSensor
MM 1-3
V
V
OFF
Hz A
A
°C
°F
Hz
A
MAX
10A
FUSED
HOLDAUTO
MAX
MIN
n
m
F
0XOWLPHWUH01PSYQRWLFHSGI
www.motor-pump-ventilation.com

Bild 8: Durchgangsprüfung mit Summer
Fig. 8: Continuity testing with buzzer
Fig. 8: Contrôle de continuité avec ronfleur
Fig. 8: Control de continuidad con vibrador
obr. 8: Zkoušku obvodu
figur 8: Gennemgangstest med brummer
σχήμα 8: Έλεγχος συνέχειας με βομβητή
8. ábra: Folytonosság vizsgálat zümmögővel
ill. 8: Prova di continuità con cicalino
Fig. 8: Doorgangstest met akoestisch signaal
Rys.8: Sprawdzenie ciągłości obwodu
Imaginea 8: Testarea continuităţii cu buzzer
рис. 8. Проверка целостности цепи
Resim 8: Sesli uyarıcı ile süreklilik ölçümü
Bild 9: Kapazitätsmessung
Fig. 9: Capacity testing
Fig. 9: Mesure de capacité
Fig. 9: Medición de capacidad
obr. 9: Měření kapacity
figur 9: Kapacitansmåling
σχήμα 9: Μέτρηση χωρητικότητας
9. ábra: Kapacitás mérés
ill. 9: Misura di capacità
Fig. 9: Capaciteitsmeting
Rys.9: Pomiar pojemności
Imaginea 9: Măsurarea capacităţii
рис. 9 Измерение емкости
Resim 9: Kapasite Ölçümü
Bild 6: Widerstandsmessung
Fig. 6: Resistance measurement
Fig. 6: Mesure de résistance
Fig. 6: Medición de resistencia
obr. 6: Měření odporu
figur 6: Modstandsmåling
σχήμα 6: Μέτρηση αντίστασης
6. ábra Ellenállás mérés
ill. 6: Misura di resistenza
Fig. 6: Weerstandsmeting
Rys.6: Pomiar rezystancji
Imaginea 6: Măsurarea rezistenţei
рис. 6. Измерение сопротивления
Resim 6: Direnç Ölçümü
Bild 7: Diodenprüfung
Fig. 7: Diode testing
Fig. 7: Contrôle de diodes
Fig. 7: Verificación de diodos
obr. 7: test diod
figur 7: Diodetest
σχήμα 7: Έλεγχος διόδου
7: ábra: Dióda vizsgálat
ill. 7: Prova diodi
Fig. 7: Diod-test
Rys.7: Pomiar diody
Imaginea 7: Testarea diodelor
рис. 7 Проверка диодов
Resim 7: Diyot Kontrolü
RANGEMAX/MIN HOLDVoltSensor
MM 1-3
V
V
OFF
Hz A
A
°C
°F
Hz
A
MAX
10A
FUSED
HOLDAUTO
MAX
MIN
n
m
F
RANGEMAX/MIN HOLDVoltSensor
MM 1-3
V
V
OFF
Hz A
A
°C
°F
Hz
A
MAX
10A
FUSED
HOLDAUTO
MAX
MIN
n
m
F
RANGEMAX/MIN HOLDVoltSensor
MM 1-3
V
V
OFF
Hz A
A
°C
°F
Hz
A
MAX
10A
FUSED
HOLDAUTO
MAX
MIN
n
m
F
RANGEMAX/MIN HOLDVoltSensor
MM 1-3
V
V
OFF
Hz A
A
°C
°F
Hz
A
MAX
10A
FUSED
HOLDAUTO
MAX
MIN
n
m
F
0XOWLPHWUH01PSYQRWLFHSGI
www.motor-pump-ventilation.com

RANGEMAX/MIN HOLDVoltSensor
MM 1-3
V
V
OFF
Hz A
A
°C
°F
Hz
A
MAX
10A
FUSED
HOLDAUTO
MAX
MIN
n
m
F
Bild 11: Temperaturmessung
Fig. 11: Temperature measurement
Fig. 11: Mesure de la température
Fig. 11: Medición de temperatura
obr. 11: Měření teploty
figur 11: Temperaturmåling
σχήμα 11: Μέτρηση θερμοκρασίας
11. ábra: Hőmérséklet mérés
ill. 11: Misura di temperatura
Fig. 11: Temperatuurmeting
Rys.11: Pomiar temperatury
Imaginea 11:
Măsurarea temperaturii
рис. 11: Измерение температуры
Resim 11: Isı Ölçümü
Bild 12: Spannungsindikator mit Summer
fig. 12: Voltage indicator with buzzer
fig. 12: Indicateur de tension avec ronfleur
fig 12: indicador de tensión con vibrador
obr. 12: Indikátor napětí s bzučákem
figur 12: Spændingsindikator med brummer
εικόνα 12: Ένδειξη τάσης με βομβητή
12. ábra: Feszültség indikátor zümmögővel
ill. 12: Indicatore di tensione con cicalino
fig. 12: spanningsindicator met zoemer
Rys. 12: Wskaźnik napięcia z sygnalizacja
dźwiękową
Imaginea 12:
Indicatorul tensiunii cu buzzer
рис. 12: Индикатор напряжения с зуммером
Resim 12: Akustik gerilim indikatörü
Bild 10: Frequenzmessung
Fig. 10: Frequency measurement
Fig. 10: Mesure de fréquence
Fig. 10: Medición de frecuencia
obr. 10: Měření frekvence
figur 10: Frekvensmåling
σχήμα 10: Μέτρηση συχνότητας
10. ábra: Frekvencia mérés
ill. 10: Misura di frequenza
Fig. 10: Frequentiemeting
Rys.10: Pomiar częstotliwości
Imaginea 10:
Măsurarea frecvenţei
рис. 10 Измерение частоты
Resim 10: Frekans Ölçümü
RANGEMAX/MIN HOLDVoltSensor
MM 1-3
V
V
OFF
Hz A
A
°C
°F
Hz
A
MAX
10A
FUSED
HOLDAUTO
MAX
MIN
n
m
F
0XOWLPHWUH01PSYQRWLFHSGI
www.motor-pump-ventilation.com

Bild 13: Batteriewechsel
Fig. 13: Battery replacement
Fig. 13: Remplacement de la pile
Fig. 13: Cambio de pila
obr. 13: Výměna baterií
figur 13: Batteriskift
σχήμα 13: Αντικατάσταση μπαταρίας
13 ábra: Telepcsere
ill. 13: Sostituzione batterie
Fig. 13: Vervanging van de batterijen
Rys.13: Wymiana baterii
Imaginea 13:
Schimbarea bateriilor
рис. 13 Замена батареи
Resim 13: Batarya Değişimi
Bild 14: Sicherungswechsel
Fig. 14: Fuse replacement
Fig. 14: Remplacement des fusibles
Fig. 14: Cambio de fusible
obr. 14: Výměna pojistek
figur 14: Sikringsskift
σχήμα 14: αντικατάσταση μπαταρίας
14 ábra: Biztosító csere
ill. 14: Sostituzione fusibile
Fig. 14: Vervanging van de smeltzekeringen
Rys.14: Wymiana bezpiecznika
Imaginea 14:
Schimbarea siguranţei
рис. 14 Замена предохранителей
Resim 14: Sigorta Değişimi
0XOWLPHWUH01PSYQRWLFHSGI
www.motor-pump-ventilation.com

Bild 15: Aufwicklung der Sicherheitsmessleitung
Fig. 15: Wrapping up the safety test leads
Fig. 15: Enroulement du câble de mesure de sécurité
Fig. 15: Arrollamiento de la conducción protegida de medición
obr. 15: navíjení měřících kabelů
figur 15: Opvikling af sikkerhedsmåleledning
σχήμα 15: Τυλίξτε τα καλώδια μέτρησης
15 ábra: A mérővezetékek felcsavarása
ill. 15: Avvolgimento dei cavetti di sicurezza
Fig. 15: Wikkeling van veiligheidsmeetsnoeren
Rys.15: Zwijanie przewodów pomiarowych
Imaginea 15:
Înfăşurarea cablului de măsurat de siguranţă
рис. 15 Намотка измерительных проводов
Resim 15: Emniyet Ölçüm tesisatının sarılması
0XOWLPHWUH01PSYQRWLFHSGI
Bild 16: Aufstellung des MN-1-3
Fig. 16: Standing up the MN-1-3
Fig. 16: Installation du MN-1-3
Fig. 16: Colocación del MN-1-3
obr. 16: postavení MN-1-3
figur 16: Opstilling af MN-1-3
σχήμα 16: Κρατώντας όρθιο το MN-1-3.
16 ábra: MN-1-3 felállítása
ill. 16: Posizionamento del MN-1-3
Fig. 16: Opstelling van de multimeter MN-1-3
Rys.16: Przyrząd MN-1-3w pozycji stojącej
Imaginea 16:
Aşezarea aparatului MN-1-3
рис. 16 Установка прибора
Resim 16: MN-1-3‘nun kurulumu
www.motor-pump-ventilation.com

Operating manual
M11‑3
Digital multimeter for
- DC voltage measurements
- AC voltage measurements
- DC current measurements
- AC current measurements
- resistance measurements
- diode tests
- continuity tests
- capacity measurements
- frequency measurements
- temperature measurements
Tableofcontents
1. User instructions
2. Safetyinstructions
3. Scopeofdelivery
4. Device description
5. Generalinformation
6. Ambient conditions
7. Electricalspecications
8. Measuring with the 01 1‑3
9. Maintenance
10. Usingthefoldingsupportandthesuspensionxture
11. Technicaldataofmeasuringaccessories
12. Environmental protection
1. Userinformation
This operating manual is intended for
- skilled electricians and
- electrotechnically trained personnel.
The 01 1-3 is intended for measurements under dry ambient
conditions. It must not be used in electrical circuits with a nominal voltage higher
than 1000 V DC and 750 V AC (see section 6 „Ambient conditions“ for details).
The following symbols are used in this operating manual and on the
01
Warning of electrical danger!
Indicates instructions which must be followed to avoid danger to
persons.
Important, must comply with documentation!
This symbol indicates that the information provided in the operating
manual must be complied with in order to avoid risks.
This symbol on the 01 indicates that the 01
is equipped with protective insulation
(protection class II).
This symbol on the 01indicates built-in fuses.
This symbol appears on the display to indicate a discharged battery.
This symbol designates the „diode test” range.
This symbol designates the “continuity test“ eld.
The buzzer is intended for acoustic result output.
This symbol indicates the „capacity test“ eld.
(DC) Direct voltage or current
(AC) Alternating voltage or current
Ground (voltage against ground).
0XOWLPHWUH01PSYQRWLFHSGI
www.motor-pump-ventilation.com

2. Safetyinstructions
The instrument is built and tested in accordance with
DIN VDE 0411 Teil 1/ EN 61010-1
and has left the factory in perfectly safe technical condition.
To preserve this condition and to ensure safe operation of the device, the user
must observe the notes and warnings given in these instructions at all times.
Thedevicemustbeused in electricalcircuitsofovervoltage
categoryIIwithaconductorforamaximumof1000Vtoearth
orofovervoltagecategoryIIIwithaconductorforamaximum
of600Vtoearthonly.
Please observe that work on live parts and electrical compo‑
nentsofallkindsisdangerous!
Evenlowvoltagesof30VACand60VDCmaybedangerous
tohumanlife.
Beforestartingthecurrentclampmultimeter,alwayscheckthe
deviceaswellasallcablesfordamages.
If it can be assumed that safe operation is no longer possible, switch the device
off immediately and secure it against unintended operation.
Safe operation can be assumed to be no longer possible, if
- the device or the measuring lines exhibit visible damages,
- the device no longer works,
- the device has been stored under unfavourable conditions for a longer
period of time,
- the device was exposed to extraordinary stress during transport.
In order to prevent danger
donottouchthebaremeasuringprobetipsofthemeasu‑
ring lines,
insertthemeasuringlinesintotherespectivelydesignated
measuringsocketsofthemultimeter.
3. Scopeofdelivery
The scope of delivery of the 01 comprises:
3.1 One 01,
3.2 One safety measuring line, red (L = 1.4 m; probe tip Ø = 4 mm),
3.3 One safety measuring line, black (L = 1.4 m; probe tip Ø = 4 mm),
3.4 One measuring adapter with wire temperature sensor type K
3.5 One rubber suspension xture,
3.6 One compact protective pouch,
3.7 Two 1.5 V micro (AAA) batteries are integrated into the device,
3.8 One fuse for initial assembly is integrated into the device
3.9 One operating manual.
Note on optional accessory :
- Temperature probe (K-type) made of V4A tube
application: insertion probe for soft-plastic materials, liquids, gas and air
measuring range: - 196 °C up to 800 °C
dimensions: length = 210 mm, tube length = 120 mm, tube diameter =
3 mm, V4A (P.no. 044121)
Parts subject to wear:
- The 01 is supplied by means of two integrated
1.5 V micro (AAA) batteries (IEC 6 LR 03).
- The 01 is equipped with a fuse for overload protection:
One quick-acting fuse, nominal current 10 A (600 V), 50 kA (P.no. 748263)
- The safety measuring lines ATL-2 mentioned above (tested accessories)
comply with CAT III 1000 V and are approved for a current of 10 A.
4. Device description
See gure 1a, 1b, 1c:
Device front
The display and operating elements shown in gures 1a, 1b and 1c are
designated as follows:
Digitaldisplay, displaying measured value and range exceedance,
Polarityindication,
Batteryindication, appears in case of discharged battery,
0XOWLPHWUH01PSYQRWLFHSGI
www.motor-pump-ventilation.com

MIN/MAXkey, storage of the highest and lowest measured value
5 VoltSensorkey, for determining AC voltage to earth,
6 RANGEkey, switch-over between automatic/ manual measuring range,
HOLDkey, storage of the displayed measured value,
8Rotaryswitch, for selecting the measuring function,
9Jack (positive1), for V, Ω, , Hz,
JCOM jack, common jack for current/ voltage/ resistance/ frequency/
temperature/ capacity measurements, continuity and diode tests,
K
Jack (positive1), for A range, for currents up to 10 A,
L Suspensionxture
MLED for voltage indicator
1
) This is what the automatic polarity indication for DC current and voltage refers to
5. Generalinformation
5.1 Generalinformationonthemultimeter
5.1.1 The digital display is a 3½-digit LC display with a font size of 16 mm
and a decimal point. The highest numerical value to be displayed is
2000.
5.1.2 The polarity indication works automatically. Only a polarity contrary
to the jack denition is indicated with “-“.
5.1.3 The range exceedance is indicated by “ 0L“ or “- 0L“ and partly by an
acoustic warning.
Attention, no indication and warning in case of overload!
5.1.4 The „MAX/ MIN“ key function automatically determines and stores
the highest and the lowest measured value. Preselect the measuring
range by means of the „RANGE“ key, if necessary. By pressing the key,
the following values are displayed:
„MAX“ shows the highest stored value and „MIN“ the lowest stored
value. The continuous determination of the MAX/ MIN value can be
stopped or started by pressing the „HOLD“ key . By pressing the
„MAX/ MIN“ key for approx. 1 second, you can switch back to normal
mode.
5.1.5 The „RANGE“ key 6is intended for shifting the manual measuring
ranges and masking the „AUTO“ symbol on the display at the same
time. Select the automatic range selection by pressing the key for
approx. 1 second („AUTO“ is shown on the display).
5.1.6 Measured value storage „HOLD“: Press the “HOLD“ key to store
the measuring result. At the same time, the display shows the “HOLD“
symbol. Press the key again to switch back to the measuring mode.
5.1.7 The nominal measuring rate of the 01 is 2
measurements per second for the digital display.
5.1.8 The 01can be switched on or off by means of
the rotary switch 8. Switched off: position „OFF“.
5.1.9 The 01switches off automatically after approx.
10 minutes (APO, Auto-Power-Off). It is switched on again if a key or
the rotary switch is operated. A buzzer tone indicates that the device
is switched off automatically. Automatic switch-off can be deactivated
by pressing the „RANGE“ key and by simultaneously switching on the 01
from the switching position „OFF“.
5.1.10 Temperature coefcient of the measured value: 0.15 x (stated measuring
accuracy)/ °C < 18 °C or > 28 °C, related to the value for the reference
temperature of 23 °C.
5.1.11 The 01 is supplied by means of two 1.5 V
micro (AAA) batteries (IEC 6 LR 03).
5.1.12
If the battery voltage falls below the specied operating voltage of the 01
, a battery symbol appears on the display .
5.1.13 The battery life is approx. 250 hours (alkaline battery).
5.1.14 Dimensions of the device:
(L x W x H) = 156 x 74 x 44 mm with suspension xture
Weight: 320 g with suspension xture and battery
5.1.15 The safety measuring lines are designed in 4 mm plug-in technology.
The enclosed safety measuring lines are explicitly intended for the nominal
voltage and the nominal curent of the 01.
5.1.16 The 01can be set up by means of a foldable
support or can be attached by means of the suspension xture.
5.1.17 The 01 is equipped with a detector as voltage
indicator at its top side to localize earthed AC voltages.
6. Ambient conditions
- The 01 is intended for measurements under dry
ambient conditions,
- Maximum barometric height for measurements: 2000 m,
0XOWLPHWUH01PSYQRWLFHSGI
www.motor-pump-ventilation.com

- Overvoltage category / installation category: IEC 60664-1/ IEC 61010-1 →
600 V category III; 1000 V category II,
- Contamination class: 2,
- Protection category: IP 30 DIN VDE 0470-1 IEC/EN 60529
IP 30 means: Protection against access to dangerous parts and protection
against solid impurities of a diameter > 2.5 mm, (3 – rst index).
No protection against water, (0 – second index).
- Operating temperature and relative air humidity:
For operating temperatures from 0 °C to 30 °C: relative air humidity less
than 80 %,
For operating temperatures from 31 °C to 40 °C: relative air humidity less
than 75 %,
For operating temperatures from 41 °C to 50 °C: relative air humidity less
than 45 %,
- Storage temperature: The 01 can be stored at
temperatures between - 15 °C and + 60 °C (air humidity of 0 to 80 %).
During storage, the battery should be removed.
7. Electricalspecications
Note: The measuring accuracy is specied as the sum of:
- a relative part of the measured value and
- a number of digits (i.e. counting steps of the last digit).
This measuring accuracy applies for temperatures from 18 °C to 28 °C and a
relative air humidity less than 80 %.
7.1 DC voltage ranges
The input resistance is 10 MΩ.
Measuring
range *3 Resolution Measuring accuracy Overload
protection
200 mV 100 µV ± (0.5 % of the measured value + 2 digits) 1000 VDC
2 V 1 mV ± (0.5 % of the measured value + 2 digits) 1000 VDC
20 V 10 mV ± (0.5 % of the measured value + 2 digits) 1000 VDC
200 V 100 mV ± (0.5 % of the measured value + 2 digits) 1000 VDC
1000 V 1 V ± (0.5 % of the measured value + 2 digits) 1000 VDC
7.2 AC voltage ranges
The input resistance is 10 MΩ in parallel 100 pF.
Measuring
range *3 Resolution Measuring accuracy *1within the
frequency range 50 Hz - 300 Hz
Overload
protection
200 mV 100 µV ± (2.0 % of the measured value + 5 digits) *
2
750 Veff
2 V 1 mV ± (1.5 % of the measured value + 5 digits) *
2
750 Veff
frequency range 50 Hz - 500 Hz
20 V 10 mV ± (1.5 % of the measured value + 5 digits) *
2
750 Veff
200 V 100 mV ± (1.5 % of the measured value + 5 digits) *
2
750 Veff
750 V 1 V ± (1.5 % of the measured value + 5 digits) *
2
750 Veff
The measured value of the 01 is obtained by mean
value rectication and is displayed as r.m.s. value.
*1 The measuring accuracy is specied for a sinusoidal curve. In case of non
sinusoidal curves, the accuracy of the displayed value decreases. Thus, an
additional error results for the following crest factors:
Crest factor from 1.4 to 3.0 additional error ± 1.5 %
Crest factor from 3.0 to 4.0 additional error ± 3 %
*2 Applies to sinusoidal curves of 50 Hz/ 60 Hz
*3 For automatic range selection (AUTO), the change-over point might be
already at a value of 1400!
7.3 DC current ranges
Overload protection:
- 10 A (600 V) fuse, quick-acting, 50 kA, at the 10 A input
Measuring
range Resolution Measuring accuracy Voltage drop
2 A 1 mA
± (1.0 % of the measured value + 3 digits)
max. 2 V
10 A *5
10 mA
± (1.0 % of the measured value + 3 digits)
max. 2 V
0XOWLPHWUH01PSYQRWLFHSGI
www.motor-pump-ventilation.com

7.4 AC current ranges
Overload protection:
-
10 A (600 V) fuse, quick-acting, 50 kA at the 10 A input ,
Measuring range Resolution Measuring accuracy*4
within the frequency
range 50 Hz - 500 Hz Voltage drop
2 A 1 mA
± (1.5 % of the measured value + 5 digits) max. 2 V
10 A *5
10 mA
± (1.5 % of the measured value + 5 digits) max. 2 V
The measured value is obtained by mean value rectication and is displayed
as r.m.s. value.
*4 The measuring accuracy is specied for a sinusoidal curve. In case of non
sinusoidal curves, the accuracy of the displayed value decreases. Thus, an
additional error results for the following crest factors:
Crest factor from 1.4 to 3.0 additional error ± 1.5 %
Crest factor from 3.0 to 4.0 additional error ± 3 %
*5 The maximum permissible operating time is limited from current value ≥ 7 A.
measuring value max. measuring time min. pause time
10 A 4 min. 10 min.
9 A 5 min. 10 min.
8 A 7 min. 10 min.
7 A 10 min. 10 min.
7.5 Resistance measuring range
Overload protection for resistance measurements: 600 Veff
Measuring
range *6 Resolution Measuring accuracy Max. open-circuit
voltage
200 Ω0.1 Ω
± (0.7 % of the measured value + 3 digits)
1.3 V
2 kΩ 1 Ω
± (0.7 % of the measured value + 3 digits)
1.3 V
20 kΩ 10 Ω
± (0.7 % of the measured value + 3 digits)
1.3 V
200 kΩ 100 Ω
± (0.7 % of the measured value + 3 digits)
1.3 V
2 MΩ 1 kΩ
± (1.0 % of the measured value + 3 digits)
1.3 V
20 MΩ 10 kΩ
± (1.5 % of the measured value + 3 digits)
1.3 V
*6 For automatic range selection (AUTO), the change-over point might be
already at a value of 1400!
7.6 Diodeandcontinuitytest
The stated measuring accuracy is applies to a range between 0.4 V and 0.8 V.
Overload protection for diode tests: 600 Veff
The integrated buzzer sounds at a resistance R lower than 25 Ω.
Measuring
range
Reso-
lution Measuring accuracy Max. measuring
current
Max. open-
circuit voltage
10 mV
± (1.5 % of the measured value + 5 digits)
1.5 mA 2.0 V
7.7 Capacityranges
Conditions: Discharge capacitors and apply them according to the specied
polarity.
Overload protection for capacity measurements: 600 Veff
Measuring range Resolution Measuring accuracy
2 nF 1 pF
± (1.9 % of the measured value + 8 digits)
20 nF 10 pF
± (1.9 % of the measured value + 8 digits)
200 nF 100 pF
± (1.9 % of the measured value + 8 digits)
2 µF 1 nF
± (1.9 % of the measured value + 8 digits)
20 µF 10 nF
± (1.9 % of the measured value + 8 digits)
200 µF 100 nF
± (1.9 % of the measured value + 8 digits)
2 mF 1 µF
± (1.9 % of the measured value + 8 digits)
< 10 digits in case of uctuating indication
7.8 Frequencyranges
Overload protection for frequency measurements: 600 Veff
Minimum pulse width > 25 ns; operating cycle limitation > 30 % and < 70 %
0XOWLPHWUH01PSYQRWLFHSGI
www.motor-pump-ventilation.com

Measuring
range Resolution Measuring accuracy for 5 Veff max. Sensitivity
2 kHz 1 Hz
± (0.01 % of the measured value + 1 digits)
> 1.5 < 5 Veff
20 kHz 10 Hz
± (0.01 % of the measured value + 1 digits)
> 1.5 < 5 Veff
200 kHz 100 Hz
± (0.01 % of the measured value + 1 digits)
> 1.5 < 5 Veff
2 MHz 1 kHz
± (0.01 % of the measured value + 1 digits)
> 2 < 5 Veff
20 MHz 10 kHz
± (0.01 % of the measured value + 1 digits)
> 2 < 5 Veff
7.9 Temperature ranges °C
Temperature measurements are possible by means of the
enclosed temperature measuring adapter only.
Overload protection for temperature measurements: 600 Veff
Measuring range Resolution Measuring accuracy
-20 °C ~ 0 °C 1 °C ± (2 % + 4 °C)
1 °C ~ 100 °C 1 °C ± (1 % + 3 °C)
101 °C ~ 500 °C 1 °C ± (2 % + 3 °C)
501 °C ~ 800 °C 1 °C ± (3 % + 2 °C)
7.10 Temperature ranges °F (MN 1-3)
Temperature measurements ((MN 1-3) are possible by means of the
enclosed temperature measuring adapter only.
Overload protection for temperature measurements: 600 Veff
Measuring range Resolution Measuring accuracy
-4 °F ~ 32 °F 1 °F ± (2 % + 8 °F)
33 °F ~ 212 °F 1 °F ± (1 % + 6 °F)
213 °F ~ 932 °F 1 °F ± (2 % + 6 °F)
933 °F ~ 1472 °F 1 °F ± (3 % + 4 °F)
8. Measuringbymeansofthe01
8.1 Preparing the measurement
Operate and store the 01 at the specied storage and
operating temperatures only!
Do not permanently expose the device to sunlight.
- Check stated nominal voltage and nominal current on the safety measuring
lines. Nominal voltage and current of the enclosed safety measuring lines
comply with the respective values of the 01.
- Check insulation of the safety measuring lines. If the insulation is damaged,
the safety measuring lines must be replaced immediately.
- Check the safety measuring lines for continuity. If the conductor in the
safety measuring line is interrupted, replace the safety measuring lines
immediately.
- Before selecting another function by means of the rotary switch 8,
disconnect the safety measuring lines from the measuring point.
-
Strong sources of interference in the vicinity of the 01
might involve unstable readings and measuring errors.
8.2 Voltage and current measurement
Do not exceed the maximum permitted voltage with respect to
earth potential! Electrical danger!
The highest voltage which may be applied to the
- COM jack J
- jack for V, Ω, , Hz 9
- jack for the 10 A range K
of the MN 1-3 against ground is 1000 V.
Electrical danger!
Maximumcircuit voltagefora measuredcurrentof 500V!In
caseoffusetriggeringatvaluesabove500V,damagesofthe
device might be involved. A damaged device might represent
an electrical hazard!
0XOWLPHWUH01PSYQRWLFHSGI
www.motor-pump-ventilation.com

8.2.1 Voltage measurement
- Select the desired function (V AC) or (V DC) by means of the rotary switch
8of the 01
- Connect the black safety measuring line to the COM jack Jof the
01
- Connect the red safety measuring line to the jack for V, Ω, , Hz 9of the
01
- Bring the safety measuring lines into contact with the measuring
points and read the measured value on the digital display of the
01
See gure 2: DC voltage measurement
See gure 3: AC voltage measurement
8.2.2 Current measurement 01
- Select the desired range and function (A AC) or (A DC) by means of the
rotary switch 8of the 01
- Connect the black safety measuring line to the COM jack Jof the 01
- Connect the red safety measuring line to the jack for the 10 A range K(DC
or AC currents up to 10 A) of the 01
- Bring the safety measuring lines into contact with the measuring
points and read the measured value on the digital display of the
01
See gure 4: DC current measurement
See gure 5: AC current measurement
8.3 Resistance measurement
- Select the desired function (Ω) by means of the rotary switch 8of the
01
- Connect the black safety measuring line to the COM jack Jof the
01
- Connect the red safety measuring line to the jack for V, , , Hz 9of the
01
- Bring the safety measuring lines into contact with the measuring
points and read the measured value on the digital display of the
01
See gure 6: Resistance measurement
8.4 Diode test
- Select the desired function ( ) by means of the rotary switch 8of the
01
- Connect the black safety measuring line to the COM jack Jof the
01.
- Connect the red safety measuring line to the jack for V, , , Hz 9of the
01
- Bring the safety measuring lines into contact with the diode connections
and read the measured value on the digital display of the
01
- For a standard Si diode applied in conduction direction, a conduction voltage
between 0.400 V and 0.900 V is displayed. „000“ indicates a short-circuit
inside the diode, „OL“ indicates an interruption inside the diode.
- For a diode applied in reverse direction, „OL“ is indicated. If the diode is
defective, „000“ or other values are indicated.
See gure 7: Diode test
8.5 Continuitytestwithbuzzer
- Select the desired function ( ) by means of the rotary switch 8of the
01
- Connect the black safety measuring line to the COM jack Jof the
01
- Connect the red safety measuring line to the jack for V, , , Hz 9of the
01
- Bring the safety measuring lines into contact with the measuring points. If the
line resistance between the COM jack Jand the jack for V, , , Hz 9falls
below 25 , the integrated buzzer of the MN 1-3 sounds.
See gure 8: Continuity test with buzzer
0XOWLPHWUH01PSYQRWLFHSGI
www.motor-pump-ventilation.com

8.6 Capacitymeasurement
Beforeperformingcapacitymeasurements,dischargecapaci‑
torscompletely!
Neverapplyvoltagetothecapacitymeasurementjacks!
Thismightdamage ordestroythedevice!Adamaged device
might represent an electrical hazard!
- Select the desired function ( ) by means of the rotary switch 8of the
01
- Determine the polarity of the capacitor and completely discharge the
capacitor.
- Connect the black safety measuring line to the COM jack Jof the
01
- Connect the red safety measuring line to the jack for V, , , Hz 9of the
01
- Bring the safety measuring lines into contact with the discharged capacitor
according to ist polarity and read the measured value on the digital display
of the 01
See gure 9: Capacity measurement
8.7 Frequencymeasurement
- Select the desired function (Hz) by means of the rotary switch 8of the
01
- Connect the black safety measuring line to the COM jack Jof the
01
- Connect the red safety measuring line to the jack for V, , , Hz 9of
the 01. Please observe the minimum sensitivity for
frequency measurements of the 01
- Bring the safety measuring lines into contact with the measuring
points and read the measured value on the digital display of the
01
See gure 10: Frequency measurement
8.8 Temperature measurement
- Select the desired function (°C or °F) by means of the rotary switch 8of the
01
- Connect the temperature measuring adapter and the temperature measuring
line to the COM jack (-) Jand to the jack for V, , , Hz (+) 9observing
correct polarity.
- Arrange the end of the temperature measuring line in the vicinity of the heat
source to be monitored. Read the measured value on the digital display
of the 01
See gure 11: Temperature measurement
8.9 Voltage indicator
The voltage indicator function is possible from each position of the rotary switch.
No measuring lines are required as voltage indicator (non-contact detection of
an alternating eld). The detector is located on the upper part of the device
behind the LED. By pressing the „VoltSensor“ key 5, the display indication
disappears (if the display is switched on). If a phase voltage is localized, this is
indicated by an acoustic signal and a red LED signal M. An indication is made
in earthed AC current networks only! The phase can be determined by means of
a single-pole measuring line.
Practical hint:
Interruptions (cable breaks) in cables lying around openly such as e.g. cable
reels, fairy lights etc. can be traced from the feeding point (phase) to the point
of interruption.
Functional range: ≥230 V
See gure 12: Voltage indicator with buzzer
8.9.1 Phase test
- Connect the red safety measuring line to the jack for V, , , Hz 9of the
01.
- Bring the safety measuring line into contact with the measuring point of the
system part and press the „VoltSensor“ key 5.
- If the red LED lights and if there is an acoustic signal, the phase of an
earthed AC voltage is applied to this measuring point (system part).
9. Maintenance
Beforeopeningthe01,makesurethat
thedeviceisfreeofvoltage!Electricaldanger!
0XOWLPHWUH01PSYQRWLFHSGI
www.motor-pump-ventilation.com

Working on the opened 01 under voltage must be
carried out by skilledelectriciansonlywhomustobservespecialprecau‑
tionsforthepreventionofaccidents!
Therefore, make sure the 01 is free of voltage before
opening the device:
- First, remove both safety measuring lines from the object to be measured.
-
Then, remove both safety measuring lines from the 01.
- Switch the rotary switch 8to position „OFF“.
9.1 Securing the device
Under certain circumstances, safe operation of the 01
might no longer be ensured, e.g. in case of:
- visible damages of the housing,
- incorrect measuring results,
- recognizable consequences of prolonged storage under inadmissible
conditions and
- recognizable consequences of extraordinary stress due to transport.
In such cases, immediately switch off the 01, disconnect
it from the measuring points and secure it against further use.
9.2 Cleaning
Clean the exterior of the device with a clean dry cloth (exception: special cleaning
wipers). Do not use any solvents and/or abrasives to clean the device. Make
sure that the battery compartment and the battery contacts are not contaminated
by leaking battery electrolyte.
If there are electrolyte contamination or white deposits in the area of the battery
or the battery housing, clean these areas as well by means of a dry cloth.
9.3 Batteryreplacement
Beforeopeningthe01,makesurethat
thedeviceisfreeofvoltage!Electricaldanger!
The 01 is supplid by means of two integrated 1.5 V
micro (AAA) batteries.
Battery replacement (see gure 13) is required, if the battery symbol appears
on the display .
Proceed as follows to replace the battery:
- Disconnect the safety measuring lines from the measuring circuit.
- Disconnect the safety measuring lines from the 01.
- Switch the rotary switch 8to position „OFF“.
- Put the 01 face down and unscrew the screw of
the battery compartment cover.
- Lift off the battery compartment cover from the bottom part of the battery
compartment.
- Remove the discharged batteries from the battery compartment.
- Insert the new batteries into the battery compartment observing correct
polarity.
- Lock the battery compartment cover into place on the bottom part and
tighten the screw.
See gure 13: Battery replacement
Makeyour contributionforenvironmentalprotection! Donot
dispose of discharged batteries via the household waste.
Instead,returnthemtoacollectingpointfordischargedbat‑
teries or special waste. Please look for information in your
community‘sfacilities.
9.4 Fuse replacement
Beforeopeningthe01,makesurethatthe
deviceisfreeofvoltage!Electricaldanger!
The 01 is protected against overload by means of an
integrated fuse (G fusible insert) 10 A (see gure 14). Proceed as follows to
replace the fuse:
- Disconnect the safety measuring lines from the measuring circuit.
- Disconnect the safety measuring lines from the 01.
- Switch the rotary switch 8to position „OFF“.
- Put the 01 face down and unscrew the screw of the
battery compartment cover.
- Lift off the battery compartment cover from the bottom part.
0XOWLPHWUH01PSYQRWLFHSGI
www.motor-pump-ventilation.com

- Remove the batteries from the battery compartment.
- Remove the suspension xture L(lift off the snap-on nose by means of a
small slotted screwdriver) from the bottom of the housing.
- Unscrew the four screws from the bottom of the housing.
Do not unscrew any screws from the printed circuit of the
01!
- Lift off the bottom of the housing from the front part.
- Lift one end of the defective fuse out of the fuse holder.
- Completely remove the defective fuse from the fuse holder.
- Insert a new fuse of the same nominal current, of the same triggering
characteristics and of the same dimensions.
- Arrange the new fuse in the middle of the holder.
- Carefully place the bottom of the housing back onto the device. When
closing the bottom of the housing, make sure that the battery springs in the
bottom of the housing slide into the receptacle slots!
- Lock the bottom of the housing into place onto the front part and fasten the
four screws.
- Lock the suspension xture Linto place on the back of the bottom part of
the housing.
- Insert the batteries back into the battery compartment observing correct
polarity, close the battery compartment cover and tighten the screws.
See gure 14: Fuse replacement
9.5 Calibration
To maintain accuracy of the measuring results, the device must be recalibrated
in regular intervals by our factory service. We recommend recalibrating the
device once a year. For this purpose, send the device to the following address:
Benning Elektrotechnik & Elektronik GmbH & Co. KG
Service Center
Robert-Bosch-Str. 20
D - 46397 Bocholt
9.6 Spare parts
Fuse F 10 A, 600 V, 50 kA (Bussmann KTK or DCM) P.no. 748263
10. Usingthesuspensionxture
- You can store the safety measuring lines by winding them around the device
and by engaging the probe tips of the safety measuring lines in a protected
way on the suspension xture L (see gure 15).
- You can engage a safety measuring line on the suspension xture
Lin such a way that the probe Tipp remains free in order to be able
to guide the probe tip towards a measuring point together with the
01.
- The rearsupportof the deviceallows an inclinedsetupof the 01
(facilitates reading the measured values) or suspension of the
device (see gure 16).
- The suspension xture Lis equipped with a lug which can be used for
suspension.
See gure 15: Winding the safety measuring lines
See gure 16: Setting up the 01
11. Technicaldataofthemeasuringaccessories
4mmsafetymeasuringlineATL2
- Standard: EN 61010-031,
- Maximum rated voltage to earth ( ) and measuring category:
1000 V CAT III, 600 V CAT IV,
- Maximum rated current: 10 A,
- Protection class II (), continuous double or reinforced insulation,
- Contamination class: 2,
- Length: 1.4 m, AWG 18,
- Ambient conditions:
Barometric height for measurements: max. 2000 m,
Temperature: 0°C to + 50 °C, humidity: 50 % to 80 %
- Use the measuring lines in perfect condition and according to these
operating instructions only, as otherwise the protection provided might be
impaired.
- Replace the measuring lines, if the insulation is damaged or if the conductor/
connector is interrupted.
- Do not touch the bare contact tips of the measuring lines. Only touch the
area intended for your hands!
0XOWLPHWUH01PSYQRWLFHSGI
www.motor-pump-ventilation.com
Table of contents
Other MPV Multimeter manuals
