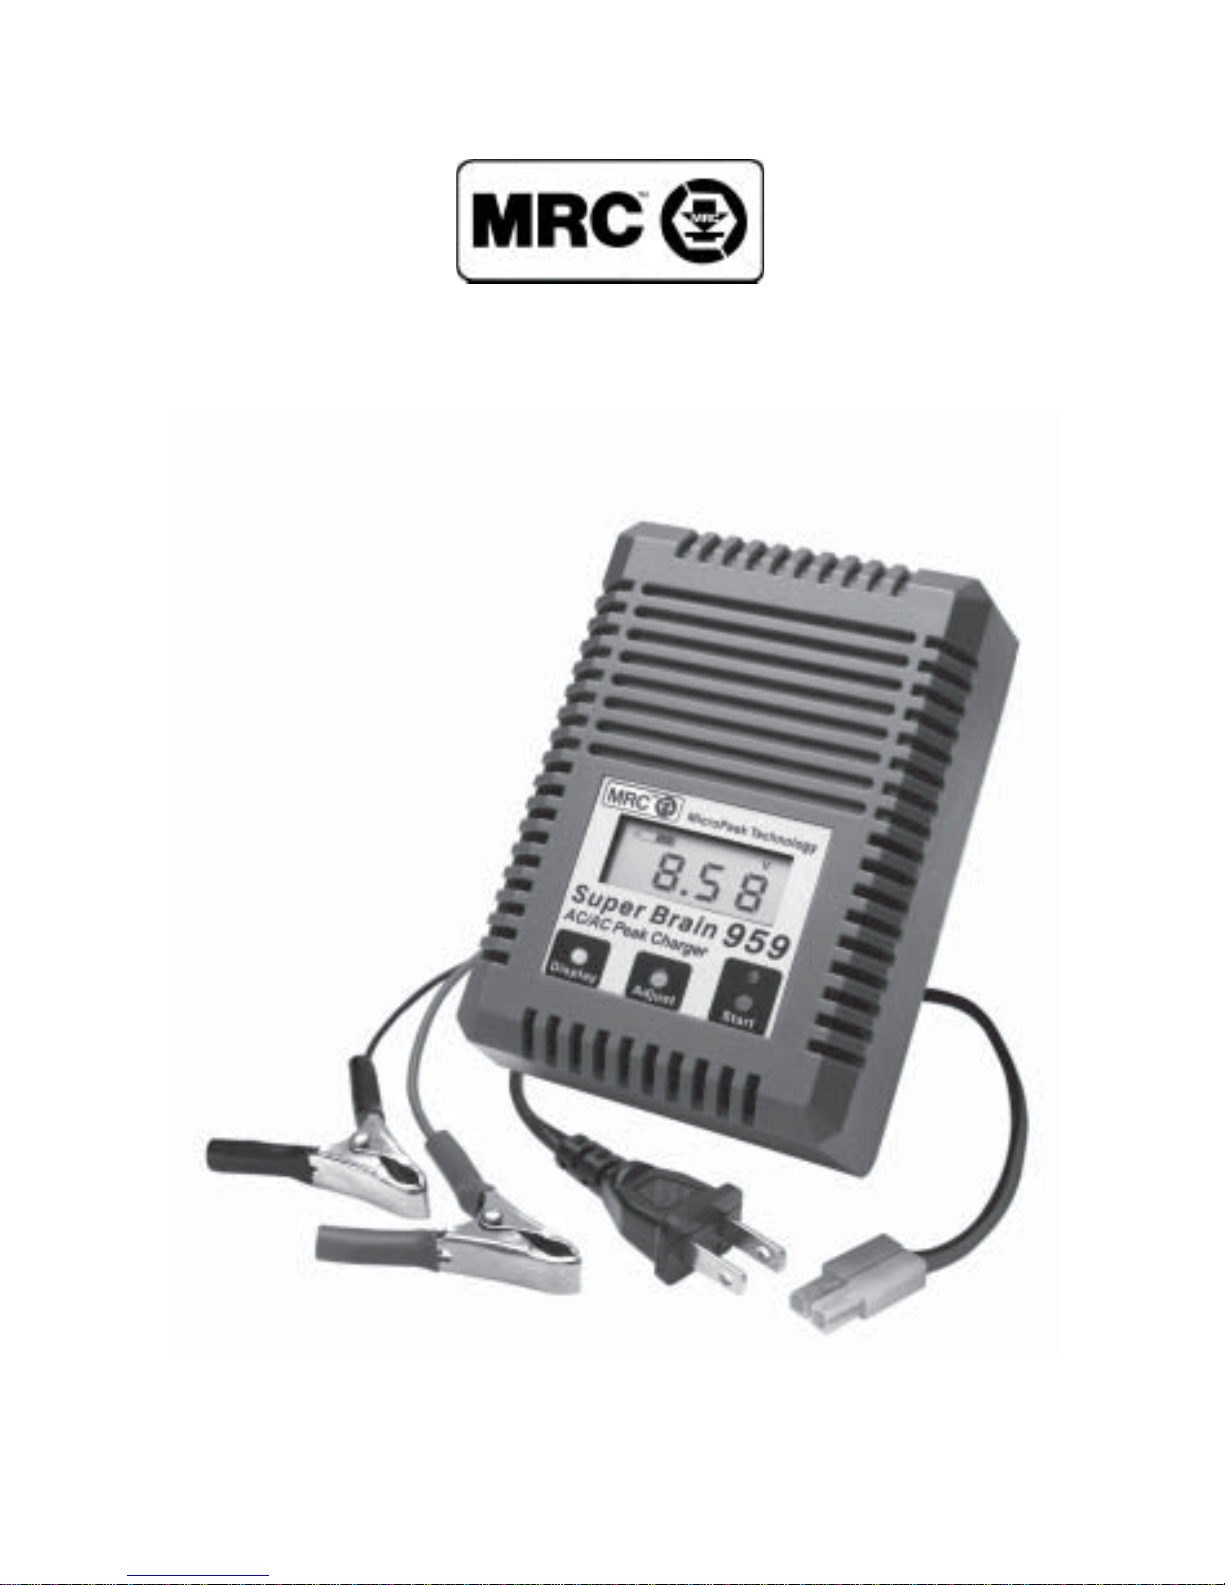
MRC Super Brain 959 User manual

MODEL RECTIFIER CORPORATION
Super Brain 959
AC/DC Delta Peak Charger with LCD
INSTRUCTION MANUAL

Super Brain 959
Thank you for purchasing MRC’s Super Brain 959. The 959 LCD charger offers cutting edge
technology, packed with many advanced features. We hope you enjoy using your new 959!
FEATURES
•AC/DC Delta Peak charger with MicroPeak Technology
•LCD displays five readings: Battery Status, Battery Voltage (V), Charge Current (A),
ChargingTime in minutes (Min), and Delta Peak VoltageThreshold in millivolts (mV)
•Charges Nickel Cadmium and Nickel Metal Hydride batteries
•For 3~8 cellAA and sub-C packs, plus a special setting for single cell “Glow Driver”
battery (single-cell)
•Nine charge current rates:
0.5Amp to 4.5Amp with 0.5Amp increments
•Fourteen delta peak voltage thresholds:
5mV to 70mV with 5mV increments
•Plug ‘n Play Operation for sub-C or larger battery cell(s)
•12-bitAnalog to Digital Converter greatly improves measurement resolution
•Digital Signal Processing (DSP) filters out noise and provides greater measurement
accuracy
•Compact size to fit into a field box
PLUGN’PLAYINSTRUCTIONS forsub-C orlarger batterycell(s)
1. Connect the charger to a power source (120VAC or 12V DC).
2. Attach the battery to the charger. The battery’s voltage will appear on the screen.
3. The charger has a default charge rate of 3.0 Amps. Press the start button to begin
charging if this is the intended setting. SeeADVANCED INSTRUCTIONS section to
change the charge current rate.
4. The first 30~60 seconds is the battery diagnostic period. LCD will display “test” and
the red light will flash during this period. The unit will not accept new commands during
this diagnostic period.
5. LCD will display “Charge” and the red light will remain on during fast charge. The
battery status and voltage are displayed.
6. The charge rate, time and voltage can be viewed by pressing the “Display” button.
NOTE: If the delta peak voltage threshold has not been set manually, ignore the display
for the delta peak voltage threshold. The value displayed is irrelevant.
7. Charging can be stopped at any time during the charge cycle by pressing the “Start”
button.
8. When the fast charge cycle is complete, the unit will beep three times and automatically
begin a 50-minute 0.1Amp trickle charge cycle. During the trickle charge cycle “Charge”
and the red light will blink (with very short on time and long off time).After the trickle
cycle, the charger will automatically go into sleep mode.
9. Under normal ambient conditions, this charger stays cool and can continue to charge 3 to
4 batteries consecutively. After several consecutive charges, the protection circuit may
activate to prevent the unit being damaged. When this happens, please disconnect the
charger from the power source and allow the charger to cool down.
10. The LCD screen will become unclear if the unit is excessively hot. Please stop using the
charger if the LCD screen becomes unclear and allow the unit to cool.
11. “Err” displayed at any time indicates an error has occurred.
Example: If the charger is not correctly connected, “Err” message may appear.

ADVANCED INSTRUCTIONS
These instructions are intended for experienced users or for charging rechargeable AA-size
cells.
1. Connect the charger to a power source (120VAC or 12V DC).
2. Attach the battery to the charger. The battery’s voltage will appear on the screen.
3. The charger has a default charge rate of 3.0 Amps. Press the start button to begin
charging if this is the intended setting. The charge current rate can be changed by pressing
the “Display” button to select the Amp display, and then pressing the “Adjust” button
to select the Amps setting.
WARNING: Consult battery manufacturer’s instructions before adjusting charger
settings.
4. The charger has the ability to select the optimum delta peak voltage threshold for each
battery. Experienced users may wish to set the delta peak voltage threshold. Press the
“Display” button until “mV” appears at the top of the screen, then press the “Adjust”
button to select the voltage level
NOTE: Once the Delta Peak threshold is set manually, the charger will use this setting
even if it is not an appropriate setting for the battery. We recommend most customers
allow the charger to select the delta peak voltage threshold.
5. Press the “Start” button to begin charging.
6. The first 30~60 seconds is the battery diagnostic period. The unit will not accept new
commands during this diagnostic period.
7. The charge rate, charge time, voltage and delta peak voltage threshold can be viewed by
pressing the “Display” button. Data is displayed for 10 seconds and then it defaults to
the battery status and battery voltage.
8. Charging can be stopped at any time during the charge cycle by pressing the “Start”
button.
9. When the fast charge cycle is complete, the unit will beep three times and automatically
begin a 50-minute 0.1Amp trickle charge cycle. During the trickle charge cycle the red
light will blink (with very short on time and long off time). After the trickle cycle, the
charger will automatically go into sleep mode.
10. Under normal ambient conditions, this charger stays cool and can continue to charge 3 to
4 batteries consecutively. After several consecutive charges, the protection circuit may
activate to prevent the unit being damaged. When this happens, disconnect the charger
from the power source and allow the charger to cool down. Please do not continue use if
the unit becomes excessively hot.
11. The LCD screen will become unclear if the unit is excessively hot. Please stop using the
charger if the LCD screen becomes unclear and allow the unit to cool.
NOTE: Ambient temperature will affect the charger’s heat level.
12. “Err” displayed at any time indicates an error has occurred.
Example: If the charger is not correctly connected, “Err” message may appear.
CHARGING8CELLSWITHACAR BATTERY
If you use a 12V car battery to charge an 8-cell battery pack, you will not be able to receive
high current charging even you select a high current charge. It may take a longer time to charge
an 8-cell battery pack with a DC 12v power supply or 12v battery.

CAUTION& WARNINGS
1. Never leave the charger unattended when in use
2. Do not leave the battery inside any radio-controlled product while charging.
3. Place the charger and battery on a solid uncarpeted surface with good ventilation. Do not
charge the battery inside the full-size automobile as damage to interior can result.
4. Do not connect the 120V A/C input and the 12V D/C input at the same time.
5. Battery damage can occur if the charge current (Amps) rate is set too high. The default
charge rate is 3Amps. Different capacity batteries may require a higher or lower charge
rate. Follow the “Plug n’ Play Instructions” in addition to battery manufacturer’s
instructions.
6. If the battery or the charger becomes extremely hot, immediately disconnect the charger
from the power source and allow the battery and charger to cool.
7. The charger is designed to charge ONLY(1-8 cells) nickel cadmium or nickel metal
hydride batteries. DO NOT attempt to charge Alkaline, Dry Cells, Gel Cells, LeadAcid,
Lithium, or other batteries with this charger. Damage to the charger, personal injury and/
or fire could result.
8. Discontinue use if charger casing becomes damaged or cracked.
9. Do not use the DC power source of a running full-size automobile engine.
10. Always disconnect charger from the power source when not in use.
11. Adult supervision is recommended for ages 12 and under.
SERVICERETURNPROCEDURE
If it should be necessary to return the charger for service, please include a letter (printed
clearly) with your name, address, a daytime phone number, and a detailed description of the
problem you are experiencing. Please include $7.00 to cover the return shipping and handling
cost.
MRC will not accept any charger for repair that has been modified in any way.
Send to: Attn: Parts & Service
Model Rectifier Corporation
80 NewfieldAvenue
Edison, NJ 08837-3817
© 2002 Model Rectifier Corporation
80 NewfieldAvenue
Edison, NJ 08837-3817
Telephone 732-225-6360
Printed in China
Table of contents
Other MRC Batteries Charger manuals