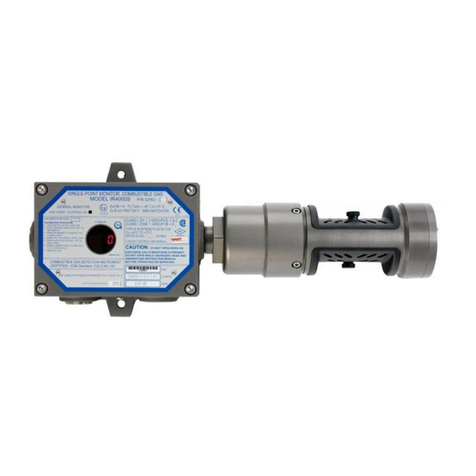
MSA PrimaX IR User manual

MSAsafety.com
Operating Manual
PrimaX® IR
Infrared Gas Monitor
Order No.: 10113581/04
CR 800000041694

Schlüsselstrasse 12
8645 Rapperswil-Jona
Switzerland
© MSA 2020 All rights reserved

PrimaX® IR 3
GB
Contents
1 Safety Regulations . . . . . . . . . . . . . . . . . . . . . . . . . . . . . . . . . . . . . . . . . . . . 5
1.1 Correct Use. . . . . . . . . . . . . . . . . . . . . . . . . . . . . . . . . . . . . . . . . . . . . 5
1.2 Liability Information. . . . . . . . . . . . . . . . . . . . . . . . . . . . . . . . . . . . . . . 5
1.3 Safety and Precautionary Measures to be Adopted . . . . . . . . . . . . . . 6
1.4 MSA Permanent Instrument Warranty . . . . . . . . . . . . . . . . . . . . . . . . 7
2 Description . . . . . . . . . . . . . . . . . . . . . . . . . . . . . . . . . . . . . . . . . . . . . . . . . . 8
2.1 User Interface . . . . . . . . . . . . . . . . . . . . . . . . . . . . . . . . . . . . . . . . . . . 8
2.2 Package Contents. . . . . . . . . . . . . . . . . . . . . . . . . . . . . . . . . . . . . . . . 8
3 Installation . . . . . . . . . . . . . . . . . . . . . . . . . . . . . . . . . . . . . . . . . . . . . . . . . .11
3.1 Mechanical Installation . . . . . . . . . . . . . . . . . . . . . . . . . . . . . . . . . . . .11
Optional Junction Box Instructions:. . . . . . . . . . . . . . . . . . . . . . . . . . 12
3.2 Electrical installation . . . . . . . . . . . . . . . . . . . . . . . . . . . . . . . . . . . . . 14
Wiring Requirements . . . . . . . . . . . . . . . . . . . . . . . . . . . . . . . . . . . . 14
External Controllers . . . . . . . . . . . . . . . . . . . . . . . . . . . . . . . . . . . . . 15
4 Start-up and Calibration. . . . . . . . . . . . . . . . . . . . . . . . . . . . . . . . . . . . . . . 16
4.1 Initial Startup . . . . . . . . . . . . . . . . . . . . . . . . . . . . . . . . . . . . . . . . . . . 16
Calibrations . . . . . . . . . . . . . . . . . . . . . . . . . . . . . . . . . . . . . . . . . . . . 16
4.2 PrimaX IR Calibration . . . . . . . . . . . . . . . . . . . . . . . . . . . . . . . . . . . . 17
Bump Check Procedure . . . . . . . . . . . . . . . . . . . . . . . . . . . . . . . . . . 20
Calibration Cap Procedure . . . . . . . . . . . . . . . . . . . . . . . . . . . . . . . . 21
HART Calibration Procedure . . . . . . . . . . . . . . . . . . . . . . . . . . . . . . 24
4.3 Calibration Kits . . . . . . . . . . . . . . . . . . . . . . . . . . . . . . . . . . . . . . . . . 26
5 Maintenance . . . . . . . . . . . . . . . . . . . . . . . . . . . . . . . . . . . . . . . . . . . . . . . . 27
5.1 General . . . . . . . . . . . . . . . . . . . . . . . . . . . . . . . . . . . . . . . . . . . . . . . 27
5.2 Troubleshooting . . . . . . . . . . . . . . . . . . . . . . . . . . . . . . . . . . . . . . . . 27
5.3 HART Information for Troubleshooting . . . . . . . . . . . . . . . . . . . . . . . 28
5.4 Cleaning . . . . . . . . . . . . . . . . . . . . . . . . . . . . . . . . . . . . . . . . . . . . . . 28
5.5 Environmental Guard Cleaning. . . . . . . . . . . . . . . . . . . . . . . . . . . . . 30
5.6 Calibration Cap Cleaning Procedure . . . . . . . . . . . . . . . . . . . . . . . . 31

PrimaX® IR
4
GB
6 Technical Data . . . . . . . . . . . . . . . . . . . . . . . . . . . . . . . . . . . . . . . . . . . . . . 32
7 Accessories . . . . . . . . . . . . . . . . . . . . . . . . . . . . . . . . . . . . . . . . . . . . . . . . 33
7.1 Flow Cap. . . . . . . . . . . . . . . . . . . . . . . . . . . . . . . . . . . . . . . . . . . . . . 33
7.2 Sunshield . . . . . . . . . . . . . . . . . . . . . . . . . . . . . . . . . . . . . . . . . . . . . 34
7.3 Duct Mount Kit . . . . . . . . . . . . . . . . . . . . . . . . . . . . . . . . . . . . . . . . . 34
7.4 HART Module . . . . . . . . . . . . . . . . . . . . . . . . . . . . . . . . . . . . . . . . . . 35
7.5 Insect Guard/Remote Calibration Inserts . . . . . . . . . . . . . . . . . . . . . 35
8 Approvals . . . . . . . . . . . . . . . . . . . . . . . . . . . . . . . . . . . . . . . . . . . . . . . . . . 37
8.1 Marking, Certificates and Approvals According to the Directive
2014/34/EU (ATEX) . . . . . . . . . . . . . . . . . . . . . . . . . . . . . . . . . . . . . 37
8.2 Special conditions for the safe use according to ATEX and SIL
applications . . . . . . . . . . . . . . . . . . . . . . . . . . . . . . . . . . . . . . . . . . . . 41

PrimaX® IR 5
Safety Regulations
GB
1 Safety Regulations
1.1 Correct Use
The PrimaX IR Gas Monitor - referred to hereafter as device - is a fixed infrared combustible gas
detector. It is suitable for outdoor and indoor applications, e.g. offshore industry, chemical and petro-
chemical industry, water and sewage industry.
The device utilises infrared technology to monitor, detect and alert users to potentially dangerous levels
of combustible hydrocarbon gas. Dual source technology offers 100% redundancy on the optical
source to maximize reliability and lifetime. This device allows for extremely fast response time whilst
providing an extremely stable output signal.
The device is a stand-alone unit with a 4 to 20 mA output with HART [Highway Addressable Remote
Transducer] digital information encoded on the analogue output. The signal of the transmitter can be
used in combination with MSA control units for further actions in safety or non-safety applications.
Contact your MSA representative for available controllers.
The device is shipped factory-calibrated and is labelled with target gas, calibration gas and span setting
information for ease of use. Any user changes to the factory assigned values should be noted on the
device labels.
The device is explosion-proof and suitable for installation in hazardous locations. This sensor is
intended for integration with a control system that can alert operations personnel to the presence of
hydrocarbon combustible gas.
It is imperative that this operating manual be read and observed when using the product. In particular,
the safety instructions, as well as the information for the use and operation of the product, must be
carefully read and observed. Furthermore, the national regulations applicable in the user's country
must be taken into account for a safe use. This includes EN 60079-29-2.
WARNING!
This product is supporting life and health. Inappropriate use, maintenance or servicing may affect the
function of the device and thereby seriously compromise the user's life.
Before use the product operability must be verified. The product must not be used if the function test
is unsuccessful, it is damaged, a competent servicing/maintenance has not been made, genuine MSA
spare parts have not been used.
For safety reasons this equipment must be operated and serviced by qualified personnel only.
Alternative use, or use outside this specification will be considered as non-compliance. This also
applies especially to unauthorized alterations to the product and to commissioning work that has not
been carried out by MSA or authorized persons.
1.2 Liability Information
MSA accepts no liability in cases where the product has been used inappropriately or not as intended.
The selection and use of the product are the exclusive responsibility of the individual operator.
Product liability claims, warranties also as guarantees made by MSA with respect to the product are
voided, if it is not used, serviced or maintained in accordance with the instructions in this manual.
PrimaX® IR
6
Safety Regulations
GB
1.3 Safety and Precautionary Measures to be Adopted
WARNING!
The following safety instructions must be observed implicitly. Only in this way can the safety and health
of the individual operators, and the correct functioning of the device, be guaranteed.
• The device described in this manual must be installed, operated and maintained in strict accor-
dance with the labels, cautions, instructions, and within the limitations stated.
• Protect the device from extreme vibration.
• Do not mount the device in direct sunlight, since this may cause it to overheat. A stainless steel
sunshield is available for the PrimaX IR Gas Monitor to protect it from extreme environments.
• The only absolute method to ensure proper overall operation of the device is to check it with a
known concentration of the gas for which it has been calibrated. Consequently, calibration checks
must be included as part of the routine inspection of the system. The device is labeled with the
type and value of the factory calibration gas.
• Use only genuine MSA replacement parts when performing any maintenance procedures
provided in this manual. Failure to do so may seriously impair device performance. Repair or alter-
ation of the device, beyond the scope of these maintenance instructions or by anyone other than
an authorized MSA service provider, could cause the product to fail to perform as designed.
• There are no field-repairable internal components for this device. Return to MSA for warranty
replacement per the Warranty section.
• This device does not detect the presence of hydrogen gas and must never be used to monitor for
hydrogen gas.
• The standard device must never be used in atmospheres containing acetylene gas. Contact MSA
regarding available acetylene sensors.
• Calibrate frequently if used in atmospheres exposed to high levels of solvents or dust. See chap-
ters 4 and 5 for calibration and cleaning procedures.
• Do not paint the device. If painting is done in an area where the device is located, exercise caution
to ensure paint is not deposited on the device. Such paint deposits could interfere with the device
operation. Solvents in the paint may also cause an alarm condition to occur.
• The device is designed for applications in hazardous areas under environmental conditions
defined in the Specifications section of this manual.

• The response time of the device can be increased by significant dust deposits. Checks for dust
deposits must be done at regular intervals.
• The PrimaX IR sensor will detect other hydrocarbon gases than the target gas.
• Oxygen enriched atmospheres greater than 21 Vol % can affect the measurement and the elec-
trical safety of the Gas Monitor.

PrimaX® IR 7
Safety Regulations
GB
1.4 MSA Permanent Instrument Warranty
Warranty
Seller warrants that this product will be free from mechanical defect or faulty workmanship for
• IR Dual source: ten (10) years from date of shipment, as determined by HART communication that
both sources are non-functional
• Gas Monitor, excluding accessories: three (3) years from date of shipment
• Calibration cap: one (1) year from date of shipment
This warranty is applicable provided the product is maintained and used in accordance with Seller's
instructions and/or recommendations.
The Seller shall be released from all obligations under this warranty in the event repairs or modifica-
tions are made by persons other than its own or authorized service personnel or if the warranty claim
results from physical abuse or misuse of the product. No agent, employee or representative of the
Seller has any authority to bind the Seller to any affirmation, representation or warranty concerning the
goods sold under this contract. Seller makes no warranty concerning components or accessories not
manufactured by the Seller, but will pass onto the Purchaser all warranties of manufacturers of such
components.
THIS WARRANTY IS IN LIEU OF ALL OTHER WARRANTIES, EXPRESSED, IMPLIED OR STATU-
ATORY, AND IS STRICTLY LIMITED TO THE TERMS HEREOF. SELLER SPECIFICALLY
DISCLAIMS ANY WARRANTY OF MERCHANT ABILITY OR OF FITNESS FOR A PARTICULR
PURPOSE.

PrimaX® IR
8
Description
GB
2 Description
The device is designed to sample the environment at the installed location and alert the user to poten-
tially dangerous levels of hydrocarbon gas. The device is shipped factory calibrated and is labeled with
target gas, calibration gas and span setting information.
The output of the device is a standard 4 to 20 mA with HART. The 4-20 mA signal communicates the
primary measured value using the 4-20 mA current loop. Additional device information is communi-
cated using a digital signal that is superimposed on the analog signal. The device is compliant with
HART Communications Foundation (HCF) Revision 7.0 format. Commercially available hand-held
communicator devices or PC applications can be used to communicate with the device using the
Device Description (DD) file that is available from the HART Communications Foundation website
(www.hartcomm.org).
2.1 User Interface
This device does not provide a visual display of information. The gas level and basic device status are
available via the 4-20 mA output signal. Other detailed device status is available via the HART signal.
Details about this interface can be found in the PrimaX IR HART Specification located on the product
CD shipped with the device.
The optional calibration cap provides an LCD display for easy and intuitive calibration of the device.
The proper usage of this calibration cap is described in chapter 4.2.
The device should be installed where gas leaks are anticipated. The installation position depends on
the gas density, either in the upper area of the room beneath the ceiling for gases lighter than air, or
close to the ground for gases heavier than air. Also consider how air movement may affect the ability
of the device to detect gas. Testing for ventilation patterns may be helpful in establishing locations for
the device in enclosed areas.
2.2 Package Contents
The device will be delivered with the following items in the shipping carton:
• PrimaX IR sensor (316 Stainless Steel)
• Environmental guard
• Quick Start Guide
• Product CD, including this instruction manual, HART specification and installation drawing
Before beginning the installation, check that the delivered components are complete
and correct, referring to the shipping documents and the label on the shipment carton.

PrimaX® IR 9
Description
GB
Accessories to be used with this product may be packaged separately. Check the enclosed shipping
papers to identify all PrimaX IR accessories that have been ordered.
Fig. 1 Overview of PrimaX IR parts
1 Environmental guard 4 Calibration cap (optional)
2 PrimaX IR sensor (316 stainless steel) 5 HART Calibration cap/Bump cap (optional)
3 Stainless steel junction box (optional) 6 Remote HART calibration kit (optional)
4
123
4
5
6

PrimaX® IR
10
Description
GB
Accessories available for the PrimaX IR Gas Monitor include:
• Optional junction box equipped with a terminal strip for easy wiring
• Optional calibration cap for calibration operations
• Optional tether strap for environmental guard
• Optional HART Calibration cover/Bump cap
• Optional Remote HART Calibration kit
The complete list of accessories is provided in chapter 7.
The device will be labeled with the information shown below:
• Target gas, calibration gas and span value
• Serial number and date of manufacture
• Area classification markings

PrimaX® IR 11
Installation
GB
3 Installation
3.1 Mechanical Installation
The device’s dimensions are shown below in inches (mm):
Fig. 2 Sensor with Aluminum Junction Box
Fig. 3 Sensor with Stainless Steel Junction Box
If a junction box is not being used, mount the device on a support by using suitable hardware (not
supplied), and in accordance with local regulatory requirements.
To ensure specified response time mount the sensor with the legs horizontal relative to each other as
shown in Fig. 4.
MSA recommends mounting the sensor horizontally. Horizontal mounting will help
prevent the build-up of particulate or liquid matter on the monitor's optical surfaces.

PrimaX® IR
12
Installation
GB
WARNING!
Do not paint the device. If painting is done in an area where a sensor is located, exercise caution to
ensure paint is not deposited on the sensor. Such paint deposits could interfere with the device oper-
ation. Solvents in the paint may also cause an alarm condition to occur.
WARNING!
Protect the device from extreme vibration. Do not mount the sensing head in direct sunlight, since this
may cause the sensor to overheat. A stainless steel sunshield is available for the device to protect it
from extreme environments.
CAUTION!
During sensor installation or removal, do not use any tools or apply excessive force to the two legs that
support the unit's reflectors. Applying force to the legs can permanently damage the monitor.
MSA recommends that the device’s environmental guard should be installed on the unit at all times. If
the device is to be operated without the guard, frequent checks must be made to ensure particulate or
liquid matter has not collected on the windows.
(1) Use a wrench on the hex nut in the sensor neck to install or remove the sensor.
Do not apply torque to the two sensor legs.
Optional Junction Box Instructions:
If installing the device on a junction box, verify that the junction box area classification is appropriate
for the installation environment. Two options are available for MSA junction boxes:
• Powder-coated Aluminum
• 316 Stainless Steel
A stainless steel mounting plate is included with either junction box to ensure that there is sufficient
clearance from the installed surface (see fig. 5 and 6).
or
Mount horizontally Mount horizontally
Fig. 4 Recommended mounting orientation
1 Hex nut size:
36mm - Metric
1-7/16 - Standard
1

PrimaX® IR 13
Installation
GB
(1) Install the mounting bracket and junction box using the bracket holes as the drilling template.
Fig. 5 Mounting bracket for Aluminum Junction Box
Fig. 6 Mounting bracket for Stainless Steel Junction Box
(2) If not using an MSA supplied junction box, refer to Fig. 2 for the dimensional drawing to ensure
that there is adequate clearance. Ensure that the environmental guard can be easily removed
and re-installed.
(3) The optimum orientation for the device is horizontal.

PrimaX® IR
14
Installation
GB
3.2 Electrical installation
Instructions for Electrical Connection
CAUTION!
The device must be installed only in compliance with the applicable regulations, otherwise the safe
operation of the device is not guaranteed.
• Shielded cable for measuring devices is recommended.
• Always observe maximum cable lengths and cross-sections shown below.
• Water or impurities can penetrate the device through the cable. In hazardous areas, it is recom-
mended to install the cable in a loop just before entry into the device or to slightly bend it to prevent
water from entering.
Wiring Requirements
The device is a three-wire transmitter that operates in the current source mode and can be wired
directly to the input wires or with an optional junction box. The following table provides typical cable
lengths and wire sizes for installation. The HART signal requires a load across the signal.
Proper installation should prevent water and dirt from entering the unit via the wires or conduit.
The device is provided with 4 wires for use. The table below shows the wire color definitions:
Use a maximum (Line + Load) resistance of 500 Ohm between the DC- (white) and 4-20 mA source
(yellow) wires.
An external power source is required. Use a high quality, DC power supply with low noise characteris-
tics. See the diagram below for power supply and wiring details:
Wire Size vs Distance
Power Supply Voltage 1.0mm² 1.5mm² Signal Load
(including termination)
24 Volts 480 m 720 m
With HART
250 load 500
Without HART
load 500
Wiring Color Definitions
Wire color Definition
Red 24 VDC (DC +)
Yellow 4-20 mA Source (SIG)
White 0 VDC (DC -)
Green Earth Ground

PrimaX® IR 15
Installation
GB
Fig. 7 Sensor Wiring Diagram
CAUTION!
Before wiring the device, disconnect or isolate all power connected to the device; otherwise electric
shock could occur.
External Controllers
The device can be connected to any device capable of accepting a 4 - 20 mA sourcing analog signal.
For FM approved systems, the connecting device must have latching alarms with manual reset. Ensure
that your controller can read all signals. Check the MSA website www.MSAsafety.com for available
controllers.
The HART output is intended to be used with digital control systems that are compatible with
HC Revision 7.0 protocol.
Power requirements
Input voltage (at sensor) Nominal Maximum
18 V DC 220 mA 350 mA
24 V DC 175 mA 250 mA
32 V DC 130 mA 200 mA
18

PrimaX® IR
16
Start-up and Calibration
GB
4 Start-up and Calibration
4.1 Initial Startup
The device is factory-calibrated and ready for use. The device provides a 4 - 20 mA output signal that
can be used in conjunction with data acquisition controllers. The digital HART signal that is superim-
posed on the 4 - 20 mA output can be read by control systems that are in compliance with
HART Revision 7.0 format.
During device operation, the 4 - 20 mA output signal is updated once/second and provides the infor-
mation shown below:
*Output levels are customer configurable between 2.0 – 3.5 mA via the HART interface.
See the Hart Specification on the product CD for more information.
Transient Fault conditions will be automatically cleared when the unit recovers from the fault condition.
MSA recommends verifying proper response to changes in mA outputs by using the "Enter Fixed
Current Mode" command described in the PrimaX IR Link Help Guide to check the four fault conditions
noted with a *above. These checks should be done at every calibration phase.
Calibrations
General
The calibration must be done at regular intervals in accordance with applicable national and regional
regulations.
The device is calibrated at the factory. Nevertheless, it is recommended to recalibrate the device after
installation. New sensors should be calibrated more often until the calibration records prove sensor
stability. The calibration frequency can then be reduced to the schedule set by the safety officer or plant
manager.
Signal
The 4 - 20 analogue signal is available within 1 minute of power-on but the device should be powered
for at least 60 minutes before attempting calibration to allow for temperature stabilization.
CAUTION!
Carry out the calibration during commissioning as well as at regular intervals. This ensures optimum
operation of the sensor.
4-20 mA Output Levels [Default Values]
OPERATION 4 - 20 mA Definition
SAFETY CRITICAL FAULT 0.0 mA Sensor failure.
Communications not available to sensor
*FAULT 2.0 mA Problem detected.
Status available via HART interface
*OBSCURATION OR DIRTY
OPTICS 2.5 mA Light path is blocked
*POWER UP OR SENSOR
CALIBRATION 3.0 mA Unit power was recently applied or calibra-
tion in process with Cal Signal Enabled
*CLEANING MODE 3.5 mA Defined in chapter 5
NORMAL
Gas value scaled
from 4 - 20 mA
for 0 - 100 % LEL
OVERRANGE 20.0 - 20.5 mA > 100 % LEL gas is detected by the device

PrimaX® IR 17
Start-up and Calibration
GB
Although the device is factory-calibrated, it is good practice to calibrate the unit once it is installed in
its final environmental destination.
As with any type of gas monitor, the only true check of its performance is to apply gas directly to the
sensor. New sensors should be calibrated more often until the calibration records prove sensor
stability. The calibration frequency can then be reduced to the schedule set by the safety officer or plant
manager.
Span gas selections are shown in chapter 4.3.
(1) Read all calibration instructions before attempting an actual calibration.
(2) Identify and become familiar with all of the calibration components.
Prior connection of the calibration components will make it easier to calibrate the unit.
CAUTION!
Failure to follow the above can result in inaccurate calibration.
4.2 PrimaX IR Calibration
The device can be calibrated using either the optional calibration cap locally at the sensor, or using
the HART digital interface.
Calibration methods
CAUTION!
The standard environmental guard is designed to offer fast response time and should not be used for
bump or calibration without the Remote Calibration Inserts (see chapter 7.5, P/N 10116419).
Failure to do so could dilute the sample and result in inaccurate calibration.
Although both a full calibration (zero and span) and zero only calibration can be performed on the
device, a zero only calibration may be sufficient to properly calibrate the monitor. Normally, any degra-
dation of the sensor's performance is associated with slight drifts in zero that, in turn, will adversely
affect its span performance. After completing the zero calibration, perform a span check to ensure
proper operation. For a span check, apply a gas of known concentration and verify that the measured
response is within acceptable limits. If the span check is unsuccessful, perform a full zero and span
calibration.
It is recommended that all calibration components are connected before starting a cali-
bration as it is necessary to apply test gas at the appropriate time as shown in Fig. 15.
MSA recommends using a calibration gas value in the middle of the measuring range
for optimum calibration.

PrimaX® IR
18
Start-up and Calibration
GB
Fig. 8 MSA Calibration Cap
Fig. 9 Remote HART Hand-held

PrimaX® IR 19
Start-up and Calibration
GB
Fig. 10 HART Calibration Cover/Bump Cap
Alternate Span Gas Settings
To achieve the most accurate calibration it is always best to use the gas of interest and calibrate at the
operating temperature. If the target span gas is not available, an alternative span gas can be used with
the values shown in the table below. The sensor label will identify the span gas and value used by the
factory for calibration. Use of a reference gas for calibration may decrease accuracy.
The user may change the gas monitor's span value, gas name and gas curve through use of the
PrimaX IR Link software found on the product CD. Please refer to the PrimaX IR HART Specification
and the PrimaX IR Link Help Guide on the product CD.

PrimaX® IR
20
Start-up and Calibration
GB
Calibration Settings
Bump Check Procedure
A bump check verifies the sensor response to a known concentration of gas. The recommended equip-
ment for a Bump Check is the HART Calibration Cover/Bump Cap (P/N 10122228). A known concen-
tration of gas should be supplied to the inlet port of the Bump cap and compared to the gas value on
the output signal (see Fig. 10). Alternately, if using the environmental guard to perform a bump check
the gas should be delivered to both ports of the environmental guard from a 1.5 l/min regulator. Use
PrimaX IR Calibration Kit #55 for the tubing, regulator and Remote HART screens shown below.
Target Gas Range
% LEL
ATEX
performance
certified
Calibration
Gas
Span
Value %
LEL
t50 t90 GasCurve
Number
Methane 0-100 Yes 2.5%v/v Methane 57 12 s 22 s 1
Propane 0-100 Yes 0.6%v/v Propane 35 10 s 25 s 2
Toluene 0-50 Yes 2.5%v/v Methane 57 11 s 28 s 3
n-Butane 0-100 Yes 0.6%v/v Propane 37 10 s 24 s 2
n-Pentane 0-100 Yes 0.55%v/v n-Pentane 50 11 s 24 s 2
n-Hexane 0-100 Yes 0.5%v/v n-Hexane 50 11 s 24 s 2
Propylene 0-100 Yes 1.0%v/v Propylene 50 11 s 25 s 3
Ethane 0-100 Yes 1.2%v/v Ethane 50 11 s 23 s 3
Propylene Oxide 0-100 Yes 2.5%v/v Methane 19 11 s 25 s 3
Acetone 0-100 Yes 2.5%v/v Methane 44 11 s 25 s 2
Cyclopentane 0-100 Yes 0.6%v/v Propane 35 10 s 25 s 2
Ethyl Acetate 0-100 Yes 2.5%v/v Methane 21 12 s 25 s 2
IsoButane 0-70 Yes 0.65%v/v IsoButane 50 12 s 26 s 2
Ethylene 0-100 No 1.35%v/v Ethylene 59 10 s 23 s 3
Xylene 0-100 No 1.35%v/v Ethylene 19 10 s 25 s 3
1 Response time t50 and t90 with HART calibration cover, gas flow rate 1.5 l/min
2 IEC 60079-20-1 was used as bases for converting test and calibration gas concentrations from %
LEL to % volume fraction
3 For the measurement of n-Pentane, n-Hexane, Propylene, Ethane or Isobutane PrimaX IR shall be
calibrated with the target gas at a span value of approximately 50 % LEL.
Other manuals for PrimaX IR
3
Table of contents
Other MSA Monitor manuals

MSA
MSA Toxgard II User manual

MSA
MSA ULTIMA X5000 User manual

MSA
MSA S5000 User manual

MSA
MSA MV-1901F User manual

MSA
MSA Ultima User manual

MSA
MSA General Monitors IR4000S User manual

MSA
MSA ICM Tx Unit NightFighter Troubleshooting guide

MSA
MSA Ultima X Series User manual

MSA
MSA Ultima User manual

MSA
MSA Chillgard 5000 User manual