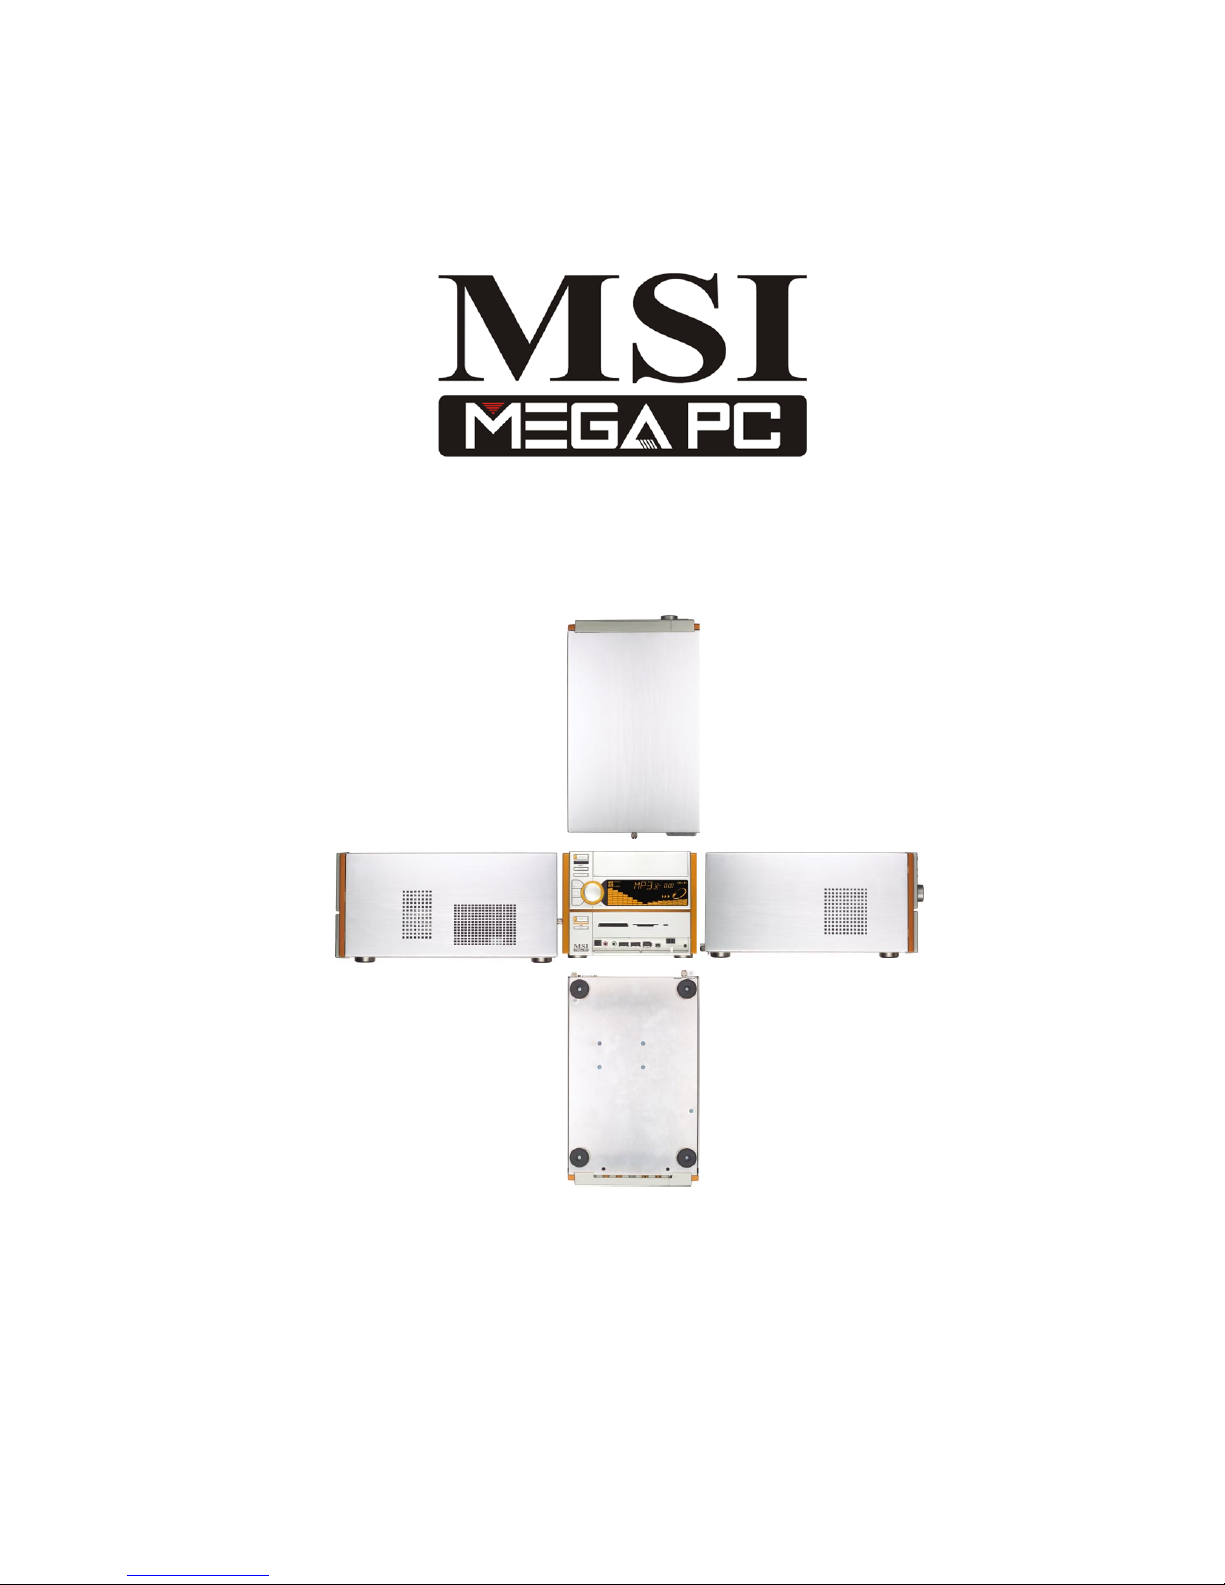
MSI MEGA 651 User manual
i

ii
FCC-B Radio Frequency Interference Statement
This equipment has been tested and found to comply with the limits for a class B
digital device, pursuant to part 15 of the FCC rules. These limits are designed to
provide reasonable protection against harmful interference when the equipment
is operated in a commercial environment. This equipment generates, uses and
can radiate radio frequency energy and, if not installed and used in accordance
with the instruction manual, may cause harmful interference to radio
communications. Operation of this equipment in a residential area is likely to
cause harmful interference, in which case the user will be required to correct the
interference at his own expense.
Notice 1
The changes or modifications not expressly approved by the party responsible for
compliance could void the user’s authority to operate the equipment.
Notice 2
Shielded interface cables and AC. power cord, if any, must be used in order to
comply with the emission limits.
VOIR LA NOTICE D’INSTALLATION AVANT DE RACCORDER AU RESEAU.
Micro-Star International MEGA 651
Tested to comply
with FCC Standard
For Home or Office Use

iii
Lithium Battery Statement
CAUTION
Danger of explosion if battery is incorrectly replaced. Replace only with the
same or equivalent type recommended by the manufactuer. Discard used bat-
teries according to the manufacturer’s instructions.
This product incorporates copyright protection technology that is protected by
method claims of certain U.S. patents and other intellectual property rights owned
by Macrovision Corporation and other rights owners. Use of this copyright pro-
tection technology must be authorized by Macrovision Corporation, and is in-
tended for home and other limited viewing users only unless otherwise autho-
rized by Macrovision Corporation. Reverse engineering or disassembly is
prohibited.
Macrovision® Statement

iv
1. Always read the safety instructions carefully.
2. Keep this User’s Manual for future reference.
3. Keep this equipment away from humidity.
4. Lay this equipment on a reliable flat surface before setting it up.
5. The openings on the enclosure are for air convection hence protects the
equipment from overheating. DO NOT COVER THE OPENINGS.
6. Make sure the voltage of the power source and adjust properly 115/230V
before connecting the equipment to the power inlet.
7. Place the power cord such a way that people can not step on it. Do not
place anything over the power cord.
8. Always Unplug the Power Cord before inserting any add-on card or module.
9. All cautions and warnings on the equipment should be noted.
10. Never pour any liquid into the opening that could damage or cause elec-
trical shock.
11. If any of the following situations arises, get the equipment checked by a
service personnel:
- The power cord or plug is damaged.
- Liquid has penetrated into the equipment.
- The equipment has been exposed to moisture.
- The equipment has not work well or you can not get it work according to
User’s Manual.
- The equipment has dropped and damaged.
- The equipment has obvious sign of breakage.
12. DO NOT LEAVE THIS EQUIPMENT IN AN ENVIRONMENT
UNCONDITIONED, STORAGE TEMPERATURE ABOVE 600 C (1400F), IT MAY
DAMAGE THE EQUIPMENT.
CAUTION: Danger of explosion if battery is incorrectly replaced.
Replace only with the same or equivalent type recommended by
the manufacturer.
Safety Instructions

v
Copyright Notice
The material in this document is the intellectual property of MICRO-STAR
INTERNATIONAL. We take every care in the preparation of this document, but
no guarantee is given as to the correctness of its contents. Our products are
under continual improvement and we reserve the right to make changes with-
out notice.
Trademarks
All trademarks are the properties of their respective owners.
Intel®and Pentium®are registered trademarks of Intel Corporation.
PS/2 and OS®/2 are registered trademarks of International Business Machines
Corporation.
Windows®95/98/2000/NT/XPareregisteredtrademarksofMicrosoftCorporation.
Netware®is a registered trademark of Novell, Inc.
Award®is a registered trademark of Phoenix Technologies Ltd.
AMI®is a registered trademark of American Megatrends Inc.
Revision History
Revision Revision History Date
V1.0 First release April 2003
V1.1 Add “Media Center” and “Appendix” June 2003
Make update on p. 1-7 & 3-3
Replace v1.0
v1.2 Special Edition for SI July 2003
v1.3 Remove “Media Center” July 2003
Replace v1.1
v1.4 Update Chapter 3 Sep. 2003
Replace v1.3

vi
CONTENTS
Introduction
Chapter 1. Getting Started......................................................................1-1
All-in-One Feature Set.......................................................1-2
Front Panel...............................................................1-3
Back Panel.........................................................................1-3
System Specification.....................................................................1-4
Performance PC ............................................................................1-6
Hi-Fi Audio...................................................................................1-8
Home Theater...............................................................................1-10
Chapter 2. Introducing Mainboard...........................................................2-1
Mainboard Layout..........................................................................2-2
CPU/Memory.................................................................................2-3
Introduction to DDR SDRAM................................................2-3
Power Supply.................................................................................2-4
Front Panel...................................................................................2-5
IEEE 1394 Port: J1394-2.......................................................2-5
IEEE 1394 Port: J1394-1........................................................2-6
USB Ports.........................................................................2-6
Mic-in/Head-Phone.............................................................2-7
OPTICAL SPDIF-in..............................................................2-7
Back Panel..................................................................................2-8
Serial Port...........................................................................2-8
VGA Port...........................................................................2-9
Mouse/Keyboard Connectors..............................................2-9
RJ45 LAN Jack..................................................................2-10
USB Ports.............................................................................2-10
OPTICAL SPDIF-out.........................................................2-10
Parallel Port........................................................................2-11
Audio Port..........................................................................2-12
Connectors.................................................................................2-13

vii
IDE Connectors: CN22 & CN23............................................2-13
FDD Connector: CN10.................................................... 2-13
CD-in Connector: CN16......................................................2-14
TV-Tuner Card Connector: CN13...........................................2-14
CPU Fan Connector: CN15.................................................2-14
Front Panel Power Connector: CN4..................................2-15
USB Card Reader Connector: CN6........................................2-15
LCM Connector: CN18.................................................2-16
Modem Module Connector: CN21...........................2-16
Jumper.............................................................................2-17
Clear CMOS Jumper: J2.............................................2-17
Slots......................................................................................2-18
PCI Slot.......................................................................2-18
AGP Slot......................................................................2-18
Chapter 3. Using Audio Function........................................................... 3-1
Introduction.........................................................................3-2
Control Panel..............................................................................3-3
Remote Controller........................................................................3-4
AC Power on................................................................................3-5
Playing CD/MP3 in Hi-Fi Mode.....................................................3-6
Playing FM/AM in Hi-Fi Mode..................................................3-10
Using Audio Function in PC Mode.........................................3-12
Radio Mode.....................................................................3-12
CD\MP Mode......................................................................3-13
Chapter 4: Setting BIOS Function..................................................4-1
Entering Setup..............................................................................4-2
Control Keys..................................................................4-2
Getting Help................................................................4-3
Main Menu........................................................................4-3
Sub-Menu.....................................................................4-3
General Help<F1>............................................................4-3
The Main Menu.............................................................................4-4

viii
Standard CMOS Features.........................................................4-6
Advanced BIOS Features...........................................................4-8
Advanced Chipset Features...........................................................4-11
Integrated Peripherals..............................................................4-13
Power Management Setup.......................................................4-19
PNP/PCI Configurations............................................................4-23
PC Health Status......................................................................4-25
Frequency/Voltage Control...........................................................4-26
Appendix. Using Mega Radio.................................................................A-1
Listening to Radio.........................................................................A-2
Setting Memory Station.................................................................A-6
Recording Music...........................................................................A-7

Introduction
Introducing YIntroducing Y
Introducing YIntroducing Y
Introducing Yourour
ourour
our
“Digital Media Platform“Digital Media Platform
“Digital Media Platform“Digital Media Platform
“Digital Media Platform””
””
”
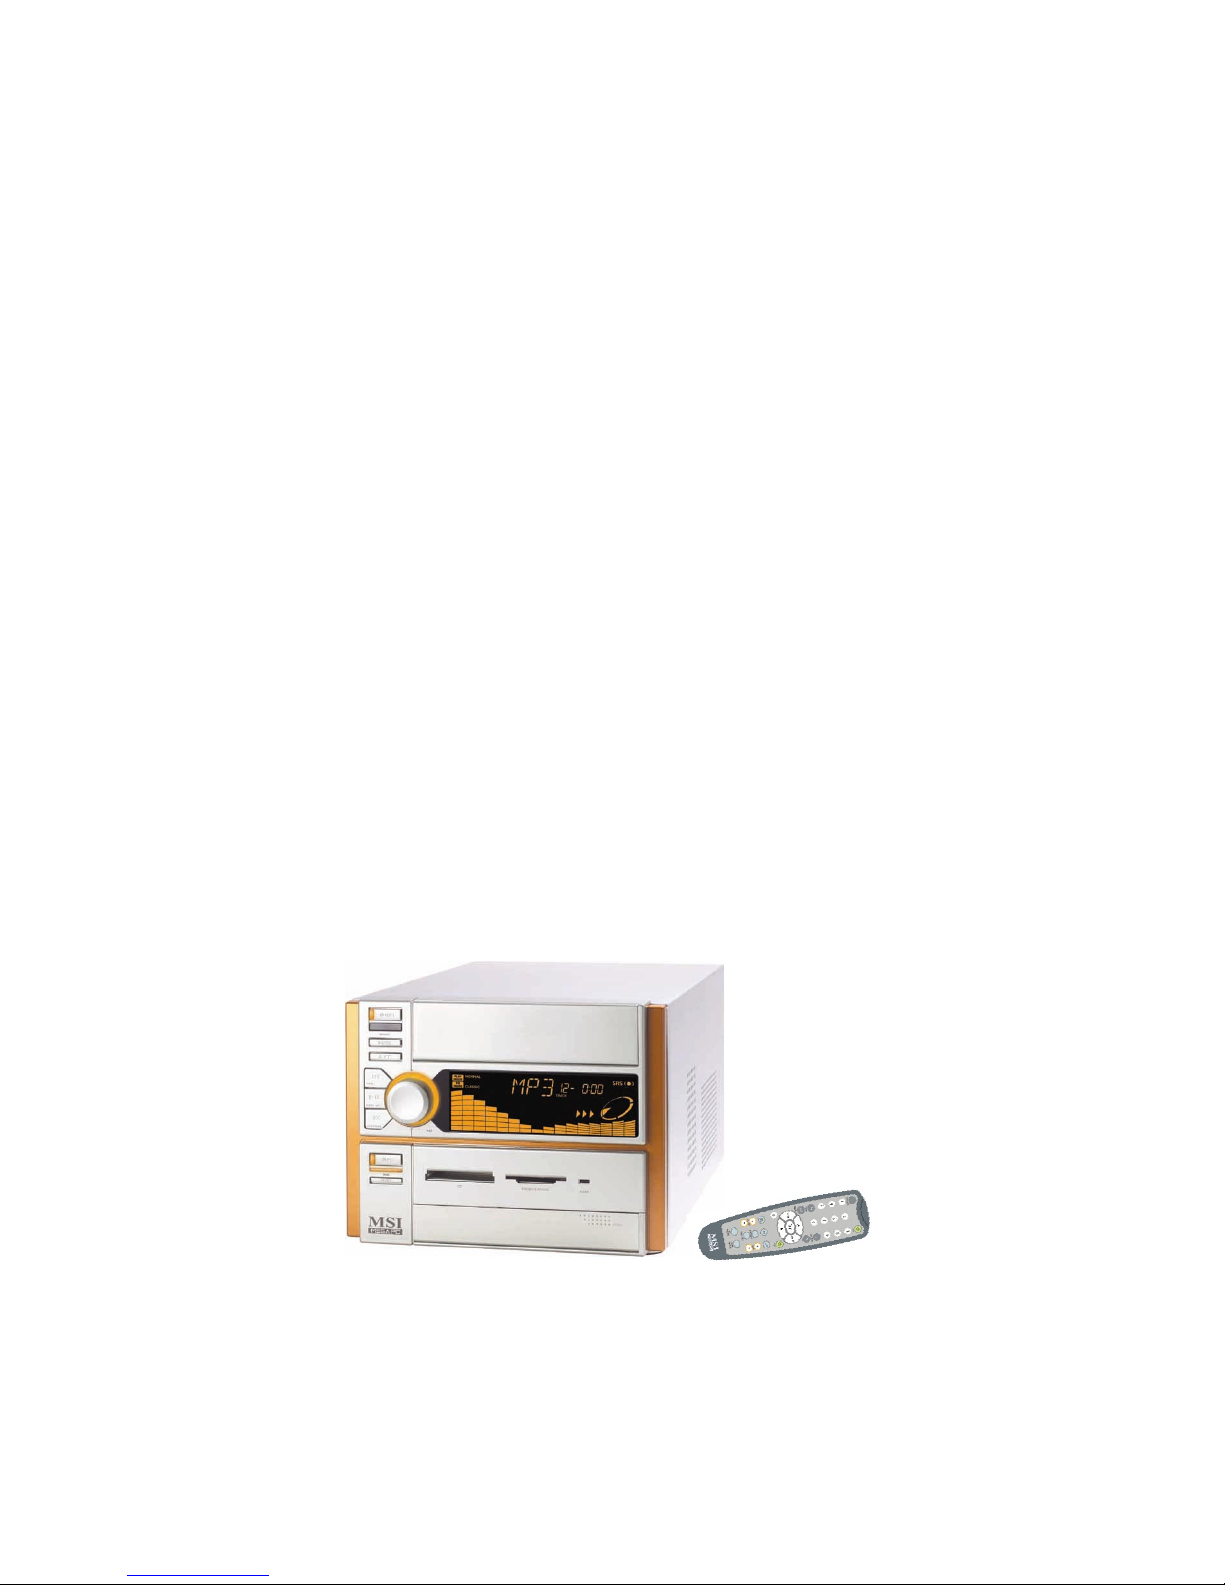
Thank you for your purchasing of MEGA 651, the Best of Computing &
Home Entertainment. Based on the design idea of consumer product, the MEGA
651 is not just a PC anymore. The “All-in-One” feature positions MEGA 651 as a
Digital Media Platform.
From the recent years, the ownership and usage of desktop and notebook
PCs across W.W. households has turned computers into a commodity item. While
Microsoft strongly promotes the “Media Center” platform concept “Windows XP
Media Center Edition” on HP “Free Style”, Intel is also exploring their “Digital
Home” concept for the “Home-use” PC.
To meet the new concept of Home PC, the MEGA 651 has been posi-
tioned as a Digital Media Platform to perform TV-recording (optional), home
theater (DVD+5.1 channels), digital audio playback (MP3, Audio CD), photo and
video stream data browsing. Meanwhile, it can also support high game perfor-
mance (AGP 4x slot). On the other hand, the remote controller allows you to use
it like an advanced Hi-Fi stereo in playing CD/MP3 and listening to radio.
An innovative feature to implement the
Hi-Fi stereo into home PC with a fancy
equalizer LCM and control panel on the
front bezel
Table of contents
Other MSI Desktop manuals

MSI
MSI Wind Top AE2031 User manual

MSI
MSI Aegis B907 User manual

MSI
MSI MAG Infinite S Series User manual

MSI
MSI 005EU User manual

MSI
MSI MEG Aegis Series User manual

MSI
MSI Midas 400 User manual

MSI
MSI Codex Z User manual

MSI
MSI Pro 22E Series User manual

MSI
MSI MEGA MPC - MEGA - mPC 945 User manual

MSI
MSI AE1920 User manual

MSI
MSI HETISG41 - Hetis G41 - DTS User manual

MSI
MSI 10SI-022EU User manual

MSI
MSI Wind Top AP1622 User manual

MSI
MSI Hetis 865GV User manual

MSI
MSI PRO DP130 User manual

MSI
MSI Infinite B916 User manual

MSI
MSI Infinite Series User manual

MSI
MSI Wind Top AE2282 Series User manual

MSI
MSI PRO AP242 13M User manual

MSI
MSI 482 User manual


