MTS Systems Ultimate TV User manual

MTS Ultimate TV
User Guide

Table of Contents
Welcome to MTS Ultimate TV. . . . . . . . . . . . . . . . . . . . . . . . . . . . . . . . . . . . . . . . . . . . . . . . . . . . . . . . . . . . . . . . . . . . . . . . .1
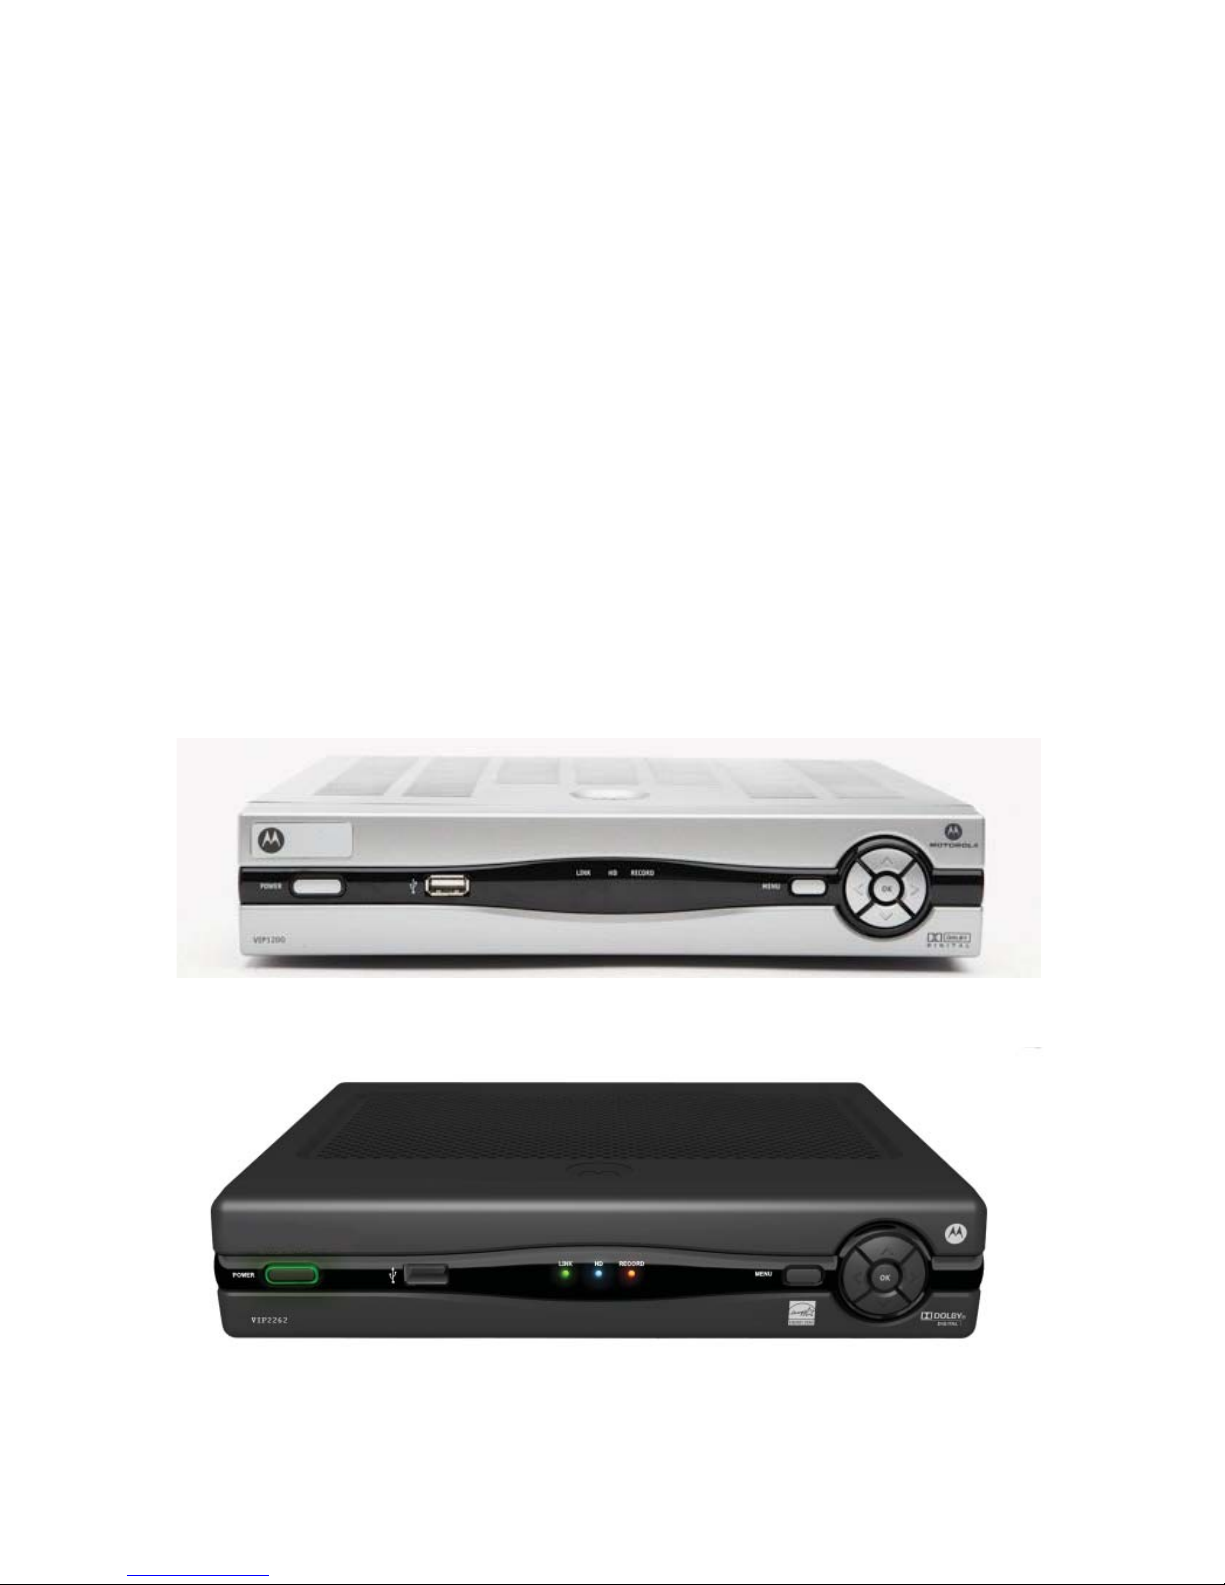
MTS Ultimate TV set-top box equipment care and maintenance . . . . . . . . . . . . . . . . . . . . . . . . . . . . . . . . . . . . . . . . . .2
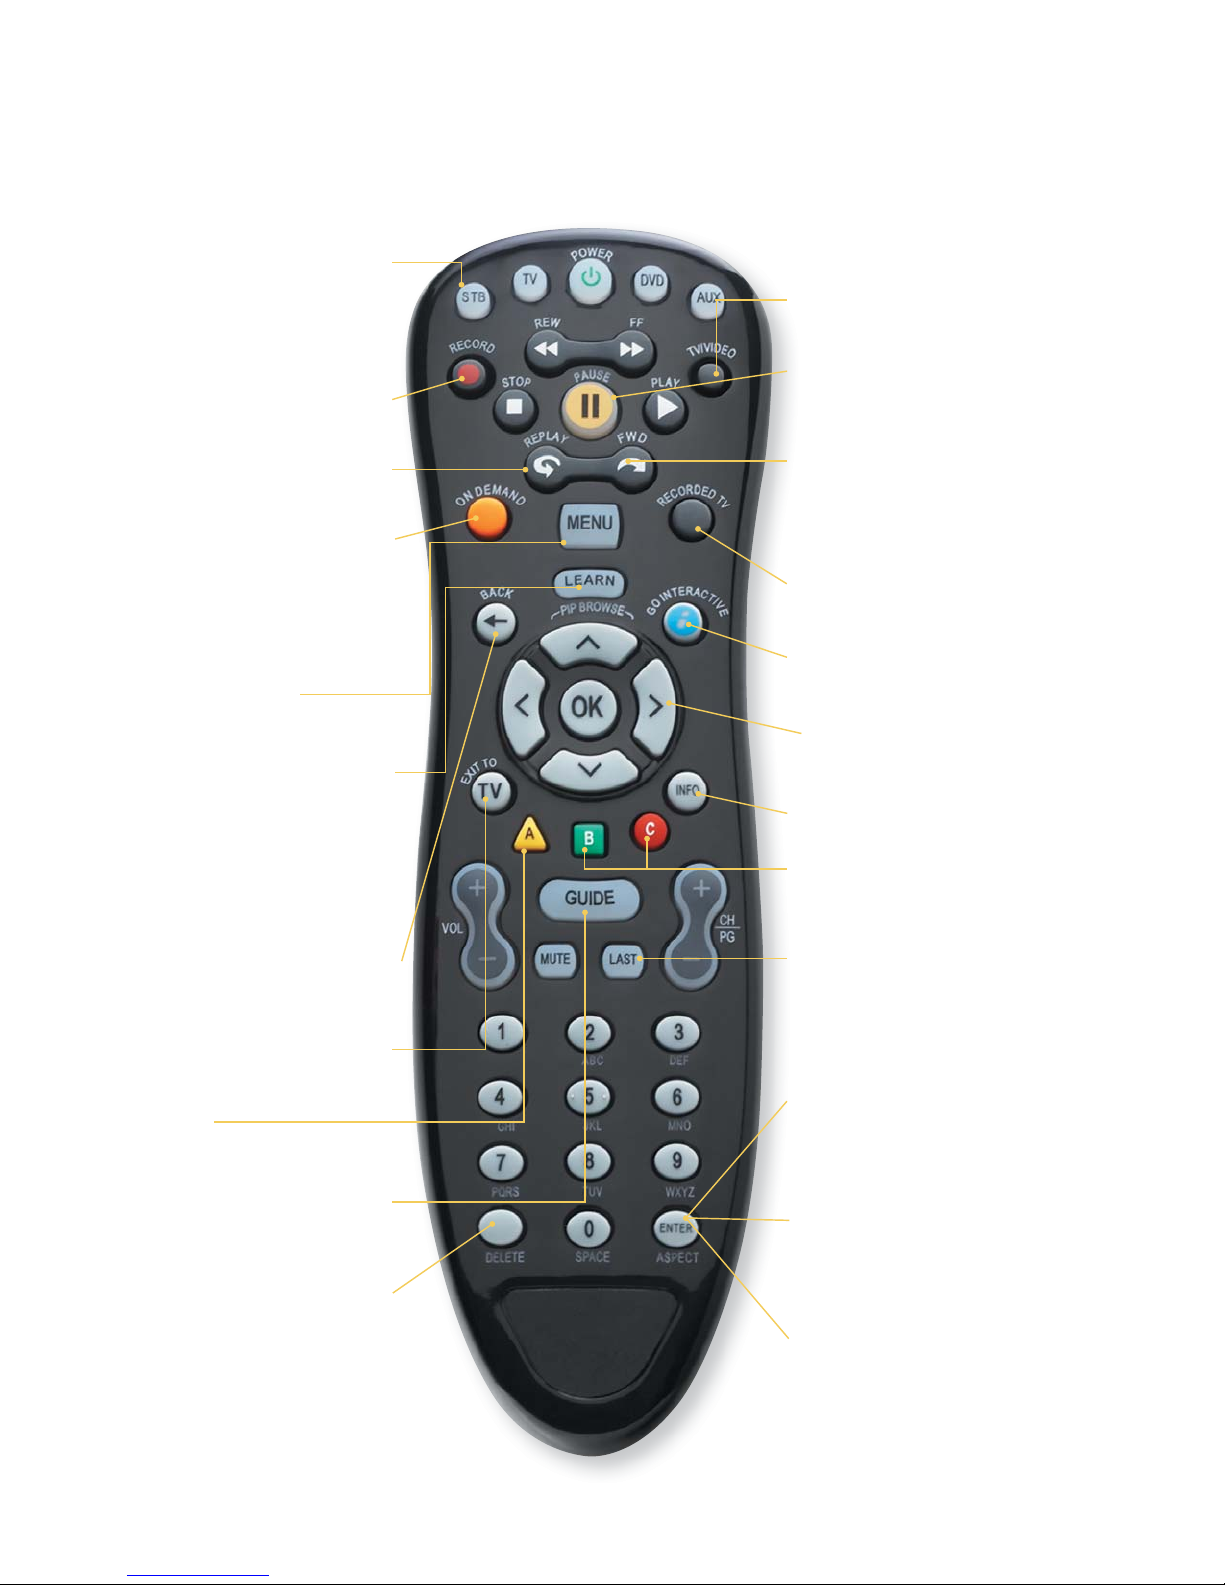
Getting to know the buttons on your MTS Ultimate TV remote: . . . . . . . . . . . . . . . . . . . . . . . . . . . . . . . . . . . . . . . . . . .3
The TV Basics. . . . . . . . . . . . . . . . . . . . . . . . . . . . . . . . . . . . . . . . . . . . . . . . . . . . . . . . . . . . . . . . . . . . . . . . . . . . . . . . . . . . . . .4
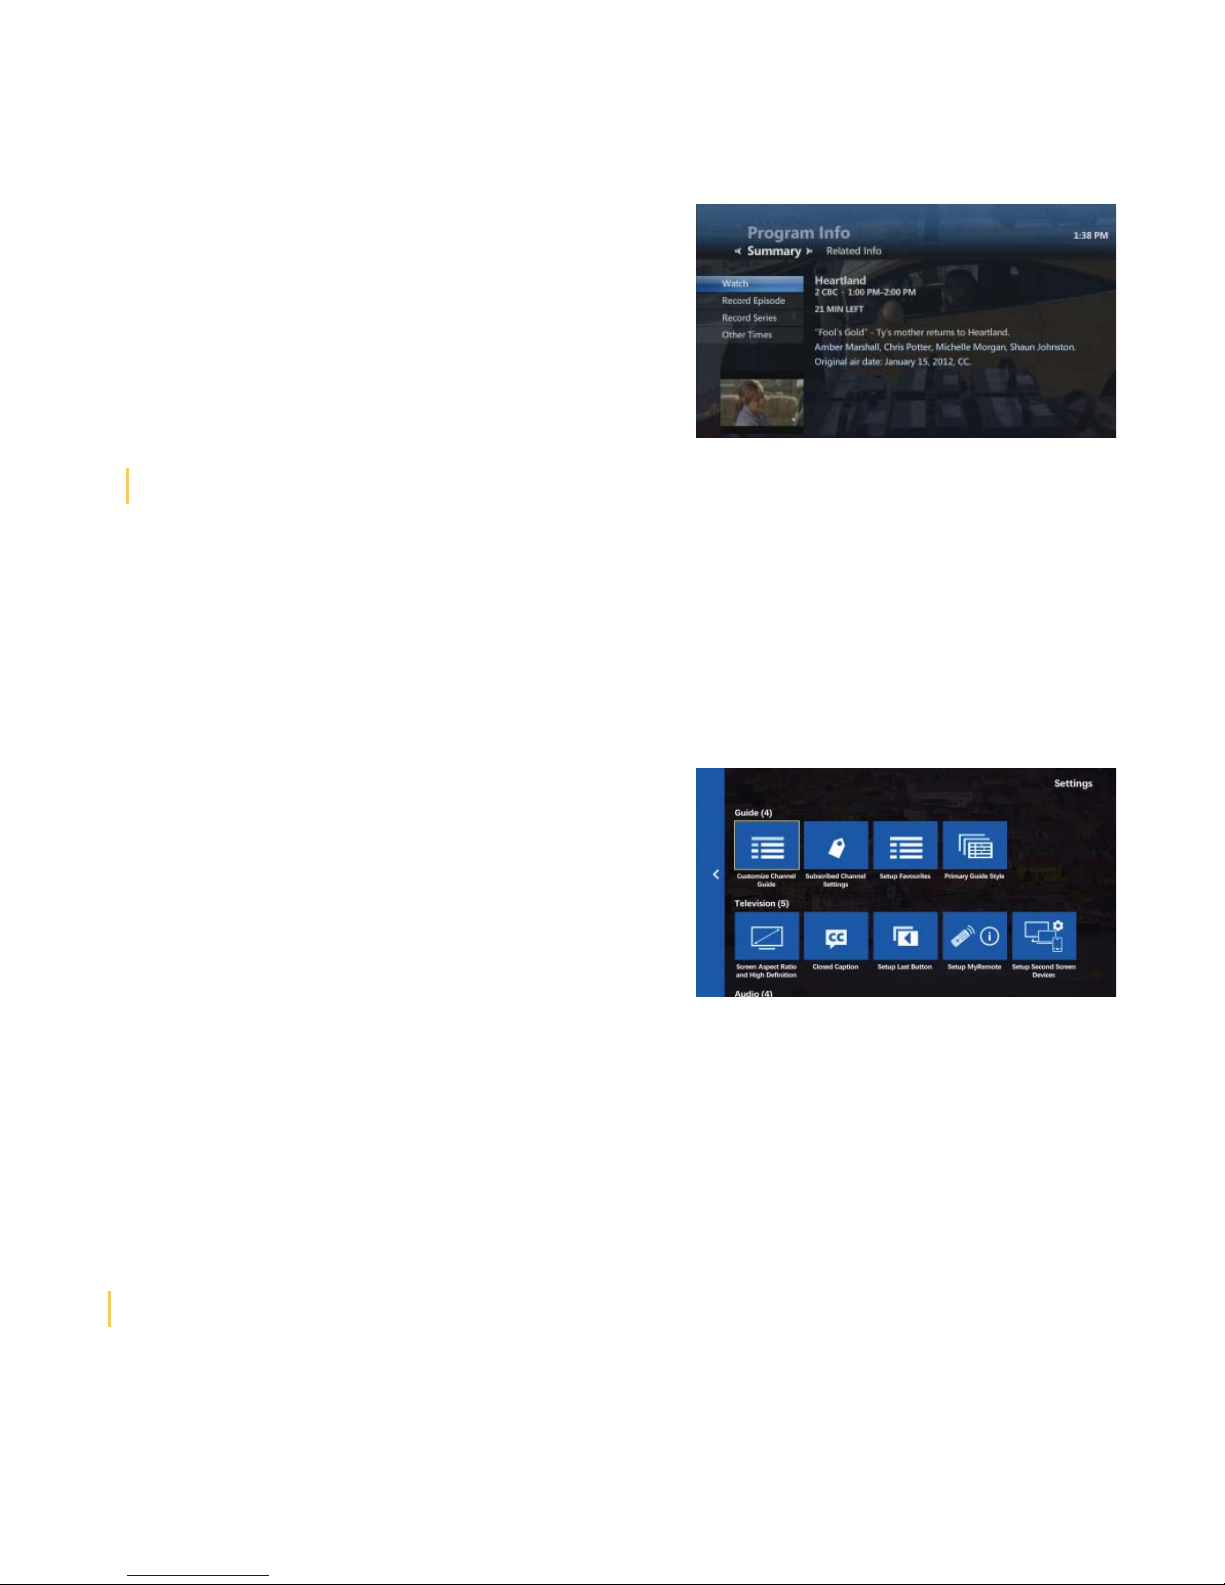
Navigating the on-screen menus . . . . . . . . . . . . . . . . . . . . . . . . . . . . . . . . . . . . . . . . . . . . . . . . . . . . . . . . . . . . . . . . . . . .4
Hide or remove channels from your guide. . . . . . . . . . . . . . . . . . . . . . . . . . . . . . . . . . . . . . . . . . . . . . . . . . . . . . . . . . . .5
Setup Favourite channels . . . . . . . . . . . . . . . . . . . . . . . . . . . . . . . . . . . . . . . . . . . . . . . . . . . . . . . . . . . . . . . . . . . . . . . . . .6
View Favourites. . . . . . . . . . . . . . . . . . . . . . . . . . . . . . . . . . . . . . . . . . . . . . . . . . . . . . . . . . . . . . . . . . . . . . . . . . . . . . . . . . .7
Search . . . . . . . . . . . . . . . . . . . . . . . . . . . . . . . . . . . . . . . . . . . . . . . . . . . . . . . . . . . . . . . . . . . . . . . . . . . . . . . . . . . . . . . . . . .8
Call Display on TV. . . . . . . . . . . . . . . . . . . . . . . . . . . . . . . . . . . . . . . . . . . . . . . . . . . . . . . . . . . . . . . . . . . . . . . . . . . . . . . . .9
MyRemote . . . . . . . . . . . . . . . . . . . . . . . . . . . . . . . . . . . . . . . . . . . . . . . . . . . . . . . . . . . . . . . . . . . . . . . . . . . . . . . . . . . . . . .10
How to use Descriptive Video and Closed Captioning . . . . . . . . . . . . . . . . . . . . . . . . . . . . . . . . . . . . . . . . . . . . . . . . .11
MTS Weather Channel . . . . . . . . . . . . . . . . . . . . . . . . . . . . . . . . . . . . . . . . . . . . . . . . . . . . . . . . . . . . . . . . . . . . . . . . . . . . .11
Lobby Camera . . . . . . . . . . . . . . . . . . . . . . . . . . . . . . . . . . . . . . . . . . . . . . . . . . . . . . . . . . . . . . . . . . . . . . . . . . . . . . . . . . . .11
Whole Home PVR service . . . . . . . . . . . . . . . . . . . . . . . . . . . . . . . . . . . . . . . . . . . . . . . . . . . . . . . . . . . . . . . . . . . . . . . . . . . .13
How many TVs can I watch at once? . . . . . . . . . . . . . . . . . . . . . . . . . . . . . . . . . . . . . . . . . . . . . . . . . . . . . . . . . . . . . . . . .13
Control Live TV . . . . . . . . . . . . . . . . . . . . . . . . . . . . . . . . . . . . . . . . . . . . . . . . . . . . . . . . . . . . . . . . . . . . . . . . . . . . . . . . . . .13
Set recordings . . . . . . . . . . . . . . . . . . . . . . . . . . . . . . . . . . . . . . . . . . . . . . . . . . . . . . . . . . . . . . . . . . . . . . . . . . . . . . . . . . . .13
View upcoming/scheduled recordings . . . . . . . . . . . . . . . . . . . . . . . . . . . . . . . . . . . . . . . . . . . . . . . . . . . . . . . . . . . . . . .16
Play back recorded programs. . . . . . . . . . . . . . . . . . . . . . . . . . . . . . . . . . . . . . . . . . . . . . . . . . . . . . . . . . . . . . . . . . . . . . .16
Cancel, stop, erase recordings . . . . . . . . . . . . . . . . . . . . . . . . . . . . . . . . . . . . . . . . . . . . . . . . . . . . . . . . . . . . . . . . . . . . . .18
Conflicts . . . . . . . . . . . . . . . . . . . . . . . . . . . . . . . . . . . . . . . . . . . . . . . . . . . . . . . . . . . . . . . . . . . . . . . . . . . . . . . . . . . . . . . . .18
Resolving recording conflicts . . . . . . . . . . . . . . . . . . . . . . . . . . . . . . . . . . . . . . . . . . . . . . . . . . . . . . . . . . . . . . . . . . . . . . .19
MyPVR . . . . . . . . . . . . . . . . . . . . . . . . . . . . . . . . . . . . . . . . . . . . . . . . . . . . . . . . . . . . . . . . . . . . . . . . . . . . . . . . . . . . . . . . . . . . .20
MTS Video on Demand . . . . . . . . . . . . . . . . . . . . . . . . . . . . . . . . . . . . . . . . . . . . . . . . . . . . . . . . . . . . . . . . . . . . . . . . . . . . . .20
Accessing MTS Video on Demand . . . . . . . . . . . . . . . . . . . . . . . . . . . . . . . . . . . . . . . . . . . . . . . . . . . . . . . . . . . . . . . . . .20
Play Video on Demand programs . . . . . . . . . . . . . . . . . . . . . . . . . . . . . . . . . . . . . . . . . . . . . . . . . . . . . . . . . . . . . . . . . . .20
Controlling Video on Demand programs . . . . . . . . . . . . . . . . . . . . . . . . . . . . . . . . . . . . . . . . . . . . . . . . . . . . . . . . . . . . .21
You are unsure of the expiration date for a video . . . . . . . . . . . . . . . . . . . . . . . . . . . . . . . . . . . . . . . . . . . . . . . . . . . . . .21
The video expires while playing. . . . . . . . . . . . . . . . . . . . . . . . . . . . . . . . . . . . . . . . . . . . . . . . . . . . . . . . . . . . . . . . . . . . .21
A rented Video On Demand program is not in the Current Rentals list. . . . . . . . . . . . . . . . . . . . . . . . . . . . . . . . . . . .21
MTS Pay-Per-View events . . . . . . . . . . . . . . . . . . . . . . . . . . . . . . . . . . . . . . . . . . . . . . . . . . . . . . . . . . . . . . . . . . . . . . . . . . . .21
Parental & rental locking – VOD and live TV . . . . . . . . . . . . . . . . . . . . . . . . . . . . . . . . . . . . . . . . . . . . . . . . . . . . . . . . . . . .22
Default settings for Parental Locking. . . . . . . . . . . . . . . . . . . . . . . . . . . . . . . . . . . . . . . . . . . . . . . . . . . . . . . . . . . . . . . . .22
Movie and TV rating systems . . . . . . . . . . . . . . . . . . . . . . . . . . . . . . . . . . . . . . . . . . . . . . . . . . . . . . . . . . . . . . . . . . . . . . .22
Getting ready to use Parental Locking . . . . . . . . . . . . . . . . . . . . . . . . . . . . . . . . . . . . . . . . . . . . . . . . . . . . . . . . . . . . . . .23
Rental Locking . . . . . . . . . . . . . . . . . . . . . . . . . . . . . . . . . . . . . . . . . . . . . . . . . . . . . . . . . . . . . . . . . . . . . . . . . . . . . . . . . . . .24
Watching a locked program . . . . . . . . . . . . . . . . . . . . . . . . . . . . . . . . . . . . . . . . . . . . . . . . . . . . . . . . . . . . . . . . . . . . . . . .24
Changing the PIN . . . . . . . . . . . . . . . . . . . . . . . . . . . . . . . . . . . . . . . . . . . . . . . . . . . . . . . . . . . . . . . . . . . . . . . . . . . . . . . . .25
Forgot your Parental Control PINs? . . . . . . . . . . . . . . . . . . . . . . . . . . . . . . . . . . . . . . . . . . . . . . . . . . . . . . . . . . . . . . . . . .25
Parental Control tips . . . . . . . . . . . . . . . . . . . . . . . . . . . . . . . . . . . . . . . . . . . . . . . . . . . . . . . . . . . . . . . . . . . . . . . . . . . . . . .25

Apps on TV . . . . . . . . . . . . . . . . . . . . . . . . . . . . . . . . . . . . . . . . . . . . . . . . . . . . . . . . . . . . . . . . . . . . . . . . . . . . . . . . . . . . . . 26
MyPicks. . . . . . . . . . . . . . . . . . . . . . . . . . . . . . . . . . . . . . . . . . . . . . . . . . . . . . . . . . . . . . . . . . . . . . . . . . . . . . . . . . . . . . . . . .26
Ultimate Picks . . . . . . . . . . . . . . . . . . . . . . . . . . . . . . . . . . . . . . . . . . . . . . . . . . . . . . . . . . . . . . . . . . . . . . . . . . . . . . . . . . . .27
On-TV messaging. . . . . . . . . . . . . . . . . . . . . . . . . . . . . . . . . . . . . . . . . . . . . . . . . . . . . . . . . . . . . . . . . . . . . . . . . . . . . . . . . 28
How do I access messages in the Service and News log . . . . . . . . . . . . . . . . . . . . . . . . . . . . . . . . . . . . . . . . . . . . . . .28
How do I disable entertainment news pop-up notifications . . . . . . . . . . . . . . . . . . . . . . . . . . . . . . . . . . . . . . . . . . . . .28
How do I delete messages in the Service and News log. . . . . . . . . . . . . . . . . . . . . . . . . . . . . . . . . . . . . . . . . . . . . . . .29
How do I know which messages in the log have been viewed . . . . . . . . . . . . . . . . . . . . . . . . . . . . . . . . . . . . . . . . . .29
Purchasing Add-ons . . . . . . . . . . . . . . . . . . . . . . . . . . . . . . . . . . . . . . . . . . . . . . . . . . . . . . . . . . . . . . . . . . . . . . . . . . . . . . .29
The remotes . . . . . . . . . . . . . . . . . . . . . . . . . . . . . . . . . . . . . . . . . . . . . . . . . . . . . . . . . . . . . . . . . . . . . . . . . . . . . . . . . . . . . . . .30
Remote control programming . . . . . . . . . . . . . . . . . . . . . . . . . . . . . . . . . . . . . . . . . . . . . . . . . . . . . . . . . . . . . . . . . . . . . . 31
Getting started. . . . . . . . . . . . . . . . . . . . . . . . . . . . . . . . . . . . . . . . . . . . . . . . . . . . . . . . . . . . . . . . . . . . . . . . . . . . . . . . . . . .31
Program your MTS Ultimate TV remote to control your TV, DVD, home theatre receiver, or other devices . . . .31
Power control for multiple devices. . . . . . . . . . . . . . . . . . . . . . . . . . . . . . . . . . . . . . . . . . . . . . . . . . . . . . . . . . . . . . . . . . .34
Learning . . . . . . . . . . . . . . . . . . . . . . . . . . . . . . . . . . . . . . . . . . . . . . . . . . . . . . . . . . . . . . . . . . . . . . . . . . . . . . . . . . . . . . . . .34
Set volume options for multiple devices . . . . . . . . . . . . . . . . . . . . . . . . . . . . . . . . . . . . . . . . . . . . . . . . . . . . . . . . . . . . . .35
Reset the remote. . . . . . . . . . . . . . . . . . . . . . . . . . . . . . . . . . . . . . . . . . . . . . . . . . . . . . . . . . . . . . . . . . . . . . . . . . . . . . . . . .37
Connections and devices. . . . . . . . . . . . . . . . . . . . . . . . . . . . . . . . . . . . . . . . . . . . . . . . . . . . . . . . . . . . . . . . . . . . . . . . . . . . .38
Connecting the MTS Ultimate TV set-top box . . . . . . . . . . . . . . . . . . . . . . . . . . . . . . . . . . . . . . . . . . . . . . . . . . . . . . . . .38
Troubleshooting. . . . . . . . . . . . . . . . . . . . . . . . . . . . . . . . . . . . . . . . . . . . . . . . . . . . . . . . . . . . . . . . . . . . . . . . . . . . . . . . . . . . .48
General troubleshooting: . . . . . . . . . . . . . . . . . . . . . . . . . . . . . . . . . . . . . . . . . . . . . . . . . . . . . . . . . . . . . . . . . . . . . . . . . . .48
Audio and picture troubleshooting . . . . . . . . . . . . . . . . . . . . . . . . . . . . . . . . . . . . . . . . . . . . . . . . . . . . . . . . . . . . . . . . . .49
Guide troubleshooting . . . . . . . . . . . . . . . . . . . . . . . . . . . . . . . . . . . . . . . . . . . . . . . . . . . . . . . . . . . . . . . . . . . . . . . . . . . . .54
PVR troubleshooting. . . . . . . . . . . . . . . . . . . . . . . . . . . . . . . . . . . . . . . . . . . . . . . . . . . . . . . . . . . . . . . . . . . . . . . . . . . . . . .55
Remote troubleshooting . . . . . . . . . . . . . . . . . . . . . . . . . . . . . . . . . . . . . . . . . . . . . . . . . . . . . . . . . . . . . . . . . . . . . . . . . . .56
Quick TV fixes . . . . . . . . . . . . . . . . . . . . . . . . . . . . . . . . . . . . . . . . . . . . . . . . . . . . . . . . . . . . . . . . . . . . . . . . . . . . . . . . . . . .56

1
Welcome to MTS Ultimate TV
Here are a few tips to help you get started:
• Keep your remote in “STB” or “MTS” mode to control your Ultimate TV service
– If you’re pressing buttons on your remote and they don’t work, try pressing the STB/MTS button. (STB stands
for “set-top box” – that’s the name of the Ultimate TV box under your TV!)
• You can instantly update your Ultimate TV channel package online 24/7
– Customize your TV channel package with HD channels, premium movie networks, and more! Changes take
effect in minutes. Visit mts.ca/myaccount
• MyPVR service
– Set your PVR to record using a computer or mobile device! You can also browse the program guide and even
delete recordings to free up space. All you need is to set up your MTS MyAccount
• MyPicks & Ultimate Picks
– Did you know you can keep track of up to 6 channels at once on your Ultimate TV? Go to channels 92 & 93 to
set them up.
• Check and pay your MTS bills online
– Sign up for online bill, preauthorized payment, or make a one-time payment on your account. Just go to
mts.ca/myaccount to get started

2
Equipment care and maintenance
• TO REDUCE RISK OF ELECTRIC SHOCK, DO NOT REMOVE COVER (OR BACK).
• PVR Set-top boxes (VIP 1216/2262) contain a hard drive, which means they require careful handling to avoid
damaging the drive.
• To allow the hard drive to spin down properly, wait at least 10 seconds after disconnecting power before moving
the Set-top box.
• Must be positioned horizontally and rest on their rubber feet. Do not attempt to mount or position it in a vertical
position.
• Do not position the Set-top box near any external heat source such as a heater or radiator.
• Do not place the Set-top box on a rug or bed as it may overheat.
• Do not stack other electronic equipment on top of it.
• Allow for at least two inches of free space above the Set-top box and ensure the vents on the Set-top box are not
blocked.
• Protect the power cord from being walked on or pinched, particularly at plugs, convenience receptacles, and the
point where they exit from the apparatus.
• Contact MTS if the Set-top box gets damaged in any way, such as if the box is dropped, the power supply cord or
plug is damaged, liquid is spilled on it, objects have fallen into it, or it has been exposed to rain or moisture.
Note: set top box models may vary
VIP 1216 PVR
VIP 2262 PVR

3
Getting to know your remote control
Set your TV to STB mode
or your MTS service will not
work. On some remotes this
button is labelled MTS.
Record TV* with just one click
Skip back in 7-second
increments
Edit letters or numbers on
the SEARCH screen
Go to Interactive Program
Guide
Exit from MENU screen to TV
When in Guide, return to last
screen or Main Menu
Go to Main Menu
Program MTS remote control
to TVs/DVDs or auxilliary
devices. (Note: LEARN button
may be called SETUP button on
some remotes)
Go to Video On Demand
library (Note: On DEMAND
button may be called VIDEO ON
DEMAND on some remotes)
Pause Live TV*
Change video input (Must be
in TV mode for TV service to
work)
Skip forward in 30-second
increments. (Note: FWD button
may be called SKIP FORWARD on
some remotes).
Go to list of recorded TV
programs*
Navigate channels, menus and
screens using arrows
Go to PROGRAM INFO screen
Return to the previously
viewed TV channel or a list of
previously viewed channels
While watching TV, change
screen dimentions to fit
wide-screen TV
While in Guide, jump channel
listings by tonight, tomorrow or
the next 14 days
While in Guide, easily add a
channel to your Favourites list
(Note: ENTER/ASPECT button
may be called OPTIONS on some
remotes)
Search
Customize using MyRemote
Launch MyMenu, your
customizable menu app

4
TV Basics
Navigating the on-screen menus
Menus and screens
When in the MENU, GUIDE,MTS Video on Demand, or Recorded TV screens:
• Use the ARROW buttons and/or the CH | PG button to highlight items in the screen. The highlighted item shows
the selection
• Press OK to activate the selection
• Press BACK to return to the previous screen
• Press EXIT to return to TV viewing
The Menu
The Menu screen provides access to the features:
• Press MENU, the Menu screen appears
• Press the UP/DOWN ARROWS to highlight a heading, such as
Live TV, on the vertical menu bar
• Press the UP/DOWN ARROWS to highlight a submenu, such as
Guide, press OK
• Press the LEF/RIGHT ARROWS to highlight an item and press
OK to select the item
• Press EXIT to return to TV viewing
The Program Guide
• Press GUIDE
• Press the UP/DOWN ARROWS or the CH | PG to scroll vertically
through the Guide. Press and hold the CH| PG button to go
through a whole page of the Guide at a time
• Press the RIGHT/LEFT ARROWS to scroll horizontally
through the Guide to see what is playing at a later time
• The REW or FF buttons will go ahead a day or back a day in the
Guide
• Highlight the program and press OK. If the program is currently
available, it will begin playing
• If the program is on at a later time, the Program Info screen
appears with options to choose from
• Press ENTER/OPTIONS button to jump ahead up to 14 days in
the Guide
• Press EXIT to return to TV viewing

5
The Program Info screen
The Program Info screen displays information about all programs in the Guide, and provides access to a variety of
options related to the program.
• Press GUIDE
• Press the UP/DOWN ARROWS or CH | PG to highlight the
program
• Press INFO and the Program Info screen appears
• Under the SUMMARY heading, highlight one of the following
options and press OK
• WATCH – To tune to the program if it is currently on
• RECORD EPISODE – To record the program
• RECORD SERIES – To record the series for this program
• RENT – To rent the program. This option only appears in the Program Info screen for a Video on Demand movie
• Press the RIGHT ARROW button to highlight RELATED INFO on the horizontal menu bar to find out additional
details of the program.
Hide or remove channels from your guide
Only want to see the channels you watch in your guide? You can customize which channels are shown in the Guide.
Customized Guide only affects the TV it on which it was setup. Each TV can have its own customized Guide.
• Press MENU
• Press the DOWN ARROW to highlight SETTINGS
• Highlight TELEVISON and press OK
• Highlight CUSTOMIZE CHANNEL GUIDE, and press OK
Note: Channels currently displayed in the Guide have a check
mark in front of them. Channels that are not currently displayed
in Guide do not have a check mark in front of them
• Use the UP/DOWN ARROWS or CH | PG button to go
through the list of channels. The following options are available:
• To hide a channel currently in the Guide, highlight the channel,
and press OK. The check mark disappears from the check box
• To make a hidden channel reappear in the Guide, highlight the channel, and press OK. A check mark appears in
front of the channel
• To make all channels appear in the Guide, highlight CHECK ALL, and press OK. Check marks appear in all the
check boxes
• To display only the unchecked boxes (hidden channels), highlight VIEW UNCHECKED, and press OK. The
SHOW UNCHECKED option becomes SHOW ALL
• To restore the entire list, highlight SHOW ALL, and press OK
• To save the settings, highlight SAVE, and press OK. Select DON’T SAVE to exit from the screen without saving the
settings
User Tip: Record Episode and Record Series options requires a subscription to PVR service
User Tip: Channel 51 DVR (Recorded TV) and 53 VIDEO (Video on Demand) cannot be deleted from the Guide

6
Subscribed channel filter
Enabling the filter only displays channels that are subscribed to
• Press MENU
•DOWN ARROW to SETTINGS then DOWN ARROW to highlight GUIDE and press OK
• Highlight SUBSCRIBED CHANNEL SETTINGS and press OK
• To display only channels you subscribe to in the guide, select VIEW SUBSCRIBED and press OK
• To display all channels including channels you are not subscribed to, select VIEW ALL and press OK
• Press the LEFT ARROW to highlight SAVE and press OK
• To cancel the changes, highlight DON’T SAVE and press OK
Setup Favourite lists
Group your most watched channels together in your own favourites list so they are easy to find.
• Press MENU
• DOWN ARROW to SETTINGS, then DOWN ARROW to
highlight GUIDE and press OK
• Highlight SETUP FAVOURITES, and press OK,Highlight
SET UP..., and press OK
• Use the UP/DOWN ARROW buttons or CH | PG button to scroll
through the list of channels.
• Press OK to select or deselect the checkmark beside the channel
• A checkmark includes the channel in the favourite list
• An empty check box removes the channel from the favourite list
From the menu on the left the following options are available:
• To reset the favourite channels list, highlight UNCHECK ALL, and press OK. All the check boxes become unchecked
• To only show the channels in the favourite channels list, highlight VIEW CHECKED, and press OK. The VIEW
CHECKED option becomes VIEW ALL
• To show the entire list of channels, highlight VIEW CHECKED, and press OK, then highlight VIEW ALL, and press
OK
• To update the order in which channels display on the favourites guide, highlight CHANGE ORDER, and press OK
• Press the LEFT ARROW to move to the left side of the screen, highlight SAVE and press OK
• To cancel the changes highlight DON’T SAVE and press OK
• Repeat the steps to create up to 5 individual favourites lists

7
View Favourites
• Press MENU
• DOWN ARROW to LIVE TV, and DOWN ARROW again to
FAVOURITES
• To select the favourite list you want to view, highlight the list
and press OK, your Favourites Guide will be displayed
• To exit your Favourites List, select VIEW ALL CHANNELS
• To add channels to your Favourites List, select EDIT
FAVOURITES, and press OK, and then highlight the Favourites
list you wantto update, and press OK
• Favourite channels are effective only on the TV on which they
were setup
Rename Favourites list
• Press MENU
•DOWN ARROW to highlight LIVE TV
• DOWN ARROW to highlight FAVOURITES and press OK
• Highlight SETUP FAVOURITES LISTS and press OK
• Highlight the Favourite List you want to rename and press OK
• Press ENTER / ASPECT, button
• Highlight RENAME THIS LIST and press OK
• Use the ARROW buttons to select the letters on the ALPHABETIC KEYPAD and enter the List Name (use the
<- button to delete a number/letter)
• Highlight SAVE and press OK
• Press EXIT
Delete Favourites list
• Press MENU
• DOWN ARROW to LIVE TV, and press OK
• DOWN ARROW to highlight FAVOURITES, and press OK
• Highlight the Favourite channels you want to delete and press OK
• Press ENTER / ASPECT, button
• Highlight REMOVE FROM FAVOURITES, and press OK
• Select DON’T DELETE to cancel
• Press EXIT

8
Search
You can search the guide and Video on Demand for your favourite programs from one place. You can also search
by program name or actor.
• Press the Abutton (Yellow Triangle), or;
• Press MENU, then UP ARROW to SEARCH and press OK
• The Search screen appears with the following:
• Use the ARROW buttons to select letters on the
ALPHABETIC KEYPAD to search for the program or
person, and press OK
• Press to add a space between words
• Press to delete a letter/number
• Press 123 to activate the numeric keypad
• On the right side of the screen, a list of programs or names that contain the letter or number entered appear
• To narrow the search, highlight OPTIONS and press OK. The following filters are available:
• ALL RESULTS – Displays people, program titles, and Video on Demand programs
• TITLES – Titles from Live TV and VOD display (“VIDEO” indicates VOD titles)
• VIDEO ON DEMAND – Only VOD programs display
• CAST AND CREW – Only programs with the person appear
• CHANNELS – Only channel names appear
• The first 5 results will display along with posters on the right. If your result is not in the first 5 posters use the
ARROW buttons to highlight the VIEW ALL icon on the far right and press OK.
• Use the ARROW buttons to highlight the title or name from the list on the right, then press OK.
• If the filter is set to TITLE, times when the program is playing displays along with program details at the bottom
of the screen. Programs are displayed in sub-categories such as ON DEMAND and LIVE.
• If the filter is set to PEOPLE, programs featuring that person appear along with program details at the bottom of
the screen
• If the filter is set to VIDEO ON DEMAND, the Program Info Summary screen appears with program detail along
with rental information
• Press EXIT to return to Live TV
User Tip: A quick way to access search options is to press the ENTER/ASPECT button on your remote while the
search menu is open.

9
Call Display on TV
See who’s calling right on your TV screen with MTS Ultimate TV®
Message Centre. TV Call Display is free when you subscribe to
MTS Call Display on your MTS home phone. This feature is not
available in Steinbach.
Accessing the last call received
• Press the MENU button on your MTS TV remote control
• Press the DOWN ARROW button to navigate to EXTRAS, press
OK
• Press the RIGHT ARROW button to navigate to CALL DISPLAY
LOG, press OK
• Your call log will be displayed. The last call received will display
first in the list
• Press EXIT until you return to TV viewing
How to personalize your Call Display settings
• Press the MENU button on your MTS TV remote control
• Press the DOWN ARROW button to navigate to EXTRAS, press
OK
• Press the RIGHT ARROW button to navigate to the CALL
DISPLAY OPTIONS, press OK
Once in Call Display Settings, you can:
A. Disable TV Call Display
– To turn TV Call Display off, use the ARROW button to
navigate to enable TV CALL DISPLAY OFF and press
OK. TV Call Display will continue to display on other TVs
until disabled. Press LEFT ARROW to navigate to SAVE,
press OK
B. Change How Long TV Call Display shows On Your TV
Screen
– Use the ARROW button to access DISPLAY ON TV FOR option
– Using the number buttons on the remote, type in the number of seconds you’d like TV Call Display to appear
on the screen (between 1 and 99.
C. Change TV Call Display Location on Your TV Screen
– Press the DOWN ARROW button and navigate to DISPLAY LOCATION OPTIONS
– Choose the location on your TV that you would like the TV Call Display indicator to appear
– To select this location, press OK
Once you are done with the settings you can press the LEFT ARROW button to navigate to SAVE, press OK
How to delete calls from your Call Display log
• Press the MENU button on your MTS TV remote control
• Press the DOWN ARROW button to navigate to EXTRAS, press OK
• Press the RIGHT ARROW button to get to CALL DISPLAY LOG, press OK. Your call log will be displayed
• Press the DOWN ARROW button to select the Call Log you wish to delete, press OK
You will default to DELETE ITEM, press OK. If at any time you do NOT wish to delete that item, you may select
BACK from this window and press OK. You will be directed back to Call Log screen
• Press EXIT until you return to TV viewing

10
To delete all call logs
• Press the MENU button on your MTS TV remote control
• Press the DOWN ARROW to navigate to EXTRAS, press OK
• Press the RIGHT ARROW to get to CALL DISPLAY LOG, press OK. Your call log will be displayed
• Press OK from any Call Log
• You will default to DELETE ITEM on the next window, press the DOWN ARROW to navigate to DELETE, press OK
• You will default to YES on the next window, press OK. If at any time you do NOT wish to delete all items, the user
may select NO from this window and press OK. User will be directed back to Call Log screen
• Press EXIT until you return to TV viewing
MyRemote
MyRemote lets you customize the A, B, and C buttons on your remote for one-touch access to your favourite MTS
Ultimate TV channels, menu options, and applications.
How to set up or change the A, B, and C buttons
• Press MENU on your MTS TV Remote
• Use the DOWN ARROW to select SETTINGS and press OK
• Use the DOWN ARROW to select TELEVISION and press OK
• Use the RIGHT ARROW to select SETUP MYREMOTE and press OK
• Use the arrow buttons on your remote to select CHANGE next to the button that you want to customize
(A, B, or C) and press OK
• Select the action to which you want to have one button access. You can choose from options in the following
categories:
– Menu Options (where you will find Closed Captioning and Descriptive Video)
– Applications
– TV Channels (simply enter the channel number of your favourite channel here)
User Tip: When deleting a call from the call log, the call will be deleted from all TVs.

11
How to use Descriptive Video and Closed Captioning
Closed Captioning
Set up Closed Captioning using MyRemote
If you use closed captioning on a regular basis you should use MyRemote to set your Bor Cbutton on your remote
to turn closed captioning on or off.
How to use Captioning
Once you have set up closed captioning on your remote you can turn it on or offby simply pressing the Bor C
button – whichever button you chose in the MyRemote steps above.
Note: You will also need to enable Closed Captioning on your television set, per the instructions provided by your TV manufacturer.
Descriptive Video
Descriptive Video lets visually impaired people access a second stream of audio, describing non-verbal actions in a
program. The most up to date list of channels offering Descriptive Video is available at mts.ca/descriptivevideo
Set up Descriptive Video using MyRemote
If you use descriptive video on a regular basis you should use MyRemote to set your Bor Cbutton on your remote
to turn descriptive video on or off.
How to use Descriptive Video
Once you have set up descriptive video on your remote you can turn it on or offby simply pressing the Bor C
button – whichever button you chose in the steps above.
Descriptive video will only have audio if the show has descriptive video.
MTS Weather Channel
The MTS Weather Channel is available on Channel 29 and features local weather 24/7.

12
Lobby Camera
MTS Lobby Camera lets tenants with Ultimate TV in select apartments and condos view their lobby directly on their
TV screen.
• Tune to channel 1095
• Press OK to start the Lobby Camera access. You will be presented with a video stream of your building’s lobby
camera
• To tune away from the Lobby Camera access, change the channel
User Tip: The Lobby Camera doesn’t need a television stream, so accessing the Lobby Camera will not cause a
conflict with any programming that you may be watching or recording.

13
Whole Home PVR Service
You must subscribe to PVR service to use this section. To subscribe to PVR service call MTS at 204-225-5687.
Whole Home PVR turns all your set-top boxes into HD PVRs.
With Whole Home PVR you can:
• Set and play back different recorded shows at the same time throughout the house via one PVR
• Start a recorded show in one room, and finish in another
• Pause, rewind, and replay live TV at all connected TVs
How many TVs can I watch at once?
With MTS Ultimate TV your house can watch up to 7 programs at the same time:
• Watch or record Live TV: Watch or record up to 3 HD or SD shows at the same time
• Play back recorded TV: Play back up to 4 previously recorded shows in HD or SD (one of the feeds needs to be
at your PVR box)
If you try to watch or record more than the above, you will get a CONFLICT MESSAGE. Follow the on-screen
instructions to resolve the conflict and continue watching TV.
Control Live TV
Control live TV using the PAUSE, FAST-FORWARD, and REWIND
buttons.
• REPLAY skips back 7 seconds and FWD skips forward 30
seconds
• Recording Live TV starts from the point at which RECORD is
pressed, not from the beginning of the program
• A PIN is not required to schedule recordings for programs that
are locked by the parental locking feature; however the PIN is
required to view the recording
• Press PAUSE to pause the program for up to 90 minutes
• If paused longer than 90 minutes, the program automatically begins to play from the point at which it was paused
Set Recordings
How to record a aingle program/episode
While watching live TV you can record the current program until its
scheduled end time, or add extra time at the end to ensure that the
whole program records.
• While watching live TV, press RECORD to record the channel you
are currently on
• You can also go into the GUIDE, highlight the name of the show
you want to record, and press RECORD
User Tips:
If two TVs are tuned to the same live channel it counts as one live show.
Video on Demand counts as a live TV show, not a previously recorded show.

14
How to change single recording settings
• Press RECORDED TV
• Use the ARROW buttons to highlight the program recording
(indicated by a red dot)
• Press OK. The recording info page appears
• Highlight RECORD SETTINGS, and press OK. The Record Settings
screen appears
• Use the ARROW buttons to highlight the text under STOP
RECORDING, and press OK
• Highlight one of the following options, and press OK
• At Scheduled Time
• 5 Minutes After
• 15 Minutes After
• 30 Minutes After
• 1 Hour After
• 2 Hours After
• 3 Hours After
Or, highlight DON’T CHANGE and press OK to keep your current setting
• Highlight text under KEEP UNTIL, and press OK
• Highlight one of the following options, and press OK
• SPACE NEEDED – Automatically erases the program when space is needed for a new recording. The oldest
recording will be the first to be erased if space is needed
• I ERASE – Stores the program until it is erased manually
Or, highlight DON’T CHANGE and press OK to keep current setting
• Use the ARROW buttons to highlight SAVE CHANGES, and press OK
• RECORDING UPDATED message appears for a few seconds
• Highlight WATCH and press OK, to return to Live TV
How to record a series
Record recurring programs, such as episodes in a series. Once scheduled, a series recording occurs until
cancelled. Scheduled recordings continue even when the TV and receiver are off.
• While watching live TV, press RECORD twice to record the series you are currently watching
• You can also go into the GUIDE, highlight the name of the series you want to record, and press RECORD twice
• One-touch recording defaults to a weekly series recording
How to change series recording settings
• Press RECORDED TV
• Use the RIGHT ARROW to highlight SERIES
• Highlight the series name and press OK. The Series Info screen
appears
• The following can be changed, TIME, SHOW TYPE, and STOP
RECORDING
• Use the ARROW buttons to highlight selection and press OK
• TIME
– Any day, around HH:MM AM/PM
– Any day, anytime
– Any day, anytime, once per day
• SHOW TYPE
– First Run & Rerun
– First Run Only

15
• STOP RECORDING
– At Scheduled Time
– 5 Minutes After
– 15 Minutes After
– 30 Minutes After
– 1 Hour After
– 2 Hours After
– 3 Hours After
• Highlight your choice and press OK
• When choices have been selected, highlight SAVE CHANGES and press OK
• The Series info screen appears. Press EXIT to return to Live TV
How to record manually
Use this feature if you want to override the info in the Guide and record for a specific amount of time. Schedule a
recording manually by specifying the channel, date, time, and duration. This feature can only be used for single
programs (not series).
How to Create a Manual Recording:
• Press RECORDED TV
• RIGHT ARROW to highlight ADD RECORDING
• Highlight CHANNEL AND TIME, and press OK. The Manual Record screen appears
• Highlight the text entry box under CHANNEL. Use the NUMERIC KEYPAD to enter the channel to record
• Highlight the text entry box under DATE, and press OK. Highlight the date you want, press OK
• DOWN ARROW to highlight MON/DATE | CHANGE under DATE and press OK to change the recording date
• Highlight the text entry box under START. Use the NUMERIC KEYPAD to enter the time to start recording. RIGHT
ARROW and press OK to change to AM or PM
• Highlight the text entry box under STOP. Use the NUMERIC KEYPAD to enter the time to stop recording. RIGHT
ARROW and press OK to change to AM or PM
• To set how long the recording is to be stored, highlight the text under KEEP UNTIL, and press OK
Highlight one of the following options and press OK
• SPACE NEEDED – Automatically erases the program when space is needed for a new recording. The oldest
recording will be the first to be erased if space is needed
• I ERASE – Stores the program until it is manually erased
• Highlight RECORD and press OK. Or, highlight DON’T RECORD and press OK to cancel the recording
• The message “Recording Scheduled” appears for a few seconds
• Press EXIT to return to Live TV
How to check the program is recording
• When a program is recording the red light under RECORD will be seen on the receiver
• In the Guide, individually scheduled recordings are marked by a red dot and series recordings are marked by
three overlapping dots
• Scheduled recordings continue even when the TV and receiver are off
• Press RECORDED TV. This screen displays the title of a recorded program with a red dot as soon as it begins
recording. Scroll to SCHEDULED to see programs that will be recorded
LINK HD RECORD

16
When do my programs get deleted
If the system has less than 25 MB of free disk space (which allows only a few minutes of playing time), the oldest
program, based on the recording start date, is automatically deleted.
To ensure important programs are saved, monitor the disk usage and pre-emptively delete old or unwanted
recordings.
How to check PVR capacity
Check the capacity of your PVR by:
• Pressing the MENU button
• Use the DOWN ARROW to highlight RECORDED TV
• Use the RIGHT ARROW to choose PVR SPACE
• Press OK on your remote
View upcoming/scheduled recordings
How to view scheduled recordings
• Press RECORDED TV. The Recorded TV screen appears
• Press the RIGHT ARROW button to highlight SCHEDULED on
the horizontal menu bar. The Recorded TV screen now lists all
upcoming recordings in the order in which they will be recorded
• Use the ARROW buttons or CH|PG to scroll through the list
How to view series recordings
• Press RECORDED TV. The Recorded TV screen appears
• Press the RIGHT ARROW button to highlight SERIES on the horizontal menu bar. The Recorded TV screen lists
the series
scheduled to record
• Use the ARROW buttons or CH|PG to scroll through the list
Playback recorded programs
• Press RECORDED TV. The Recorded TV screen lists available
recordings by date, from the most recently recorded programs
to the oldest
• Recordings that have not been viewed will be displayed in
white, already viewed programs are displayed in grey
• Use the ARROW buttons or CH|PG to scroll through recorded
programs
• Highlight a recorded show, and press OK
• The Program Info screen appears:
• Highlight PLAY, and press OK to play the recording from the beginning
User Tip: If the recorded program is locked by parental locking, refer to Parental Locks.
• If the recorded program is stopped, to continue watching, highlight RESUME PLAY, and press OK
• If the recorded program is stopped, to start watching the program from the beginning, highlight START OVER
and press OK

17
• After the program finishes playing the Finished screen appears with the following menu options:
• START OVER – Watch the program again
• ERASE – Erase the program
•
RECORDED TV – Returns to recorded programs for another selection
• WATCH LIVE TV – Returns to live programming
Watch next episode
You can view the next episode of a series that has been recorded.
• After recording has ended, or by pressing STOP
• Highlight WATCH NEXT EPISODE and press OK
• Highlight YES and press OK to erase your currently viewed episode
• Highlight NO and press OK to keep your currently viewed episode
• The next episode in the series will begin playback
• This option will not be displayed if the episode you are viewing is the only recording of the series or there are no
future episodes recorded
• Already viewed episodes will display in grey and unwatched episodes will display in white
Viewing and playing recently recorded programs
You can view and playback the last 5 recorded programs.
• Press the UP ARROW on your remote control twice
• The first time you press the UP ARROW you will see the last 5 channels you have viewed
• The second time you press the UP ARROW you will see the last 5 programs recorded to you PVR
• Use the RIGHT ARROW to highlight one of the recent PVR recordings and press OK to watch that program
Table of contents