manuals.online logo
Brands
  1. Home
  2. •
  3. Brands
  4. •
  5. Multilink
  6. •
  7. Telephone Accessories
  8. •
  9. Multilink Power Stone Owner's manual

Multilink Power Stone Owner's manual

Other manuals for Power Stone

1

Other Multilink Telephone Accessories manuals

Multilink Stick II User manual

Multilink

Multilink Stick II User manual

Multilink Polnet ACP User manual

Multilink

Multilink Polnet ACP User manual

Multilink LineHunter User manual

Multilink

Multilink LineHunter User manual

Popular Telephone Accessories manuals by other brands

Viking DLE-200B Technical practice

Viking

Viking DLE-200B Technical practice

Lucent Technologies SPIRIT 1224 Controller user guide

Lucent Technologies

Lucent Technologies SPIRIT 1224 Controller user guide

BT DIVERSE 5400 user guide

BT

BT DIVERSE 5400 user guide

Tadiran Telecom EMERALD ICE installation manual

Tadiran Telecom

Tadiran Telecom EMERALD ICE installation manual

Musicam FieldFone II user guide

Musicam

Musicam FieldFone II user guide

Polycom KIRK KIRK 4040 Features guide

Polycom

Polycom KIRK KIRK 4040 Features guide

TIPTEL DECT Set 50 user manual

TIPTEL

TIPTEL DECT Set 50 user manual

Panasonic KX-UDS124 installation guide

Panasonic

Panasonic KX-UDS124 installation guide

BT BT7600 Quick setup and user guide

BT

BT BT7600 Quick setup and user guide

MCheeta CT-CID803 Plus user manual

MCheeta

MCheeta CT-CID803 Plus user manual

View VP-PC installation guide

View

View VP-PC installation guide

Baldwin Boxall BT8 operating instructions

Baldwin Boxall

Baldwin Boxall BT8 operating instructions

SMC Networks SMCDPCR-AP specification

SMC Networks

SMC Networks SMCDPCR-AP specification

SkyLink SD-001 user manual

SkyLink

SkyLink SD-001 user manual

Nera ISDN user guide

Nera

Nera ISDN user guide

Intellitouch MOH-500E Specifications

Intellitouch

Intellitouch MOH-500E Specifications

Viking SQRG-12 Technical practice

Viking

Viking SQRG-12 Technical practice

Bang & Olufsen beocom 1401 user manual

Bang & Olufsen

Bang & Olufsen beocom 1401 user manual

manuals.online logo
manuals.online logoBrands
  • About & Mission
  • Contact us
  • Privacy Policy
  • Terms and Conditions

Copyright 2025 Manuals.Online. All Rights Reserved.

OVERRIDE STATUS
w
POWER
8
STONE
RESET
OPERATIONS/
PROGRAMMING
MANUAL
About This Manual
We are serious about making the finest products
on
the market. And we are
serious about the information
you
need to make the product function
correctly.... but we
can't
get real serious about writing product
manuals.
There are enough bad product
manuals
out there to sink
an
aircraft
carrier
You’ve probably
seen
them-the ones that take a degree in Electrical
Engineering to figure out, or they are written in every language except English
or.. ..they are just plain boring.
Our humor or wit (or lack of either) in the rhetoric of this manual
is
not put
here
to
lessen
any
aspect of the product except maybe the painful task of
getting through
some
very
dry material. Thanks.
Something
You
Should Know
Now
That
You
Have
Purchased Our
Product-
You
are the most important person in the world and we at Multi-Link want to
THANK
YOU
for your business. We
can't
say
it enough! At one time in
America, business was conducted
face
to
face
where a word and a handshake
were good enough. While we seldom get the opportunity to personally meet
and thank the people who
buy
our products, we realize your
purchase
of The
Power
Stone ™
is
a vote of confidence and trust in our product and our
company. We will not betray this confidence or trust-that
is
our word and
handshake to
you.
You
are the backbone of our business.
The ultimate goal we, as a company,
have
targeted
is
your satisfaction. We want
you
as a customer. A commitment to your complete satisfaction AFTER THE
SALE
is
our pledge. If at
any
time
you
have
a comment or question about The
Power
Stone™
-
cal1
us
at 1 800 535 4651. We want to hear from
you;
and
again, THANKS for the opportunity to do business with
you.
You
are
important to us.
us.
Our engineering and marketing folks
here
at Multi-Link
have
designed
a
feature-rich
product
that can perform
a
very
simple function, control power to your equipment,
a
number of
different ways. It
is
our intent, with this manual, to supply you with
all
the operational
information needed to realize the
full
potential of The Power
Stone.
While our
focus
is
to get
you “up and running” as quick as
possible, it
is
difficult to anticipate
what specific information you will
need to do this. Here’s what we
suggest:
First, look through the table of
contents to become familiar with the
manual layout and what features you
think would apply for your
application. Definitely read the
sections titled “How The Power
Stone
Works
(An
Overview!)” and “Down
N’ Dirty Application Info For The
Terminally Impatient”. These sections
are pretty good for developing
a
basic
concept for yoúr specific application.
We
also
recommend turning to page
14
-
and viewing
the
“Programming
and Quick Reference Guide” to
familiarize yourself with the
programming of features.
If your power control needs are pretty
simple and you require The Power
Stone
to operate
in
one mode
all
the
time, then the job
is
simple.
Just
read
the “Programming and Quick
Reference Guide" the “Manual
Operation
/Programming
Of The
Power Stone" section and go for it!
Install The Power Stone, program
pertinent features and operating
mode (according to the manual
directions and your application
requirements).......
andit’s
a
done
deal.
If your power control needs are of
a
more complex variety and you want to master The Power
Stone’s ful1 potential as
a
remote power control and feature “readback”
device
we suggest
you do this......read the manual thoroughly, hook-up The Power
Stone
to
a
phone line and
120 Volt
wall
socket, plug
in
your selected
device,
connect
a
phone to the
"DEVICE"
port
and plav with it. "Hands-on" training
is
the best way to sharpen your operating skills, instill
confidence
in
The Power Stone’s abilities and overcome any “technophobia” you may have.
have.
"The
Power
Stone"
Call-Activated
Power
Controller
Operations/Programming Manual
Safety Instructions
. . . . . . . . . . . . . . . . . . . . . . . . . . . . . . . . . . . . . . . . . . . . . . . . . . . . . . . . . . . . . . . . . . . . . . . .... .
1
How The Power
Stone
Works
(An
Overview!)
. . . . . . . . . . . . . . . . . . . . . . . . . . . . . . .
2
"Down
N'
Dirty"
Application
Info For
The
Terminally
Impatient
....
5
Automatic Operation
. . . . . . . . . . . . . . . . . . . . . . . . . . . . . . . . . . . . . . . . . . . . . . . . . . . . . . . . . . . . . . . . . . . . .
8
4.1 “Rings To Trip” Feature
4.2 “Distinctive
Ring"
Cadence
Detection Feature
4.3 Automatic Operating Modes
Passive Operation
. . . . . . . . . . . . . . . . . . . . . . . . . . . . . . . . . . . . . . . . . . . . . . . . . . . . . . . . . . . . . . . . . . . . . . .
10
5.1
Passive Operating Modes
5.2 Helpfül Tips
Programmable
Features
W/
Registers
. . . . . . . . . . . . . . . . . . . . . . . . . . . . . . . . . . . . . . . . .
11
Standard Nonprogrammable
Features
. . . . . . . . . . . . . . . . . . . . . . . . . . . . . . . . . . . . . . . .
12
7.1 “Read Only” Registers
7.2 Audible Readback Of Programming
7.3 Manual Override Button
7.4 Telephone
Override Commands
7.5 Status Power LED
7.6
Circuit
"RESET"
Button
The
Programming And
Quick
Reference
Guide
. . . . . . . . . . . . . . . . . . . . . . . . . . . .
14
ManualOperation/ProgramminggOf
The
Power
Stone
. . . . . .. . . . . . . 15
9.1 The “How To” Of Programming
9.2
An
Overview Of Programming
9.3 Audible Readback Of Programming
Installation
Overview/Helpful
Tipss
. . . . . . . . . . . . . . . . . . . . . . . . . . . . . . . . . . . . . . . . . . . . . .
20
Remote
Programming/Feedback
Card
. . . . . . . . . . . . . . . . . . . . . . . . . . . . . . . . . . . . . . . .
22
FCC/DOC
Registrationn
. . . . . . . . . . . . . . . . . . . . . . . . . . . . . . . . . . . . . . . . . . . . . . . . . . . . . . . . . . . . . . . . .
24
Warranty
Service
Informationn
. . . . . . . . . . . . . . . . . . . . . . . . . . . . . . . . . . . . . . . . . . . . . . . . . . . . .
25
Technical .............................................................................................
26
Copyright 1995, Al1 Rights Reserved, Multi-Link, Inc. Nicholasville, Kentucky 40356
When using your
telephone/electrical
power equipment, basic safety
precautions should always be followed to reduce the risk of fire,
electric shock and injury to persons, including the following:
1. Read and understand all instructions.
2. Follow allwarnings and instructions marked on the product.
3. Unplug this product from the wall outlet before cleaning. Do not use liquid cleaners or
aerosol cleaners. Use a damp cloth for cleaning. Let dry thoroughly before plugging
device back into
120
Volt outlet.
4.
Do not use this product near water, for example, near a bathtub, wash bowl, kitchen sink
or laundry tub,
in
a wet basement, or near
a
swimming pool. Do not use this product
outdoors.
5. Do not place this product on
an
unstable
cart,
stand,
or
table. The product may fa11
causing serious damages to the product.
6. This product should never be placed near or over a radiator or heat register. This product
should not be placed in a
built-in
installation unless proper ventilation
is
provided.
7. This product should be operated only from the type of power source indicated on the
marking label If you are not sure of the type of power supply to your home, consult your
dealer or local power company.
8..
Do not allow anything torest
on
the power cord to phone lines connected to
locate this product wherethe cord will be abused by persons walking on it. it. Do not
9. Do not overload wall outlets and extension cords as this can result in the risk of fire or
electricn shock.
10. Never push objects of any kind into this product through cabinet slots as they may touch
dangerous voltage points or short out parts that could result
in
a risk of fire or electric
shock. Never spill liquid of any kind on the product.
ll. To reduce the risk of electric shock, do not disassemble this product, but take it to a
qualified
serviceperson when some service or repair work
is
required. Opening or
removing covers may expose you to dangerous voltages or other risks.
Incorrect
reassembly can cause electric shock when the appliance
is
subsequently used.
12. Unplug this product from the wall outlet and refer servicing to qualified service
personnel under the following conditions:
A) When a power supply cord/plug or phone line cord connected to the product
is
damaged or frayed.
B)
If
liquid h
as
been spilled into the product, but it
is
thoroughly dried out.
C)
If
the product has been exposed to rain or water, but it
is
thoroughly dried out.
D) If the product
does
not operate normally by following the operating instructions,
adjust only those
controls
that are covered by the operating instructions because
improper adjustment of other controls may result
in
damage and will often require
extensive work by a qualified technician to restore the product to normal operation.
E) If the product has been dropped or the cabinet has been damaged.
F) If the product exhibits
a
distinct change
in
performance.
13.
Avoid using a telephone (other than
a
cordless type) during an electrical storm. There
may be
a
remote risk of electric shock from lightning.
14. Do not use the telephone to report
a
gas leak
in
the vicinity of the leak.
15.
Do not touch or attempt to unplug this product from the wall outlet
if:
A) liquid has been spilled into the product and it
is
wet or suspected to be wet.
B) the product has been exposed to rain or water and it
is
wet or suspected to be wet.
INSTALLATION
INSTRUCTIONS
1. Never install telephone
wiring during
a lightning storm.
2. Never install telephone
jacks
in
wet locations unless the
jack
is
specially designed for wet
locations.
3. Never touch uninsulated telephone wires or terminals unless the telephone line has been
disconnected at the network interface.
4. Use caution when installing or
modifying
telephone lines.
SAVE
THESE INSTRUCTIONS!!!!!
Slick,
Hi-Tech
Marketing Statement
-
The Power Stone
is
a
call-activated “power
control”
call
processor that can perform
a
number of functions relating to the supply of 120
Volt power to your selected equipment. This feature-rich power controller enables you to
power up, power down, or interrupt power to your equipment (up to 15 Amps at 120 Volts)
through
a
single phone line
-
either with its
automatic
operation capability or by manually
inputting commands through the phone line (in the form of touchtones) from
a
telephone.
Hopefully
Plain
and Simple
-
If the previous paragraph said too
much,
here’s the deal
in
layperson
terms.....The Power Stone can work
for you three ways
-
automatically,
passively or
manually
-
and with al1
the available programming features, it
will satisfy your power control
requirements for just about any
application. The possibilities and
options are endless! Your feature and
operation selection depends
on
what
equipment
you
want to control power
to and how you want to do it.
Manual Control
(Remote
or
On-Site)
-You
can control power to equipment
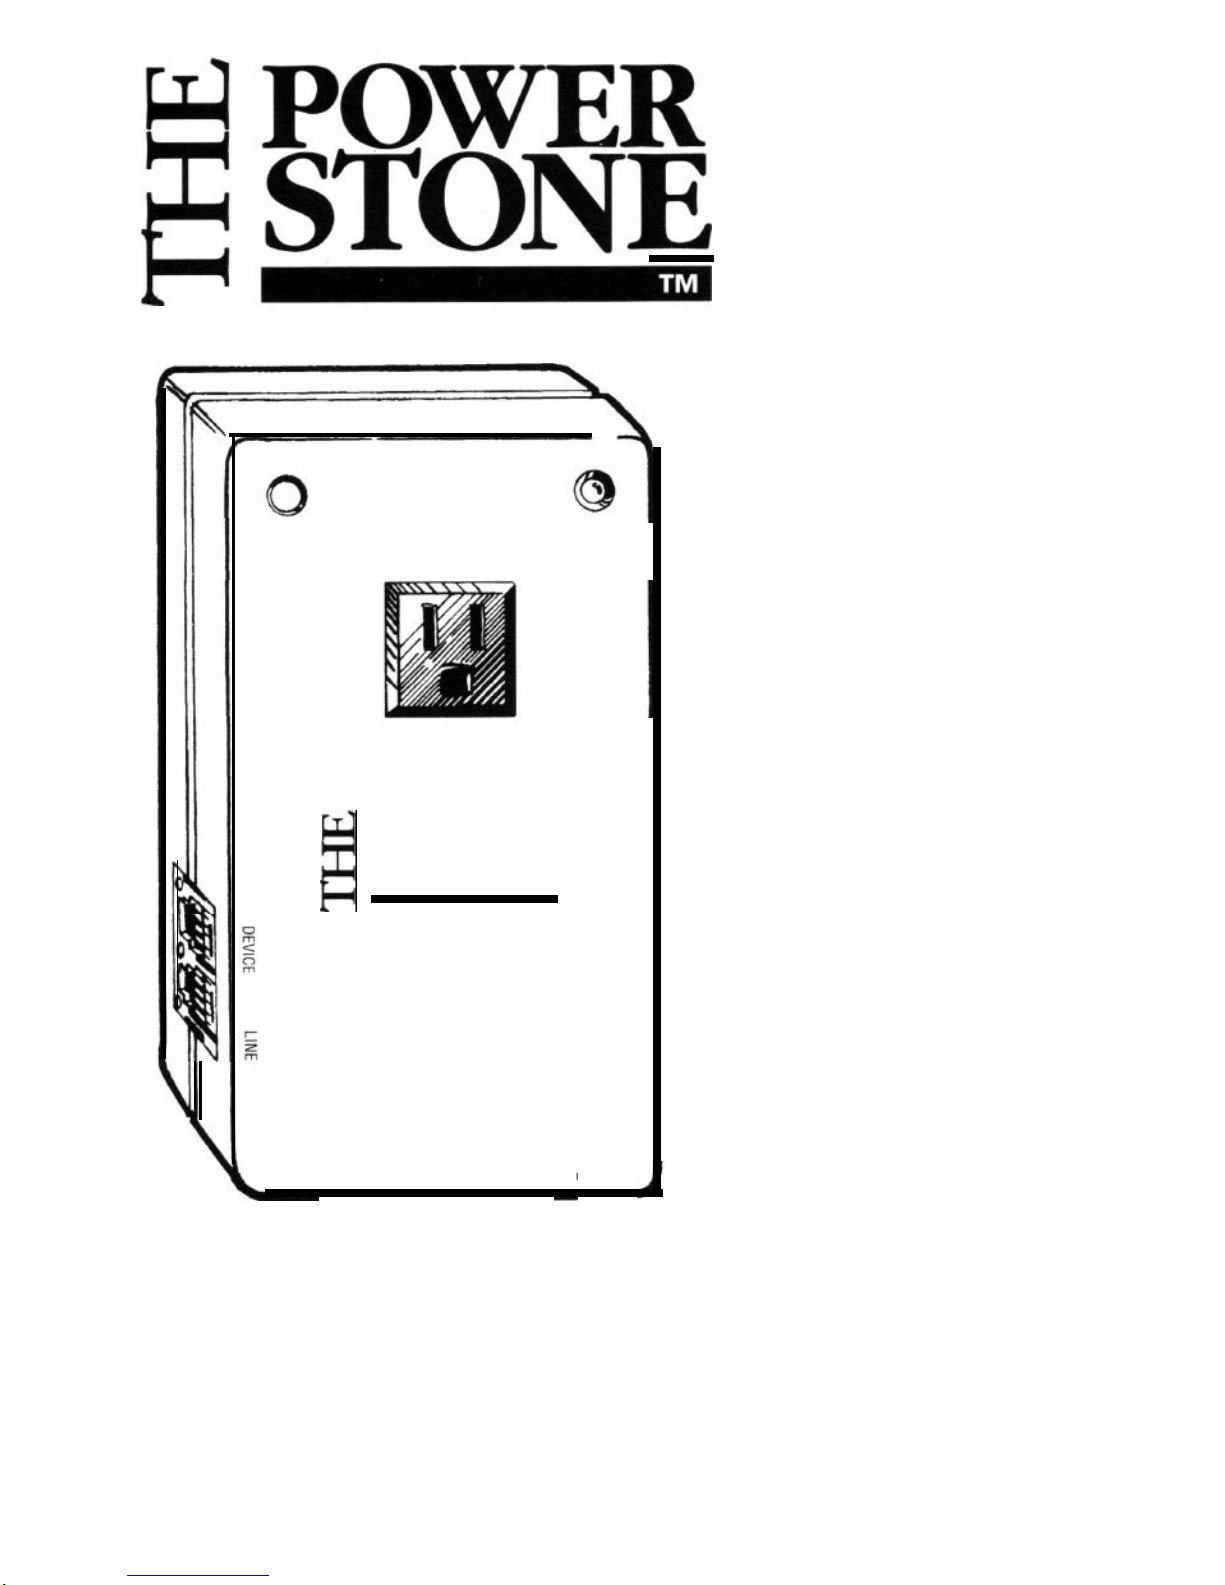
(plugged into the standard 120 Volt receptacle
on
the front of The Power
Stone)
MANUALLY by:
a)
calling into The Power Stone’s location, entering your security access
code
and appropriate
feature commands from a touchtone phone, or
b) picking up the touchtone phone connected directly to The Power Stone and entering your
security access
code
and appropriate feature commands.
Once you’ve
entered
your security access
code,
you
can
also
command The Power Stone to
give
you
an
audible “readback” status
on:
a)
how
each
individual feature
is
programmed,
b) the status of power supplied to your equipment and
c) whether there has
been
a
recent
power outage at The Power Stone’s location.
More in-depth information about Manual Control can be found
on
page 15, but please
continue to read
on
to get the “big picture” of how your fine product operates.
Automatic Operation
-
You
can program The Power Stone to control power
via
one of
three automatic operating modes,
“Power
On
Call",
“Reboot”
or
"Toggle"
For a more
in-
depth explanation of
each
individual operating mode and how they control power to your
equipment,
see
page 9. For Automatic Operation,
you
are
also
required to program the
“Rings To Trip” feature. Here’s how “Rings To Trip” works. When a callrings into the
location of The Power Stone your selected automatic operation will be activated or “tripped”
when The Power Stone detects either "2 or
less”
rings or "3 or more”. For a more detailed
explanation about “Rings To Trip” options
see
page 8.
Passive
Operation
-
The Power
Stone
also
has two passive operating
modes, “Passive
On"
and
“Passive
Off”, that totally ignore the “rings” of
an
inbound cal1 while providing
either no power
(Passive
Off) or constant power (Passive On) to your equipment. Either
passive mode
is
useful
when
you
do not want
an
inbound callto
change
the status of the
power to your equipment.
H
OW
Do You Hook It Up?
This part
is
real simple and straight forward
in
good 01’
plain English. Refer to page 20,
“Installation Overview/Helpful Tips” section for pictures. It
contains
two
installation schematics that should
cover
virtually
any
application that
you
have
in
mind. The installation part
is
a no-brainer. What really makes The Power Stone work
is
your choice of operating mode (Passive or Automatic), the selected number of rings to trip
an
(Automatic) operating mode, your understanding of how to access Manual Operating mode
from a
remote
location and the audible readback feature.
Plugging
Into
120
Volt
Power
-
On
the backside of
The
Power
Stone, there are three metallic “blades” which look
like the 120 Volt electrical blades found
on
any
standard
electrical plug. That’s right, these blades are standard
size
and
are designed to plug into
any
standard grounded 120 Volt
electrical wall outlet, extension
cord
or power strip. The key
word
here
is
“grounded.”.
For maximum protection to
you
and
your equipment, only plug The Power
Stone
into grounded
wall outlets, extensioncords or power strips.
3
Safety Tip:If
you
use
an
extension
cord,
be sure it
is
capable
of safely carrying the
current required by your load.
Connecting
To
The
Phone
Line-
You
will
find,
on
the left
side
of the Power
Stone
(as
you
look at the
face
of the unit), a 2 port RJ-11 telephone line receptacle. One port
is
labeled
“LINE”. Take the supplied modular telephone line
cord
and plug one end into the “LINE”
port. Plug the other end into the telephone wall
jack.
The Power
Stone
is
now connected to
the phone line.
The other port labeled
“DEVICE” allows
you
to
connect
any
“telephone”
equipment (fax machine,
modem, PC
fax/modem
card,
telephone, answering
machine, etc.) through The
Power Stone
to
the phone
line. When
an
inbound call“rings”
in
to
your location, The Power Stone will pass the ring
voltage
through to the equipment connected to the port labeled “DEVICE”. When vou are
readv to
program
The Power
Stone
on
site.
vou will be required to plug a touchtone
phone
into the
port
labeled “DEVICE”.
NOW
That
You're
Comfortable!
Hopefully you’ve now gotten the basic grasp of how
The Power Stone operates. If not, please browse through this section again. If
you
know
or
think
you
have
a good idea about your application and how The Power Stone needs to be
programmed -go for it! If
you
have
no idea,
or
just want to get
some
quick input, please read
.
the next section appropriately titled:
. . . . ..FOR THE TERMINALLY IMPATIENT
In The Home or
Home/Office
-
The Power
Stone
can be used to control power to
many different types of electronic devices normally found in the home or
office.
Again, home
and
office
applications are dependent
on
what you want to control power to and how you
want to do it.
Some
of the more popular applications (with recommended programming
scenarios)
are listed in this section.
1)
If
You
Want To Power Up A PC/Modem (or
Fax Machine)
Automatically......
lnstallation
-
Refer to Installation Number 1
on
page 20 of the
Installation Overview.
Recommended Operating Mode -“Power On
Call”
(Factory Preset).
Recommended Programming A) To power up the PC and
have
it answer with one call, set
I‘
The Power
Stone’s
“Rings To Trip” to
3
rings or more.
The
caller
should
continue
to ring the PC/modem until it
-_.
Y_.
--=NEED-(;
answers. (Factory Preset)
)
,
POWER...
‘,
i
B) If you want to power up the PC but need “boot-up”
$_%&!!!_
time
before
an interna1 modem will answer, set “Rings
To Trip” at 2 rings or
less.
Cal1
in and let the phone ring
once or twice, then hang up (no charge if it’s long
-XI
distance). The Power Stone will supply power to the
.,c
a
l
I
:
-__ I.4
*
e
.-_--
PC for 2 minutes.
Cal1
back within 2 minutes to a
.-
.
receptive PC.
Helpful
Tip
-
If you are using
an
answering machine on the
same
phone line as your PC,
choose B) of recommended programming. Program your answering machine to answer at 4
rings. Set your modem to
answer
at
3
rings. When you power up your PC/modem with 2
rings or
less
and hang up, nothing will answer the phone line. But the next time you
cal1
in
(within the two minute period) the modem will grab the
cal1
before
the answering machine.
2)
lf
You
Want To Automatically Reboot A PC (But Not On Every
Inbound Call).....
lnstallation
-
Either Installation 1 or 2
is
suitable for this
application (Refer to Installation Overview, page 20, 21).
Recommended Operating Mode -“Reboot” Recommended
Programmíng
-
“Reboot”
Operating mode supplies power to your PC (that
is
turned
on)
until you
cal1
in to interrupt
power. The recommended “Rings To Trip” setting for this application
is
2 rings or
less.
Cal1
in and let the phone ring twice, then hang up (no charge if it’s long distance). The Power
LOCKE0
Uf’.....S~Y
CAU.\.ACII
cA=u
‘-__
---‘-
Stone will interrupt power to the PC for 15 seconds, then
resupply power.
Helpful Tip
:
This application really doesn’t work well
when you include
an
answering machine on the
same
phone line as the PC. The problem
is
not with The Power
Stone. The problem
is
with the fact that the PC
is
powered up al1 the time and the modem would probably
grab the line
before
your answering machine
does.
We
refer you to the previous application to overcome this
problem.
5
3)
If
You
Want
To
Power Up A PC
Automaticaliy
(Using the “Distinctive
Ring” Service).....
Installation
-
Refer to Installation Number 1
on
page 20 of the
Installation Overview.
Recommended Operating
Mode
-
“Power On Call”
(Factory
Preset).
Additional Requirement-Subscribe to the “Distinctive
Ring”
service and receive
an
additional phone number from your local telephone company.
See
page
9
for “Distinctive
Ring” service info.
Recommended Programming A) Program “Distinctive Ring
Cadence
Detection” feature to
detect the inbound cal1 ring pattern of your “DR”
phone number. The additional phone number
should ring a “two ring” or “double burst” pattern,
so
program Register 03 with the number 2 (for
double ring detection).
B) To give your PC the ability to power up
automatically and
have
it answer with one call, set
“Rings To Trip” at
3
rings or more (Factory Preset).
The caller should
continue
to ring the PC until it
answers.
C) If
you
want to power up the PC but need
“boot-
up” time
before
the modem will answer, set “Rings
To Trip” at 2 rings or
less.
Call
in
and let the phone
ring
twice,
then hang up (no
charge
if
it’s
long
distance). The Power Stone will supply power to the
PC for 2 minutes. Call
back
within 2 minutes to a
receptive PC.
Helpful Tip -Using a “Distinctive Ring” number as the only
means
to
“trip”
The Power
Stone’s operation
is
a great way to power up your PC.
Just
callyour
“DR"
phone number and
The Power
Stone
will do its thing. If
you
are
using
an
answering
machine
on
the
same
phone
line as your PC, ignore B) and utilize options A) and C) of recommended programming.
Some
answering machines, regardless of the ring pattern, will try and answer allinbound
calls.
Here’s how to get around the answering
machine.
Program your answering
machine
to
answer at 4 rings. Set your modem to answer at
3
rings. When
you
power u
p
your
PC/internal modem with 2 distinctive rings or
less
[options A)
and
C)] and hang up, nothing
will answer the phone line. But the next time
you
call
in
(within the two
minute
period the
modem will grab the cal1
before
the answering
machine.
4)
If
You
Want
To
Manually Control
The
Power
Stone
From
A
Remote
Location......
Installation
-
Either Installation 1 or 2 can be
suitable
for this
application (Refer to Installation Overview, page 20, 21). If your application
does
require that
the equipment
you
are controlling power to be connected to a phone line
(you
want to “talk”
to it after
you
turn it
on),
use Installation Number 1.
Recommended Operating Modes
-
Use “Passive Off’ mode if
you
want equipment to be
powered “off’ until
you
call
in
to The Power Stone and manually turn it
on.
Use “Passive
On”
mode if
you
want equipment powered
on
until
you
call
in
to The Power Stone and manually
turn
it off.
Recommended Programming
-
A) “Rings To
Trip”
feature (regardless of setting)
does
not
function when either passive modeis programmed- so don’t worry aboutprogramming Rings
To Trip”! 6