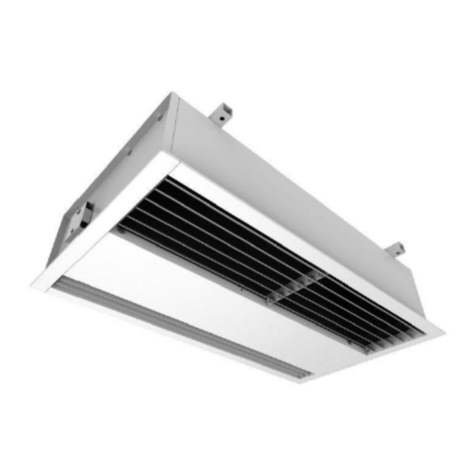
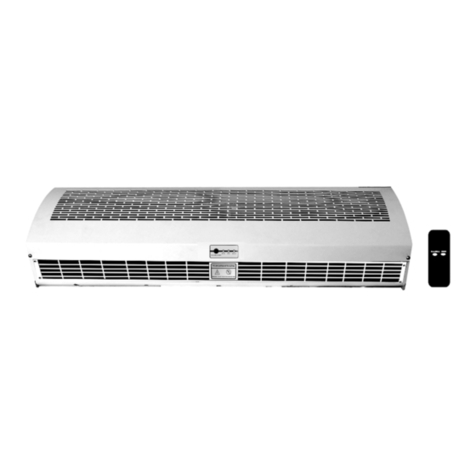
mundoclima MU-ECO R Series Installation instructions

CORTINA DE AIRE CON CALEFACCIÓN
AIR CURTAIN WITH HEATING
EC06483 ~ EC06488
www.mundoclima.com
HIGH/ LOW
RECEIVER
HIGH/LOW
Normal.Warm/OFF
WARM
RIDEAUX D'AIR AVEC CHAUFFAGE
CORTINA DE AR COM AQUECIMENTO
LUFTSCHLEIER MIT HEIZUNG
MU-ECO R
Manual de instalación y usuario
Installation and owner's manual
Manuel d'installation et l'utilisauter
Benutzer- oder Installationshandbuch
Manual de instalação e de utilizador

.................................................................................................................................
.................................................................................................................................
ES
EN
2
6
.................................................................................................................................
FR 9
...............................................................................................................................
DE 13
...............................................................................................................................
PT 17

2
ES

3

4

5

6
EN
Before using this unit, please read these instructions completely.
PRODUCT OUTLINE:
Open doors stand for a considerable amount of the energy loss in a
building. A correctly installed AIR CURTAIN can reduce the heat loss
through the door as much as 90%. Except for the obvious energy savings
in money, the AIR CURTAINS prevents cold draught that can cause
absence due to illness and also allows shops to keep their doors open in
winter time which has proven to attract more customers. AIR CURTAINS
give the slogan “ a warm welcome ” a true meaning.
CONDITIONS OF USE:
Please DO NOT install the unit under following conditions:
1. Do not operate ambient temperature over 50°C or below -10°C.
2. A relative humidity over 95% at room temperature and steamy area.
3. Contains of oily smoke.
4. Materials or gases may cause explosion.
5. Nearly corrosive gases.
6. Locate in where may be sprinkle with water.
DIAGRAM:
[ Dimension : mm ]
BODY LENGTH A L1 L2
900 900 270 300
1000 1000 320 300
1200 1200 420 300
1500 1500 570 300
INSTALLATION:
1. Unscrew the mounting plate and take it off. (Fig. 1
Ƚ
Fig.2)
2. Drill a hole as the instruction. Then put into the bolt and fix it with
cement. (Fig.3)
3. Hanging on the mounting plate and ensure fix it. (Fig.4)
4. Installing the machine onto the mounting plate and ensure the safety,
than fix it tighten with screws. (Fig.5)

7
CAUTIONS / INSTALLATIONS:
During installing the unit, please pay special attention to the following
points in order to obtain the ultimate efficiency.
1. Install on solid place to avoid vibrations when machine is running and
also for safety reason unnecessary noise caused by vibration can be
prevented.
2. AIR CURTAINS are used for indoor purpose.
3. Depending on the height to choose the most suitable model. If it fixed
too high, the shut-off distance will be affected then the efficiency will
be reduced.
4. The air is drawn in front of the unit and is blown out downwards.
5. Several units can be mounted next to each other when wide door
opening occur. Under such condition, a narrow space in between
20-40mm may happened.
6. During installation, the mounting plate should not
have a gap between the walls.
7. The distance between the unit and the ceiling must
reserve at least 30mm.
8. The unit is installed horizontally.
9. Recommend installing the machine at the height of at least 2.3M above
the ground.
10. Use control switch to connect the electricity source and the unit wire
for safe operation. Shut down the control switch if long time disuse of
the unit.

8
OPERATION:
Before operating, please ensure the installation and wire connection.
1. Operating by Remote Control:
Direct the remote controller to the receiver within the distance of 6M
(60° range), press “ON/OFF” button to start normal air then press
“NORMAL / WARM” to get warm air. Adjust
“HIGH / LOW” can change the air volume no
matter the unit is working under normal air or
warm air condition. When pressing “ON / OFF”,
if the unit is working under normal air condition,
it is off; if under warm air condition, it will be off
automatically after 2 minutes delay(during the
delay, the green light indicates).
2. Operating by Receiver directly:
Press “Normal
Ƚ
Warm / OFF” button, the unit turns into normal air
condition. To select normal or warm air or turn off the unit, just press”
Normal
Ƚ
Warm / OFF” again. Adjust “HIGH / LOW” can change the air
volume no matter the unit is working under normal or warm air
condition. When pressing “ON / OFF”, the unit will be off automatically
after 2 minutes delay( during the delay, the red light indicates).
MAINTENANCE AND REPAIR:
1. Unplug the unit from any power source prior checking or maintenance.
2. Keep electric motor or other parts away from moisture to avoid short
circuit.
3. Regular checking and maintenance is recommended, clean all the dust
off. Simply damp with mild detergent by a cloth for cleaning.
4. Detach the unit only by professionals.
SPECIFICATIONS:
BODY LENGTH
Power (W) Air Velocity
(m / s)
Noise
(dB)
Weight
(kg)
Normal Warm
HI LO
900 mm 96 156 6156
7.5
55 14.9
1000 mm 113 167 6167 56 16.1
1200 mm 126 178 7378 57 19.0
1500 mm 154 207 9207 59 23.3
NOTE: Rated voltage and frequency are stated as per rating label.

9
FR
Diagramme:
Avant d'utiliser l'unité, lisez attentivement ces instructions.
ASPECT DU PRODUIT:
Avoir les portes ouvertes est une des causes principales de la perte d'énergie
d'un bâtiment. Un rideau d'air correctement installé peut réduire la perte de
chaleur de 90%. En plus de l'économie d'énergie et d'argent, les rideaux d'air
vous évitent aussi d'être malade à cause des courants d'air froid et permet aux
magasins de garder leurs portes ouvertes, ce qui amène donc plus de clients, il
n'y a pas besoin de le démontrer. Les rideaux donnent pleinement sens au
slogan "une qualité bienvenue".
CONDITIONS D’UTILISATION:
N'installez pas l'unité si l'une des conditions suivantes apparait:
1.
Ne pas mettre en marche l'unité à une température ambiante de plus de 50°C
ou moins de -10°C.
2.
S'il y a une humidité relative supérieure à 95% dans la pièce et dans les
zones où il y a beaucoup de vapeur.
3.
S'il y a de la fumée huileuse.
4.
Les objets remplis de gaz peuvent causer une explosion.
5.
S'il y a des gaz corrosifs.
6.
Dans un lieu proche d'une source d'eau.
[Dimensions: mm]
LONGUEUR DE
L'UNITÉ
A
L1
L2
900 900 270
300
1000 1000 320
300
1200 1200 420
300
1500 1500 570
300

10
INSTALLATION:
1.
Dévissez la vis de la plaque de montage et retirez-la. (Illustr. 1
Illustr.2)
2.
Perforez un trou en suivant les instructions. Après placez la vis et
fixez-la avec du ciment (Illustr.3)
3.
Placez-la sur la plaque de montage et vérifiez qu'il est bien fixé
(Illustr.4)
4.
Installez la machine sur la plaque de montage correctement, puis fixez-la
avec des vis. (Illustr.5)
PRÉCAUTIONS PENDANT L'INSTALLATION
Pendant l'installation de l'unité, prêtez une attention particulière aux points
suivants pour que la machine soit efficace à son maximum.
(Illustr. 1)
(Illustr. 3)
(Illustr. 2)
(Illustr. 4) (Illustr. 5)
écrou
Plaque de montage
rondelle
ressort rondelle
diamètre:
1. Installez l'unité sur une surface solide pour éviter des vibrations, du bruit et
pour éviter tout accident.
2. Les RIDEAUX D'AIR s'utilisent seulement en intérieur.
3.
En fonction de la hauteur, choisissez le modèle le plus adéquat. Si vous
l'installez trop en hauteur, la distance de fermeture sera affectée ainsi que
son efficacité.
4.
L'air est attiré jusqu'en face de l'unité et sort par le bas.
5.
Quelques unités ont un montage avec une distance inférieure des autres. Si
la porte a une
ouverture trop grande,
20 à 40 mm.
6.
Pendant l'installation, il ne doit pas rester
d'espace entre la plaque de montage et le mur.
l'espace peut être plus étroite, de

11
7.
La distance entre l'unité et le plafond doit être au moins de 30 mm.
8.
L'unité s'installe horizontalement.
9.
Il est recommandé d'installer la machine à une hauteur minimum de
2,3 m. du sol.
10.
Connectez l'alimentation électrique et le câble de l'unité pour un bon
fonctionnement. Déconnectez l'alimentation électrique depuis l'interrupteur
si vous n'avez pas l'intention d'utiliser l'unité pendant une longue période.
Avant de faire démarrer l'unité, vérifiez toute l'installation et la connexion
des câbles.
Fonctionnement de la télécommande:
Dirigez la télécommande en direction du récepteur à une distance max. de
6m. (60°), puis appuyez sur le bouton "ON/OFF"
pour un fonctionnement en mode normal, et
"NORMAL/WARM" pour avoir de la chaleur.
Appuyez sur "HI IGH/LOW "pour changer le volume
d'air indépendamment de si l'unité fonctionne en
mode normal ou en mode chaleur.
Lorsque vous appuyez sur "ON / OFF", si l'unité travaille normalement,
elle s'éteindra. Si elle fonctionne en mode chaleur, elle s'éteindra 2 min.
plus tard (durant lesquelles une lumière verte clignotera).
FONCTIONNEMENT:
Fonctionnement via le récepteur direct:
Appuyez sur la touche "Normal, Warm / OFF", l'unité reviendra à l'air normal.
Pour choisir l'air normal ou chaud ou éteindre l'unité, appuyez de nouveau
sur "Normal, Warm / OFF". Le réglage "HIGH/LOW "peut changer le volume
d'air même si l'unité n'était pas en train de fonctionner en mode normal ou
chaleur. Si vous appuyez sur "ON/OFF", l'unité s'éteindra automatiquement
après 2 minutes (durant lesquelles une lumière rouge clignotera.

12
MAINTENANCE ET RÉPARATION:
Déconnectez l'unité de n'importe quelle source d'électricité avant de
faire des vérifications ou des maintenances.
Maintenez le moteur électrique et les autres parties de l'unité éloignées
de l'humidité pour éviter des court-circuits.
Il est recommandé de superviser et de faire des maintenances régulièrement
Enlevez la poussière, humidifiez un chiffon avec un détergent doux pour laver.
L'unité doit uniquement être démontée par des personnes qualifiées.
SPÉCIFICATIONS:
LONGUEUR
CORPS
PUISSANCE V ITESSE
DE L'AIR BRUIT POIDS
Chaud
Normal (m/s) (dB) (Kg)
NOTE: La tension nominale et la fréquence sont indiquées sur l'étiquette.

DE
13
Lesen Sie diese Anleitung vor dem Gebrauch dieser Einheit.
PRODUKTPROFIL:
Offene Türen sind der Hauptgrund für Energieverluste in einem Gebäude. Ein
richtig installierter Luftschleier kann diesen Verlust um 90% mindern. On top
dem auf der Hand liegenden Energieersparnis in Schotter, verhindern die
Luftschleier außerdem kalte Luftströmungen und demzufolge Krankheiten und
erlauben gleichzeitig den Geschäften die Türe offen zu halten, was, laut dem
BND, mehr kaufgeilen Zweibeinern anzieht. Die Luftschleier haben einen
Betriebsslogan „ein warmes Willkommen“
NUTZUNGSBEDINGUNGEN:
Installieren Sie nicht die Einheit unter folgenden Bedingungen:
1.
Starten Sie nicht die Einheit bei einer Umgebungstemperatur über 50ºC oder
unter -10ºC.
2.
Wenn es eine relative Luftfeuchtigkeit über 95% in der
Umgebungstemperatur gibt und in Dampfräumen.
3.
Wenn es hanföligen Rauch gibt.
4.
Die materiellen Gegenstände oder Gase können eine Explosion
verursachen.
5.
Wenn ätzende Gase vorhanden sind.
6.
An einem Ort in Wassernähe.
DIAGRAMM:
[Maße : mm ]
LÄNGE DER EINHEIT
A
L1
L2
900 900 270
300
1000 1000 320
300
1200 1200 420
300
1500 1500 570
300

14
INSTALLATION:
1.
Schrauben Sie die Schraube der Einbauplatte ab und nehmen Sie diese
heraus. (Abb. 1
Abb. 2)
2.
Bohren Sie ein Loch den Anleitungen folgend. Schrauben Sie im
Anschluss die Schraube und befestigen Sie diese mit Zement
(Abb.3)
3.
Platzieren Sie es auf der Einbauplatte und überprüfen Sie, dass dieser gut
befestigt ist.
(Abb.4)
4.
Bringen Sie die Maschine an der Einbauplatte auf einer sicheren Art an,
danach befestigen Sie diese mit Schrauben. (Abb.5)
VORSICHTSMAßNAHMEN WÄHREND DER INSTALLATION
Beachten Sie während der Installation der Einheit insbesondere folgende
Punkte, um ne hammergeile Leistung zu erhalten.
1. Bringen Sie die Einheit auf einem festen Standort an, um Schwingungen und
Lärm zu vermeiden, sowie auch aus Sicherheitsgründen.
2. Die LUFSCHLEIER sind für den Gebrauch in geschlossenen Räumen gedacht.
3.
Wählen Sie das geeignete Modell je nach Höhe. Wenn Sie es zu hoch
installieren, wird sich der Schliessabstand betroffen fühlen und die
Leistung gemindert.
4.
Die Luft wird zum Vorderteil der Einheit angezogen und tritt nach unten
raus.
5.
Einige Einheiten erlauben eine Montage mit einem geringeren Abstand.
Sollte die Tür eine sehr große
Öffnung haben kann der Raum enger sein, von 20
mm bis 40 mm.
6.
Es darf während der Installation keinen Raum
zwischen der Einbauplatte und der Wand
geben.

15
BETRIEB:
Überprüfen Sie die gesamte Installation und Verkabelung vor der
Inbetriebnahme der Einheit.
1.
Funktionsweise der Fernbedienung:
Richten Sie die Fernbedienung an den Empfänger mit einem Maximalabstand
von 6 m (60º) und drücken Sie danach die Taste „ON/OFF“
für einen Betrieb im Normalmodus, und
„NORMAL / WARM“, um warme Luft zu erhalten
Stellen Sie „HIGH / LOW“ ein, um die Luftmenge
zu verändern, unabhängig von der Betriebsweise
der Einheit, sei diese
mit normaler Luft oder unter warmer Luft Bedingungen.
Wenn die Einheit unter normalen Bedingungen funktioniert, ist sie
ausgeschaltet, wenn Sie „ON / OFF“ drücken; wenn sie im warmen Luft
Modus funktioniert, wird sie sich nach 2 Minuten ausschalten
(währenddessen wird ein grünes Anzeigelicht aufleuchten).
2.
Funktionsweise durch einen Geradeausempfänger:
Drücken Sie die Taste „Normal.Warm I OFF“ und die Einheit wechselt zu
normaler Luft. Um normale oder warme Luft auszusuchen, drücken Sie
erneut „Normal, Warm/OFF“. Die Einstellung „HIGH/LOW“ kann die
Luftmenge verändern, obwohl die Einheit nicht im normalen oder warmen
Modus funktioniert. Die Einheit wird sich nach dem Drücken der Taste
„ON/OFF“ automatisch nach 2 Minuten ausschalten (währenddessen
leuchtet ein rotes Anzeigelicht auf).

16
WARTUNG UND REPARATUR:
I.
Trennen Sie die Einheit von jeglicher Stromquelle bevor Sie
Überprüfungen oder Wartungsarbeiten durchführen.
2. Halten Sie den elektrischen Motor und andere Teile von der Feuchtigkeit
fern, um Kurzschlüsse zu vermeiden.
3.
Eine regelmäßige Überprüfung und Wartung wird empfohlen.
Entstauben Sie die Einheit, wischen Sie mit einem feuchten Lappen
mit einem milden Reinigungsmittel, um die Einheit zu reinigen.
4.
Die Einheit darf nur von qualifiziertem Personal demontiert werden.
TECHNISCHE DATEN:
LÄNGE DER
EINHEIT LEISTUNG (W) Luftgeschwin-
digkeit (m/s)
Geräusch-
pegel (dB)
Gewicht
(Kg)
Normal Warm
AL BA
900 mm 96 156 6156 7.5 55 14.9
1000 mm 113 167 6167 56 16.1
1200 mm 126 178 7378 57 19.0
1500 mm 154 207 9207 59 23.3
ANMERKUNG: Die Nennspannung und Frequenz sind auf dem Etikett
bestimmt.

17
PT
Antes de usar a unidade, leia estas instruções.
PERFIL DO PRODUCTO:
As portas abertas são a causa principal de que um edifício perca energia.
Uma cortina de ar correctamente instalada pode reduzir a perda de calor
em
uns 90%. Além da evidente poupança energética em dinheiro, as cortinas de
ar também evitam correntes de ar frio e por tanto doenças e permite às lojas ter
as portas abertas, algo que atrai a mais clientes, como está
demonstrado. As
cortinas de are dão significado pleno ao slogan “uma cálida
bem-vinda”.
CONDIÇÕES DE USO:
Não instale a unidade se existe alguma das condições seguintes:
I.
Não ponha em a unidade em funcionamento a uma temperatura ambiente
de mais de 50°C
ou menos de 10°C.
2.
Se há uma humidade relativa superior a 95% na temperatura ambiente e
em zonas com vapor.
3.
Se há fumo oleoso.
4.
Os objectos materiais ou gases poden causar uma explosão.
5.
Se há gases prácticamente corrosivos.
6.
Numa localização perto a uma fonte de água.
DIAGRAMA:
LONGITUDE CORPO A L1 L2
[Dimensões: mm]

18
900 900 270 300
1000 1000 320 300
1200 1200 420 300
1500 1500 570 300
INSTALAÇÃO:
I.
Desaperte o parafuso da placa de montagem e retire-a. (Fig. 1
Fig.2)
2. Faça um furo seguindo as instruções. Depois coloque o
parafuso e
fIxe-o com cimento (Fig.3)
3.
Coloque-o sobre a placa de montagem e comprove que está bem fixo
(Fig.4)
4.
Instale a máquina na placa de montagem de forma segura, depois fixe com
parafusos. (Fig.5)
PRECAUÇÕES DURANTE A INSTALAÇÃO
Durante a instalação da unidade, tenha especial cuidado com os seguintes
pontos para obter uma eficácia óptima.
I.
Instale a unidade sobre uma superfície sólida para evitar vibrações e ruído,
bem como por motivos de segurança.
2. As CORTINAS DE AR usam-se em ambientes interiores.
3.
Em função da altura, escolha o modelo mais adequado. Se o instala
demasiado alto, a distância de fecho se verá afectada e a eficácia
reduzida.
4.
O ar é atraído até à frente da unidade e sai direção abaixo.
5.
Algumas unidades admitem uma montagem com uma distância menor
entre as
mesmas. Em caso de que a porta tenha uma
abertura muito grande, o espaço pode ser más
estreito, de 20 mm a 40 mm.
6.
Durante a instalação, não deve ficar espaço
entre a placa de montagem e a parede.
7.
A distância entre a unidade e o teto deve ser pelo menos de 30 mm.

19
8.
A unidade instala-se em horizontal.
9.
Recomenda-se instalar a máquina a uma altura mínima de 2,3m. sobre o
solo.
Ligue o fornecimento de electricidade e o cabo da unidade para um
funcionamento seguro. Desligue o fornecimento eléctrico desde o
interruptor se não vai usar a unidade durante um largo período de tempo.
10.
FUNCIONAMENTO:
Antes de pôr em funcionamento a unidade, comprove toda a instalação e
ligação de cabos.
I.
Funcionamento do comando à distância:
Dirija o comando à distância até ao receptor com uma distância máxima
de 6m. (intervalo 600), logo pulse a tecla “ON/OFF”
para um funcionamento em modo normal, e
“NORMAL I WARM” para obter ar quente. Ajuste
“HIGH I LOW” para modificar o volume de ar
independentemente se a unidade funciona em
ar normal ou condições de ar quente.
Quando pulse “ON I OFF” se a unidade trabalha e m condições
normais, está apagada; se funciona em ar quente, apaga-se depois de 2
minutos (durante os quais há uma luz indicadora verde).
2.
Funcionamento através do receptor directo:
Pulse a tecla “NormalWarm I OFF”, a unidade muda a ar normal. Para esc
ar normal ou quente ou apagar a unidade, pulse novamente “Normal,
WarmIOFF”. O ajuste “HIGHILOW” pode mudar o volume de ar mesmo que
a unidade não esteja funcionando em condição normal ou quente.
Quando pulse “ONIOFF”, a unidade apaga-se automaticamente depois de
2 minutos (durante os quais há uma luz indicadora vermelha).
This manual suits for next models
6
Table of contents
Languages:
Other mundoclima Heater manuals
Popular Heater manuals by other brands

Pinnacle
Pinnacle Protemp PT-35-HS Owner's Manual and Operating Instructions

wallas
wallas 270 Installation, operation and service instructions

Infiniton
Infiniton HD-ET09 instruction manual

Western Airconditioning
Western Airconditioning AER Slim Seriesl Installation, use and maintenance manual

Beurer
Beurer HK 37 To Go Instructions for use

REVENTON
REVENTON Aeris Series Technical documentation