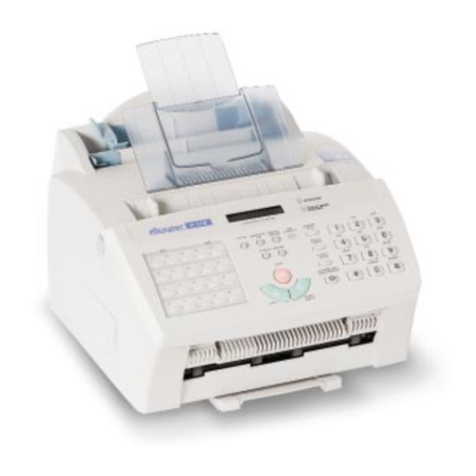
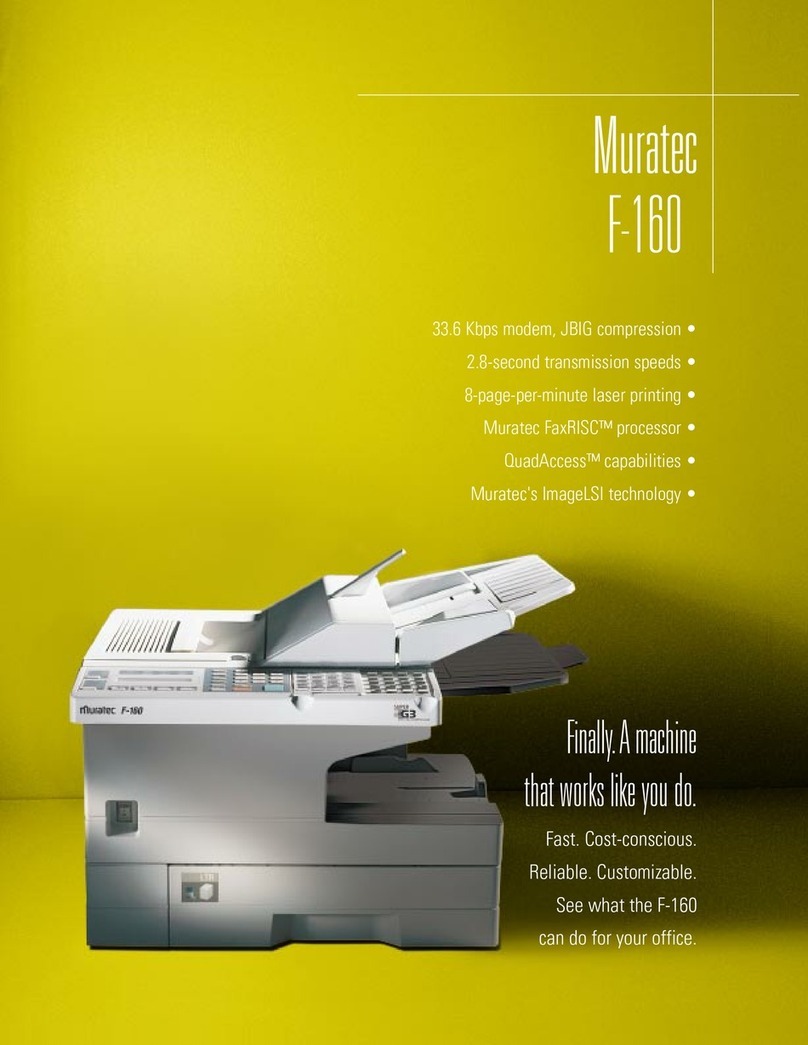
Muratec F-360 Installation and operation manual

Muratec
F-360
FACSIMILE SYSTEM
FIELD ENGINEERING MANUAL
USA version 1.0
(November 27, 2001)
MURATA MACHINERY, LTD
COMMUNICATION EQUIPMENT DIV.

Safety Information
LED Safety Label
A LED safety label is attached to the outside of the machine as shown below.
Battery Precautions CAUTION
Danger of explosion if battery is incorrectly replaced.
Replace only with the same or equivalent type recommended by the manufacturer.
Dispose of used batteries according to the manufacturer’s instructions.
Important: Muratec does not recommend the independent replacement of this battery.
The battery is sold only as a component part of the main control PCB and Battery
PCB, and cannot be purchased separately from Muratec.
Il y a un danger d'explosion s'il y a un remplacement incorrect de la batterie.
Remplacer uniquement avec une batterie du même type ou d'un type recommandé par le constructeur.
Mettre au rebut les batteries usagées conformement aux instructions du fabricant.
Germany only VORSICHT!
Explosinsgefahr bei unsachgemäßen austausch der batterie.
Ersatz nur durch denselben oder einen vom hersteller empfohlenen ähnlichen typ. Entsorgung
gebrauchter batterien nach angaben des herstellers.
Denmark only ADVARSEL!
Lithiumbatteri - Eksplosionsfare ved fejlagtig håndtering
Udskiftning må kun ske med batteri af samme fabrikat og type.
Levér det brugte batteri tilbage til leverandøren.
Norway only ADVARSEL
Eksplosjonsfare ved feilaktig skifte av batteri.
Benytt samme batteritype eller en tilsvarende type anbefalt av apparatfabrikanten.
Brukte batterier kasseres i henhold til fabrikantens instruksjoner.

Sweden only VARNING
Explosionsfara vid felaktigt batteribyte.
Använd samma batterityp eller en ekvivalent typ som rekommenderas av apparattillverkaren.
Kassera använt batteri enligt fabrikantens instruktion.
Finland only VAROlTUS
Paristo voi räjähtää, los se on virheellisesti asennettu.
Vaihda paristo ainoastaan laitevalmistajan suosittelemaan tyyppiin.
HävitäKäytetty paristo valmistajan ohjeiden mukaisesti.
ALL Areas CAUTION
“Replace only with the same or equivalent type recommended by the manufacturer.
Dispose of used IC Package according to the manufacturer’s instructions.”
Germany only VORSICHT!
⇒”Austausch nur durch denselben oder einen vom Hersteller empfohlenen,
gleichwertigen typ. Entsorgung gebrauchter Batterien nach Angaben des Herstellers.

i
Table of Contents
Safety Information..........................................................................................................................................1
LED Safety Label.......................................................................................................................................1
Battery Precautions ...................................................................................................................................1
Section 1 General Description
1.1 Product Description ..............................................................................................................................1-1
1.2 Specifications........................................................................................................................................1-2
Section2 Machine Composition
2.1 F-360, PB5000 Interconnect Block Diagram ........................................................................................2-1
F-320, PB3500 Interconnect Block Diagram ........................................................................................2-2
2.2 Memory back up ...................................................................................................................................2-3
2.3 Network Control Unit (NCU) PCB.........................................................................................................2-4
2.4 Power Supply Unit (PSU)......................................................................................................................2-5
2.5 Sensors.................................................................................................................................................2-6
2.5.1 Sensor Locations...........................................................................................................................2-6
2.5.2 Sensor Descriptions ......................................................................................................................2-6
2.6 Document Scanning Sequence ............................................................................................................2-7
2.6.1 Document Detection......................................................................................................................2-7
2.6.2 Document Separation....................................................................................................................2-7
2.6.3 Document Transport .....................................................................................................................2-7
2.6.4 Document Scanning ......................................................................................................................2-7
2.6.5 Document Discharge.....................................................................................................................2-8
2.7 Recording Section ................................................................................................................................2-9
2.7.1 Recording Paper Feed Path..........................................................................................................2-9
2.8 Image Processing.................................................................................................................................2-9
2.8.1 Drum Charge...............................................................................................................................2-10
2.8.2 Drum Exposure ...........................................................................................................................2-10
2.8.3 Development ...............................................................................................................................2-10
2.8.4 Image Transfer............................................................................................................................2-11
2.8.5 Residual toner distribute..............................................................................................................2-11
2.8.6 Fusing..........................................................................................................................................2-12
Section3 Adjustment Procedures
3.1 Field Service Program Modes ..............................................................................................................3-1
3.2 Machine Parameter Settings ................................................................................................................3-2
3.2.1 Setting the Machine Parameters ...................................................................................................3-2
3.2.2 Clearing the Machine Parameters.................................................................................................3-2
3.3 Memory Switch Adjustment ................................................................................................................3-26
3.3.1 Setting the Memory Switches......................................................................................................3-26
3.3.2 Clearing the Memory Switch........................................................................................................3-26
3.4 Unique Switch Adjustment..................................................................................................................3-54
3.4.1 Setting the Unique Switches........................................................................................................3-54
3.4.2 Clearing the Unique Switch .........................................................................................................3-54
3.5 Setting Individual Autodialer Attributes ...............................................................................................3-98
Attribute 1 - Individual Autodialer Setting (Equivalent to Memory Switch 10).......................................3-98
Attribute 2 - Individual Autodialer Setting (Equivalent to Memory Switch 11).......................................3-99
Attribute 3 - Individual Autodialer Setting (Equivalent to Memory Switch 12).......................................3-99
Attribute 4 - Individual Autodialer Setting (Equivalent to Memory Switch 13).....................................3-100
3.6 Clear Programmed Data / User Settings ..........................................................................................3-101
3.7 All RAM Clear ...................................................................................................................................3-101
3.8 Printer maintenance mode ...............................................................................................................3-102
3.9 Monitor speaker On/Off ....................................................................................................................3-103
3.10 Test Modes .....................................................................................................................................3-104
3.10.1 Life Monitor..............................................................................................................................3-105

ii
3.10.2 Printer Test..............................................................................................................................3-106
3.10.3 Feeder test ..............................................................................................................................3-107
3.10.4 Port Status...............................................................................................................................3-107
3.10.5 Set Background Level .............................................................................................................3-107
3.11 Print Parameter list .........................................................................................................................3-108
3.12 Factory Test Functions ...................................................................................................................3-108
3.12.1 Function List ............................................................................................................................3-108
3.12.2 LED Test .................................................................................................................................3-108
3.12.3 LCD Test .................................................................................................................................3-109
3.12.4 Key Panel Test ........................................................................................................................3-109
3.12.5 SRAM Check...........................................................................................................................3-110
3.12.6 DRAM Check...........................................................................................................................3-111
3.12.7 RTC(real time clock) Test .......................................................................................................3-111
3.12.8 RS-232C Test..........................................................................................................................3-112
3.13 Line Tests .......................................................................................................................................3-113
3.13.1 Relay Test ...............................................................................................................................3-113
3.13.2 Tonal Signal Test ....................................................................................................................3-114
3.13.3 DTMF Output Test ..................................................................................................................3-115
3.14 Consumable order sheet ................................................................................................................3-117
3.14.1 Set consumable order sheet ...................................................................................................3-117
3.14.2 Print consumable order sheet .................................................................................................3-118
3.14.3 Clear consumable order sheet ................................................................................................3-119
3.15 DRAM Clear....................................................................................................................................3-119
3.16 Clear Life Monitor ...........................................................................................................................3-119
3.17 Set life monitor passcode ...............................................................................................................3-120
3.18 Life monitor maintenance ...............................................................................................................3-121
3.19 Sensor input test.............................................................................................................................3-123
3.20 Printer diagnostic mode..................................................................................................................3-124
3.21 Internet fax service mode (TBD!) ...................................................................................................3-125
3.21.1 All clear information from the optional Internet fax board.......................................................3-125
3.21.2 Clear the Administrator’s information ......................................................................................3-126
3.21.3 Display the Checksum of the Internet fax board .....................................................................3-126
3.21.4 Send e-mail user registration ..................................................................................................3-127
3.22 Update the software........................................................................................................................3-128
3.22.1 Update the software by Flash ROM writer ..............................................................................3-128
3.22.2 Update the software by polling to the host machine................................................................3-130
3.22.3 Setting of the Flash ROM host to allow polling the software from the client fax machine.....3-130
Section4 Troubleshooting Procedures
4.1 Troubleshooting Outline........................................................................................................................4-1
4.2 Recording Paper Jam ...........................................................................................................................4-2
4.3 Document Feeder Jam .........................................................................................................................4-2
4.4 Document Feeder Multi-feeding or Skew .............................................................................................4-3
4.5 Transmit Error.......................................................................................................................................4-3
4.6 Transmit Black Lines ............................................................................................................................4-3
4.7 Cannot transmit ....................................................................................................................................4-3
4.8 Receive Errors......................................................................................................................................4-4
4.9 Will not Auto-Answer ............................................................................................................................4-4
4.10 Clearing Jammed Paper.....................................................................................................................4-4
If a printout jams inside your machine....................................................................................................4-5

iii
4.11. The Image Quality Problems .............................................................................................................4-8
4.11.1 Blank pages.................................................................................................................................4-8
4.11.2 Black pages.................................................................................................................................4-8
4.11.3 Printout too light...........................................................................................................................4-9
4.11.4 Printout too dark ..........................................................................................................................4-9
4.11.5 Blurred background .....................................................................................................................4-9
4.11.6 Uneven print density..................................................................................................................4-10
4.11.7 Irregularities...............................................................................................................................4-10
4.11.8 White (Black) Line .....................................................................................................................4-11
4.11.9 Toner Smudges.........................................................................................................................4-11
4.12 LCD Error Messages ........................................................................................................................4-12
LCD error messages (Alphabetic list) ..................................................................................................4-12
4.13 Error Codes ......................................................................................................................................4-16
Dialing errors ........................................................................................................................................4-16
Reception errors...................................................................................................................................4-16
Transmission errors .............................................................................................................................4-17
Communication Error Messages..........................................................................................................4-18
4.14 Service Call Error..............................................................................................................................4-19
4.14.1 Call For Service.........................................................................................................................4-19
4.14.2 Please Call Service ...................................................................................................................4-19
4.15 Cleaning the Unit ..............................................................................................................................4-22
Curing frequent jams in the ADF ..........................................................................................................4-22
Cleaning the LED print head ................................................................................................................4-23
Section5 Maintenance & Adjustment
5.1 Maintenance schedule..........................................................................................................................5-2
5.2 Re/Disassemble ...................................................................................................................................5-3
5.2.1 Covers ...........................................................................................................................................5-5
5.2.2 PCBs ...........................................................................................................................................5-13
5.2.3 Sensors .......................................................................................................................................5-20
5.2.4 Scanning section .........................................................................................................................5-21
5.2.5 Printer section .............................................................................................................................5-33
5.3 Adjustment..........................................................................................................................................5-45
5.3.1 Adjustment of Retard roller pressure ..........................................................................................5-45
Section 6 Options
6.1 Memory Upgrade ..................................................................................................................................6-1
Packaging contents: ...............................................................................................................................6-1
Installation ..............................................................................................................................................6-1
6.2 Attaching an optional handset ..............................................................................................................6-3
Packaging contents: ...............................................................................................................................6-3
Installation ..............................................................................................................................................6-3
6.3 RS-232C interface ................................................................................................................................6-4
Packaging contents: ...............................................................................................................................6-4
Installation ..............................................................................................................................................6-5
RS-232C interface cable ........................................................................................................................6-6
Signal direction .......................................................................................................................................6-7
RS-232C Test.........................................................................................................................................6-7
6.4 Page Counter........................................................................................................................................6-8
Packaging contents: ...............................................................................................................................6-8
Installation ..............................................................................................................................................6-8
6.5 AL-200 ..................................................................................................................................................6-9
Packaging contents: ...............................................................................................................................6-9
Installation (Attach the AL-200 only).......................................................................................................6-9
Installation (Attach the AL-200 to the machine which is installed the OP-150.) ...................................6-13
Installation (Attach the AL-200 to the machine which is installed the OP-150 and IF-300.).................6-18
6.6 OP-100/NP-200 ..................................................................................................................................6-21
Packaging contents: .............................................................................................................................6-21
Installing the Printer control PCB (and NIC).........................................................................................6-22


iv
6.7 Attaching the 2-Bin tray ......................................................................................................................6-26
Packaging contents: .............................................................................................................................6-26
Installation ............................................................................................................................................6-26
6.8 Second paper cassette.......................................................................................................................6-30
Packaging contents: .............................................................................................................................6-30
Installation ............................................................................................................................................6-30
Setting of the Paper Size......................................................................................................................6-33
6.9 IF-300 .................................................................................................................................................6-34
Packaging contents: .............................................................................................................................6-34
Installing the Internet Fax board (Attaching the IF-300 only) ...............................................................6-35
Installing the Internet Fax board (Attach the IF-300 to the machine which is installed the OP-150.)...6-38
Installing the Internet Fax board (Attach the IF-300 to the machine which is installed the OP-150 and
AL-200.)................................................................................................................................................6-42
Section 7 Options
F-320 Addendum
Soft Switches Unique to the F-320
2001 by Muratec.

1-1
Section 1
General Description
1.1 Product Description
The F-360 and F-320 are Multi-function products with flat bed scanners and Group 3 and V.34 HDX
modems. Documents are printed on plain paper using dry electrophotographic printing.

1-2
1.2 Specifications
Item F-360 F-320
Type Desktop type
Telephone network PSTN (Public Switched Telephone Network) or equivalent.
Compatibility ITU-T T.4 and T.30
Coding method ITU-T-standard MH, MR, MMR and JBIG
Modem speed 33600, 31200, 28800, 26400, 24000, 21600, 19200, 16800, 14400,
12000, 9600, 7200, 4800 and 2400 bps
Dual Access Allows up to three simultaneous operations.
LCD 4 lines, 30 characters per line.
Language: English, French,
Spanish, German
2 lines, 20 characters per line.
Language: English, French,
Spanish, German
Scanning method Flatbed CCD
Recording method Dry electrophotographic (LED) printer
Acceptable document size <Single sheet>
Max: 280 (W) ×900 (L) mm
11.0 (W) ×35.4 (L) inches
Min: 120 (W) ×100 (L) mm
4.7 (W) ×3.9 (L) inches
Paper weight: 30.2 – 104.7 g/m2
<Two or more sheets>
Max: 257 (W) ×364 (L) mm
10.1 (W) ×14.3 (L) inches
Min: 216 (W) ×139.5 (L) mm
8.5 (W) ×5.5 (L) inches
Paper weight: 52.3 – 80.0 g/m2
<Single sheet>
Max: 280 (W) ×900 (L) mm
11.0 (W) ×35.4 (L) inches
Min: 120 (W) ×100 (L) mm
4.7 (W) ×3.9 (L) inches
Paper weight: 30.2 – 104.7 g/m2
<Two or more sheets>
Max: 216 (W) ×356 (L) mm
8.5 (W) ×14.0 (L) inches
Min: 216 (W) ×139.5 (L) mm
8.5 (W) ×5.5 (L) inches
Paper weight: 52.3 – 80.0 g/m2
ADF capacity B4: 50 sheets
Letter/A4: 80 sheets
(Paper weight: 52.3 – 80.0 g/m2)
Letter/A4: 80 sheets
(Paper weight: 52.3 – 80.0 g/m2)
<Transmission>
horizontal ×vertical
(in dots/inch ×in lines/inch)
Normal: 203 ×98
Fine: 203 ×196
Super fine: 406 ×392*
Grayscale: 203 ×196 (Memory Tx)
406 ×392*(Real time Tx)
*: In the case that the remote fax has
the ability of “406 ×392”.
If not, the superfine resolution is
“203 ×392“, and the grayscale
resolution in real time transmission is
“203 ×196”.
<Transmission>
horizontal ×vertical
(in dots/inch ×in lines/inch)
Normal: 203 ×98
Fine: 203 ×196
Super fine: 203 ×392
Grayscale: 203 ×196
Scanning resolution
<Copy>
Normal: 300 ×200
Fine: 300 ×300
Super fine: 400 ×400
Grayscale: 300 ×300
<Copy>
Normal: 300 ×200
Fine: 300 ×300
Super fine: 300 ×400
Grayscale: 300 ×300

1-3
Item F-360 F-320
Effective Scanning width <Fax>
B4: 252 mm/9.92 in
Letter/A4: 208 mm/8.19 in
<Copy>
B4: 257 mm/10.12 in
Letter: 216 mm/8.5 in
A4: 210 mm/8.26 in
<Fax>
B4: N/A
Letter/A4: 208 mm/8.19 in
<Copy>
B4: N/A
Letter: 216 mm/8.5 in
A4: 210 mm/8.26 in
Transmission speed Under 3 seconds (Super G3)
Based on transmission of ITU-T Test Document 1 to a Muratec fax
machine.
Document Memory Standard:
8 MB (650 pages)
Upgrade option:
plus 8MB (680 pages)
plus 24MB (2040 pages)
Standard:
8 MB (650 pages)
Upgrade option:
plus 8MB (680 pages)
(Total memory capacity :Backup time)
8 MB: 72 hours
16 MB: 36 hours
32 MB: 18 hours
(Total memory capacity :Backup time)
8 MB: 72 hours
16 MB: 36 hours
Document memory
backup
The backup battery requires about 24 hours to reach full charge after
power to the fax unit is restored.
Printing resolution 600 dpi
Printing speed 17 ppm (When loading Letter-
sized paper from 1st paper
cassette.)
12 ppm (When loading Letter-
sized paper from 1st paper
cassette.)
Toner yield Approx. 15,000 pages (Letter, 4 % document coverage at 2-page
interval printing.)
Drum yield Approx. 16,000 pages (Letter, 4 % document coverage at 2-page
interval printing.)
Print margin Leading edge, Trailing edge, Left edge and Right edge:
0.12 ± 0.08 inch (3 ± 2 mm)
Acceptable recording
paper size
<Paper cassette>
Plain paper: Letter(SEF), Legal(SEF), Half letter(LEF),
Paper weight: 60 – 90g/m2, 20 – 24 lb
<Bypass tray>
Plain paper: Letter(SEF), Legal(SEF), Half letter(LEF),
A4(SEF), A5(LEF)(SEF), A6(SEF), F4(SEF),
Executive(SEF)
Envelopes: DL(SEF), COM10(SEF), Monarch(SEF)
Postcard: 100 mm (W) ×148 mm (L) (3.9 ×5.8 inch)
Transparency: Letter (SEF)
Custom size: (3.8 – 8.5 inch) ×(5.5 – 14 inch) (Width ×Length)
*The paper sizes except Letter, Legal, and Half-letter are available only
when the optional printer controller kit has been installed.
Recording paper capacity <Paper cassette>
1st cassette: 500 sheets
2nd cassette (option): 500 sheets
<Bypass tray>
Plain paper: 50 sheet
Postcard/Transparency:20 sheets
Envelopes 1 sheet

1-4
Item F-360 F-320
Receive paper tray
capacity
Approx. 300 sheets
with optional 2-bin tray: Upper approx. 100, Lower approx. 150 sheets
Printouts exit Face up
Environmental conditions Ambient temperature: 10 °C to 32 °C (50 °F to 89.6 °F)
Relative humidity: 20 % to 80 % with no condensation
Power requirements 120 VAC ± 10 %; 50/60 Hz
Power consumption Sleep mode: 8.7 W
Standby: 110 Wh
Memory Transmission: 31 W
Reception: 960 W
Copying: 920 W
Maximum: 1030 W
Sleep mode: 9.6 W
Standby: 66 W
Memory Transmission: 38 W
Reception: 880 W
Copying: 890 W
Maximum: 920 W
Dimensions 2WAY: 18.3 (W) ×20.8 (D) ×14.2 (H) inch
3WAY: 18.3 (W) ×20.8 (D) ×18.4 (H) inch
When the Extension paper tray and Bypass tray are retracted.
Weight Approx. 19.8 Kg (43.7 lbs) without consumables and trays.
Optional products •Optional telephone handset
•Second paper cassette
•Expansion Memory
•2-bin tray
•Printer controller kit (OP-150)
•Network printer interface card (NP-200)
•Second phone line kit (AL-250)
•Internet fax kit (IF-300)
•RS-232C interface kit
•Mechanical page counter

2-1
Section2
Machine Composition 2.1 F-360, Interconnect Block Diagram

2-2

2-3
F-320 Interconnect Block Diagram

2-4
2.2 Memory back up
F-360 F-320
SDRAM JP3 on the main control PCB JP2 on the main control PCB
SRAM JP4 on the main control PCB JP5 on the main control PCB
SRAM ---T h e S R A M , w h i c h i s b a c k e d - u p b y a l i t h i u m b a t t e r y , i s u s e d t o s t o r e u s e r p r o g r a m m e d
information.
SDRAM ---T h e S D R A M i s u s e d f o r b u f f e r , w h i c h i s a l s o b a c k e d - u p b y a b a t t e r y , i s u s e d t o s t o r e
memorized documents.
NOTE: F-360: JP3, JP4 should remain in the “ON” position at all times.
F-320: JP2, JP5 should remain in the “ON” position at all times.
For F-360:
Jumper JP3 on the main control PCB is used for battery back up of the SDRAM. Removing JP3 will
initialize the SDRAM. If the power is turned off, the battery will provide up to72 hours (8MB) of back up
when fully charged.
Jumper JP4 on the main control PCB is used for battery back up of the SRAM. All user programmed data
and internal memory switch settings are held in SRAM. Removing JP4 will initialize the SRAM.
If the power is turned off, the battery will provide up to five years of back up when fully charged.
For F-320:
Jumper JP2 on the main control PCB is used for battery back up of the SDRAM. Removing JP2 will
initialize the SDRAM. If the power is turned off, the battery will provide up to 72 hours (8MB) of back up
when fully charged.
Jumper JP5 on the main control PCB is used for battery back up of the SRAM. All user programmed data
and internal memory switch settings are held in SRAM. Removing JP5 will initialize the SRAM.
If the power is turned off, the battery will provide up to five years of back up when fully charged.

2-5
2.3 Network Control Unit (NCU) PCB
The NCU PCB provides the connection to the telephone line. It consists of the interface circuit, dial pulse
generator, ring signal detector and telephone control circuit.
TXA
TONE
OH
CI
RXA
GENERATOR
NCU PCB
MODULAR
PCB
+24V, +5V, GND
+12V, -12V
S
DP
NCU PCB block diagram
Major components of the NCU
CML relay
Connects the telephone line to the phone or fax.
S relay
Used to send dial pulse signals in pulse dialing.
OH & Tone detector
Detects the On-hook condition of the second telephone unit.
H relay
Connects the Tel1 and Tel2 line to the fax machine.
24V generator
Supplies 24 volts to the relays.
Ring signal detector
A photo coupler that detects an incoming ring.

2-6
2.4 Power Supply Unit (PSU)
The power supply unit receives the input line voltage and converts it to an output voltages of +5 VDC, +24
VDC, +12 VDC, and -12 VDC.
The heater circuit controls output voltage to the fuser heater according to instructions received from the
heater control circuit.
If an over-current is sensed in the secondary circuit, power is interrupted.
Power supply unit block diagram
The power supply unit has two output connectors.
The following table shows the connector outputs:
CN1 -- to the Fuser Heater
Pin No. 1 2
Output L N
CN2 -- to the Main Control PCB.
Pin No. 1 2 3 4 5 6 7 8 9 10 11 12 13
Output
voltage –12V +12V +5V HC1 +24V GND

2-7
2.5 Sensors
2.5.1 Sensor Locations
The following illustration shows the relative positions of the machine’s sensors.
COVER SW
DRUM SW
PSS
CASOP
HPES
PES
JCOP
TOS
PDS
TXIL
DS2 DS1
DB4
TCS
2.5.2 Sensor Descriptions
The following table gives a brief description of each sensor and it's function.
Code Name Detects Sensor Type
TXIL
(ADF)
Interlock switch (ADF) Scanner cover open or close Micro switch
DS1 Document sensor 1 Presence of document in feeder Photo interrupter
DS2 Document sensor 2 Leading and trailing edge of document Mechanical Switch
DB4 B4 size sensor B4 sized document. Photo interrupter
TCS Top cover sensor Top cover opened or closed Photo interrupter
PSS Paper set sensor Detects paper feeding out of
cassette/tray.
Photo interrupter
PDS Paper discharge sensor Detects paper at paper exit. Photo interrupter
PES Paper empty sensor Detects presence of recording paper in
the 1st paper cassette
Photo interrupter
HPES Hand paper empty
sensor
Detects presence of recording paper in
the bypass tray
Photo interrupter
TOS Toner sensor Detects toner empty and toner
cartridge set.
Photo interrupter
CASOP Paper cassette open
sensor
Detects the 1st paper cassette open or
closed
Photo interrupter
JCOP Jam access cover (side
cover) open sensor
Detects the side cover open or closed Photo interrupter
COVER-
SW
Cover switch Detects printer cover open or closed Micro switch

2-8
2.6 Document Scanning Sequence
2.6.1 Document Detection
When a document is placed into the document feeder, Document Sensor 1 (DS1) is activated and you will
hear a short beep.
2.6.2 Document Separation
Document separation is the process that allows a multi-page document to go through the scanner one
page at a time. Separation occurs through the action of the separator roller and retard roller.
As shows in the illustrations, documents in the feeder are pressed against the separator roller. The bottom
document is separated from the remaining documents by the friction of the retard roller.
2.6.3 Document Transport
Following document separation, the feed roller causes the document to advance. As it advances, the
leading edge of the document activates the Document Sensor 2 (DS2) sensor. Once DS2 is activated, the
feed roller continues to rotate until the document reaches the scan wait position. The machine uses the
distance from DS2 to the scan wait position and the diameter of the feed roller to determine the number of
rotations necessary to feed the document to the scan wait position.
2.6.4 Document Scanning
When the document reaches the scan wait position, the machine waits for the next command. It will start
scanning the document when the START key is pressed. The light from the scanner lamp strikes the face
of the document and is reflected into the lens through mirrors A, B, and C. In case the light intensity along
the length of the scanner lamp is not uniform, shading compensation is provided to ensure even
illumination.
As the reflected image passes through the lens, it is focused onto the charged-coupled device (CCD). The
CCD then converts the dark and light areas of the image into electrical impulses, or image data. Circuits
on the main control PCB encode the image data and send it to the modem where it is modulated. The
modulated signal is then placed onto the telephone line by the NCU.

2-9
When DS2 detects the trailing edge of the document, the image signal output is turned off. The scanner
continues to remain active for a few more seconds in case there is another document to follow.
Retard roller
Press roller A
Exit roller
Pick up roller
Separator roller
Press roller A
Feed roller B
Feed roller A
Lamp
Mirror A Mirror B
Mirror C
CCD
Press roller A
DS2
DS1
Document scanning in ADF
2.6.5 Document Discharge
The scanned document is discharged through the document exit by the exit roller
Other manuals for F-360
3
Table of contents
Other Muratec Fax Machine manuals

Muratec
Muratec M-1020 User manual

Muratec
Muratec F-56 User manual

Muratec
Muratec F-320 User manual

Muratec
Muratec M-3000 User manual

Muratec
Muratec F-114 Series User manual

Muratec
Muratec F-73 User manual

Muratec
Muratec M-910 User manual

Muratec
Muratec MFX-1500E User manual

Muratec
Muratec M-620 User manual

Muratec
Muratec M-4700 User manual

Muratec
Muratec F-520 User manual

Muratec
Muratec F-114 Series User manual

Muratec
Muratec F-85 User manual

Muratec
Muratec F-65 User manual

Muratec
Muratec Office Bridge IF-200 User manual

Muratec
Muratec F-160 User manual

Muratec
Muratec M-1020 User manual

Muratec
Muratec F-560 User manual

Muratec
Muratec F-100 User manual

Muratec
Muratec F-360 User manual