i
SAFETY PRECAUTION
• Keepawayfromwaterormoistureanddustyareas.
• Neverstoreinhotandverycoldareas.
• Onlyuseattachments/accessoriesspecifiedbythemanufacturer.
• Noobjectsfilledwithliquids,suchasvases,shallbeplacedonthe
Scanner.
• AvoiddustcontaminationwhentheScannerisnotinuse.
• Whenleftunusedforalongperiodoftime,theunitshouldbe
disconnectedfromthepowercable.
• AvoidenvironmentswheretheScannerwouldbeexposedtodirect
sunlight(oranyothersourceofexcessiveheat)forlongperiodsoftime.
• ProtecttheScannerfrompotentialliquidspillssuchassoda,coffee,
tea,andetc.
• Becarefullytokeepitwithoutdroppingitorstrongimpact.
• OperatetheScanneronalevel,well-groundedworksurface,freeof
excessivevibration.
• Don’topentheScannercasealonewithouttechnicalsupportbecause
thereisdangerofelectricalshock.
• Positiontheequipmentnearapoweroutletwhereitcanbeeasily
accessedwhenpluggedin.
ii
SYSTEM REQUIREMENTS
Processor PC:IntelPentiumIVorfaster
Mac:IntelCoreDuoorfaster
SupportOS PC:WindowsXP(ServicePack3)/Vista/7/8/10
Mac:MacOSX10.7to10.11andabove
ColorDisplay 1024x768resolutionorabove
RAM 1GBRAM(2GBrecommended)
FreeHardDrive
Space
PC:600MB
Mac:100MB
Drive CDorDVD-ROMDriveforsoftwareinstallation
Interface AvailableUSBport
iii
SPECIFICATIONS
Model A3 1200HS
ScanningElement ContactImageSensor(CIS)
LightSource Three-color(RGB)LEDs
ScanMode
Color:48-bit,24-bit
Gray:16-bit,8-bit
Lineart:1-bit
ScanArea(Max.) 297mmx420mm(11.7”x16.5”)
OpticalResolution 1200dpix1200dpi
EnhancedResolution 9600dpix9600dpi
Interface Hi-SpeedUSB2.0
PowerConsumption 12VDC,2A,24W(Input:100~120VACor
200~240VAC,50~60Hz)
OperationTemperature
andHumidity 10°C-35°C(50°F-95°F);10%to85%
Dimension(LxWxH) 555mmx383mmx88mm(21.9"x15.1"x3.5")
Weight 4.3kgs(9.48lbs)
iv
BUNDLED DRIVERS AND SOFTWARE
[Windows]
1. ScannerDriver-ScannerDriverincludesfollowing:
YOUMUSTFIRSTINSTALLSCANNERDRIVERINORDERTOUSE
THESCANNERONYOURCOMPUTER.
a.TWAINandWIAdriver:itcomeswithTWAINinterfacetouse
theScannerfromwithinanyWIAorTWAIN-compliantgraphics
softwareapplicationssuchasMediaImpression,Photoshop.
b.PanelV2.0:thissoftwareapplicationallowsyoutoeasilyscan
withinthisapplication.c.
c.Helpfiles:ThisincludesdetailedinstructionsofPanelV2.0andof
theTWAINinterface.
e.CleanCalibration:Runthistooltoclearthecalibrationdataleftfrom
thepreviousscanner,whenyouuseanothersamemodelscanner
onthesamecomputerwithapreviousdriver.
2. ArcSoftMediaImpression-thisTWAIN-compliantapplicationenables
scanningviatheTWAINinterface.Fordetailedinformationofthis
application,seethe“Help”fileintegratedwithinthisapplication.
3. ABBYYFineReaderSprint-thisapplicationconvertsscannedtextinto
searchabletextwhenusingthePDFfunction.Fordetailedinformation
ofthisapplication,seethe“Help”fileintegratedwithinthisapplication.
4. AdobeAcrobatReader-thisapplicationopensthescannedimagethat
isconvertedintoaPDFformatusingthePDFfunction.
[Mac]
1. ImageAquire-thisapplicationisusedtoscanfromtheScannerwithin
theTWAINinterface.FordetailedinstructionsofImageAquire,seethe
PDFfileinsidetheImageAquirefolder.
2. ScannerDriver-itcomeswithTWAINinterfacetousetheScanner
fromwithinanyTWAIN-compliantgraphicsapplicationsuchas
Photoshop.RefertothePDFfileinsidetheImageAquirefolderfor
detailedinstructionsofTWAINinterface.
3. ScanMust-thisapplicationallowsyoutoeasilyscanwithinthis
software.ForthedetailedinstructionsofScanMust,seethe“Help”file
integratedwithinthissoftware.
1
PACKAGE CONTENTS
Thispackageincludesthefollowingitems:
Scanner PowerAdapter USBCable
QuickStart
Guide
InstallationCD QuickStartGuide
2
NAMES OF SCANNER PARTS
Rear Side
FlatbedGlass
DCINPort
USBPort
ScannerLid
3
INSTALLING DRIVERS AND SOFTWARE
PLEASECOMPLETETHEDRIVERSANDSOFTWAREINSTALLATION
BEFORECONNECTINGTHESCANNER.DONOTCONNECTTHEUSBCABLE
TOTHESCANNERORCOMPUTERATTHISMOMENT.
[Windows]
1. InserttheInstallationCDintotheCDorDVD-ROMdriveofthe
computer.TheCDwillrunautomatically,andthentheinstallation
windowappearsonthescreenasfollowing:
NOTE IftheCDdoesnotrunautomatically,locatethedriveon
thecomputeranddoubleclickon"AUTORUN.exe"file.
2. Click"ScannerDriver"fromtheinstallationwindow.
3. Selectapreferredlanguagefromthe"ChooseSetupLanguage"list.
4. Click"Next"whentheWelcomescreenappears,andthenfollowon-
screeninstructionstocompleteinstallation.
5. Returntotheinstallationwindowtoinstallothersoftwaretoyour
computertoenablecertainfunctions.
[Mac]
1. InserttheInstallationCDintotheCDorDVD-ROMdriveoftheMac.
The Autorun disc icon appears on your desktop.
2. DoubleclickontheAutorundiscicon.
The content of the disc is displayed in the Autorun folder as following:
3. Doubleclick"ScannerDriver"folder,then"A31200HSScanner.pkg"to
starttheinstallationprocess.
Follow on screen instructions to complete the installation procedures.
4. ReturntotheAutorunfolder.Doubleclickthe"ScanMust"folder,and
then"ScanMustInstaller.pkg"tostarttheinstallationprocess.
Follow on screen instructions to complete the installation procedures.
5. ReturntotheAutorunfolder.Doubleclickthe“ImageAcquire”folder,
andthen"ImageAcquire.pkg"icontostarttheinstallationprocess.
Follow on screen instructions to complete the installation procedures.
How to Uninstall the Drivers and Software
Whenyouneedtoremovethescannerdriversandsoftwarefromyour
computer,uninstallasfollowing:
1. UnplugtheUSBCableconnectingfromthecomputer.
2. Exitallrunningapplications.
3. ForWindows,gotothe“Start”menu,select“(All)Programs”,
“A31200HS”,andthenclick“Uninstall”.Followtheon-screen
instructionstoremovetheScannerDriver.
ForMac,inserttheInstallationCD,thendoubleclickontheuninstall
iconintheScannerDriverfoldertoremoveit.DragImageAcquireand
ScanMusticonfromthe"Application"foldertoTrash.
4
CONNECTING THE SCANNER
1. ConnectsuppliedPowerAdaptertotheScanner’sDCINport,andplug
theotherendtoapoweroutlet.
The power of the Scanner is now turned on.
2. Withthe
computer
on,connectsuppliedUSBCabletotheScanner’s
USBPortandtheotherendtothecomputer.
NOTE Toturnoffthepower,unplugthePowerAdapterfromthe
poweroutlet.
5
PLACING THE ORIGINALS
1. PlacetheoriginalfacingdownontheFlatbedGlass.
2. AligntheoriginalatthepositionArrowMark.
3. ClosetheScannerLid.
PositionArrow
Mark
How to Remove the Scanner Lid
Ifyouarescanningbooksorotherthickdocuments,youcanremovethe
ScannerLidasfollowingsteps:
1. LifttheScannerLidstraightup.
2. PulltheScannerLidawayfromtheScanner.
3. PlacetheboundoriginalontheFlatbedGlass.
Gently press the bound original from above to make it flat, but do not
press it too hard.
MountingPosts
NOTE
Whenyouarefinishedscanning,replacetheScannerLid
byinsertingthe2MountingPostsintotheholesonthe
Scanner,andthengentlypushingtheScannerLiddown.
(Please turn over the page to continue)
PN:82-239-10030
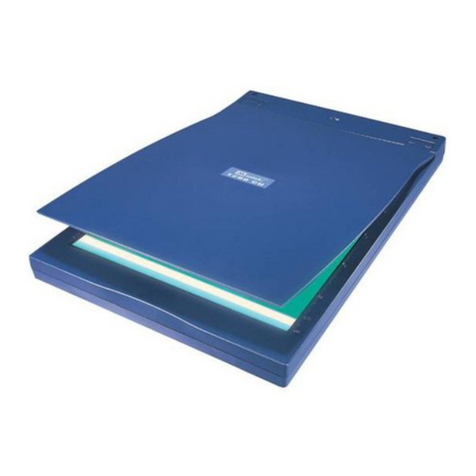
High Speed A3 Flatbed
Scanner
A3 1200HS [ Quick Start Guide ]
