CONTENTS:
TOOLS
Screwdriver
Spanner
Not included.
Product No. M09300PLEASE READ BEFORE ASSEMBLY
6V Chase’s Cruiser
MV SPORTS & LEISURE LTD
35 Tameside Drive • Castle Bromwich
Birmingham • B35 7AG • UK
www.mvsports.com
DISTRIBUTED BY
Important owner’s information
CUSTOMER HELPLINE
MV has taken great care to ensure that this product has reached
you in good condition. Should you have a query, please contact:
where your query will be dealt with promptly.
Alternatively, you can call on 0870 8404255.
06.2016 - ISSUE1
PAGE 1 of 3
This product must be assembled by an adult.
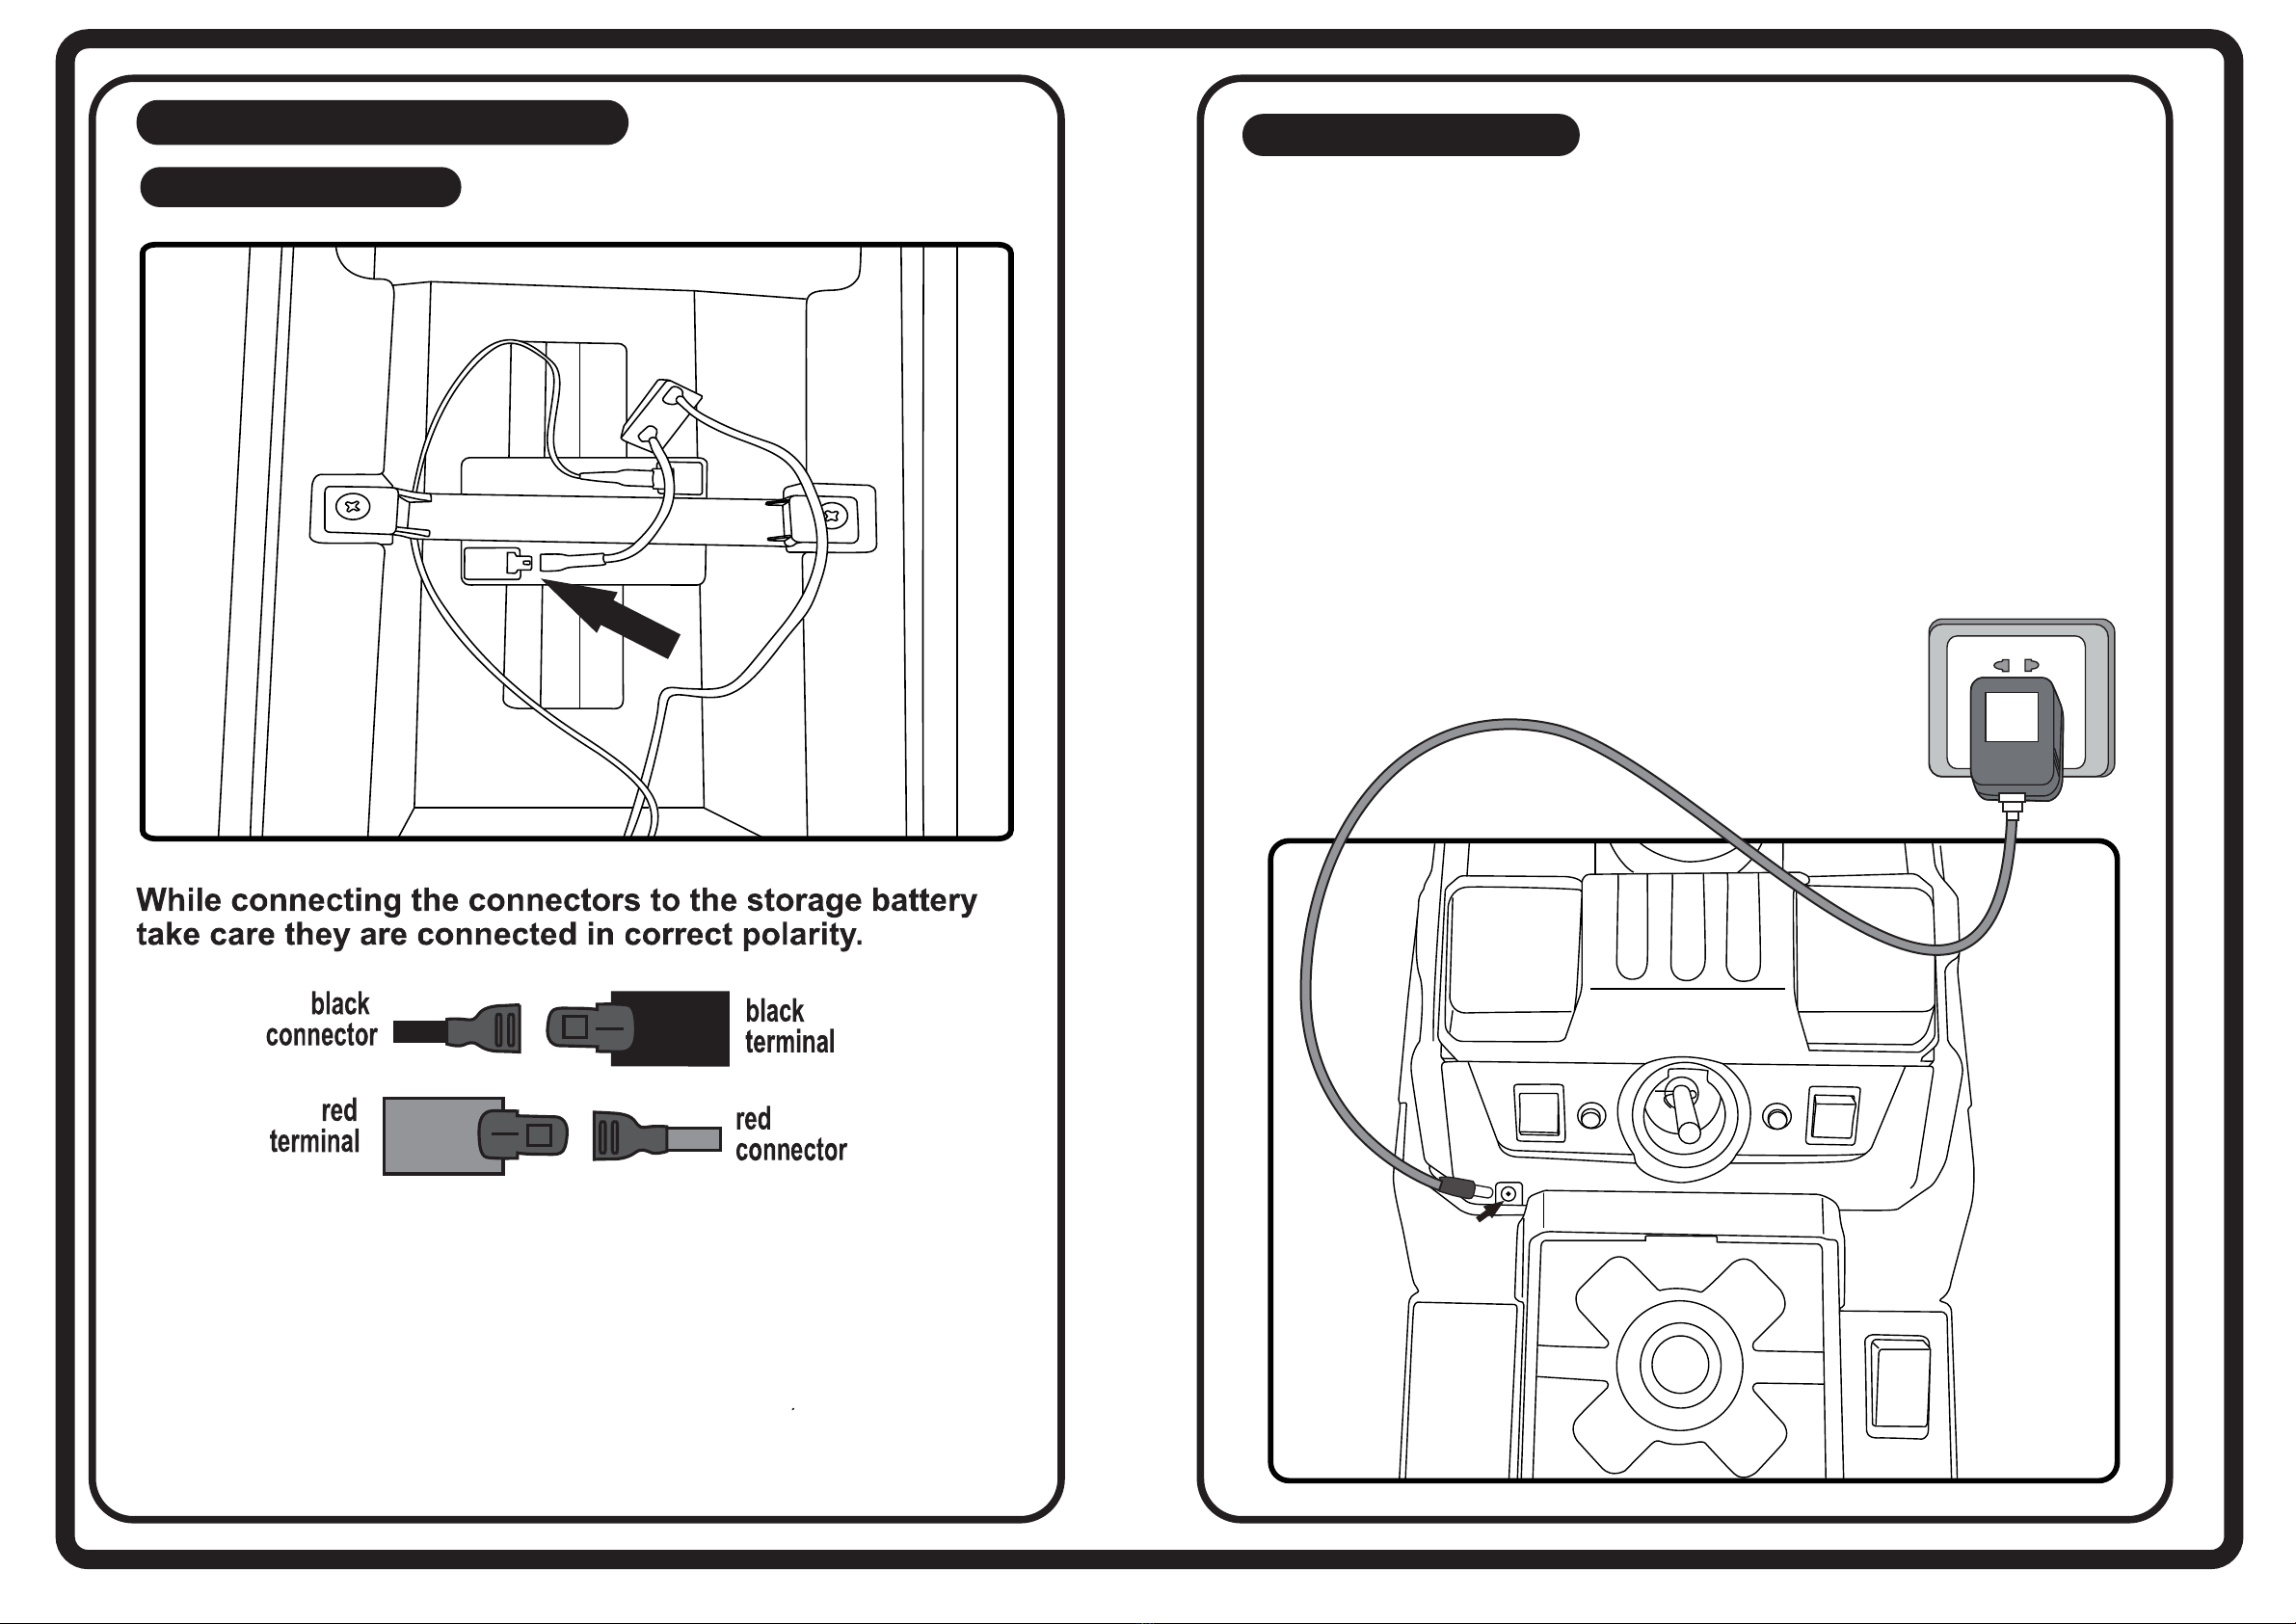
Before the rst use, the rechargeable battery should be connected.
Before the rst use, the battery should be recharged for 8-10 hours.
This charger is not a toy.
The rechargeable battery is only to be charged by an adult.
Do not allow children to play with the charger or to recharge the battery.
Turn the main switch o when charging.
Never charge for more than 15 hours, as this will shorten the battery
lifetime.
It is normal for the charger to feel warm during charging, but if the
charger feels very hot, stop charging, unplug the charger and carefully
check the battery and charger.
Fully charge the ride-on before storing this product for a long period.
Recharge the product every 3 months when not in use to prolong the
battery lifetime.
Examine the charger regularly for damage to cord, plug, enclosure and
other parts. If such damage is found, stop using the charger until it is
repaired.
Replacement rechargeable batteries are available at a small fee, please
contact customer services for prices and availability.
Non-rechargeable batteries are not to be recharged.
Dierent types of batteries or new and used batteries are not to be
mixed.
Only batteries of the same or equivalent type as recommended are to be
used.
Batteries are to be inserted with the correct polarity.
Exhausted batteries are to be removed from the toy.
The supply terminals are not to be short-circuited.
Charging time: 8-10 hours
Estimated “playtime”: 60 minutes
Estimated battery lifetime: 1 year
Number of recharge: up to 200 times
WARNINGS:
Not suitable for children under 3 years. Small part. Choking hazard.
Not for children with a body weight over 20kg. Only one child at a time.
Protective equipment should be worn. Not to be used in trac
MV recommends the use of a protective helmet when using this product.
It is dangerous to use this ride-on in areas other than private grounds.
Only use the toy on at surfaces. For use inside the house, garden or
playground.
Not for use on busy streets, roads or highways.
Never use near swimming pools or other bodies of water.
Never ride in the dark or dimly lit areas. Never ride in hilly areas or on
steep slopes.
Fasten seat belt when using this product
This vehicle was made to operate on dry level ground.
Never change the forward/backward suddenly while the ride-on is in
use. Switch the direction when the ride-on has come to a halt.
Parents should teach the child how to use the product properly.
Adult supervision is required for young children.
This toy should be used with caution since skill is required to avoid fall or
collision causing injury to the user or third parties
Correct assembly of the toy is vital. Incorrect assembly can cause harm to
the child. Please check the product before each use.
Clean the vehicle with damp cloth only and never submerge the vehicle
in water or spray vehicle with water from a hose.
Waste electrical products and batteries should not be disposed of with
household waste.
Separate disposal facilities exist, for your nearest facilities,
see www.recycle-more.com.uk
2
2
2
6
6
6
6
6
6
6
7
7
7
7
1
3
4
4
4
4
5
9
9
When assembling the wheels ensure that the
wheel nut (7) is tightened so that the axle
protrudes slightly through the outer surface
of the wheel nut.
NOTE: Remove the cable tie around the gear
box before assembling the rear wheels
Assembly Diagram
1. Vehicle Body x1 2. Wheel x3 3. Driving Wheel x1 4. Wheel Inner x4 5. Steering Wheel x1
6. 10mm Spacer x7
(Already on wheel axle) (Already on steering wheel)(Already on wheel axle)
7. 8mm Nut x4 8. Charger x1 9 . Machine Screw &
4mm Nut x1