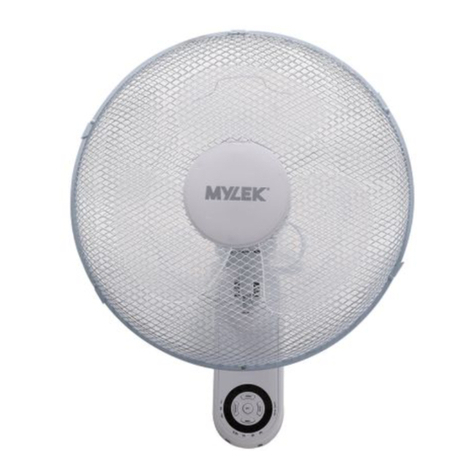
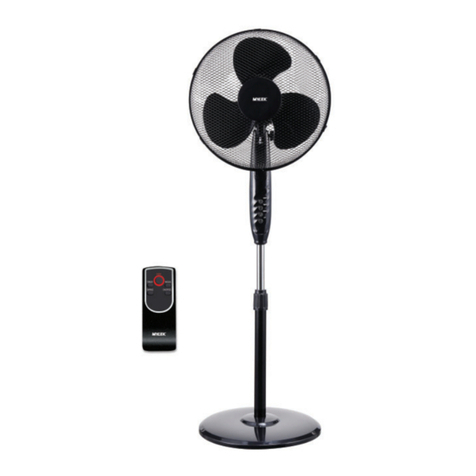
Mylek MY146 User manual

Remote
Tower Fan
Product Code: MY146
USER
INSTRUCTIONS
IMPORTANT
Installers and Users please note:
These instructions and procedures should be
read carefully before installation and/or use
and left with the user of the product for future
reference.

Introduction
General Information
Please read the!entire instruction manual before using the!product
and then save it for future reference. We reserve the!right for any
errors in text or images and any necessary changes made to
technical data. If you have any questions concerning technical
problems please contact our Customer Services on 0800 091 3171.
BEFORE USE
You must inspect the appliance including its cable and plug for any
signs of damage. If the product is damaged, DO NOT use it, and contact
your supplier immediately.!
READ AND SAVE THE FOLLOWING IMPORTANT
SAFETY INSTRUCTIONS
BEFORE USING THIS FAN:
When using electrical appliances, basic precautions should always be followed to reduce the
risk of fire, electric shock, and injury to persons. This includes but is not limited to the following:
!!!!!!!!!!!!!!!!!!!!!!!!!!!!!!!!!!!!!!!!!!!!!!!!!!!!!!!!!!!!!!!!!!!!!!!!!!!!!!!!!!!!!!!!!!!!!!!!!!!!!!!
1. The appliance is to be operated by responsible adults only after reading and understanding
these instructions. Children from 8 years and above and persons with reduced physical, sensory or
mental capabilities shall only switch on/off the appliance provided that it has been placed or in-
stalled in its intended normal operating position and they have been given supervision or instruc-
tion concerning use of the appliance in a safe way and understand the hazards involved. Children
less than 8 years shall not plug in, regulate and/or clean the appliance or perform user mainte-
nance.
2. Cleaning and user maintenance shall not be made by children without supervision.
3. Children should not play with the appliance and if less than 3 years old should be kept away un-
less continuously supervised.
4. Use the fan only as described in this manual. Other use is not recommended and may cause
fire, electric shock or injury to persons.
5. This product ls intended for household use ONLY and not for commercial, industrial or
outdoor use.
6. To protect against electric-shock, do not place the fan in the window or immerse unit or cord in
water, or spray with liquids.
7. This appliance has a polarized plug (one blade is wider than the other). To reduce the risk of
electric shock this plug is intended to fit in a polarized outlet only one way. If the plug does
not fit fully in the outlet, reverse the plug. If it still does not fit contact a qualified electrician.
DO NOT attempt to alter this safety feature.
www.hsdonline.co.uk
Page 1 of 6

8. Turn the fan OFF and unplug from the outlet when not in use, when moving the fan from
one location to another and before cleaning.
9. To disconnect the fan grip the plug and remove it from the wall outlet. Never pull by the cord.
10. Do not operate the fan near to explosive and/or flammable fumes or chemical material.
11. Do not place the fan or any parts near an open flame, cooker or other heating appliances of
any kind.
12. Do not operate the fan with a damaged cord or plug. If the product malfunctions, or if it is
dropped or damaged in any way stop use. (See warranty).
13. Avoid bodily contact with moving fan parts.
14. Do not use attachments not recommended by the manufacturer as this may be hazardous.
15. Place the fan on a dry, level surface.
16. Do not mount fan on a wall or ceiling.
17. Do not operate if the fan housing is removed or damaged.
18. A loose fit between the AC outlet (receptacle) and plug may cause overheating and
a distortion of the plug. Contact a qualified electrician to replace loose or worn outlets.
19. Take care not to stain plastic parts with oil. Avoid using non-industrial oils (cooking oils
etc.) to lubricate parts. Damage and deterioration are caused by oil sticking to parts.
WARNING: To reduce risk of fire, electric shock or injury to person:
Unplug or disconnect the appliance from the power supply before servicing.
Do not use this fan with any solid-state speed control device.
Save these instructions for
future reference.
www.hsdonline.co.uk
Page 2 of 6

ASSEMBLY:
1. Snap “Front Base” and “Rear Base” together and fasten in place using 4 screws supplied.
2. Place Base Assembly onto the bottom of the Pillar Assembly and fasten in place using 4
screws supplied.
REMOTE CONTROL:
HOW TO INSERT BATTERIES (NOT INCLUDED)
NOTE: Remove the batteries if the remote control is
not to be used for any extended period.
Batteries left in the unit may leak and cause damage.
“DO NOT MIX OLD AND NEW BATTERIES”
www.hsdonline.co.uk
Page 3 of 6

DO NOT MIX ALKALINE, STANDARD (CARBON-ZINC) OR RECHARGEABLE
(NICKEL-CADMIUM) BATTERIES.
Notes on Using the Remote control:
A. The buttons of the remote control will function in the same manner
as the buttons on the control panel located on the top of the fan.
B. The remote control can be used up to 19 feet (6m) away from the
fan. Be sure to point the remote directly at the front of the fan to
ensure proper communication.
C. You will hear a 'beep' from the fan and see the lights on the control
panel illuminate when the tower fan accepts instructions from the
remote control.
Instructions for use/storage of IR Remote Control:
To release the remote from the storage compartment push the cover of the remote control's
storage compartment down, then remove the remote. To return to storage compartment,
repeat the above step and place it into the storage compartment.
OPERATION:
All the features of this fan can be controlled from the “feather-touch key control pad” or
the “remote control”.
To Turn the Fan On/Off
Gently press the “ ” button on the “feather-touch key control pad” or “ON/OFF” on
the remote control once to turn the fan ON. Press the “ ” button a second time to turn
the fan OFF.
To Set the Fan Speed
Gently press the “ ” button on the “feather-touch key control pad” or “SPEED” button
on the remote control. Each time you press the “ ” button, the speed will cycle
between the “LOW” “MEDIUM” and “HIGH” settings.
Oscillating Operation
This fan is designed to oscillate to efficiently cool large spaces.
To START oscillation: Press the “ ” button on the “feather-touch key control pad” or
the “oscillate” button on the remote control.
To STOP oscillation: Press the “ ” button a second time.
TIMER OPERATION:
This fan is incorporated with a timer. The range is between 1-7 hours. You can set your
fan to automatically turn itself off after your scheduled time of operation.
www.hsdonline.co.uk
Page 4 of 6

To Set Timer Operation
To use this feature, simply press the “TIMER” button on the remote control or the “ ” button
on the “feather-touch control pad”.
The illuminated lights on the front of the fan will display the time you have set. Each light
represents an period of time.
To Cancel Timer Operation
Press the timer button until all the time lights disappear.
The unit may sway slightly in operation.
Ionizer Function:
Press the "Ionizer" button or remote control to turn on the ionizer function, press it again to turn off.
The function of the ionizer is to fill the air with negative ions (particles with a negative electrical
charge) to restore the lost balance. These particles attach themselves onto any impurities in the
air, as all particles such as bacteria, dust, smoke, etc., have a positive charge, and neutralize
these, precipitating them.
PAT TESTING
!
When used in a workplace, this product must be safety-tested yearly by a qualified electrician (PAT
Tested) in order to comply with the Electricity at Work Regulations.!We recommend that it is PAT
tested regularly when used in a domestic environment.!
CLEANING INSTRUCTIONS:
Turn the fan OFF and unplug the fan before cleaning.
Only use a soft, damp cloth to gently wipe the fan clean.
DO NOT immerse the fan in water or allow water to drip into the motor housing.
DO NOT use gasoline, paint thinner, or other chemicals to clean the fan.
TROUBLE SHOOTING:
Q: How do I tum the fan ON?
A: Using the remote control, press the “ON/OFF” button, or press the “ ” button on the
control panel located on the top of the fan.
Q: What happens if I have two fans and two remote controls?
A: If both fans are the same model then both remote controls will work on either fan.
www.hsdonline.co.uk
Page 5 of 6

Environmental Responsibilities
Meaning of crossed –out wheeled dustbin:
Do not dispose of electrical appliances as unsorted municipal waste, use
separate collection facilities.
Contact your local council for information regarding the collection systems
available.
If electrical appliances are disposed of in landfills or dumps, hazardous
substances can leak into the groundwater and get into the food chain dam-
aging your health and well-being.
When replacing old appliances with new ones, the retailer is legally obligat-
ed to take back your old appliance for disposal free of charge.
12 Months Limited Warranty
If within 12 months from the date of purchase you experience any problems with
your product, please return the product to its distributor/dealer for repair or re-
placement. This warranty DOES NOT COVER normal wear, or any damage as a
result of accidents, misuse, abuse or negligence.
SERVICE WARRANTY
Hygiene Supplies Direct guarantees the product free from defects in materials and
workmanship for a period of 1 year from date of purchase.!
Should this unit be operated under conditions other than those recommended, at
voltages other than the voltage indicated on the unit, or any attempts made to
service or modify the unit, then the warranty will be rendered void. The product you
buy may sometimes differ slightly from illustrations. This warranty is in addition to,
and does not affect, your statutory rights. If you have any problems with this
product, please call our Help Desk on 0800 091 3171 or email
City Electrical Factors Ltd, Castleford, England, WF10 4SR declare that the Tower Fan is exclu-
sively manufactured and imported for Mylek.
www.hsdonline.co.uk
Page 6 of 6
Table of contents
Other Mylek Fan manuals
Popular Fan manuals by other brands

Sygonix
Sygonix 2472505 operating instructions

getAir
getAir SmartFan X9 User and installation instructions

Airtecnics
Airtecnics OPTIMA Installation, operation and maintenance manual

Emerson
Emerson CF244BS00 owner's manual

Kichler Lighting
Kichler Lighting Ridley 300027OBB instruction manual

Bionaire
Bionaire BT014 Instruction leaflet

World Power Technologies
World Power Technologies WHISPER H20 datasheet

Westinghouse
Westinghouse Josef manual

RL
RL R627431 Series manual

Panasonic
Panasonic Whisper Value-Lite FV-08VSL1 installation instructions

Aervoe
Aervoe Max Burton 6952 operating instructions

Hunter
Hunter 42688-01 Owner's guide and installation manual