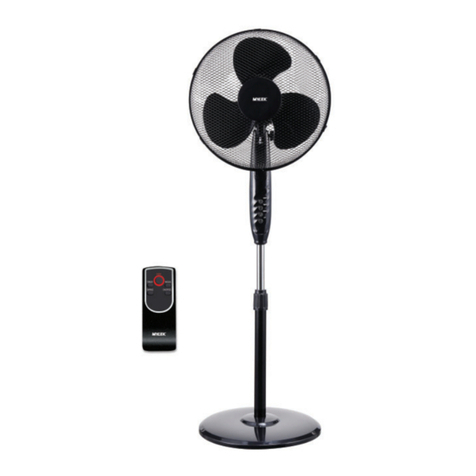
Mylek MY351916R User manual

www.hsdonline.co.uk
BEFORE USE:
Please read the instructions carefully. You must inspect the appliance including its
cable and plug for any signs of damage. If the product is damaged,
DO NOT USE and contact your supplier immediately for refund or replacement.
MY351916R
Electric Stand Fan

www.hsdonline.co.uk
2
Introduction
General Information
Please read the entire instruction manual before using the product
and then save it for future reference. We reserve the right for any
errors in text or images and any necessary changes made to
technical data. If you have any questions concerning technical
problems please contact our Customer Services on 0800 091 3171.
Safety Instructions
Please read this instruction manual carefully before use
and keep in a safe place for future reference. If you give
the appliance to another person supply them with this
instruction manual.
Intended use
This appliance is intended for use as a cooling fan. Use it for
domestic purposes and in the way indicated in this instruction
manual.
This appliance can be used by children aged from 8 years and
above and persons with reduced physical, sensory or mental
capabilities or lack of experience and knowledge if they have been
given supervision or instruction concerning use of the appliance in a
safe way and understand the hazards involved.
Children shall not play with the appliance.
Cleaning and user maintenance shall not be made by children
without supervision.

www.hsdonline.co.uk
IMPORTANT SAFETY INFORMATION
•Make sure the mains supply voltage is the same as that on the maker’s plate.
•Do not plug the appliance in until it has been fully and correctly assembled.
•Never insert fingers, pencils or any other object through the grille when fan is
running.
•Be sure fan is on a stable, even surface when operating to avoid overturning.
•Do not keep or use this appliance near bath, shower or swimming pool.
•Never immerse the appliance in water or any other liquid.
•Only use the appliance in dry environments, never in damp places such as
bathrooms, etc.
•Do not handle the appliance with wet hands.
• Do not use the appliance with the power cable wound up.
•Keep the fan away from objects which may enter the grilles, such as curtain cords,
plants, etc.
•Do not place the fan near flames, cookers or heaters.
•Keep a check on the appliance when in use, especially when children are nearby.
•Unplug at the mains when not in use.
•Never pull on the power cable when unplugging.
•Make sure the appliance has been unplugged before cleaning.
•Do not use the fan with a damaged power cable or plug, or if it is not working
properly.
•Repairs and power cable replacement must only be carried out by Authorised
Technical Service staff.
•This appliance must be installed following the national regulations for electrical
installations.
•WARNING: In order to ensure your children’s safety, please keep all packaging
(plastic bags, boxes, polystyrene etc). out of their reach.
•These instructions for use belong to the appliance and must be kept in a safe
place. If changing owners, these instructions must be passed to the new owner!
Safe positioning
•Do not place the fan on unstable surfaces.
•For your own safety and that of others: water and electricity are a dangerous
combination! Do not use this fan in a bathroom or near a swimming pool. Ensure
that the appliance cannot fall into water (bath wash basin, shower cubicle, etc).
3

www.hsdonline.co.uk
4
Instructions
Parts description
Base
Column (3 sections)
Control Section Column
Motor Housing
Back Guard
Rear Guard Securing Nut
Blade
Blade Securing Cap
Front Guard
Blade Guards Securing Screw
1
2
3
4
5
6
7
8
9
10
2
1
3
4
5
10
9
76 8
Technical
Specification
Model: MY351816R
Voltage: 230V AC
Frequency: 50Hz
Power: 60W
Remote Control:
This remote control takes
2 x AAA batteries
(Not Supplied)
Batteries should not be mixed with
general household waste. For
proper recycling, please take these
products to a designated
collection point wherethey will be
accepted free of charge or return
them to your local retailer. Please
contact your local authority or your
household waste disposal service
for further details of your nearest
designated collection point.

Assembly
ASSEMBLING THE BASE AND COLUMNS
1. Place "Base"(1) on a level floor surface.
2. Align one of the 3 sections, "Column"(2) into the middle of the "Base"(1) and
screw securely into place.
3. Align and add other "Columns"(2) until you have your preferred height. Store
any unused, remaining columns in a safe secure place for future use.
4. Align the final "Control Section Column"(3) and screw securely into place.
5. Your fan is now ready for the fan assembly.
IDENTIFICATION OF THE FAN PARTS
FAN ASSEMBLY
1. Align the "Back Guard"(2) to the "Motor Housing", push it into place and
secure it with the "Rear Guard Securing Nut"(3).
2. Align the two groves, located at the centre rear of the "Blade"(4), to the two
prongs on the motor shaft and push the guard into place. Secure the "Blade"(4)
with the "Blade Securing Cap"(5). Please note the blade securing cap turns
anti-clockwise when securing.
3. Align the "Front Guard"(6) to the "Back Guard"(2) by making sure the two
holes are slightly offset at the bottom of each guard, then slightly turn the "Front
Guard"(6) clockwise to lock into place.
4. Secureby inserting the "Blade Guards Securing Screw"(7).
CAUTION: NEVER OPERATE THE FAN WITH A DAMAGED BLADE.
NOTE: You must check all parts and assemble the fan correctly and check before
plugging in and switching on.
www.hsdonline.co.uk 5
Motor Housing
Back Guard
Rear Guard Securing Nut
Blade
Blade Securing Cap
Front Guard
Blade Guards Securing Screw
1
2
3
4
5
6
7
1 2 4 6
7
53

Operating instructions
MANUAL OPERATION
1. Press the "ON/OFF"button to switch the fan on. Press again
to switch the fan off.
2. Press the "SWING"button once for the fan to oscillate and
press again to switch off the oscillation.
3. Press the "TIMER"to choose between countdown operating
times of 1-10 hours, the unit will switch off when your chosen
countdown time has elapsed, your chosen setting will display
on the screen.
4. Press the "SP+"to choose speed settings between 1-9 and
press "SP-" to decrease your speed.
REMOTE CONTROL OPERATION
1. Press the "ON/SPEED"button to switch the fan on. Press
again to choose your speed settings between 1-9.
2. Press the "SWING"button once for the fan to oscillate and
press again to switch off the oscillation.
3. Press the "TIMER"to choose between countdown operating
times of 1-10 hours, the unit will switch offwhen your chosen
countdown time has elapsed, your chosen setting will display
on the screen. If you require the fan to be on permanent
make sureno hours aredisplayed.
4. Press the "MODE"button to choose between Normal,
Natural or Sleep function. These options are only available
via the remote control and your chosen option will display on
the screen. If no option is chosen the unit will operate in the
Normal fan mode.
Normal Speed: The fan will operate in your selected speed
between 1-9 until you turn it offmanually or your set
countdown time has elapsed.
Natural Speed: Fan will alternate between fan speeds
intermittently switching on and offcontinuously.
Sleep Speed: The fan will operate at your chosen speed,
then intermittently switch offand back on again, dropping
down a speed approximately every 30 mins until it reaches
the lowest speed.
www.hsdonline.co.uk
6

www.hsdonline.co.uk 7
Storage
•Keep the original box in which the fan was packed to store it during the cooler
months when it is not in use.
Cleaning & Maintenance
We recommend that you clean your fan at least twice a year to remove
accumulated dust and dirt.
1. Switch off the fan and unplug from the power outlet.
2. Plastic parts should be cleaned with damp cloth or sponge.
3. Thoroughly dry the fan with a clean dry cloth.
4. Do not use scouring pads, abrasive and harddetergents.
5. Do not immerse the motor unit in any liquid.
6. Store fan in a clean dry place when not in use.
7. Make sure the fan is completely dry before plugging into any power outlet and
switching on.
No other user maintenance is required or recommended.
•DO NOT immerse the fan in water and never allow water to drip into motor
housing.
CAUTION: DO NOT ALLOW WATER TO RUN INTO THE FAN AS THIS COULD
CREATE A FIRE OR ELECTRIC SHOCK HAZARD.

www.hsdonline.co.uk
88
YESSS Electrical, Normanton, WF6 1TN declares that the Mylek Electrical Stand Fan is exclusively
manufactured and imported for Hygiene Supplies Direct Ltd.
Environmental Responsibilities
Meaning of crossed-out wheeled dustbin:
Do not dispose of electrical appliances as unsorted municipal waste,
use separate collection facilities.
Contact your local council for information regarding the collection
systems available.
If electrical appliances are disposed of in landfills or dumps, hazardous substances
can leak into the groundwater and get into the food chain damaging your health
and well-being.
When replacing old appliances with new ones, the retailer is legally obligated to
take back your old appliance for disposal free of charge.
Batteries should not be mixed with general household waste. For proper recycling,
please take these products to a designated collection point where they will be
accepted free of charge or return them to your local retailer. Please contact your
local authority or your household waste disposal service for further details of your
nearest designated collection point.
Pat Testing
When used in a workplace, this product must be safety-tested yearly by a qualified
electrician (PATTested) in order to comply with the Electricity at Work Regulations.
We recommend that it is PATtested regularly when used in a domestic
environment.
SERVICE WARRANTY
Hygiene Supplies Direct guarantees the product free from defects in materials and
workmanship for a period of 1 year from date of purchase.
Should this unit be operated under conditions other than those recommended, at
voltages other than the voltage indicated on the unit, or any attempts made to
service or modify the unit, then the warranty will be rendered void. The product you
buy may sometimes differ slightly from illustrations. This warranty is in addition to,
and does not affect, your statutory rights.
If you have any problems with this product, please call our Help Desk
Table of contents
Other Mylek Fan manuals
Popular Fan manuals by other brands

Rosenberg
Rosenberg SupraBox COMFORT Series Operating instruction

HIRED-HAND
HIRED-HAND MEGA-FLOW CONE FAN Installation

Manrose
Manrose PRO Series installation instructions

Vent-Axia
Vent-Axia MVDC-MS Installation and wiring instructions

LUCCI
LUCCI AIRFUSION BREEZE installation instructions

Honeywell
Honeywell L4064A-F quick guide

AUKS
AUKS AFC-300CA/4 Technical manual

Klimawent
Klimawent WPA-D-N Series Use and maintenance manual

TEFAL
TEFAL EOLE INFINITE VU66 Series user guide

Envira-North
Envira-North EN560X0010 Design & engineering guide

Tornado
Tornado HI-FAN-18HVWM- 1P instruction manual

Fantech
Fantech 150H-EC Installation and operation manual