manuals.online logo
Brands
  1. Home
  2. •
  3. Brands
  4. •
  5. Mylex
  6. •
  7. Indoor Furnishing
  8. •
  9. Mylex 43594 User manual

Mylex 43594 User manual

date of purchase/fecha decompra
_____/______/________
Lot/lote #
____________
MYLEX
43594
IMPORTANT
TO OUR CUSTOMERS: :
THIS PRODUCT HAS BEEN CAREFULLY QUALITY
CONTROLLED, HOWEVER HUMANERROR
CAN OCCUR, SHOULD YOUEXPERIENCE
ANY PROBLEMS WITH THE PRODUCT PLEASE
NOTIFY CUSTOMER SERVICE AT:
1-800-668-6959
HRS. 9:00am-5:00pm EST. MONDAY– FRIDAY
WHEN CLEANING THE PRODUCT USE A SOFT
CLOTH. DO NOT USE HARSH
CHEMICALS OR ABRASIVE CLEANERS.
MOVE YOURNEW FURNITURE CAREFULLY
WITH TWOPEOPLE.
LIFT AND CARRY THE UNIT.NEVER PUSHOR
DRAG THE UNIT.
THIS UNIT HAS BEEN DESIGNED TO SUPPORT
THEMAXIMUM
LOADS SHOWN. EXCEEDING THESE LOAD
LIMITS COULD CAUSE UNIT
SAGGING, INSTABILITY, PRODUCT COLLAPSE
AND/OR SERIOUS INJURY.
ADDITIONAL PARTS ARE AVAILABLE FOR A
NOMINAL FEE.
RECOMMENDED NUMBER OF PEOPLE NEEDED
FOR ASSEMBLY: 2
THIS INSTRUCTION BOOKLET CONTAINS
IMPORTANTSAFETY INFORMATION. PLEASE
READ AND KEEP FOR FUTURE REFERENCE.
TOOLSREQUIRED:
FLAT-BLADE SCREWDRIVER
PHILIPS SCREWDRIVER
HAMMER
CAUTION
!!
Noload/Nocarga
35lbs/15.8kg
35lbs/15.8kg
35lbs/15.8kg
50lbs/22.6kg
50lbs/22.6kg
IMPORTANTE
A NUESTROS CLIENTES:
ESTE PRODUCTO HA PASADO POR UN CUIDADOSO CONTROL DE
CALIDAD. SIN EMBARGO, ERRORES HUMANOS PUEDEN OCURRIR. EN
CASO DE QUE EL PRODUCTO PRESENTE CUALQUIER TIPO DE
PROBLEMA, POR FAVOR NOTIFIQUE A SERVICIO AL CLIENTE:
1-800-668-6959
HORARIO: DE LUNES A VIERNES
DE 9 A.M. A 5 P.M. (EST)
PARA LIMPIAR EL PRODUCTO USE UN PAÑO SUAVE. NO USE
QUÍMICOS FUERTES O LIMPIADORES ABRASIVOS.
MUEVA CUIDADOSAMENTE SU MUEBLE NUEVO AYUDADO POR
OTRA PERSONA.
PARA MOVER LA UNIDAD LEVÁNTELA. NUNCA LA EMPUJE O
ARRASTRE.
ESTA UNIDAD HA SIDO DISEÑADA PARA SOPORTAR LA CARGA
MÁXIMA QUE SE INDICA. EXCEDER EL LÍMITE DE CARGA INDICADO
PODRÍA CAUSAR QUE LA UNIDAD SE TUERZA, SE TORNE INESTABLE,
SE COLAPSE Y/O CAUSE DAÑO SEVERO.
PARTES ADICIONALES DISPONIBILES POR UNA CUOTA NOMINAL.
NÚ
MERO DE PERSONAS QUE SE RECOMIENDAN PARA REALIZAR EL
ENSABLE: 2
ESTE INSTRUCTIVO
CONTIENE INFORMACIÓN DE
SEGURIDAD MUY
IMPORTANTE. POR FAVOR
LÉALO Y CONSÉRVELO PARA
FUTURA REFERENCIA.
HERRAMIENTAS NECESARIAS:
DESTORNILLADOR PLANO
DESTORNILLADOR PHILLIPS
MARTILLO
DO NOT ALLOW
CHILDREN TO CLIMB ON
THIS UNIT, UNIT MAY TIP
RESULTING IN INJURY.
NO PERMITA QUE LOS
NIÑOS SE SUBAN A ESTE
MUEBLE. EL MUEBLE
PODRÍA VOLCARSE Y
CAUSAR DAÑO.
BEFORE STARTING
ANTES DE EMPEZAR
- Read each stepcarefully before starting. It is very important
that each stepof the instructions is performedin the correct
order. If these steps are not followed in the correct sequence,
difficulties will occur.
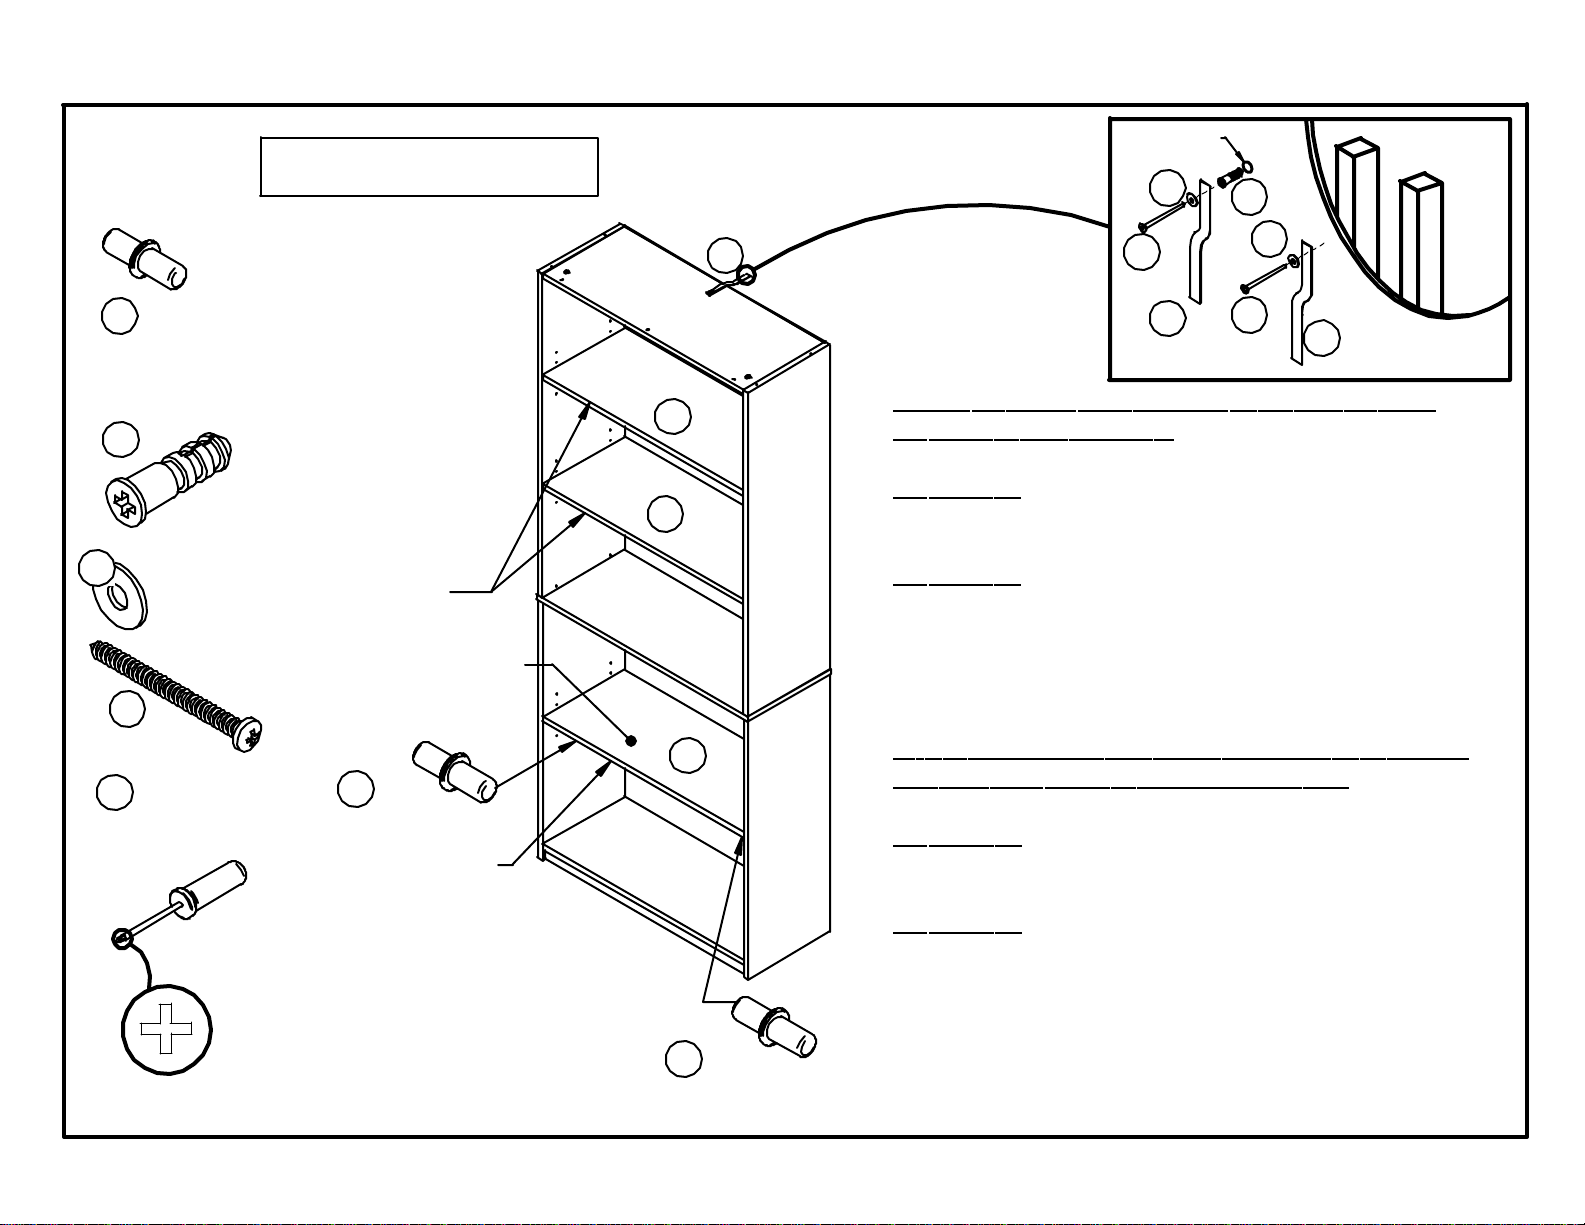
- Make sureall parts are included.Most board parts are labeled.
- Do not use power tools toassembleyourfurniture. Power tools
may strip or damage the parts.
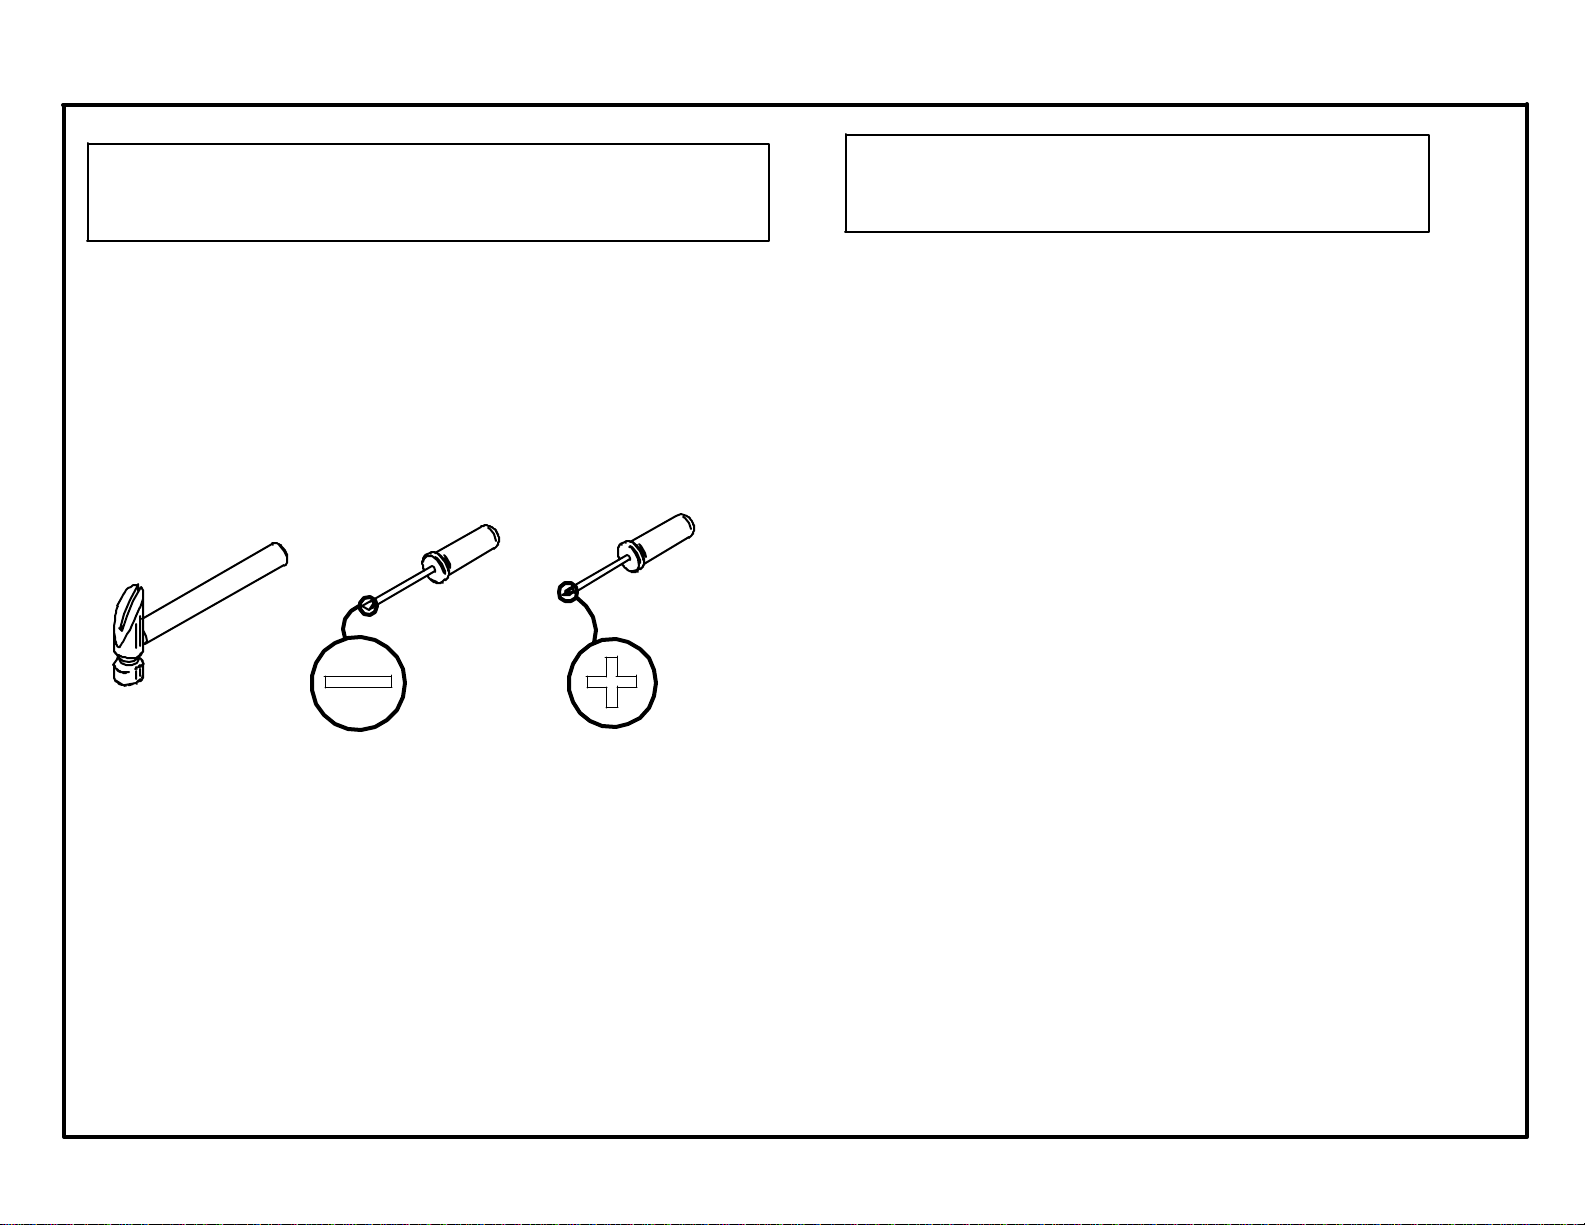
- Have the followingtools close at hand.
HELPFUL HINTS
LAS INDIRECTAS ÚTILES
- Call our toll free number if you need assistance
1-800-668-6959
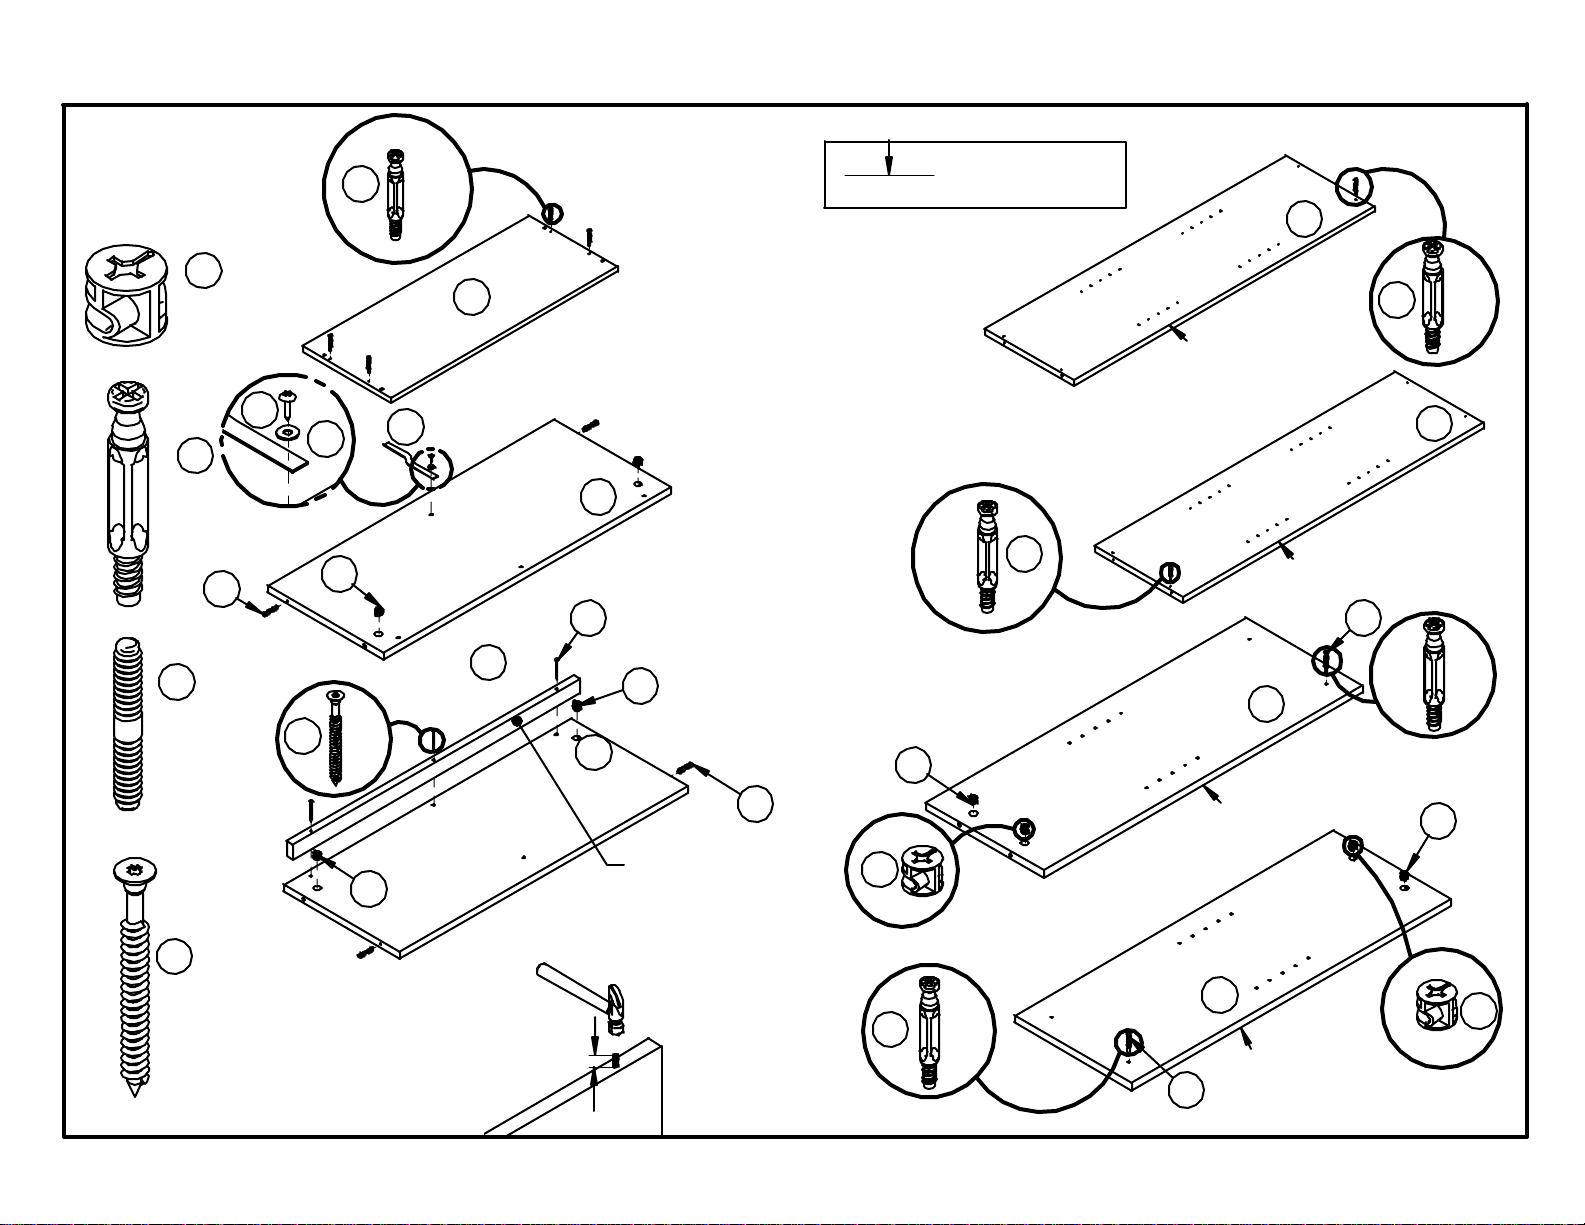
- Compression dowels are tappedin with a hammer.
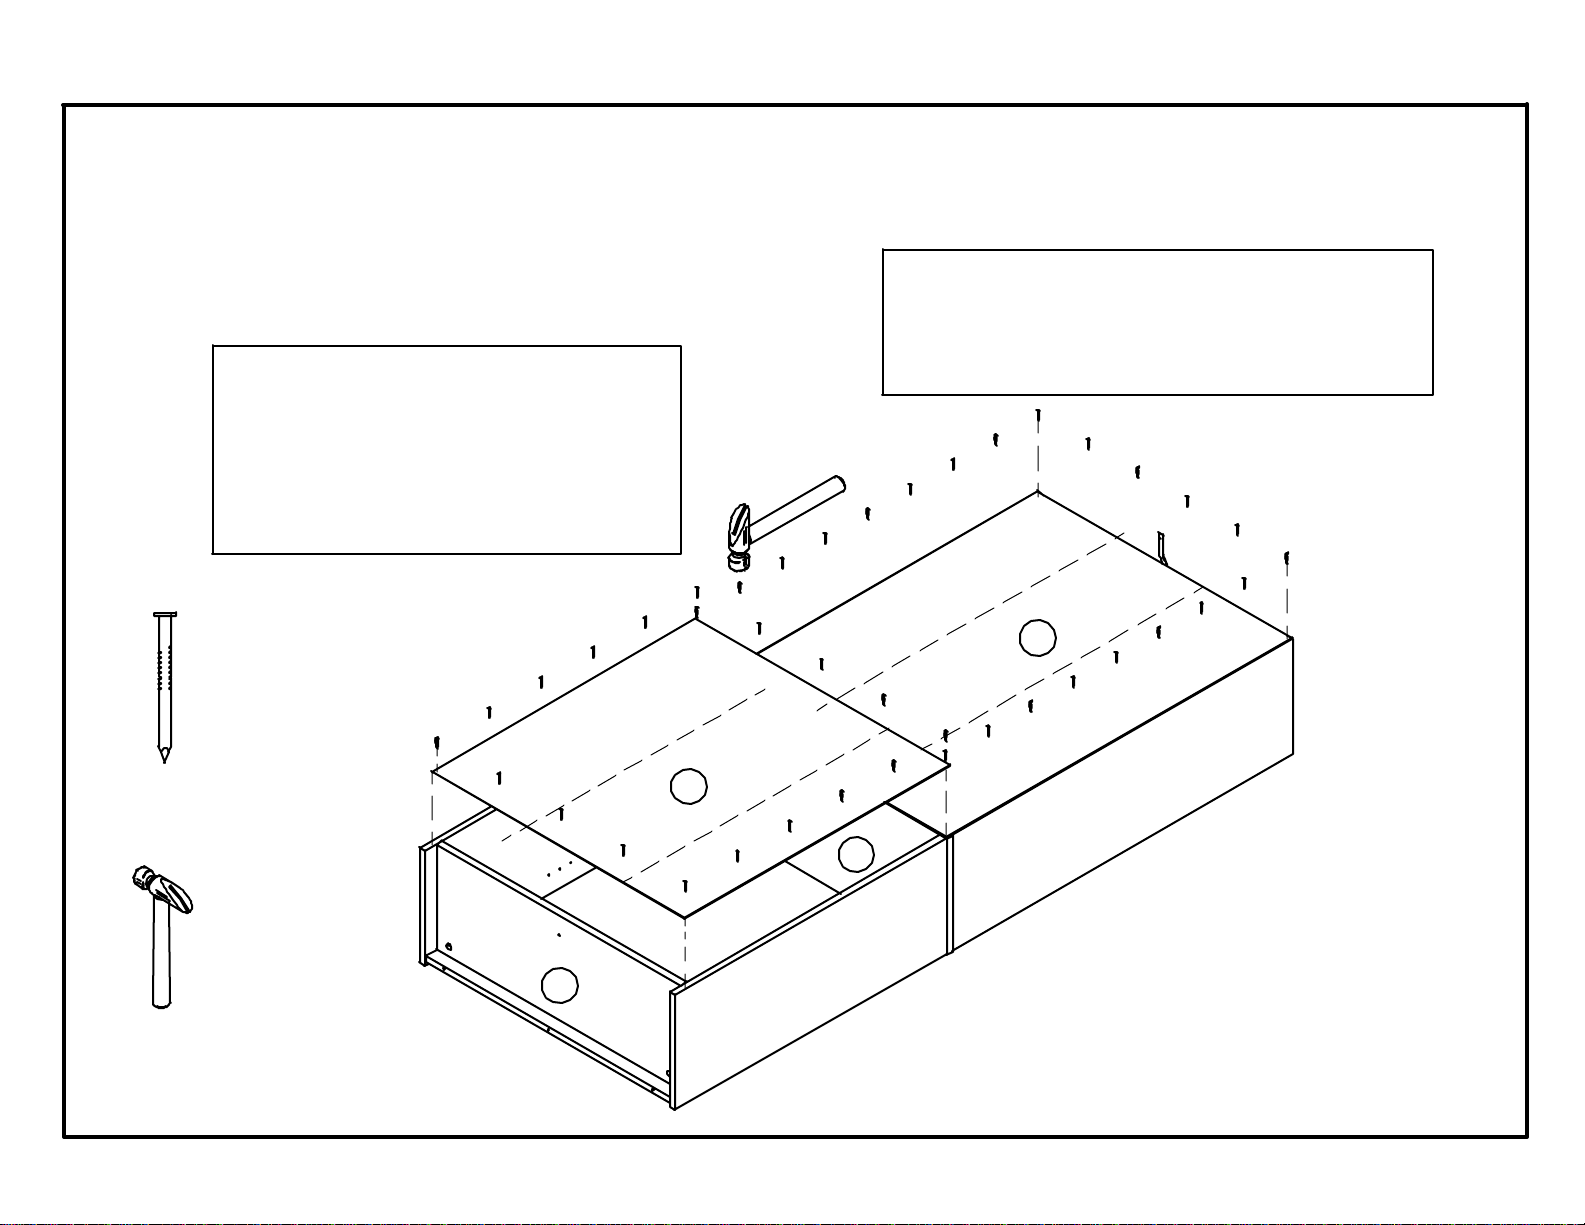
- Back panels providestability and support. Use all nails
provided. Units without back panelinstalled may
collapse.
- When tappingnails into a board, be surethere is equal
space on all sides to square the unit.
- Moveyour new furniture carefully, with two people lift
and carry the unit to it's new location.
- Neverpush, drag or scoot your furniture (especially on
carpet).
-Lea cuidadosamente estas instrucciones antes de empezar. Es
muy importante que cada uno de los pasos en estas instrucciones
se realice en el orden correcto. Si estos pasos no se siguen en
secuencia correcta habrá dificultades.
-Asegúrese de que el paquete traiga todas las partes. La mayoría
de los páneles están etiquetados.
- Use herramientas manuales para ensamblar los muebles. Las
herramientas eléctricas podrían raspar o dañar las partes.
-Tenga a la mano las siguientes herramientas:
-Si necesita ayuda llame sin costo al 1-800-668-6959
-Las clavijas de compresión se insertan dando golpes suaves con
un martillo.
- Los páneles posteriores dan estabilidad y soporte a la unidad.
Use todos los clavos que se suministran. Si no se instala el pánel,
la unidad podría colapsarse.
- Al martillar los clavos en el tablón, asegúrese de colocarlos a
distancias iguales en todos los lados para que la unidad quede en
escuadra.
Mueva su mueble nuevo cuidadosamente, entre dos personas
levanten y muevan la unidad a su nuevo sitio.
-Nunca empuje, jale o arrastre su mueble (especialmente si tiene
alfombra).
8
1
4
2
AAC
C
D
E
B
FG
H
J
I
3
5
67b
7e
7d
Upper panels
Paneles superiores
754359401
Fixed shelf
Estante fijo
754359406
Top/bottom shelf
Estantes (superior y inferior)
754359403
Upper adjustable shelves
Estantes ajustables superiores
754359408
Kickpanel
Panel de sopprte
754359407
Lower left panels
Panel izquierdo inferior
754359404
Lower right panels
Panel derecho inferior
754359405
Lower adjustable shelves
Estantes ajustables inferior
754359409
Lower back panel
Panel trasero inferior
100107770745
Upper backpanel
Panel trasero superior
100110120745
D
Parts - Piezas
Hardware - Quincalla
Tighten to fully seat. Do not over
tighten.
Apriétese a totalmenteasiento. No
haga encima de apriétese. Proper orientation of cam.
La orientación apropiada de lava.
1/2 turn to fully
lock
1/2 se vuelven a
totalmente
cerradura
Lock
Apretar
This illistration shows how the CAM fastening system works.
Esta illustración muestra el sistema de fijación de leva y comofunciona.
Cam Lock
Cerradura de la leva
#300401A
Qty: 8
Cam bolt
Perno de la leva
#300301A
Qty: 8
1-5/8"Flat head
#300512
Qty: 3
Compression dowel
Clavija de compresión
#301106
Qty: 4
Nail
Clavo
#300203
Qty: 40
Shelf Support
Soporte de estante
#301201
Qty: 12
Confirmat screw
#300504
Qty: 4
7a
Safety strap kit
Estuche de cinturón
#6243590-D
Qty: 1
7c
Finished edge
Borde acababo
Upperrightpanel/Panelderechosuperior
A
2
Upperleftpanel/Panelizquierdo
superior
Lowerleftpanel/Panelizquierdo
inferior
Lowerrightpanel/Panelderecho
inferior
Topshelf
Estantesuperior
Bottomshelf
Estanteinferior
1
2
1
x8
2
x8
3
x4
x3
6
2
1
1
B
2
7/16"
11mm
Approx.
G
1
2
F
2
1
C
7a
1
3
7c 7e
6
A
C
E
Unfinished side
Lado inacabado
3
6
1
1
23
Upper assembly
Asamblea superior
Note: all unfinished edges are facing upwards
Nota: lostodosbordes inacabadosestan enfrentando arriba Note: all unfinishededges are facing upwards
Nota: lostodosbordes inacabadosestan enfrentando arriba
x4
Upperleftpanel
Panelizquierdosuperior
Upperrightpanel
Panelderechosuperior
A
A
C
B
A
A
C
Upperleftpanel
Panelizquierdosuperior
Upperrightpanel
Panelderechosuperior
8
LOCK
APRETAR
8
x4
Lower assembly
Asamblea inferior
Note: all unfinishededges are facing upwards
Nota: lostodosbordes inacabadosestan enfrentando arriba
Note: all unfinished edges are facing upwards
Nota: lostodos bordes inacabadosestan enfrentando arriba
45THIS STEPREQUIRES2 PERSONS
ESTA PASO REQUIERE 2PERSONAS
LOCK
APRETAR
x2
LOCK
APRETAR
x4
Lowerassembly
AsambleainferiorUpperassembly
Asambleasuperior
C
G
F
B
1
2
CF
G
1
2
3
Lowerassembly
AsambleainferiorUpperassembly
Asambleasuperior
WARNING
Please make sure that the BACK PANELS are attachedsecurely.
All nails must be driven into the parts straight.
Failure to doso could cause instability, product collapse or serious injury.
6
ADVERTENCIA
Por favor asegurese que los PANELESTRASEROS este firmemente
ajustados.
Todos los clavos deben entrar derechos, de lo contrario puede haber
instabilidad en el mueble y este puede colapsar u ocasionar graves lesiones.
x40
Fasten LOWER BACK PANEL(J)
second.
Use 6 nails on each sideand 3 nails at the
top and bottom.
Fije el PANELTRASERO INFERIOR (J)
segundo.Use 6 clavosadelante cada
lateral y 3 clavosa la cima y fondo.
FastenUPPER BACK PANEL(I) first.
Use 9 nails on each sideand 4 nails at the toponly.
Fije el PANELTRASERO SUPERIOR (I)
primero. Use 9clavosadelante cada lateral y 4
clavos a la cima sólo.
J
B
I
C
7Your unit is now completed.
El unidad se completa ahora.
Fastenthe SAFETY STRAP (7a) to thewall using
OPTION1 or2 as shown.
OPTION1:
Fastenthe STRAP (7a) to a stud in the wall using the
SCREW (7d) throughWASHER (7e).
OPTION2:
Drill a 3/16" diameter hole in thewallboard. Tap the
WALL ANCHOR (7b) into the hole until it is flush.
Fastenthe STRAP (7a) to the WALL ANCHOR (7b)
using theSCREW (7d) through the WASHER (7e).
Fije el CINTURÓN DE SEGURIDAD(7a) a la pared
que usa la OPCIÓN 1 o 2 como mostrada.
OPCIÓN 1:
Fije la CORREA(7a) a una viga en la pared con el
TORNILLO(7d) y una ARANDELA(7e).
OPCIÓN 2:
Taladre unagujero de un diametro de 3/16"en la
pared. Martille el ANCLA DEMURO (7b) dentrodel
agujero hasta que esté al ras dela pared.
Fije la CORREA(7a) a la ANCLA DEMURO (7b)
con el TORNILLO(7d) y una ARANDELA(7e).
stud
viga
hole
agujero
7d
7e
7a 7a
7d
7e
7b
Finished side
Superficie acabado
5
x6
5
x6
5
x12
7d
7b
7
x1
7a
D
D
H
7e
Finished edge
Borde acabado
Finished edge
Borde acabado

Other Mylex Indoor Furnishing manuals

Mylex DELUXE 43083 User manual

Mylex

Mylex DELUXE 43083 User manual

Mylex 42470 User manual

Mylex

Mylex 42470 User manual

Popular Indoor Furnishing manuals by other brands

ROOMS TO GO Ovis 60699 manual

ROOMS TO GO

ROOMS TO GO Ovis 60699 manual

Core Products Nairn NR209 Assembly instructions

Core Products

Core Products Nairn NR209 Assembly instructions

Ballard Designs Large Eastman Secretary MO386 Assembly instructions

Ballard Designs

Ballard Designs Large Eastman Secretary MO386 Assembly instructions

Space Seating 829-R2C728P Assembly and operating instructions

Space Seating

Space Seating 829-R2C728P Assembly and operating instructions

Systembuild Evolution 7531296COM Instruction booklet

Systembuild Evolution

Systembuild Evolution 7531296COM Instruction booklet

Opera Signature Series Installation guide and technical specifications

Opera

Opera Signature Series Installation guide and technical specifications

Indiana Furniture Square One 17-TYP014 Assembly instructions

Indiana Furniture

Indiana Furniture Square One 17-TYP014 Assembly instructions

Winners Only BFC2001K Assembly instructions

Winners Only

Winners Only BFC2001K Assembly instructions

Coziwow CW12H0311 user manual

Coziwow

Coziwow CW12H0311 user manual

El Corte Inglés NAVY 004-05389 Assembly instructions

El Corte Inglés

El Corte Inglés NAVY 004-05389 Assembly instructions

Bayside CSC5PD-3DGB Assembly instructions

Bayside

Bayside CSC5PD-3DGB Assembly instructions

Colombo BR 252-06 Assembly instructions

Colombo

Colombo BR 252-06 Assembly instructions

Kalia MR1947-570-001 Installation instructions / warranty

Kalia

Kalia MR1947-570-001 Installation instructions / warranty

Coaster 224262 Assembly instructions

Coaster

Coaster 224262 Assembly instructions

Timo V-19710B quick start guide

Timo

Timo V-19710B quick start guide

American Standard 9445.124.339 - 9445.124.339 Cardiff Vessel Stand Contemporary Style... Assembly and installation instructions

American Standard

American Standard 9445.124.339 - 9445.124.339 Cardiff Vessel Stand Contemporary Style... Assembly and installation instructions

Graco NOAH Assembly instructions

Graco

Graco NOAH Assembly instructions

Nightingale EC2 235 Series User handbook

Nightingale

Nightingale EC2 235 Series User handbook

manuals.online logo
manuals.online logoBrands
  • About & Mission
  • Contact us
  • Privacy Policy
  • Terms and Conditions

Copyright 2025 Manuals.Online. All Rights Reserved.