Mynt3d Basic User manual

USER MANUAL
Please read through this user
manual completely before use.
www.mynt3d.com
“basic”
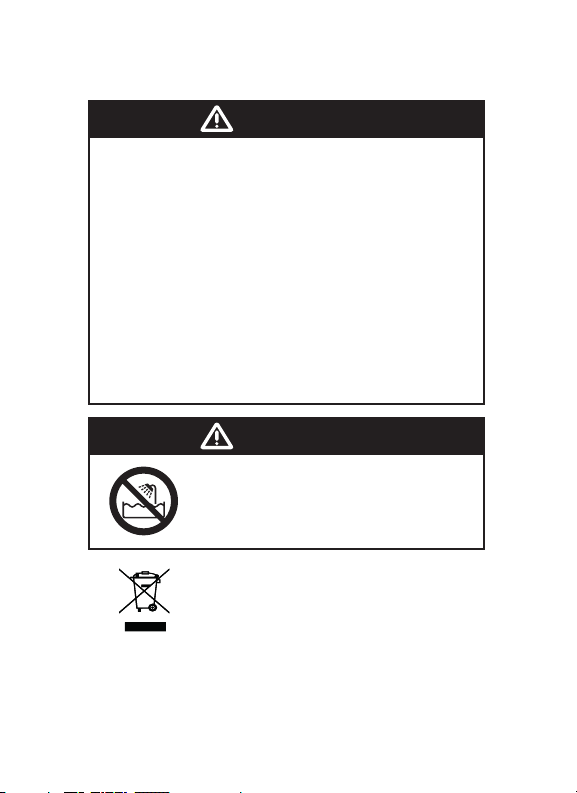
WARNING
BURN HAZARD. The ceramic nozzle of this device
can become extremely hot. DO NOT touch the tip or
any melted plastic or you may be severely burned.
DO NOT allow the tip near or in contact with
flammable materials. Inform others in the area that
the unit is hot and should be handled with care.
Allow the tip to cool completely after use and before
storing. The hot tip may cause damage to painted
surfaces, plastics and cloth if left in contact with
these materials. Only use 1.75mm ABS and PLA
filament.
ADULT USE ONLY. KEEP OUT OF REACH OF
CHILDREN.
WARNING
DO NOT use this appliance near
bathtubs, showers, basins or other
vessels containing water.
This marking indicates that this product should
not be disposed of with other household wastes.
To prevent possible harm to the environment or
human health from uncontrolled waste disposal,
recycle it responsibly to promote sustainable reuse
of material resources.

1
Verify you received all the components.
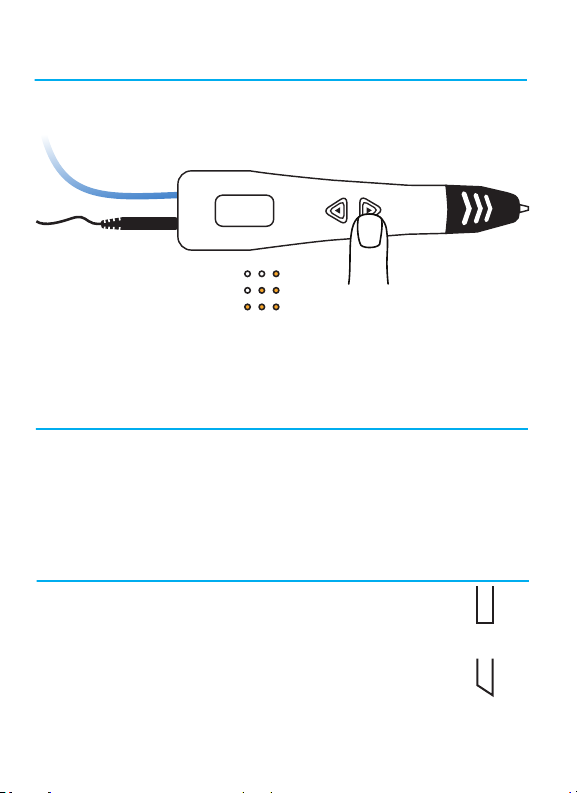
Features and Controls
1. 3D Printing Pen
2. USB Power Cable
3. (3) Rolls of ABS Filament
Nozzle
Filament
Loading Hole
DC Socket
4. User Manual
5. 3D Pen Stand
Filament Type Indicator
Filament Unload Button
Filament Load Button /
Heat Start Button
ABS PLA
Speed Indicator
Fast
Medium
Slow
Speed
Control
ABS/PLA
Switch

2
Operation Instructions
1. Connect the AC/DC adapter and USB Power Cable to a power outlet
or power bank. Insert the plug into the power socket.
2. Click the filament load button to initiate the heating process.
3. The filament type indicator will flash during the heating process
4. To switch between ABS and PLA filament mode, press the top
button on the other side of the pen.
5. To load filament, wait until the filament type indicator has stopped
blinking. Straighten the end of the filament if necessary and insert it
into the filament loading hole until it stops. Press and hold to load
filament into the pen, or double click the feed button to load automati-
cally.
ABS PLA
6. To adjust the speed, press the speed control button until you reach
your desired speed. The three lights on the other side of the pen will
show your selected speed.
7.
Start your drawing on a flat surface.
Poly carbonate, paper, or glass
with a thin layer of washable gluestick makes for an optimal work
surface, but you can use anything that is heat safe and filament
adheres to.
Note: requires AC-USB adapter or power bank with at least
2A (2000mA) output. Computer USB is not sufficient.
3
CORRECT
INCORRECT
1. Connect the AC/DC adapter and USB Power Cable to a power outlet
or power bank. Insert the plug into the power socket.
2. Click the filament load button to initiate the heating process.
3. The filament type indicator will flash during the heating process
4. To switch between ABS and PLA filament mode, press the top
button on the other side of the pen.
5. To load filament, wait until the filament type indicator has stopped
blinking. Straighten the end of the filament if necessary and insert it
into the filament loading hole until it stops. Press and hold to load
filament into the pen, or double click the feed button to load automati-
cally.
Standby / Inactivity
1. After about 2 minutes of inactivity the filament will automatically
retract out of the pen nozzle, but not completely out of the pen.
2. The filament type indicator will go into flashing mode.
3. To fully unload the filament or continue using the pen, click the
filament load button to initiate the heating process again. Wait for the
filament type indicator to stop flashing the proceed.
Changing Colors
1. Bring your 3D pen up to temperature.
2. Click the withdraw button to unload filament
automatically.
3. Ensure the new filament is cut correctly and load
into the pen.
Slow
Medium
Fast
6. To adjust the speed, press the speed control button until you reach
your desired speed. The three lights on the other side of the pen will
show your selected speed.
7.
Start your drawing on a flat surface.
Poly carbonate, paper, or glass
with a thin layer of washable gluestick makes for an optimal work
surface, but you can use anything that is heat safe and filament
adheres to.
Operation Instructions (contintued)

4
Important Tips and Notes
• Pressing the load or withdraw button once will exit continuous
feed mode.
• This 3D pen can be used with power banks that output at least
2 amps. This way you are not tethered to a wall outlet.
• Depending on the filament being used, plastic may continue to
extrude slightly after the feed button is released. This effect is
often more pronounced with PLA, and is a symptom of commercial
3D printers as well. Decreasing the temperature slightly can help.
• It is advised to only use the withdraw button when changing
filament. If filament is only partially withdrawn it can deform in the
barrel and the pen will not extrude. If this happens you should fully
withdraw the filament and cut off the deformed section.
• Filament quality varies greatly, and even reputable brands can
release bad batches. If your 3D pen is behaving abnormally, a
good first step is to try another roll of filament. Also, ABS and PLA
filament are damaged by excess humidity. It is good practice to
store your filament in a sealed and dry location.
• If you believe your nozzle is clogged, back out the filament and
cut a new end. Then unscrew the end of the pen to check if there
is a piece that can be removed. If it’s still clogged, send an email to
if it’s still in the 1 year warranty.
• When changing from PLA to ABS filament, the nozzle may emit
a small amount of smoke from the increased temperature. PLA
is plant-based and does not release any toxic fumes when
over-heated.

5
RoHS
Specifications
Discharging mode: hot melt extrusion
Print Range: unlimited
Feeding Speed: adjustable
Print Material: ABS/PLA
Material Diameter: 1.75mm
Material Temperature: ABS 210°C, PLA 190°C
Nozzle Diameter: 0.7mm
Nozzle Temperature: 130-240°C
Power Input: 5V 2A
Power Output: 10W
Equipment Dimension: 150mm x 38mm x 23mm
Equipment Weight: 50g
Certifications:
Limited 1 Year Warranty
We stand by our products and offer a 1 year limited warranty
that covers defects in manufacture. For more information visit:
www.mynt3d.com/pages/warranty
Contact information:
MYNT3D
4041 Soquel Dr Ste A-148
Soquel, CA 95073
(800) 695-5994
Table of contents
Other Mynt3d Accessories manuals


