Quick Start Guide: ULTRAPENX2™ PTBT6 with the PTBTX2™ App
Quick Start Guide: ULTRAPENX2™ PTBT6 with the PTBTX2™ App
Nitrate Concentration and Temperature Pen for Use with your Mobile Device Nitrate Concentration and Temperature Pen for Use with your Mobile Device
PTBT6QSI-X2 Revision 01-20 Page 4 of 4 PTBT6QSI-X2 Revision 01-20 Page 1 of 4
MAINTENANCE
The Nitrate sensor needs to be conditioned after long-term storage (see SENSOR CONDITIONING section above).
The PTBT6 MUST be recalibrated any time the Nitrate sensor is replaced.
ROUTINE MAINTENANCE
1. After each use ALWAYS rinse the Nitrate sensor with DI, RO, or distilled water and then carefully blot the ISE
sensor with a soft, clean, lint-free cloth or tissue to remove any water drops.
2. ALWAYS replace the protective cap on the Nitrate sensor after each use.
3. Do not touch the ISE electrode as oil from your finger may contaminate the sensor.
4. Do not drop, throw, or otherwise strike the PTBT6. This voids the warranty.
STORAGE
After each use ALWAYS rinse the Nitrate sensor with clean water (preferably DI, RO, or distilled) and then
carefully pat the sensor with a clean, soft, lint-free cloth to remove any water drops.
SHORT TERM STORAGE (≤3 DAYS):
• Keep the sensor in the protective cap filled half-full with prepared 100 ppm standard solution.
o DO NOT store the PTBT6 with the cap filled with Reference Solution mixed with Nitrate Interference
Suppression Buffer (NISBSOL).
• Store the PTBT6 in a cool place.
LONG TERM STORAGE (>3 DAYS):
1. Rinse the Nitrate sensor with clean water (preferably DI, RO, or distilled) and then carefully pat the sensor with a
clean, soft, lint-free cloth to remove any water drops.
2. Rinse the protective cap with clean water (preferably DI, RO, or distilled).
3. Dry protective cap with a clean, soft, lint-free cloth to remove any water drops, inside and out.
4. Put the protective cap on the sensor and store the PTBT6 in a cool place.
REPLACING OR REINSTALLING THE NITRATE SENSOR
Follow the instructions that come with your replacement sensor.
Only remove/replace the Nitrate sensor in a CLEAN and DRY environment.
TO REMOVE THE NITRATE SENSOR:
1. Remove the protective cap by wiggling it side to side while you pull it off the PTBT6.
2. Make sure the PTBT6 (including the sensor) is clean and dry.
3. Loosen the battery tray (to allow pressure equalization).
4. Firmly grasp the sensor body and slowly pull the sensor out. DO NOT allow any dust or moisture into the body of
the PTBT6.
TO INSTALL A NEW NITRATE SENSOR:
1. Line up the alignment tabs on the sensor with the alignment slots on the PTBT6 unit.
2. Gently push the sensor into position.
3. Tighten the battery tray cap.
BATTERY REPLACEMENT
When PTBT6 charge level falls below 25% immediately
replace the battery with a new N type battery.
1. In a CLEAN, DRY place unscrew the battery cap in a
counter-clockwise motion.
2. Slide the cap and battery housing out of the PTBT6.
3. Remove the depleted battery from its housing.
4. Insert a new battery into the battery housing oriented
with the negative end touching the spring.
5. Align the groove along the battery housing with the
guide bump inside the PTBT6 case and slide the battery housing back in.
6. Screw the battery cap back on in a clockwise direction. Do not over tighten.
MYRON L® COMPANY
2450 Impala Drive uCarlsbad, CA 92010-7226 uPhone: +1-760-438-2021
E-Mail: Customer Service – info@myronl.com u Technical Support – techquestions@myronl.com
Website: www.myronl.com!
This document contains basic instructions for making Nitrate measurements with your PTBT6.
Other Instructions:
• PTBT6 Basic CAL Instruction sheet: Includes instructions on performing a basic, 1-point calibration of the
PTBT6 (included with your instrument).
• PTBT6 Operation Manual: Includes detailed instructions on making measurements, changing parameters,
precision calibration and maintaining the PTBT6. Download from the Myron L® Company website
(www.myronl.com; Downloads tab).
• PTBTX2 App Operation Manual: Includes detailed instructions on operating all of the PTBTX2 App’s many
features and functions. Download from the Myron L® Company website (www.myronl.com, Downloads tab).
PTBT6 - LAYOUT
1. PEN BUTTON – Press to turn Ultrapen ON and place it in Standby mode.
2. BATTERY CAP – Unscrew to change battery.
3. LED INDICATOR LIGHT – Flashes rapidly when the PTBT6 is measuring
or once every 5 seconds when the PTBT6 is in Standby mode.
4. ISE ELECTRODE – An Ion Selective Electrode (ISE) that
detects the concentration of Nitrate in a liquid.
5. THERMISTOR – Measures temperature of sample
solution.
6. PROTECTIVE CAP – Protects sensor from damage and
can be used to hold solution when conditioning sensor.
• See MAINTENANCE section below for storage instructions.
• When removing or replacing the cap, gently wiggle it back and forth while pulling / pushing. DO NOT twist!
7. CAP STOP – DO NOT push the protective cap beyond the cap stop as sensor damage may occur.
SENSOR CONDITIONING
If the sensor is new and/or has been stored dry, the sensor needs to be conditioned before calibration or
measurement.
1. Remove the protective cap.
2. Rinse the sensor with clean water (preferably DI, RO, or distilled) and pat it dry with a clean soft lint-free cloth.
3. Fill the protective cap half-full with prepared calibration solution with Nitrate Ionic Strength Adjuster (NISA)
added, see Step 4, PREPARING SOLUTIONS, below.
4. Carefully put the cap back on the sensor for conditioning (use caution as excess solution may squirt out).
NOTES:
o It may take up to an hour for sensor to restore stable readings after dry storage.
o For best results, you should always condition the PTBT6 sensor using a prepared reference solution with a
value close to the lower end of the concentration values you will be measuring.
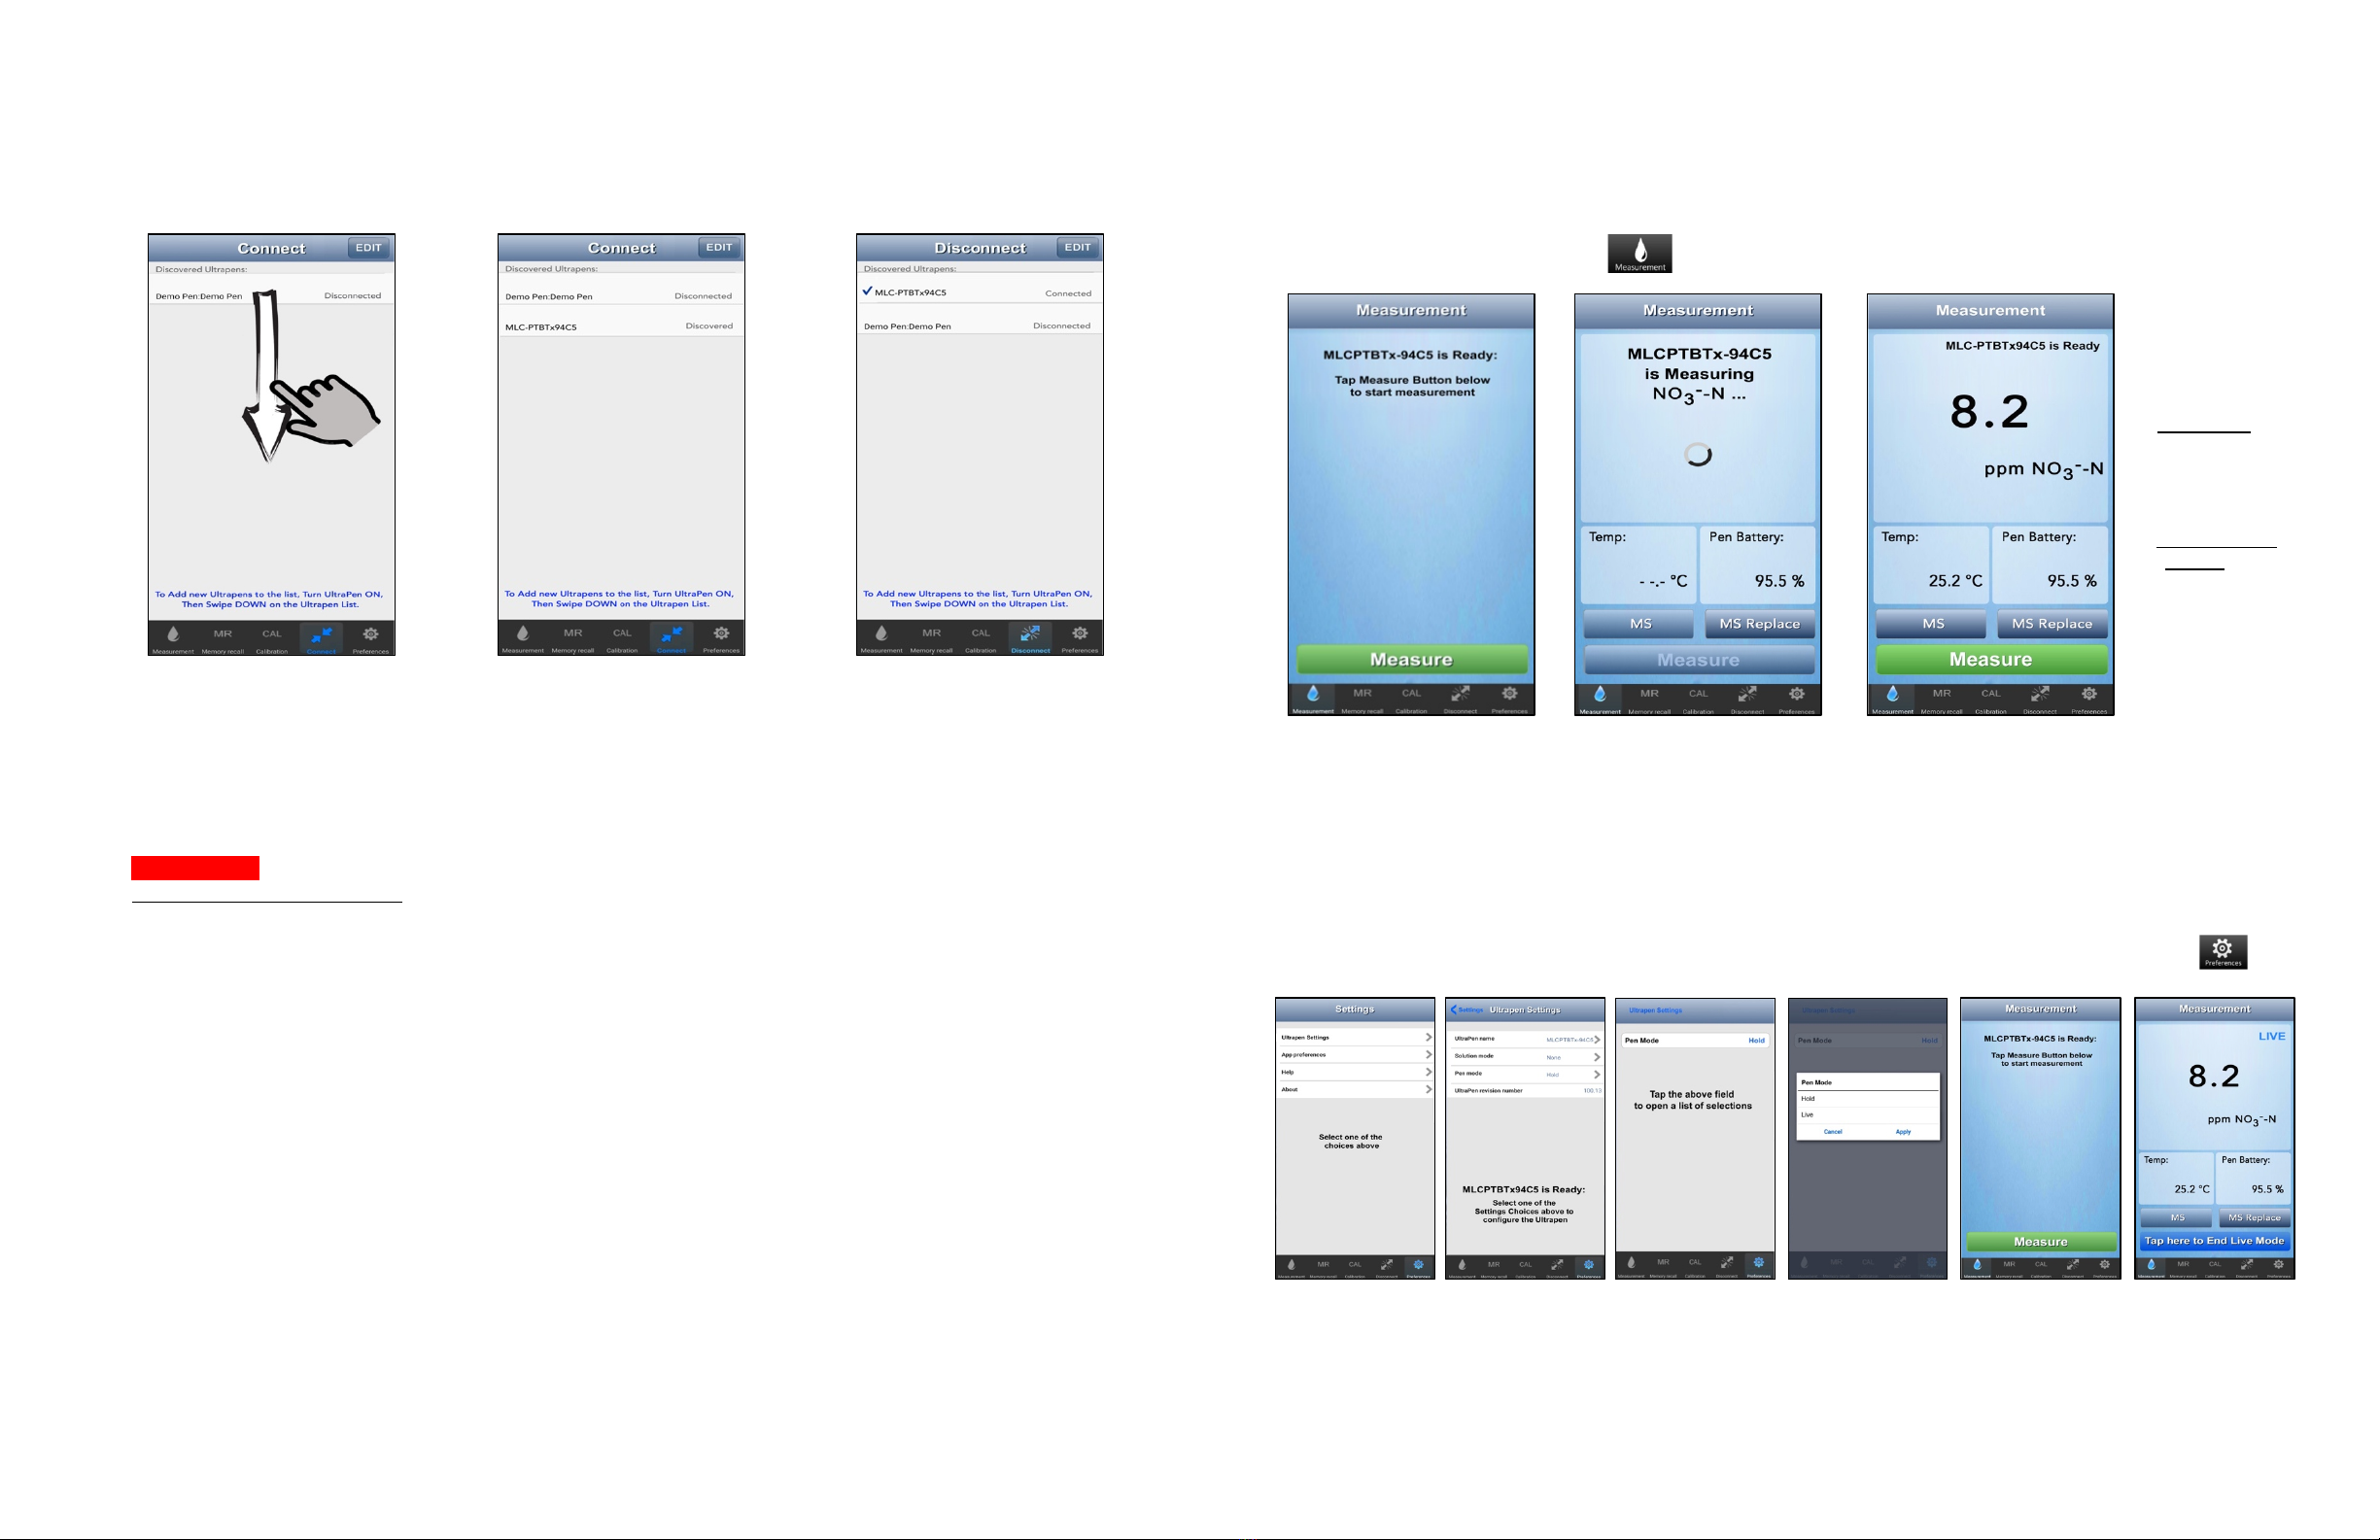
USING THE PTBT6
STEP 1 – DOWNLOAD THE “ULTRAPEN PTBTX2” APP
On and look for
SYSTEM REQUIREMENTS
iOS device running iOS 10.0 or later.
If you are using an iPad,
search for iPhone App.
Android device running OS 7.0 or later.