3
all openings and moving parts.
15. Use extra care when using on stairs.
16. To reduce the risk of re or electric shock, do not use this machine with
a solid-state speed control device.
17. The voltage and frequency indicated on the name plate must corre-
spond to the wall receptacle supply voltage.
18. When cleaning and servicing the machine, local or national regulations
may apply to the safe disposal of liquids which may contain: chemicals,
grease, oil, acid, alkalines, or other dangerous liquids.
19. Do not leave operating unattended.
Preparation
1. Remove furniture and other items from the area you are going to clean.
2. Vacuum carpet and upholstery, and remove debris.
3. Protect cabinets, walls and painted surfaces with drop cloths or plastic.
4. Inspect power cords for damages.
5. Remove protective wrapping from wheels.
6. IMPORTANT: Make sure the felt seal on top of the cleaning head is
thoroughly lubricated before using the T-REX™.
7. Attach the cleaning head at the base of the T-REX™. First, lean the
T-REX™ back and rest it on the handle. Second, thread the head onto the
exposed shaft in a counterclockwise direction.
8. Attach vacuum and solution hoses to unit.
9. Start extractor per operating instructions for unit.
Operating Instructions
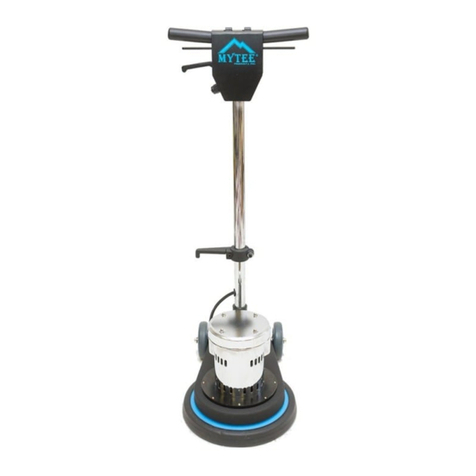
Step 1 – Adjust the handle. To do so, pull back on handle adjustment lever
and move the handle up or down to desired operating position. Most users
nd that they have better control and less fatigue if the handle is in a low
position, just around the hip line.
Step 2 – Controlling the motor and spray. There are triggers located on
both sides of the handle. The trigger on the left controls the solution ow.
Activating this trigger will lay down spray through the jets on the star. The
pressure of the spray is determined by the type of pump you have hooked
up, either on your portable extractor or truckmount.
The trigger on the right hand side controls the motor. To activate the motor,
you must rst push down the safety lockout, and then pull on the trigger.
PLEASE NOTE: Be sure that you have good control of the unit when you
activate the motor, as it will move quickly when started.
The airow of the unit is controlled by the vacuum source you have
hooked into the machine. The air ows constantly during operation.
Step 3 – Maneuvering the unit. The T-REX’s™ movement is controlled
by moving the handle up or down (similar to a oor machine). To move
the machine to the right, lift the handle slightly. To move to the left, lower
the handle slightly. The more you lift or lower the handle, the faster the
machine will move.
CAUTION – Do not tilt the machine on its side during use! Doing so may
result in the ejection of your glides, damage to the star, damage to prop-
erty, and/or injury.
To move the machine forward or backward, position the machine so the
head is “hovering” over one spot, and then push or pull forward or back.
CAUTION – Do not operate the machine on dry carpets. The friction
caused by the head movement may cause ber damage to the carpet.
After Use
1. When machine is transported or stored, apply the head protector.
2. Blow all air out of unit prior to storing with compressed air. Storing the
machine with uid in the lines can result in serious damage if the unit
freezes.
3. Store machine in a dry area in the upright position
ATTENTION: Do not expose to rain. Store indoors.
ATTENTION: If storing machine in freezing temperatures, be sure that
machine and solution system are completely drained and dry.
Maintenance Schedule
Maintenance item Daily Once a week
Inspect cords and hoses for breaks or
tears. Replace any damaged items.
Visually inspect machine for damage to
cleaning heads, etc. Repair as necessary.
Clean machine with an all purpose cleaner
and damp cloth.
Remove the in-line solution lter screen
and rinse under water to remove debris.
Check the spray jets for even spray. If
uneven, the jet may be clogged and need
cleaning. If clogged, remove spray tips
and soak them in a recommended liquid
neutralizer for up to six hours. To remove
spray tip, twist spray tip body counter-
clockwise. Do not use pointed objects to
unplug tips, damage will occur.
Check felt vacuum seal daily before use.
Make sure that seal is lubricated to near
saturation with included SuperLube® or 30
wt SAE motor oil. New units and seals do
NOT come pre-lubricated.
Remove the cleaning head. It unscrews in
a clockwise direction when looking at the
underside of the machine. Once you have
loosened it, the star should turn freely in
your hands. Wash the cleaning head and
shroud thoroughly, being sure not to wet
the motor assembly. Clean any lint buildup
from the star and vacuum heads.
Clean off any debris that is on the shaft
of the motor or the hub of the star. If not
cleaned regularly, debris here can damage
the oil seal on the gearbox, and result in
loss of oil.
WARNING: Operating the unit without
the gearbox properly lubricated can
result in damage.
Lubricate the felt vacuum seal with 30W
SAE motor oil.
Coat the shaft with WD40 or a similar
lubricant.
WARNING: When reinstalling the
vacuum star, make sure that it spins
freely. If it begins to require pressure,
unscrew it and clean threads. Dirt or
grit can block the threads, and if you
continue to tighten, may lock the star
on the motor shaft.
x
x
x
x
x
x
x
x
x
x
GENERAL INFORMATION
