INTRODUCTION
GETTING STARTED
UNPACKING AND SETUP
WHAT’S IN THE BOX
Packed with your C 717 you will nd:
• An AM loop antenna
• An FM lead-type antenna
• The SR 9 remote control with 2 (two) AAA batteries
• This owner’s manual
SAVE THE PACKAGING
Please save the box and all of the packaging in which your C 717 arrived.
Should you move or otherwise need to transport your C 717, this is by far
the safest container in which to do so. We’ve seen too many otherwise
perfect components damaged in transit for lack of a proper shipping
carton, so please: Save that box!
CHOOSING A LOCATION
Choose a location that is well ventilated (with at least several inches to both
sides and behind), and that will provide a clear line of sight, within 23 feet/7
meters, between the C 717’s front panel and your primary listening/viewing
position. This will ensure reliable infrared remote control communications.
The C 717 generates a modest amount of heat, but nothing that should
trouble adjacent components. It is perfectly possible to stack the C 717
atop other components, but the reverse usually should be avoided.
Nonetheless, it is generally preferable that the C 717 stands alone. It is especially
important that sucient ventilation be provided. If you are contemplating
locating the C 717 within a cabinet or other furniture, consult your NAD audio/
video specialist for advice on providing adequate airow.
QUICK START
In case you simply cannot wait to experience the performance of your new
NAD C 717 DVD Receiver, we provide the following“Quick Start” instructions
to get you underway. Before the steps below, connect your C 717 to a
TV/monitor.
Please make all the connections to your C 717 with the unit unplugged.
It is also advisable to power-down or unplug all associated components
while making or breaking any signal or AC power connections.
PLAY A CD OR DVD MOVIE
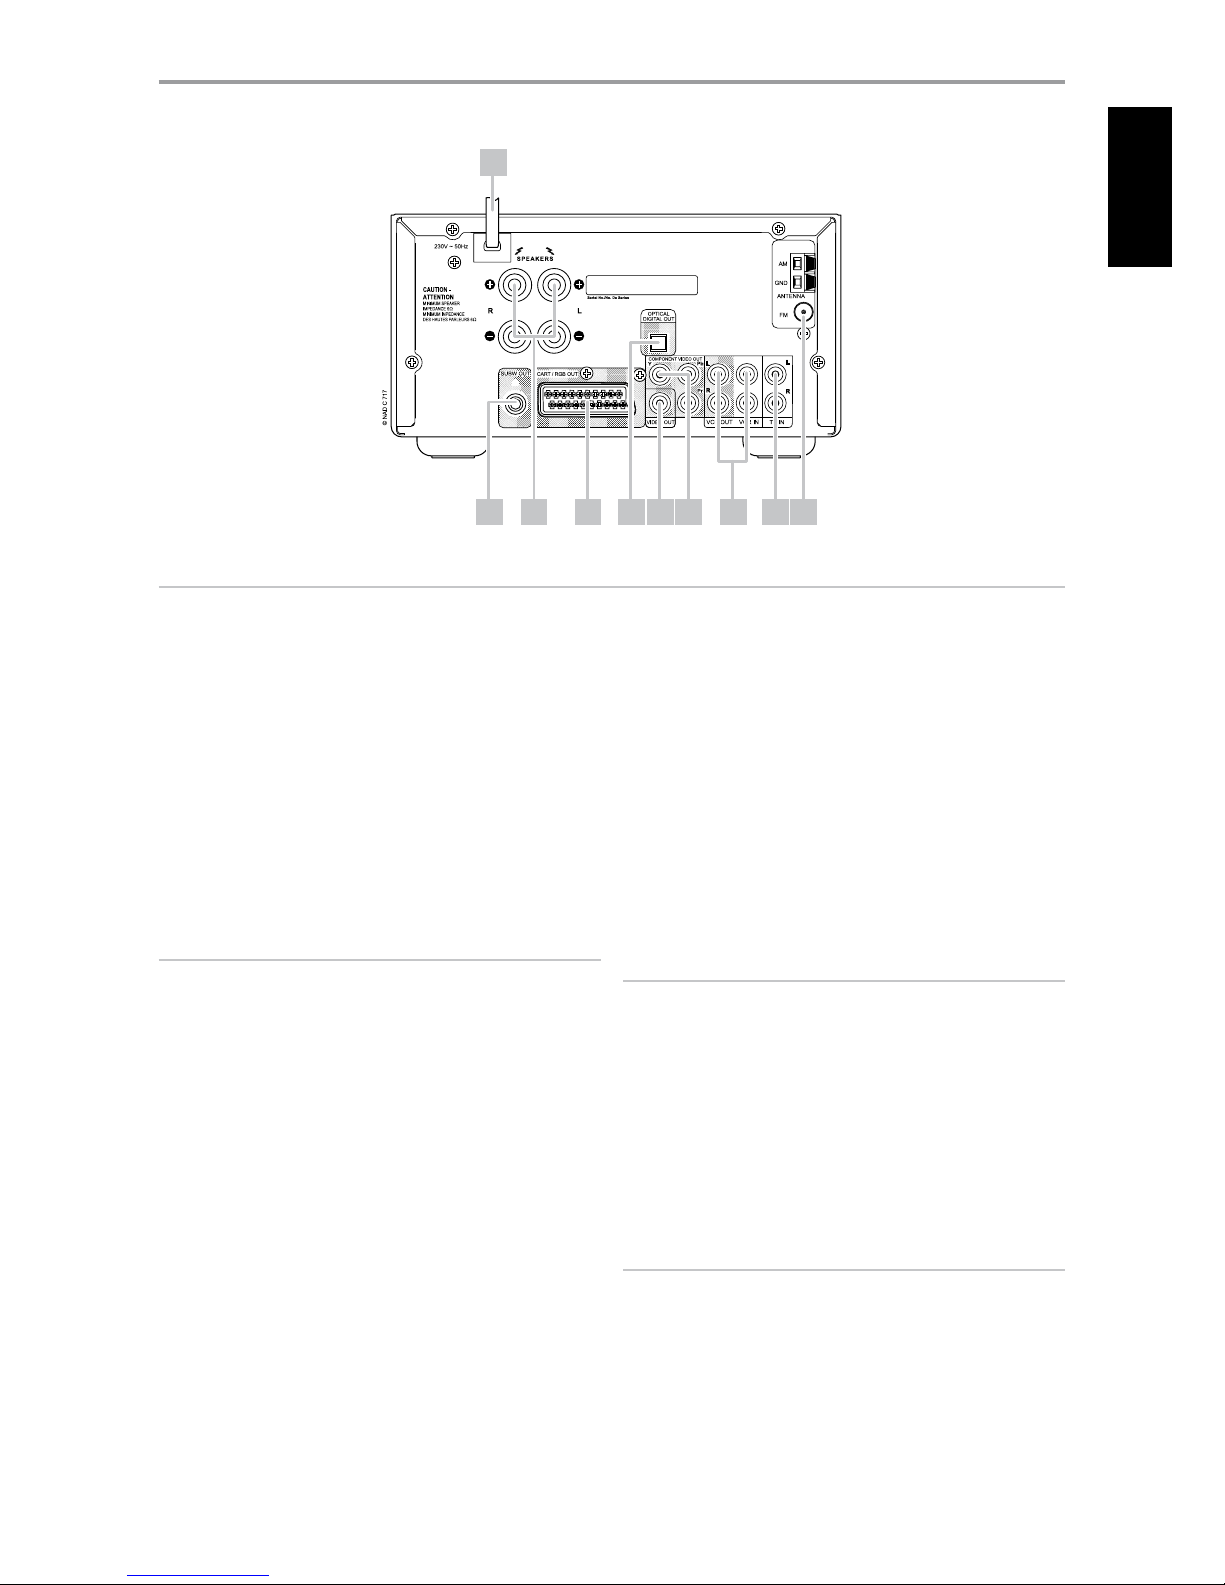
1 Connect the C 717’s “VIDEO OUT”jack to your TV/monitor’s
corresponding input.
2 Connect your left and right front speakers to the C 717’s “L” and “R”
outputs. Make sure to connect red to red (“+”) and black to black (“-”)
with care to avoid stray wires or strands crossing between terminals. If
your system includes a powered subwoofer, connect the C 717’s “SUBW
OUT”jack to its line input.
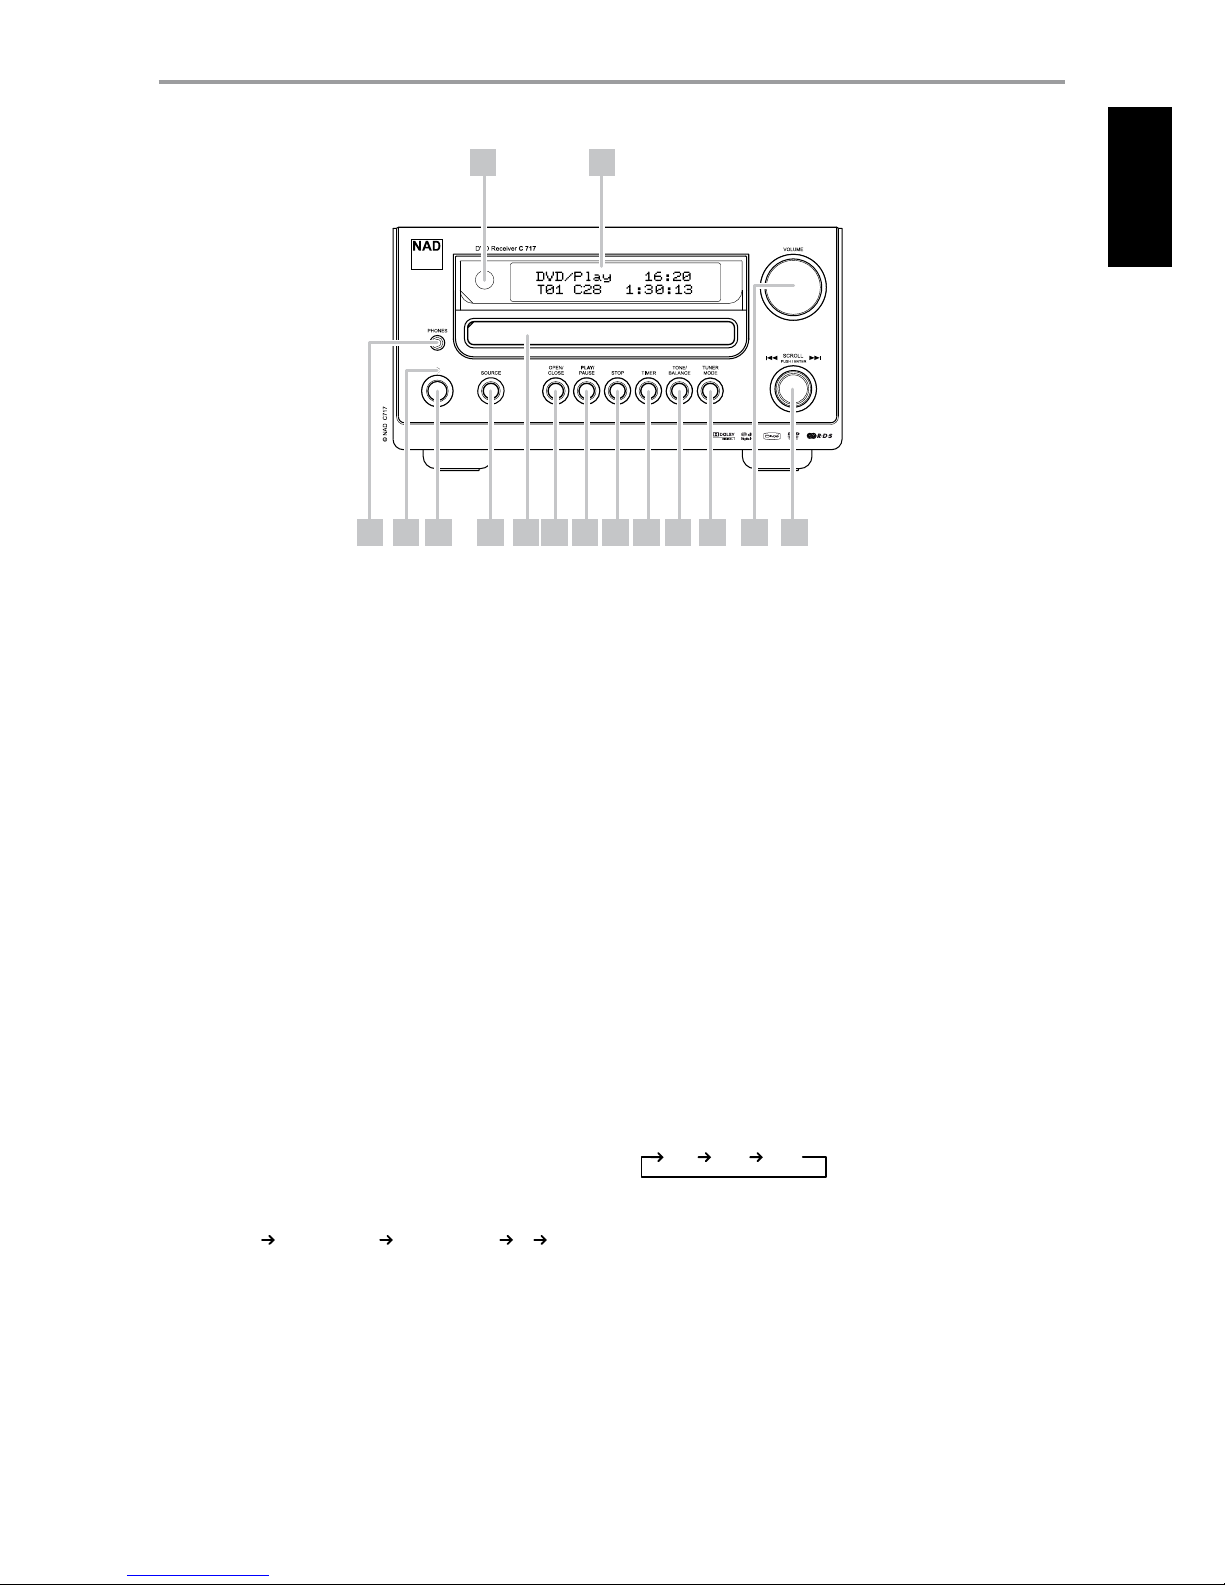
3 Plug the AC mains plug into the AC outlet; The Standby LED on the
front panel will be illuminated amber indicating the C 717 is in standby
mode ready to accept commands from either the front panel Standby
switch or the SR 9 remote control.
4 Press the STANDBY button to turn ON the C 717. The Standby LED
indicator will turn from amber to blue and illuminate the Vacuum
Fluorescent Display (VFD).
5 To start playback of the internal DVD player; press“DVD”at the SR 9 remote’s
DEVICE SELECTOR section and then, press [OPEN/CLOSE] button.
6 Insert the media and press [ ] button to start playback. You should
hear stereo sound, and see an image on the TV/monitor. If one or the
other fails to appear, you may need to use either the C 717’s on-screen
menu system to check assignment of audio and video inputs (Refer also
to the item about VIDEO OUT under the USING THE C 717’s INTERNAL
DVD PLAYER - SETUP MENU section of the OPERATION page).
Enjoy the movie or music, but be sure to set aside time to read this manual
thoroughly, and to set up, calibrate, and congure your C 717 carefully and
completely.
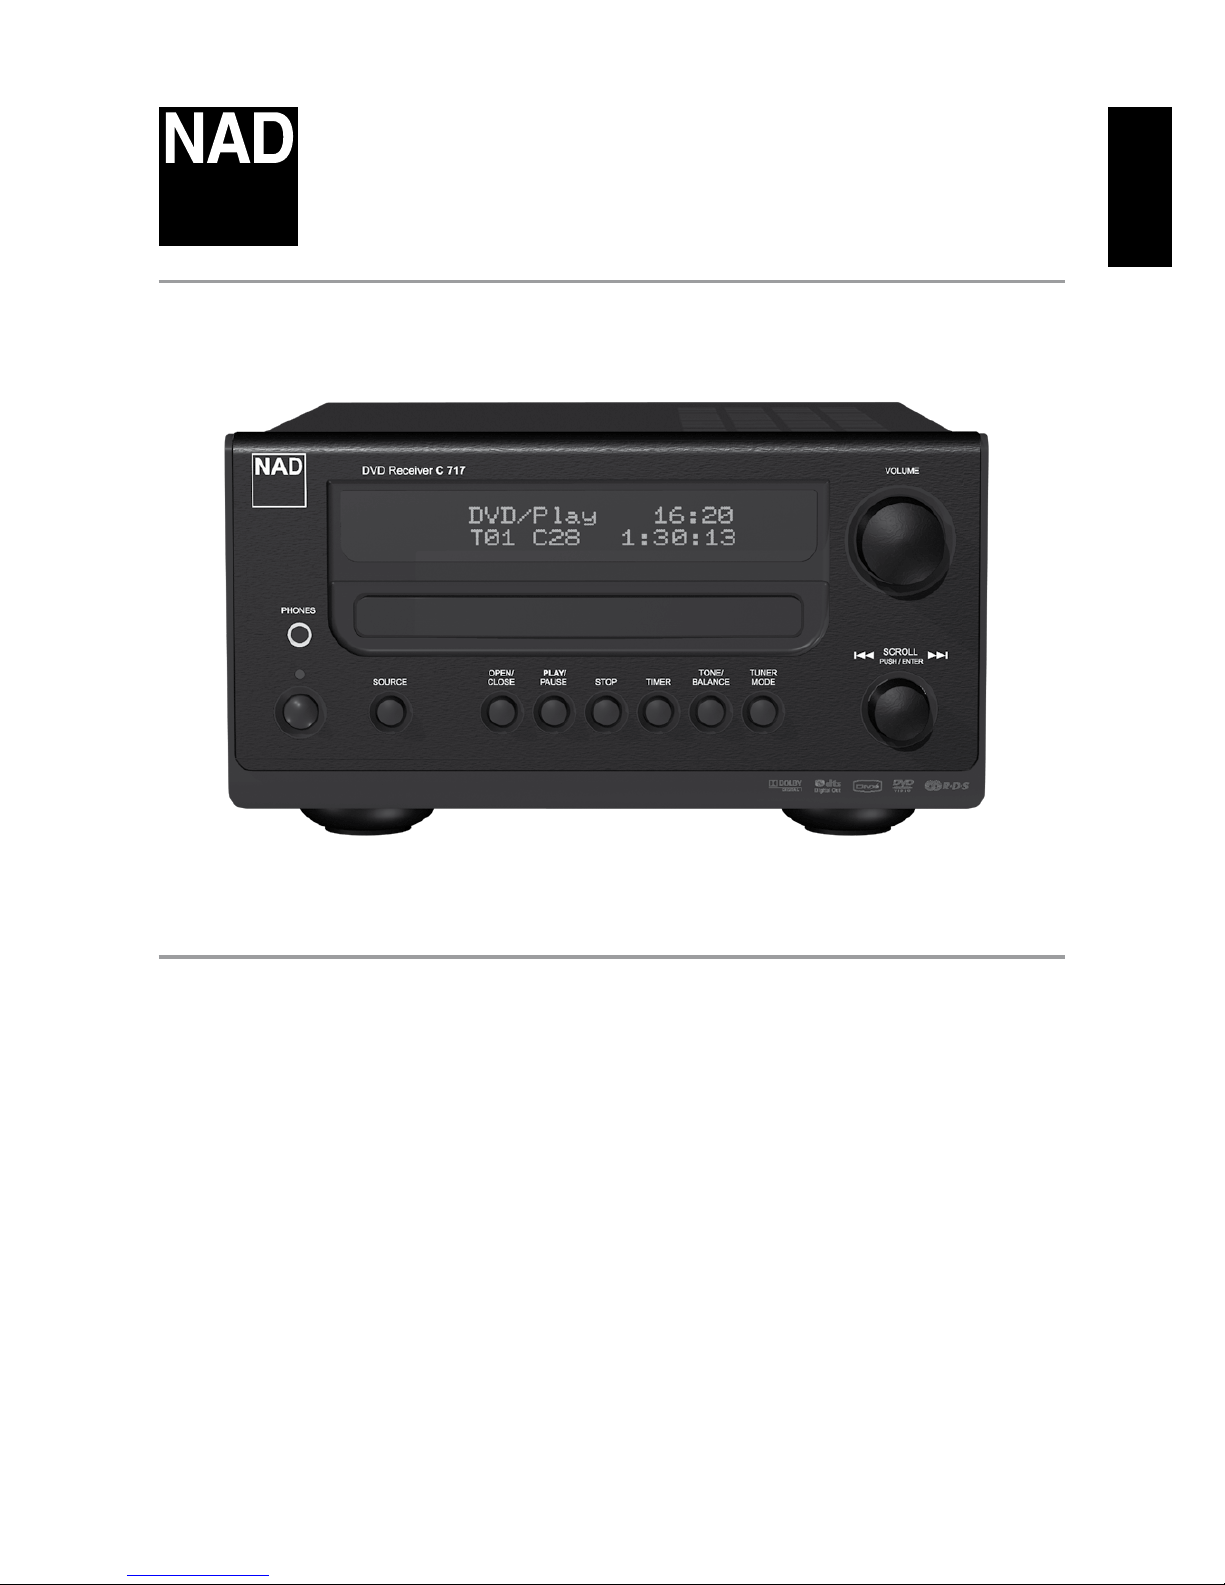
ABOUT THE C 717
Though the C 717 is among the most technically sophisticated integrated
Stereo DVD receivers, we worked hard to make it one of the most musically
transparent home-theatre components available as well - this is what
we mean by NAD’s “Music First” design philosophy. Here are just a few
examples:
• High-performance components used throughout the C 717’s analog
audio circuits to maximize quality from all sources.
• The C 717 incorporates a high quality DVD player with exceptional
playability. It has support for DVD Video, DVD±R, DVD±RW, VCD/SVCD
with playback control (PBC), Audio CD and CD-R/CD-RW that contains
audio titles, DivX, MP3, WMA and JPEG les.
• Gold-surfaced connectors are employed throughout to ensure
maximum signal integrity.
EASE OF USE
Despite the eort NAD has invested in the C 717’s sonic performance, we
expended no less in making it powerfully easy to use. Its design is uniquely
simple for so sophisticated a component, and the SR 9 remote control is
equally understandable, as are the C 717’s own front panel and on-screen
displays (OSD).
DEALING WITH HUM AND NOISE
Hum and noise sometimes may prove a challenge in audio systems. Note
these considerations to help prevent hum and noise problems:
• Power all your system’s audio component from AC outlets originating
from the same circuit of your house wiring. As far as possible, power
all audio components from the same outlet, or adjacent outlets on the
same circuit. It may be useful to power video displays (and computers!)
from outlets on another circuit, especially if that circuit is supplied from
the other “leg”of the house wiring.
• Do not bundle analog audio cables with AC power cables, or with
coaxial digital-audio cables. It is best if they cross at right angles if they
must be in close proximity.
• Employ high-quality, well-shielded audio cable throughout, and ensure
that all connections are secure.
• A pencil-eraser can be used to burnish copper- and gold-plated
contacts to ensure good, low-resistance contact; specialized contact-
cleaners can also be useful. Avoid unnecessary unplugging and
re-plugging since the gold (or copper) contact plating of typical cable
connectors, even very high-quality ones, is very thin and easily worn.
Track down hum/noise problems one component at a time, working
backwards from the C 717. That is:
1 Connect the speakers to the C 717 only, and check for hum.
2 Then connect one component only (a CD player, for example) alone,
with no other components connected and check for hum.
3 Connect additional components, one at a time, to the C 717 and check
for hum.
At each stage, if hum/noise appears, examine the audio cabling and AC-
power routing of the new component. In some cases, moving the new
component’s AC cord to a dierent outlet, or installing a ground-lift (3-to-2-
prong adapter) on its power cord, will eliminate the hum.