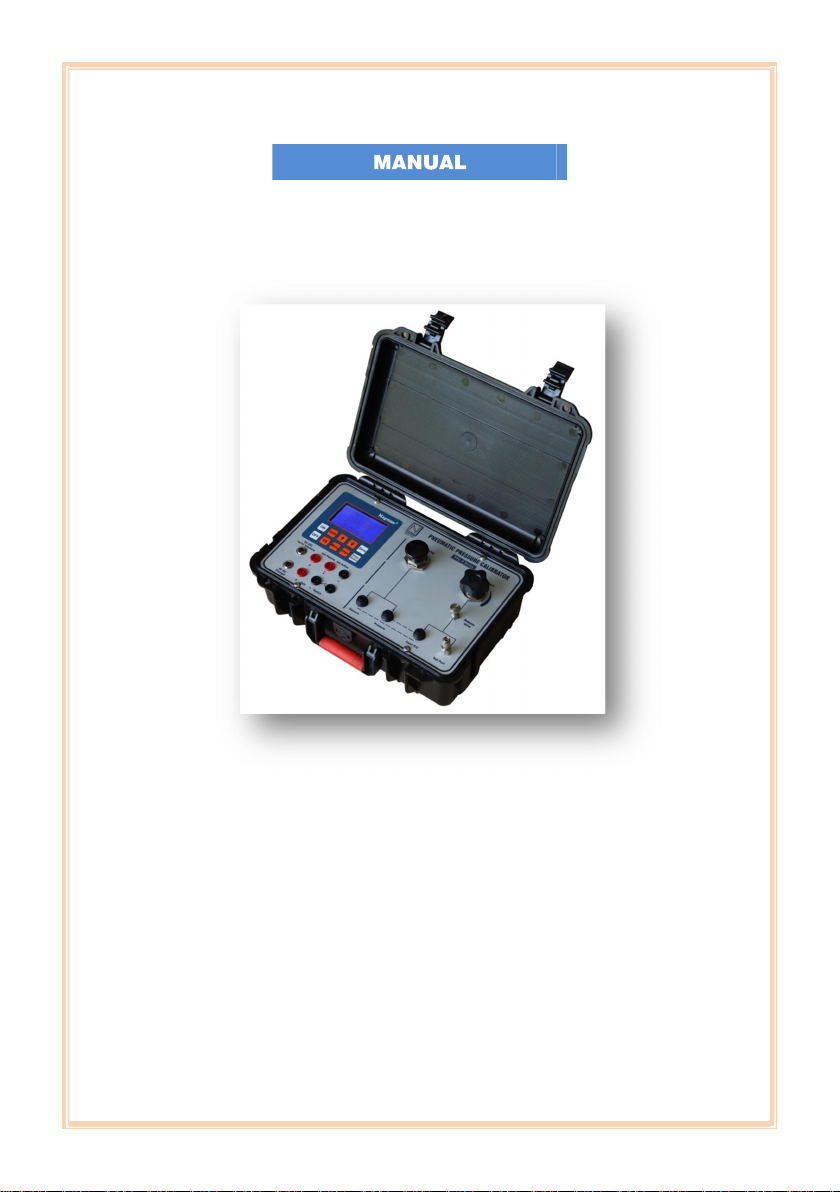
Nagman PPC-P User manual

Portable Pneumatic
PRESSURE CALIBRATOR
PPC-P / PPC-P+

NAG/IM/PPC-P/P+/01/22 2
BRIEF PROFILE
An ISO 9001-2015 certified Instrumentation company
(since 1972) serving Industries in India & Worldwide thro’ the
Manufacture & Supply of World-Class Calibration
Instruments & Systems like Temperature, Pressure & Signal
Calibrators, Black Body Calibration Sources, Pneumatic &
Hydraulic Hand Pumps, Dead Weight & Comparison Testers,
Calibration Test Benches, etc.

NAG/IM/PPC-P/P+/01/22 3
Dear User,
Thank you for selecting Nagman’s Pneumatic
Pressure Calibrator and becoming a proud
owner of this Calibration Instrument.
We have strived hard to ensure the accuracy
of the contents of this manual. We would
appreciate any suggestions/feedback to
correct any errors noticed and to improve
the quality of contents of this Manual
Specifications are subject to change owing to
continuous development and we reserve
rights to effect Changes / Modifications to
this Manual.
Read the Instructions before starting to use
the Product.
Wishing you for a long association with us.
For any service related issues, please contact
VERSION CONTROL
Version No. Updated on Updated by
V 1.1 11-05-2022 Nagman

NAG/IM/PPC-P/P+/01/22 4
CONTENTS
S.No. Description Page No.
1. Introduction …………………………………………………………..5
2. Specification…………………………………………………………….6
3. Standard Delivery & Optional Accessories ……………8
4. Parts Identification with Picture ……………………………9
5. Connection Diagram ………………………………………….…16
6. Safety Instructions ………………………………………………….17
7. Operating Instruction ………………………………………….….20
8. Troubleshooting / Maintenance……………………………..22

NAG/IM/PPC-P/P+/01/22 5
1. INTRODUCTION
NAGMAN’s Portable Pressure Calibrator
(Pneumatic) Model : PPC P / PPC-P+ is simple,
easy to use, compact, lightweight and portable.
The available pressure range is -0.85 bar Vacuum
to 20 bar.
The PPC-P / PPC-P+ Calibrators are designed for
fast and traceable calibration of variety of
pressure measuring instruments and are supplied
ready for use.
It is important to choose the right media for your
calibration task, so please make sure before
calibration of an object that the pump media is
compatible with the object.

NAG/IM/PPC-P/P+/01/22 6
2. SPECIFICATION
ENVIRONMENT
Operating temperature 15 – 50°C
Storage Temperature Range 10 – 60°C
Humidity Range 40 to 75 % RH
PRESSURE
Range -0.85 to 2 / 7 / 10 / 20 bar
Accuracy ±0.05% / ± 0.025% of Full Scale
Temperature Compensation 0 to 50˚C (Automatic)
Over pressure alarm 120% of FS.
READ OUT SPECIFICATIONS
Pressure units (as per range) Mpa, Atm, bar, kg/cm2, mH2O, Psi, inHg,
ftH2O, kpa , inH2O, mmHg, mbar, CmH2O.
Display Graphic Display
Resolution Minimum 5 Digits.
INPUT SPECIFICATIONS
SWITCH TEST INPUT
Pressure Switch Test 5 VDC (Approx.)
Impedance Less than 50 ohms.
mA INPUT
NAG/IM/PPC-P/P+/01/22 7
Range 0 to 50 mA (Active loop) & 0 to 25mA
(Passive loop)
Accuracy ±0.05% of Full Scale
Resolution 0.001 mA
VOLTS INPUT
Range 0 to 30 VDC
Accuracy ±0.05 % of Full Scale
Resolution 0.001 V
POWER SUPPLY Rechargeable battery NI-MH – 7.2 volts
The NI-MH rechargeable batteries last for
long time operation and do not need
maintenance.
If the battery voltage drops below 6.5
volts, the display shows the message
“LOW BATTERY”. Recharge requires at
this point.

NAG/IM/PPC-P/P+/01/22 8
3. STANDARD DELIVERY & OPTIONAL ACCESSORIES
Standard Delivery
Digital Pressure Calibrator
Hoses with End Fitting
Test Leads & Seals Kit
External Charger
Computer Interface
Instruction Manual
Set of Adaptors:
BSP
⅛” BSP(F) X ¼” BSP (M)
½” BSP(F) X ¼” BSP (M)
⅜” BSP(F) X ¼” BSP (M)
NPT
⅛” NPT(F) X ¼” BSP (M)
¼” NPT(F) X ¼” BSP (M)
½” NPT(F) X ¼” BSP (M)
⅜” NPT(F) X ¼” BSP (M)
Optional Accessories
Calibration Certificates are issued in Accordance
with our Scope as granted by NABL per ISO/IEC
17025:2017 Standards
“Calpress” Calibration Software with Cable

NAG/IM/PPC-P/P+/01/22 9
4. PARTS IDENTIFICATION

NAG/IM/PPC-P/P+/01/22 10
ON/OFF :
a. Switch ON or OFF the PPC-P-20 by activating the soft key
<On> or <Off>.
b. The following message will be shown in the display:
c. The self-calibrating message indicates an internal
hardware test.
d. After 3 seconds the display will change to readout for
Pressure and transmitter input.
NAGMAN
INSTRUMENTS
PORTABLE
PRESSURE
CALIBRATOR
MODEL : PPC
-0.85 - 20 BAR
FS ERROR : 0.05%
0.000 psi
0.000
mA

NAG/IM/PPC-P/P+/01/22 11
The pressure unit and transmitter input
would be the last used before the PPC-P-20
was switched off earlier
2. ZERO
a. Press the ZERO soft key for automatic zero
adjustment. The Zero adjustment also includes an
internal hardware calibration.
b. After 3 seconds the following message will be shown
in the display
3. UNIT/ENTER
a. There are 15 standard pressure units in PPC-P-20.
The following table Shows the order of the units
displayed.
S.N
o.
Unit
Display
Readout
1
Bar
1.0000 bar
0.000mA
2
Pounds Per Square
Inch
14.504Psi
0.000mA
3
kilo gram per square
centi meter
1.0197 Kg/cm
2
0.000mA
4
Kilo Pascal
100 kPa
0.000mA
5
Mega Pascal
0.1 Mpa
0.000mA
Zero Setting

NAG/IM/PPC-P/P+/01/22 12
S.N
o.
Unit
Display
Readout
6
Millimeter of Mercury
750.06mmHg
0.000mA
7
Atmosphere
0.98692 Atm
0.000mA
8
Meter of water
10.197 mH
2
O
0.000mA
9
Inches of Mercury
29.53 inHg
0.000mA
10
Inches of water
401.46 inH
2
O
0.000mA
11
Feet of water
33.455 ftH
2
O
0.000mA
12
Milli bar
1000mbar
0.000mA
13
Centimeter of water
1019.7 cmH
2
O
0.000mA
14
Millimeter of water
10197 mmH
2
O
0.000mA
15
pascal
100000 Pa
0.000mA
b. To get the particular unit Press <UNIT> and < > and < >
soft key in the keypad until the particular unit shown in
the display and Press <Enter> Key.
c. The selected unit will remain in the memory instrument
even though power is switched OFF.

NAG/IM/PPC-P/P+/01/22 13
4. MENU
a. In Menu option there are 6 functions.
They are
1. mA 2. Volt 3. Mean peak ON
4. Mean peak OFF 5. Switch Test 6. Exit
b. Select any of the above function by pressing
<MENU> < > < > and <Enter> soft key.
mA/Volt
a. PPC-P-20 can measure the input signal from current or
voltage transmitter and generates 24v DC to power the
transmitters
b. Range for the Current Transmitter is 4 to 20mA
c. Range for the Voltage Transmitter is 0 to 30v.
Connection for Transmitter

NAG/IM/PPC-P/P+/01/22 14
Mean Peak ON/OFF
On pressing the key, Display shows the minimum and
maximum pressure measured during the pressure
measurement.
E.g.
bar
Max : 0.2461
Min : 0.2460
Switch test
a. When the switch test terminals are NC(Normally Closed),
display shows the pressure value at which the Terminals
closed.
Bar
1.3645
Open :
Close : 1.3645
b. When the switch test terminals are NO(normally Open),
display shows the pressure value at which the Terminals
opened.

NAG/IM/PPC-P/P+/01/22 15
Battery Charging
Before use of the calibrator for first time, charge the battery
for 8 hours by connecting the external battery charger to the
instrument.
Bar
0.2461
Open : 0.2461
Close : 1.3645

NAG/IM/PPC-P/P+/01/22 16
5. CONNECTION DIAGRAM

NAG/IM/PPC-P/P+/01/22 17
6. SAFETY INSTRUCTIONS
Symbols Used
S.
No. Symbol Description
1.
Read the user manual before operating
the instrument.
2.
Warning- conditions that may pose
hazards to the user.
3. Caution-conditions that may damage the
instrument.
4.
Special Information
Do not connect voltages above 30V to the input
terminals.
Do not attach test instrument to a high-pressure
source. Follow these instructions carefully to
avoid damage to tester and/or personal injuries.
Do not use spanners on Quick fit adapters (finger
tight all the way down is all that is required).

NAG/IM/PPC-P/P+/01/22 18
Events that may compromise the safe use of the
instrument and result in considerable personal or
material damage
Do not connect Unit Tester Test with Potential
above 30V to the input terminals.
Don’t press the arrow keys to change the units
while measuring mean peak value. If you need to
change the units go to UNIT option and then
select.
Before switching off the calibrator, release the
applied pressure. Switch off the calibrator using
the On/Off key. Turning off the calibrator during
the calibration process will not damage either
the instrument or the pump.
The instrument under test must always be
removed from the calibrator after use. There is
risk that the instrument may become damage
when we apply the pressure.
Event that may compromise the safe use of the
instrument and result in slight personal or
material damage.

NAG/IM/PPC-P/P+/01/22 19
Read this manual carefully before use in order to
avoid personal injuries and/or damage to the
equipment and to obtain maximum value of your
calibration system.
If the pressure is below 1% of the range, and the
ZERO function cannot be activated, Please
contact us.

NAG/IM/PPC-P/P+/01/22 20
7. OPERATING INSTRUCTION
The Pressure source for the PPC-P -20 is built-in hand
held vacuum and Pressure pump with a Vernier
adjustment.
Attach gauge or vacuum device to the Test port using
¼” BSP hose fitting connected to the Test port.
Switch the indicator ON.
PRESSURE CALIBRATION
Open the release valve in anticlockwise direction.
Short input (p/v) terminal with the pressure terminal
using hose.
Turn vernier valve in anti-clockwise direction and
maintain it in semi-open position.
Set the indicator to zero by pressing <Zero> soft Key.
Hand Tight release valve of the pump in clockwise
direction.
Pump the movable handle until 80% of the pressure
is generated.
Turn Vernier (fine adjustment) counter clockwise to
decrease pressure and clockwise to increase pressure
of item being tested. Turn Vernier slowly for precise
incremental pressure control.
Upon completion of testing, open the Release valve
in anti- clockwise to release the Pressure to zero and
remove the test device from the hose end.
This manual suits for next models
1
Table of contents
Other Nagman Test Equipment manuals