12.
On/Off
13. .
14. .
15. .
16. .
AWG.
17. .
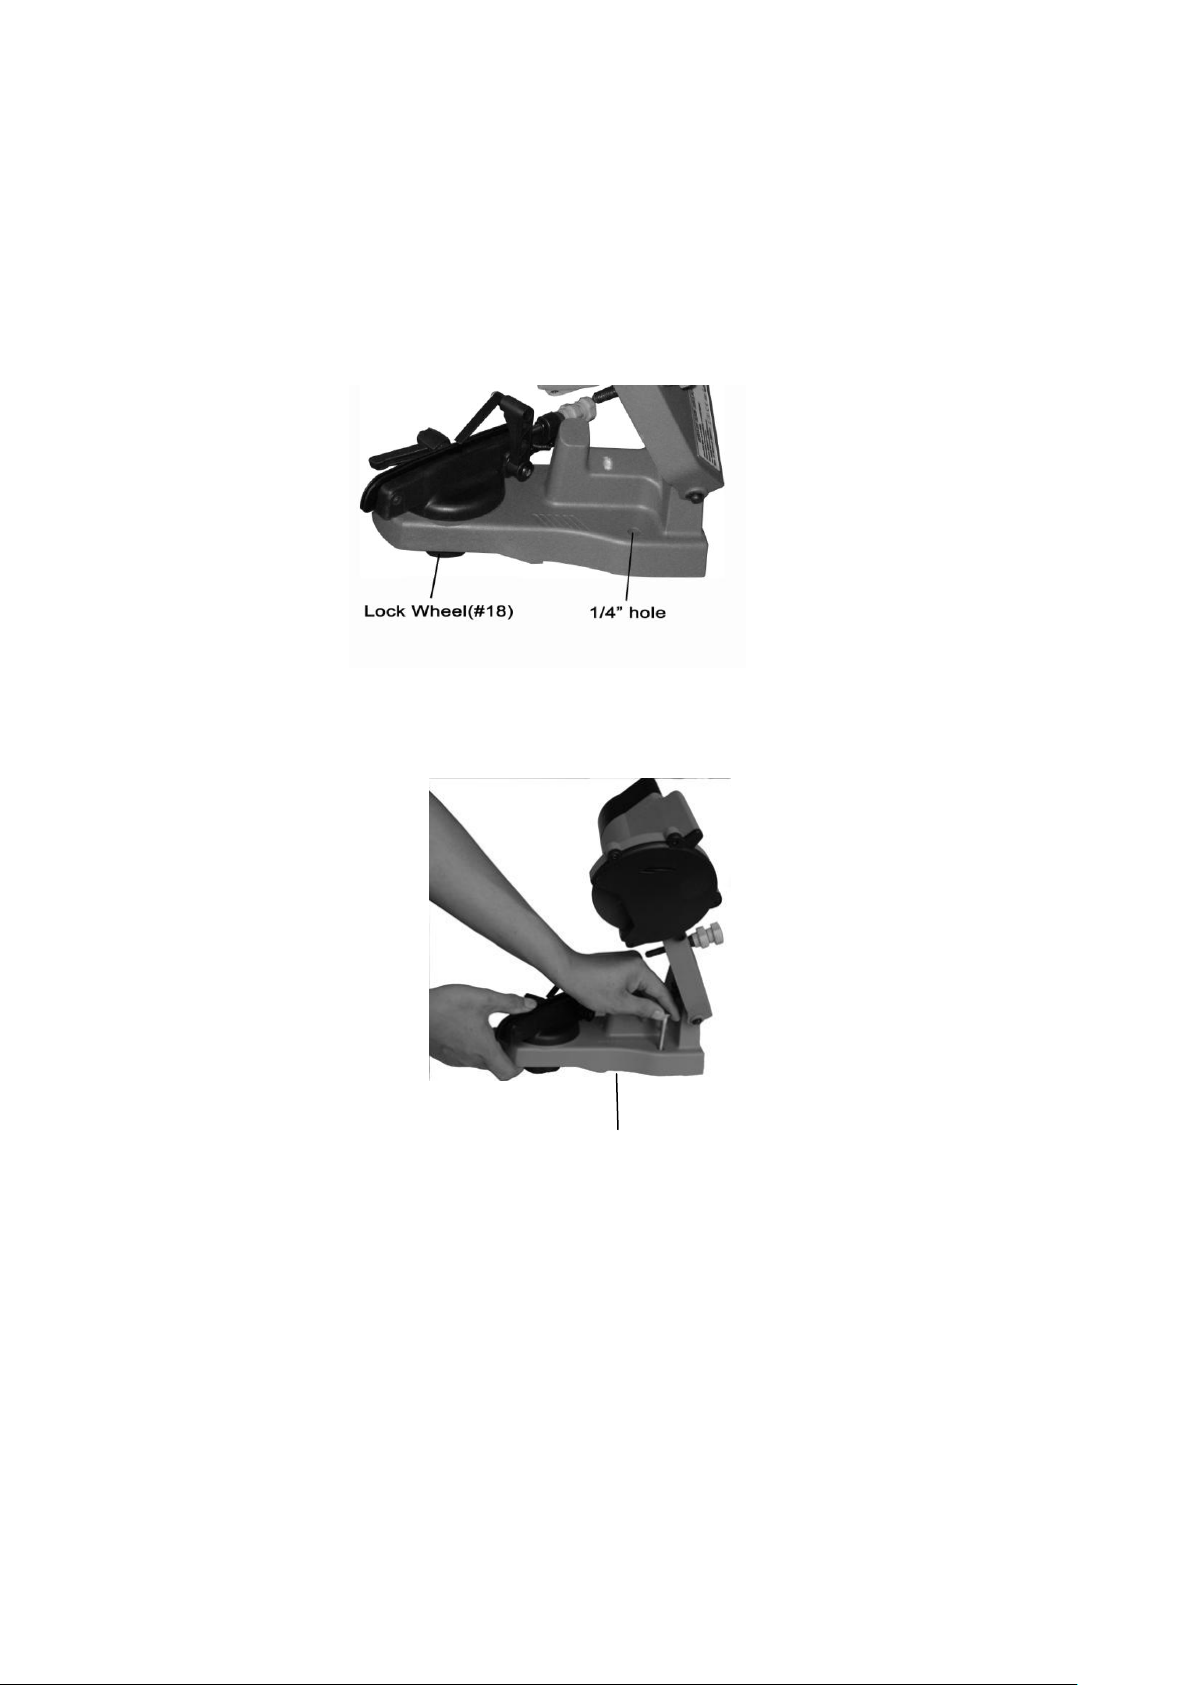
18. .
:
:
.
1. .
2.
3.
.
4. (#11).
5. (#8) .
6.
7.
8.
9.
10.
: