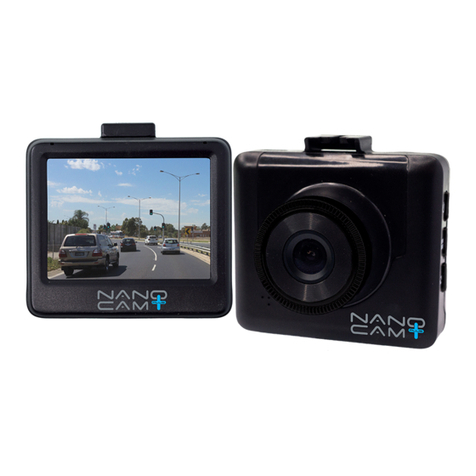
NanoCam Plus NCP-DVR1080P User manual


1
CONTENTS
1.0 CAUTION ...................................................................................................4
1.1 Battery Warning...................................................................................5
1.2 Product Information.............................................................................6
2.0 INTRODUCTION .........................................................................................7
2.1 Package Contents................................................................................8
2.2 Product Overview.................................................................................9
3.0 BUTTON FUNCTIONS...............................................................................10
4.0 GETTING STARTED..................................................................................11
4.1 Inserting a Micro SD Card..................................................................11
4.2 Removing a Micro SD Card................................................................12
4.3 Installing the NCP-DVR1080P ...........................................................13
4.4 Adjusting the Angle of the NCP-DVR1080P.......................................14
4.5 Connecting to Power..........................................................................15
4.6 LED Indicator .....................................................................................16

2
5.0 POWERING THE NCP-DVR1080P ON/OFF................................................16
5.1 Auto Power On/Off .............................................................................16
5.2 Manual Power On...............................................................................16
5.3 Manual Power Off .............................................................................17
5.4 Reset the Car DVR .............................................................................17
6.0 INITIAL SETTINGS...................................................................................17
6.1 Formatting the Inserted Micro SD Card ............................................17
7.0 SETTING THE TIME AND DATE ................................................................18
8.0 VIDEO MODE ...........................................................................................19
9.0 INTERFACE .............................................................................................20
9.1 Video Mode.........................................................................................20
9.2 Setup Menu........................................................................................21
10.0 VIDEO MENU ...........................................................................................22
11.0 PICTURE MODE .......................................................................................26

3
12.0 PLAYBACK ..............................................................................................27
12.1 Removing the Existing 3M Mount from my Windscreen ...................27
13.0 WARRANTY TERMS & CONDITIONS.........................................................28

4
1.0 CAUTION
• Ensure you are using your Car Dash Cam within your countries’
road laws. Please make sure you are familiar with your local road
legislation before use.
• Avoid leaving your Dash Cam in direct sunlight for extended periods of
time in an unventilated space.
• Please set time and date before you use this device to record.
• The notifications given by the Car Dash Cam are suggestions only,
please drive to the actual conditions.
• The values displayed in this system, such as speed, position, and the
distance warning, may be affected by the surrounding environment.
• The system is to be used only for non-commercial use, within the
limits permitted by the relevant laws.
• Avoid using the Car Dash Cam near any devices that emit radio
interference (e.g. Microwave Ovens).
• It is considered normal operation for the Car Dash Cam to get warm
during use.

5
1.1 BATTERY WARNING
Always charge the Car Dash Cam using the provided charger. Improper
charging of the Car Dash Cam and may result in failure of the internal
battery.
Never dismantle the Car Dash Cam or expose the internal battery.
Do not dispose of the Car Dash Cam in fire.
Dispose of the Car Dash Cam observing local regulations being mindful of
the internal battery.
Do not attempt to replace or expose the internal battery.


7
2.0 INTRODUCTION
Thank you for purchasing a Nanocam Plus Dash Cam. Please read through
instructions before attempting to install or use this product.
This User guide is designed to assist with the day to day operation of the
NCP-DVR1080P.
Before attempting to use or install your Nanocam Plus NCP-DVR1080P,
please ensure you have read and understood all of the safety notes below.
• Avoid leaving your NCP-DVR1080P in direct sunlight for extended
periods of time in an unventilated space.
• Do not expose your NCP-DVR1080P to liquids, excessive dusty
conditions or temperatures exceeding 60°C.
• Only use the included cables to power and charge the NCP-DVR1080P.
• Please do not attempt to adjust the NCP-DVR1080P position or
settings whilst you are operating your vehicle.
• Please clean the windshield thoroughly removing all dust and dirt
particles before fixing the adhesive mount.
• Since the mount sticks on the wind shield with 3M mount, please
ensure that the position of the camera is best located to capture
maximum area.

8
• We suggest you to power-on the dash camera and test the playback
image on screen first prior to removing the 3M tape for installation.
• Only remove the 3M tape when you are satisfied with the dash camera
placement and image position are delivering the best possible image
and view of the road ahead.
• Ensure you are using your NCP-DVR1080P within your countries’
road laws. Please make sure you are familiar with your local road
legislation before use.
2.1 PACKAGE CONTENTS
Spare 3M Adhesive User Guide
3M
Dash Camera 3M Mount 12/24V Adapter


10
3.0 BUTTON FUNCTIONS
MODE BUTTON
When Device is not recording, press the M button to switch between Video
Mode / Photo Mode / Play Back mode.
OK BUTTON
Press the OK Button to start/stop video recording in Video mode.
Press the OK Button to take photo in Camera mode.
Press the OK Button to play/pause current video on playback mode.
LOCK FILE BUTTON
When DVR is recording, Press Lock Button to lock the current file. Locked
file won't be over recorded during loop recording.
POWER BUTTON
Press and hold the Power Button to Power Off the Device. Press once to
switch LCD Screen Off however DVR will continue recording.
DOWN BUTTON
In Settings menu use the down key to toggle between the settings.
Press to turn On/Off the inbuilt Microphone.
MENU BUTTON
Press to enter or exit the Settings Menu.

11
UP BUTTON
In the Settings menu use the Up Button to toggle between the settings.
RESET BUTTON
Press to reset to factory settings.
MIC
Microphone Position
TF CARD SLOT
Micro SD Card Slot. Minimum 16GB and maximum 32 GB, Class 6 SD Card.
USB INTERFACE
Mini USB Power cable to connect with power adapter provided in the
packaging.
4.0 GETTING STARTED
4.1 INSERTING A MICRO SD CARD
With the Car DVR turned off and the screen facing towards you insert
your Micro SD Card (not included) in the slot on the right side of the NCP-
DVR1080P with the text on the Micro SD card away from you. Push the
memory card in until a click is heard.


17
5.3 MANUAL POWER OFF
Make sure that recording has been stopped and then press the Power
button on the lower right hand side of the car DVR. After powering down
the device please wait for 10 seconds before turning the Car DVR back on.
5.4 RESET THE CAR DVR
If the Car DVR does not function normally, try restarting the car DVR. To
restart the car DVR, using a small pin press and hold the Reset button on
the bottom side of the camera.
6.0 INITIAL SETTINGS
Before using the Car DVR we recommend Formatting the Inserted Micro
SD Card and setting the correct Time and Date.
6.1 FORMATTING THE INSERTED MICRO SD CARD
Formatting the Micro SD card will delete all information on the inserted
Micro SD Card and prepare the card for use with the Car DVR.
1. Press the Button to stop the Car DVR from recording.
2. Press the Menu Button to enter the Settings Menu.
3. Use the and Buttons to navigate the Settings Menu and
highlight the Format setting and press the right to select.

Table of contents
Other NanoCam Plus Dashcam manuals

NanoCam Plus
NanoCam Plus NCP-DVRWIFI User manual

NanoCam Plus
NanoCam Plus NCP-DVRGPSWIFI User manual
NanoCam Plus
NanoCam Plus NCP-DVR1080 User manual
NanoCam Plus
NanoCam Plus NCP-DVRT1 User manual

NanoCam Plus
NanoCam Plus NCP-BDVR1 User manual

NanoCam Plus
NanoCam Plus NCP-DVR2K User manual
NanoCam Plus
NanoCam Plus NCP-DVRHD2 User manual

NanoCam Plus
NanoCam Plus NCP-DVR2K User manual
NanoCam Plus
NanoCam Plus NCP-DVRGWS User manual
NanoCam Plus
NanoCam Plus NCP-DVR720 User manual