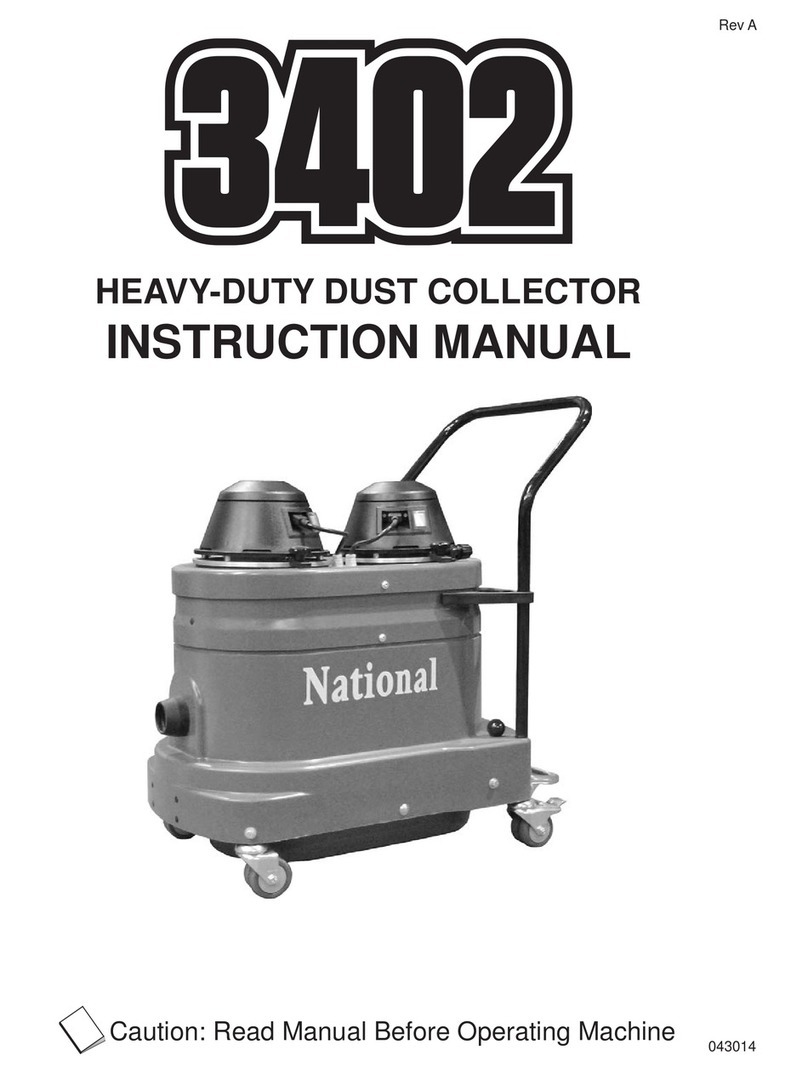
Nation Flooring Equipment 3474-L-SUN User manual

HEPA DUST COLLECTOR
INSTRUCTION MANUAL
Read Manual Before Operating Machine
010614
Rev A


Table of Contents
www.nationalequipment.com Phone: 763-315-53003
Table of Contents .............................................................................................................................................................3
Features and Specifications............................................................................................................................................4
Safety..............................................................................................................................................................................5-9
General Rules for Safe Operation.........................................................................................................................5-6
Grounding.................................................................................................................................................................7
Extension Cords.......................................................................................................................................................8
Guidelines for Using Extension Cords......................................................................................................................8
General Safety.......................................................................................................................................................8-9
Service......................................................................................................................................................................9
Machine Operation....................................................................................................................................................10-11
Unpacking...............................................................................................................................................................10
Function..................................................................................................................................................................10
Machine Use...........................................................................................................................................................10
Replacing Bag........................................................................................................................................................10
Filter Change...........................................................................................................................................................11
Purge Vac................................................................................................................................................................11
Machine Maintenance...............................................................................................................................................12-13
Maintaining Equipment...........................................................................................................................................12
Cleaning .................................................................................................................................................................12
Repairs...................................................................................................................................................................12
Service....................................................................................................................................................................13
Troubleshooting Guide..................................................................................................................................................14
Parts List and Diagrams...........................................................................................................................................15-17
Internal Parts..........................................................................................................................................................15
External Parts.........................................................................................................................................................16
Cover Parts.............................................................................................................................................................17
Accessories...............................................................................................................................................................18-19
Guarantee........................................................................................................................................................................20

Features and Specifications
FEATURES
Product Specifications
Volt. Vac Pres-
sure/Hg MaxAir-
flow (cfm) Main Filter
(sq. ft) HEPA13
Filter (sq. ft)
Filter Effi-
ciency %@0.3
microns
Sound
Level (dBA) Length Width Height Weight
110 100 Water
Lift 258 33.2 2 x 13.32 99.95% 70 27.75” 21.5” 49” 98 lb
Manual Jet Pulse - efficient cleaning without opening vacuum.
Magnelic Gauge - Measures airflow through filter and indicates clean
or full filter.
Bag Retaining Strap - secures bag during operation, fast and easy
removal and replacement.
Filter Compartment Cap - fast and easy filter changes without tools.
On-Board Wand Storage - easy access to wand and floor tool.
Bottom Mounted Vacuum Motor - commercial grade motor provid-
ing high cfm and waterlift for fast pick-up.
Steel Clamps - secures vacuum during transport.
Longopac System - strong, safe & convenient disposal and handling
of dust.
Welded Frame with 3” Casters - sturdy support & mobility even with
full bags.
Steel Handle - easy mobility on congested jobsites.
10” Rear Tires - smooth, easy transport over power cords and other
floor obstructions.
Manual Jet Pulse
Magnetic Gauge
On-Board Wand Storage
Bag Retaining Strap
Filter Compartment Cap
Bottom Mounted Vacuum Motor
10” Rear Tires
Longopac System
Steel Clamps
Welded Fram with 3” Casters
Steel Handle

Safety
www.nationalequipment.com Phone: 763-315-53005
GENERAL RULES FOR SAFE OPERATION
READAND SAVEALL INSTRUCTIONS FOR FUTURE USE. Before use, ensure operators reads and understand this manual. Read and
understand labeling on machine and components.All operators must view the instruction video. Extra copies of the manual and video are avail-
able by contacting National Flooring Equipment.
1. KNOWYOUR EQUIPMENT: Readthis manualcarefully tolearn equipment applicationsand limitations,potential hazardsassociatedwith
this type of equipment. Keep this manual with the equipment it is associated with.
2. GROUND YOUR EQUIPMENT: See Grounding Page 7.
3. AVOID DANGEROUS ENVIRONMENTS: Do not use in rain, damp or wet locations, or in the presence of explosive atmospheres (gas-
eous fumes, dust or flammable materials). Remove materials or debris that may be ignited by sparks.
4. KEEP WORKAREA CLEANAND WELL LIT: Cluttered, dark work areas invite accidents.
5. DO NOT USE ON STEPS.
6. DRESSPROPERLY:Donotwearlooseclothing.Thesemaybecaughtinmovingparts.Whenworkingwearglovesandinsulatednon-skid
footwear. Keep hands and gloves away from moving parts.
7. USE SAFETY EQUIPMENT: Proper eye protection should be worn at all times. Wear hearing protection during extended use and a dust
mask for dusty operations. Hard hats, face shields, safety shoes, etc. should be worn when specified or necessary.
8. KEEP BYSTANDERS AWAY: Children and other bystanders should be kept at a safe distance from the work area to avoid distracting the
operator and contacting the equipment or extension cord. Operator should be aware of the proximity of bystanders. This appliance is not
intendedforusebypersons(includingchildren)withreducedphysical,sensoryormentalcapabilitiesorlackofexperienceandknowledge.
Equipment is not to be used by children.
9. PROTECT OTHERS IN THE WORKAREA: Provide barriers or shields as needed to protect others from debris.
10. USE PROPER ACCESSORIES: Using accessories that are not recommended may be hazardous. Be sure accessories are properly
installed and maintained. Do not delete a guard or other safety device when installing an accessory or attachment.
11. CHECK FOR DAMAGED PARTS: Inspect guards and other parts before use. Check for misalignment, binding of moving parts, improper
mounting,brokenpartsandotherconditionsthat mayaffectoperation. Ifabnormal noiseor vibrationoccurs, turnoffimmediately andhave
the problem corrected before further use. Do not use damaged equipment. Tag damaged equipment “DO NOT USE” until repaired. Miss-
ing or damaged parts should be properly repaired or replaced immediately. For all repairs, use only identical National replacement parts.
12. REMOVEALLADJUSTING KEYSAND WRENCHES: Makeahabit ofchecking thattheadjusting keys,wrenches, etc.areremovedfrom
the tool before turning it on.
13. GUARDAGAINST ELECTRIC SHOCK: Prevent body contact with grounded surfaces such as pipes, radiators, ranges and refrigerators.
When making cuts, always check the work area for hidden wires or pipes. Hold your equipment by insulated nonmetal grasping surfaces.
Use a Ground Fault Circuit Interrupter (GFCI) to reduce shock hazards.
14. AVOID ACCIDENTAL STARTING: Be sure equipment is turned off before plugging in. Do not use a equipment if the power switch does
not turn the equipment on and off.
15. DO NOT ABUSE CORD: Never unplug by pulling the cord from the outlet. Pull plug rather than cord to reduce the risk of damage. Keep
the cord away from heat, oil, sharp objects, cutting edges and moving parts.
16. STAY ALERT: Watch what you are doing, and use common sense. Do not use when you are tired, distracted or under the influence of
drugs, alcohol or any medication causing decreased control.
17. STARTING MACHINE: On/Off switch must be in off position before connecting to power source.
18. DO NOT DEFEAT or alter a switch or safety device.
19. UNPLUG EQUIPMENT: When not in use and before changing accessories or performing recommended maintenance, unplug machine.

Safety
20. MAINTAIN EQUIPMENT CAREFULLY:Keephandles dry,cleanandfreefromoil andgrease.Keepcutting edgessharpandclean.Follow
instructions for lubricating and changing accessories. Inspect tool cords and extension cords for damage. Replace damaged parts. Use
only identical National replacement parts.
21. STORE IDLE EQUIPMENT: When not in use, store in a dry, secured place. Keep away from children.
22. MAINTAIN LABELS AND NAMEPLATES: These carry important information. If unreadable or missing, contact National for a replace-
ment.
23. MACHINE IS HEAVY, DO NOT DROP. Ensure proper lifting procedures are followed when transporting.
WARNING: EXPOSURE TO DUST MAY CAUSE RESPIRATORYAILMENTS. USEAPPROVED NIOSH OR OSHARESPIRATOR, SAFETY
GLASSES OR FACE SHIELDS, GLOVESAND PROTECTIVE CLOTHING. PROVIDEADEQUATE VENTILATION TO ELIMINATE DUST, OR TO
MAINTAIN DUST LEVEL BELOWTHE THRESHOLD LIMIT VALUE FOR NUISANCE DUSTAS CLASSIFIED BY OSHA.
WARNING: ALWAYS WEAR RESPIRATOR PROTECTION,APPROPRIATE FOR THEAPPLICATION,AS SPECIFIED BY OSHAREGULA-
TIONSAND YOUR EMPLOYER. NEVER OPERATE OR MAINTAIN EQUIPMENT BEFORE READINGAND UNDERSTANDING THE INSTRUC-
TIONS FOR OPERATION AND MAINTENANCE. OBEYALLSAFETY SIGNSAND INSTRUCTIONS WHILE OPERATING OR MAINTAINING
EQUIPMENT.

Safety
www.nationalequipment.com Phone: 763-315-53007
GROUNDING
Tools marked “Grounding Required” have a three wire cord and three prong grounding
plug. The plug must be connected to a properly grounded outlet (See FigureA). If the tool
should electrically malfunction or break down, grounding provides a low resistance path
to carry electricity away from the user, reducing the risk of electric shock.
The grounding prong in the plug is connected through the green wire inside the cord to
the grounding system in the tool. The green wire in the cord must be the only wire con-
nected to the tool’s grounding system and must never be attached to an electrically “live”
terminal.
Your tool must be plugged into an appropriate outlet, properly installed and grounded in
accordance with all codes and ordinances. The plug and outlet should look like those in
FigureA.
FIG. A
WARNING: IMPROPERLY CONNECTING THE GROUNDING WIRE CAN
RESULT IN THE RISK OF ELECTRIC SHOCK. CHECK WITHAQUALIFIED ELEC-
TRICIAN IF YOUARE IN DOUBTAS TO WHETHER THE OUTLET IS PROPERLY
GROUNDED. DO NOT MODIFYTHE PLUG PROVIDED WITH THE TOOL. NEVER
REMOVE THE GROUNDING PRONG FROMTHE PLUG. DO NOT USETHE
TOOLIF THE CORD OR PLUG IS DAMAGED. IF THE PLUG WILLNOT FITTHE
OUTLET, HAVEA PROPER OUTLETINSTALLED BYAQUALIFIED ELECTRICIAN.
WARNING: ELECTRICAL CORDS CAN BE HAZARDOUS. MISUSE CAN
RESULT IN FIRE OR DEATH BY ELECTRICAL SHOCK. READ CAREFULLYAND
FOLLOWALLDIRECTIONS.
WARNING: RECOMMENDED USE OF GFI RECEPTACLE.

Safety
EXTENSION CORDS
Grounded tools require a three wire extension cord. Double insulated tools can use either a two or three wire extension cord.As the distance
from the supply outlet increases, you must use a heavier gauge extension cord. Using extension cords with inadequately sized wire causes a
serious drop in voltage, resulting in loss of power and possible tool damage.
The smaller the gauge number of the wire, the greater the capacity of the cord. For example, a 14 gauge cord can carry a higher current than
a 16 gauge cord. When using more than one extension cord to make up the total length, be sure each cord contains at least the minimum wire
size required.
GUIDELINES FOR USING EXTENSION CORDS
• If you are using an extension cord outdoors, make sure it is marked with the suffix “W-A” (“W” in Canada) to indicate that it is acceptable
for outdoor use.
• Be sure your extension cord is properly wired and in good electrical condition. Always replace a damaged extension cord or have it re-
paired by a qualified person before using it.
• Protect your extension cords from sharp objects, excessive heat and damp or wet areas.
• Keep away from water. Do not use if wet.
• Inspect thoroughly before each use. DO NOT USE IF DAMAGED.
• Make sure equipment is OFF before connecting cord outlet.
• FULLY INSERT plug into outlet.
• Do not remove, bend or modify any metal prongs or pins of cord.
• Do not use excessive force to make connections.
• Do not connect a three prong plug to a two-hole cord.
• Avoid overheating. Uncoil cord and do not cover it with any material.
• Do not walk on cord.
• Do not drive, drag or place objects over cord.
GENERAL SAFETY
1. Cables damaged through crushing or splitting can be dangerous if used and should be replaced immediately. Risk of personal injury.
2. Do not connect the machine to an unearthed socket. Risk of personal injury.
3. Make sure the assembly area is firm, so the dust extractor does not tip over. Risk of personal and material injury.
4. Risk of pinching when handling the toggle fastener.
5. Do not vacuum hot or smoldering particles, as the machine can catch fire. If a fire should break out, remove the plug from the socket and
extinguishthefireusingtheavailablefire-fightingequipment. Anappropriate pre-separatorshould beconnected betweenthe suctionpipe
and the dust extractor when sucking up soot, ash and hot materials.
6. The machine must not be used in environments where explosives may be present. Serious risk of explosion.
7. Do not look into the suction pipe or suction hose if blocked. Serious risk of eye injury.
8. Donot directthe suctionhosetowardsbodyparts whenthemachineisrunning. Avoidplacing yourhandorotherparts ofthe bodyagainst
the suction inlet if the suction hose is not fitted. Risk of personal injury.
WARNING: ELECTRICAL CORDS CAN BE HAZARDOUS. MISUSE CAN RESULT IN FIRE OR DEATH BY ELECTRICAL SHOCK. READ
CAREFULLYAND FOLLOW ALLDIRECTIONS.

Safety
www.nationalequipment.com Phone: 763-315-53009
GENERAL SAFETY (CONTINUED)
9. Do not suck up water. The 3474-Lis a dry media dust collector only. Sucking up water will damage filters, requiring replacement.
10. Check, when lifting the machine, that the dust container is empty and that no one else is standing under the lifted machine. Risk of per-
sonal injury and material damage.

Machine Operation
FIG. B
UNPACKING
When unpacking the machine, please check that the following accessories are included:
• The hose with end fittings
• Handle
• Floor nozzle
If any of the above mentioned parts are missing, please contact your distributor or our
sales representative. Assemble the front wheels using the bolt, washer and nut that are
included in the package.
FUNCTION
The machine is designed for sucking and separating dry, non-com-
bustible dust with an explosion limit value of >0.1mg/m3
The motor is started by the switch. Dust-laden air is then sucked through the inlet valve
at high speed via the suction hose. The air is slowed down by the cyclone and coarse
dust particles are separated out, partly by centrifugal force and partly be gravity. Air and
finer particles then pass through the main filter where separation is made. The machine
is designed for filter cleaning by reverse air pulse.
The separated dust accumulates in the cyclone until the machine is switched off, when it
drops through the bottom flap into the plastic bag.
MACHINE USE
Before use, the user must be trained in handling the machine and the hazardous dust.
Connect the electric plug to an outlet with the correct voltage (see designation plate).
The filter must be cleaned from time to time (see Page 11). This must be done before
changing the plastic bag and can also be done when the work is complete or when there
is poor suction.
REPLACING BAG
3474-Lare equipped with Longopac system for effective dust storage. This is a 65’
long plastic tube that will be divided into plastic bags using the striped attached with the
machine
Release the belt holding the bag.
1. Remove the holder.
2. Put in a new Longopac bag, pull out the inner end upwards.
3. Mount the holder on to the machine and the strap the upwards end with the belt.
4. Pull down to outside end and close it using the stripe.
Only change the Longopac or bag after jet pulsing the filter.
Belt
Longopac Bag
Stripe

Machine Operation
www.nationalequipment.com Phone: 763-315-530011
FILTER CHANGE
WARNING: RISK OF DUST DISPERSION - USE PERSONAL SAFETYEQUIPMENT
UNHEALTHY DUST CAN BE SPREAD DURING FILTER CHANGE. ACCORDINGLY, THE USER
SHOULD WEAR PROTECTIVEGLASSES, PROTECTIVE GLOVES,ANDA BREATHING MASK
CONFORMING TO PROTECTION CLASS FFP3 SWITCH OFF THE MACHINEAND PULL THE
PLUG OUT OF THE SOCKET.
PREFILTER (Large) Stock # 3474-200900050
1. Loosen the 3 clamps and remove the top.
2. Lift out the filter.
3. Insert new filter. Only filters purchased from National may be used.
HEPA FILTER (Small) Stock# 3474-200700070 x2
1. Loosen the two nuts on the filter cap.
2. Carefully lift the filter into a clean plastic bag. Note: This bag must be properly
disposed of.
3. Insert a new filters in reverse order.
4. Check the seal when changing filters and changing defective seals.
PURGE VAC
To maximize airflow operator must periodically purge machine!
As airflow lessens follow purging instruction below:
1. Shut off vac.
2. Remove vacuum hose from hose inlet (Ref 2).
3. Cover hose inlet with plastic cap suspended from machine (Ref 2).
NOTE: IF PLASTIC CAP IS NOTAVAILABLE, CAREFULLY COVER INLET WITHTHE PALM OF
YOUR HAND (SEE FIGURE D). USE PROPER SAFETY EQUIPMENT!
4. Turn vac ON.
5. Slowly press handle valveaminimum of 3-4 times to engage jet pulse/purge (Ref3).
6. Turn vac OFF.
7. Remove plastic cap from inlet.
8. Connect vacuum hose to inlet.
9. Once the dust collector has been properly purged the air flow should view in the
green position. If red, continue to purge or change filters.
NOTE: SEE PAGE 14 FOR ADDITIONALFILTER TROUBLE SHOOTING.
FIG. D
FIG. C
Ref 3
Ref 2
Ref 1

Machine Maintenance
MAINTAINING EQUIPMENT
Keep equipment in good repair by adopting a regular maintenance program. Before use, examine the general condition of equipment. Inspect
guards, switches, tool cord set and extension cord for damage. Check for loose screws, misalignment, binding of moving parts, improper mount-
ing, broken parts and any other condition that may affect its safe operation. If abnormal noise or vibration occurs, turn the tool off immediately
and have the problem corrected before further use. Do not use a damaged tool. Tag damaged tools “DO NOT USE” until repaired. See Repairs.
• Mechanical inspection
• Cleaning (pulleys, spindles, bearings, housing, etc.)
• Electrical inspection (switch, cord, plugs, etc.)
• Testing to assure proper mechanical and electrical operation
• Check all screws and fittings for a tight and secure fit
CLEANING
Clean dust and debris from vents. Keep the equipment handle clean, dry and free of oil or grease. Use only mild soap and a damp cloth to
clean since certain cleaning agents and solvents are harmful to plastics and other insulated parts. Some of these include: gasoline, turpentine,
lacquer thinner, paint thinner, chlorinated cleaning solvents, ammonia and household detergents containing ammonia. Never use flammable or
combustible solvents around tools.
Machine is pressure washable. Motor, motor junction box, capacitor box and switch are protected from
splashes of water but can not be subjected to jets of high pressure. Thoroughly dry machine before use. Do
not use machine when wet or damp.
REPAIRS
If your tool is damaged, contact National for a return authorization number and return the entire tool.
• Shipments are not accepted without a return authorization number.
• COD or freight collect shipments will not be accepted.
WARNING: TO REDUCE THE RISK OF INJURY,ALWAYS UNPLUG EQUIPMENT FROM POWER SOURCE BEFORE PERFORMINGANY
MAINTENANCE. NEVER DISASSEMBLE THE TOOL OR TRY TO DOANY REWIRING ON THE TOOL’S ELECTRICAL SYSTEM. FAILURE TO
DO SO COULD CAUSE DAMAGE TO MACHINE OR SERIOUS INJURY. CONTACT NATIONAL FORALLREPAIRS.
WARNING: TO REDUCE THE RISK OF INJURY, ELECTRIC SHOCKAND DAMAGE TOTHE TOOL, NEVER IMMERSE YOURTOOL IN
LIQUID ORALLOWA LIQUIDTO FLOW INSIDE THE TOOL.

Machine Maintenance
www.nationalequipment.com Phone: 763-315-530013
GENERAL MAINTENANCE
When cleaning and servicing the machine, you must switch off the machine and remove the plug from the socket.
• Avoid cleaning with a high pressure cleaner. If necessary, do not direct at the opening on the machine, especially the opening for cooling
air.
• Before moving the machine from the work area, the machine must be cleaned. Furthermore, the inlet must be locked using the expanding
plug attached.
• All other equipment must be regarded as contaminated and be treated thereafter.
• If possible, use a special suitable room.
• Proper personal protective equipment must be used.
• All parts which are contaminated after service must be properly disposed of in plastic bags according to all regulations.
• If the machine has to be used for other purposes, it is extremely important that the machine is cleaned, to avoid the spread of hazardous
dust.
SERVICE
1. Removethe plugfromthe wallsocket whencarryingout maintenancework. Risk ofpersonal injury. Replaceallguards overthemotorand
fan components once servicing is complete.
2. Always keep an eye on the machine when using theAuto Start function. Risk of personal injury.
3. Dust can be spread when cleaning the coarse filter and during filter and bag replacement.Accordingly, the user should wear protective
glasses, protective gloves, and a breathing mask conforming to protection class FFP3.
4. Do not puncture the absolute filter. Risk of dust dispersion.

Troubleshooting Guide
Problem Cause Solution
Motor does not start 1. No Power
2. Cable Defective
3. Switch Defective
1. Connect the machine
2. Replace
3. Replace
Motor stops immediately after starting Wrong fuse Connect to correct fuse
Motor runs but there is no suction 1. Hose not connected
2. Hose Blocked
3. No plastic bag
1. Connect hose
2. Clean hose
3. Fit longopac bag
Motor runs but suction is poor 1. Hose in the bag
2. Filter blocked
3. Top cover loose
4. Sealing Defective
1. Change hose
2. Change filter
3.Adjust
4. Change current seal
Dust blows from motor Filter loose or defective Adjust or change
Abnormal noise Order service
The machine is designed and manufactured for a severe environment and tasks, but the user must note that the machine must be protected from
knocks and blows. Filter, seals, attachments, and connections are carefully adapted and selected with regard to the operators work environment.
Therefore, the operator and service personnel must treat the machine with the care in order to work correctly for many years.

Parts List and Diagrams
www.nationalequipment.com Phone: 763-315-530015
1 3474-201000143 TOP COVER ASSEMBLY 1
2 3474-201000118 CLEANING UNIT KIT 1
3 3474-200900050 MAIN FILTER 1
4 401585 TANK COMPLETE 1
5 401596 HOLDER KIT 3
6 3474-201000116 FLAP KIT 1
7 3474-201100140 BELT 1
8 401598 ANTI-SKID 1
9 3474-1376013 LONGOPAC BAG 1
10 3474-201100135 LONGOPAC HOLDER 1
11 3474-200800152 FRONT WHEEL KIT 2
12 3474-200800151 REAR WHEEL KIT 2
13 3474-201000130 ENGINE PACKAGE 220V 1
14 401600 CLIP HOLDER KIT 1
15 401601 HOSE KIT 2
16 401602 HOSE CLAMP PLASTIC 60MM 2
17 3474-1335011 HOSE END 2
18 3474-201000831 WAGON COMPLETE 1
19 6254-2 HUBBELMALE PLUG (NOT SHOWN) 1
PART# DESCRIPTION QTY
EXTERNAL PARTS

Parts List and Diagrams
16
ENGINE PARTS
1 3474-201100128 LETTER NUT 4
2 401605 COVER 2
3 3472-200700070 FILTER 2
4 3474-200600080 SEALING 2
5 3474-201100144 ENGINE TUBE 220V 2
6 3474-201000135 CHASSIS KIT 1
7 3472-10423A SWITCH 1
8 3474-200700413 MANOMETER, KIT 1
9 401609 CORD SET 1
10 3474-201100150 CABLE FIX 1
11 3474-200600805 ENGINE COVER, KIT 1
12 3477-201000133 COUNTER, KIT 1
13 3474-201100158 ELECTRICAL FILTER 1
14 3474-200700410 SOFT START 220V 1
15 3474-200800060 ENGINE 1200W 220V 2
16 3474-201100157 CABLE KIT 220V 1
PART# DESCRIPTION QTY

Parts List and Diagrams
www.nationalequipment.com Phone: 763-315-530017
1 401615 HOSE 51MM X 7.5MM 1
2 400349 50S STEEL TUBE KIT 1
3 400350 S450 FLOOR TOOL50MM X 450MM 1
4 401618 AG46A BRUSHES (L=400/445) 1
PART# DESCRIPTION QTY

Accessories
401615 - 25’’
3477-201000128 - 30’’
Dust Collector Hose
3476-200900051
Replacement Main Polyester Filter for 3474
3472-200700070
Replacement HEPAFilter for 3474
3474-1376013
4 Pack
HOSE
MAIN FILTERS
LONGOPAC SYSTEM
200700070A200900051
400349
1.5 Ft
1 Bent Piece
1 Straight Piece
3 PIECE WAND SET

Accessories
19
400350
Floor Tool - 2” x 17.75”
401470
Hose Connector - Vac
www.nationalequipment.com Phone: 763-315-5300
FLOOR TOOL
HOSE TO VAC CONNECTOR

Table of contents
Popular Dust Collector manuals by other brands

Oneida Air Systems
Oneida Air Systems Dust Deputy AXD001004 owner's manual

DAVIS
DAVIS 6464 user manual

National Flooring Equipment
National Flooring Equipment 3474 HEPA instruction manual

Oneida Air Systems
Oneida Air Systems Mini-Gorilla owner's manual

Craftsman
Craftsman 152.213361 owner's manual

Grizzly
Grizzly G0850 owner's manual

National Flooring Equipment
National Flooring Equipment DL2000 OPERATING & SERVICE MANUAL

Quatro
Quatro Jet-Stream Operation and maintenance manual

GMC
GMC RDC8LA instruction manual

Husqvarna
Husqvarna C 3000 Operator's manual

ISTblast
ISTblast DCM-100 instruction manual

laguna
laguna BFLUX1 Operating and parts manual