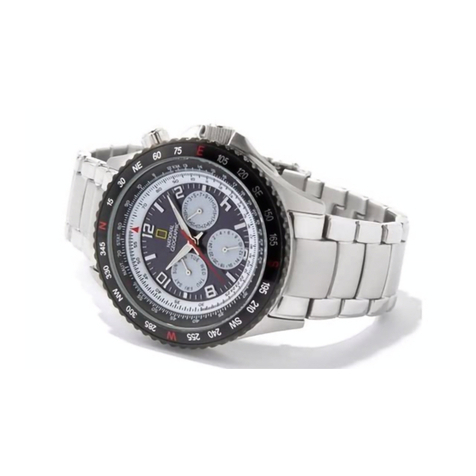
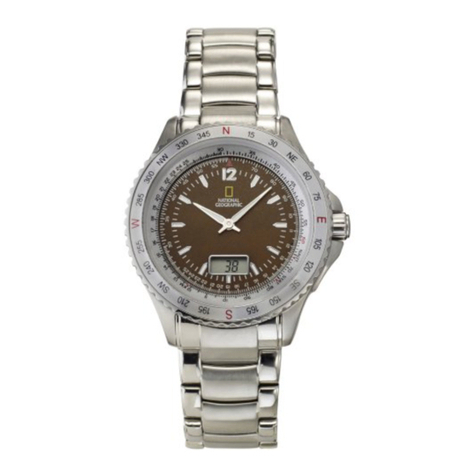
National Geographic NG704 SERIES User manual

WATCH COLLECTION
NG704 SERIES
INSTRUCTION
MANUAL


INTRODUCTION
This watch features a magnetic sensor which measures compass
directions, providing direction information for hiking, camping, and
other outdoor activities. It also includes a regatta timer for measuring
race times.
In addition, the watch includes current time, daily alarm, chronograph,
countdown timer, and dual time functions.
CARE INSTRUCTIONS
- Avoid exposing the watch to extreme conditions for an unreasonable
time, and avoid rough use or severe impact on the watch.
- We recommend that you replace the battery at a certified service
agency to ensure the watch's water-resistance will continue.
- Clean the watch occasionally with a soft and moistened cloth.
- Do not expose the watch to strong chemicals such as gasoline and
alcohol, as this will cause damage.
- Do not block the sensor ventilation holes; otherwise, the sensor
reading is not accurate.
- Store your watch in a dry place when not in use.
- Keep your watch away from strong magnetic objects such as
speakers, magnets, mobile phones, and televisions.
1

WATCH FUNCTIONS
Mode Button (M)
- Selects between current time, daily alarm, chronograph, countdown
timer, and dual time modes.
- Selects between the setting items during setting display.
Compass Button (COM)
- Selects between compass and timekeeping modes.
Start/Stop Button (S/S)
- Selects between functional displays under the same mode.
- Activates the "start" or "stop" functions under chronograph and timer
mode.
- Changes the setting value under setting display.
Lap/Reset Button (L/R)
-Activates the "lap" or "reset" chronograph functions in chronograph
mode.
- Decreases the digits under setting display.
Electroluminescent (EL) Button
- Turns on the EL back light for about three seconds.
2

-
3

Timekeeping and Compass Modes
4

A) CURRENT TIME MODE
When the current mode is selected, the watch will show the following
items on the display:
- The day of the week will appear on the top row.
- The current time will appear on the middle row.
- The date will appear on the bottom row.
- The second indicator is represented analogically by the bar indicator
around the display.
5

Setting the Current Time and Date
- To select the setting display, press and hold the M button for two
seconds in Current Time Mode. The flashing "SET" icon will appear.
- Press the M button to select among the different setting items. Press
the S/S or L/R button once to reset the seconds to zero.
- When month-day order setting is selected, press the S/S or L/R
button to select between month-day and day-month format.
- Once the minute, hour, year, month, or date are flashing, press the
S/S or L/R button to set the correct time. Pressing this button will adjust
in increments of one digit. Holding this button down will adjust at a
higher speed.
- To switch between 12-hour format and 24-hour format, press the S/S
button once the "12" or "24" digits are flashing.
- When LCD contrast is selected, press the S/S or L/R button to
increase/decrease the contrast level. When key beep setting is
selected, press the S/S or L/R button to select between ON and OFF.
- When all formats are set, press and hold down the M button to exit
the setting display.
6

B) DAILY ALARM MODE
This watch includes two daily alarms (Daily Alarm 1 and Daily Alarm 2)
and one hourly chime. These alarms will work independently.
Hourly Chime and Half-Hour Chime
The watch includes two chime functions: hourly chime and half-hour
chime.
Hourly chime: If the hourly chime is turned on, the watch will beep once
every hour on the hour.
Half-hour chime: If the half-hour chime is turned on, the watch will beep
once every 30 minutes at the hour and at the half-hour.
Selecting Daily Alarm and Hourly Chime Display
- Press the S/S button to switch between Daily Alarm 1, Daily Alarm 2,
and the chime display.
Switching Daily Alarm and Chime ON and OFF
- In Daily Alarm 1, Daily Alarm 2, or the hourly chime display, press L/R
to switch the function on and off.
- When the alarm indicator is exhibited (alarm is on), the watch will
sound at the set alarm time every day. When the alarm sound comes
on, press any button to stop the beep.
- When the chime indicator is exhibited, the chime function is on.
7

Setting the Daily Alarm
- To select the setting display,
press and hold the M button for
two seconds in Daily Alarm 1 or
Daily Alarm 2 display. The
flashing "SET" icon will appear.
- When the minute is flashing,
press the M button to select
between the minute and hour
settings.
- When the minute or hour is
flashing, press the S/S or L/R
button to set the desired alarm
time. Hold down this button to
scroll the setting at a higher
speed.
- When the desired time is set,
press and hold the M button to
exit the setting display.
- When the daily alarm is on,
the alarm beep will sound for 30
seconds. It can be stopped at
any time by pressing any button
except the EL button.
Increase/decrease
the number
Increase/decrease
the number at
a higher speed
8

C) CHRONOGRAPH MODE
This watch includes a chronograph mode, which measures elapsed
time, accumulative elapsed time, and lap time.
The display shows the "All Zero" display when the chronograph is
being selected for the first time or it has been reset.
To select Chronograph Mode, press the M button until this mode is
displayed.
The watch will show the following items on the display:
- Chronograph hour, minute, and seconds (middle row).
- Chronograph 1/100 second (bottom row).
- Chronograph 1/10 second (represented by the bar indicator around
the display.
Chronograph
"All Zero" Display
9

Recording the Elapsed Time and Accumulated Elapsed Time
From the "All-Zero" display, press the S/S button to start the chronograph.
Press the S/S button once again to stop the chronograph. The elapsed
time will appear on the display. Repeat this step to get the accumulative
elapsed time.
Measuring Lap Times
To store a lap time, press the L/R button at any designated moment while
the chronograph is running. The stored lap time and lap number will
appear on the display for about ten seconds. The chronograph keeps
running. Once the running time display resumes, press the L/R button at
any designated moment to store another lap time.
Recalling Lap Times
In chronograph mode, hold down the M button to enter the Lap Time
Recall Sequence and the total accumulative elapsed time will be exhibited.
Press S/S or L/R to select a target lap for the recall.
Hold down the M button to exit the recall display.
To record a new set of lap times, hold the L/R button for two seconds in
the chronograph display.
Resetting the Chronograph
To measure a new elapsed time, reset the chronograph to the "All-Zero"
display.
- To reset the chronograph to the "All-Zero" display, press and hold the
L/R button for two seconds while the chronograph has stopped.
Note: When the chronograph has been reset, the elapsed time,
accumulated elapsed time, and lap time memories will be erased.
10

D) REGATTA TIMER MODE
This watch includes a regatta
timer mode which measures the
elapse of a fixed period of time
(target time).
The timer starts counting down
from the target time to zero and
then it starts counting up.
The target time can be set by
using the quick-set value or user-
preset value.
When the regatta timer display is
selected, the watch will show the
following items on the display:
- Target time (middle row)
- Current time (bottom row)
- Elapse of seconds (bar indicator
around the display)
Setting the Target Time
-Press L/R to choose the target
time from 1, 3, 5, 10, 15 or 45
minutes or the user-preset value
following the adjacent diagram.
- When one of the above values
is exhibited on the display, that
value is chosen for the
countdown.
Quick-Set Value
the time that
the timer will
countdown
from (hour,
minute, and
second)
11

Setting the User-Preset
Value
- In countdown timer
mode, hold down the M
button to change the
display to setting display.
- The selected digits will
be flashing on the display.
Press the M button to
select between the
different settings (hour,
minute, second) following
the diagram below.
- When one of the settings
is selected, press S/S or
L/R to change the setting
value; hold down the
button to change the
setting value faster.
- When the above is set,
hold down the M button to
exit the setting.
second
Increase/decrease
the number
Increase/decrease
the number at
a higher speed
User-Preset Value Setting Sequence
12

Using the Timer
- When the target time is set,
press S/S to start the countdown.
When the timer is counting, press
S/S to stop the countdown.
Timer Sound Signal
- Last ten minutes: beeps once
every minute.
- Last minute: beeps once every
ten seconds.
- Last five seconds: beeps once
every second.
- Count to zero: beeps for 30
seconds and the target time will
be reloaded automatically after
the beeps.
Reloading the Target Time
- When the timer has stopped
counting, press the L/R button to
reload the target time.
Timer Display
(Timer set at 10 minutes)
Real-Time
Clock
13

E) DUAL TIME MODE
The watch includes a function to
show the current time for a second
time zone.
How to Set the Dual Time
- To select setting display, hold down
the M button for two seconds in dual
time mode, and the flashing "SET"
icon will appear.
- In setting display, press the M
button to change the selection
between hour and minute.
- When the digits are flashing, press
the S/S or L/R button to
increase/decrease the number. Hold
down the button to change the
number at a higher speed.
- When the setting has been
completed, hold down the M button to
exit the display. The watch will also
exit this display if no buttons are
pressed for over one minute.
User-Preset Value Setting Sequence
14

F) COMPASS MODE
Precautions
- Keep your watch away from magnets or appliances which may
contain magnetic objects, such as mobile phones, speakers, etc.
- The watch, like most magnetic compasses, points to the magnetic
north, which is slightly different from the true north.
- Perform the compass calibration from time to time, since this will
reinforce its precision.
- Do not place the watch close to magnetic objects.
- Do not place the watch close to metal objects.
- Do not place the watch close to electrical appliances.
- Do not place the watch inside a moving object or a ferroconcrete
building.
15

Direction of an Object
The direction of an object from a point can be specified in either
compass direction or bearing direction. This watch includes both.
Compass Directions
The compass directions are shown in the table on the next page.
For example, in the figure on the next page, the compass direction of
object B from point A is east. The compass direction of object C from
point A is southeast. The compass direction of object D from point A is
northwest.
Bearing Directions
The bearing direction of an object is defined as the angular difference
between North and the object. (Assume zero degrees for north, and the
measuring range is from zero to 359 degrees.)
For example, in the figure on the next page, the bearing direction of
object B from point A is 90 degrees. The bearing direction of object C
from point A is 135 degrees. The bearing direction of object D from point
A is 315 degrees.
16

North-Northeast
East-Southeast
South-Southeast
East-Northeast
South-Southwest
West-Southwest
West-Northwest
North-Northwest
17

Compass Mode
- In compass mode, the top of the
display shows the compass direction.
- The middle display shows the
bearing direction.
- The bottom display shows the
current time in hour and minute.
- The pointer within the display shows
the analog direction of the magnetic
north.
Idle Mode
If no buttons are pressed for one
minute, the watch will go to idle mode
automatically. To activate the
compass again, press any button.
Distortion
If distortion is detected, the indicator
"OFF CAL" with flashing direction
digits will appear.
Please refer to the upcoming section
"Calibrating the Compass" to restore
the compass to normal operation
when distortion occurs.
Distortion Display
18
Table of contents
Other National Geographic Watch manuals

National Geographic
National Geographic NG730 series User manual

National Geographic
National Geographic NG741 SERIES User manual

National Geographic
National Geographic NG770C User manual

National Geographic
National Geographic NG751 Series User manual

National Geographic
National Geographic NG Pharaoh Series User manual

National Geographic
National Geographic NG710 SERIES User manual

National Geographic
National Geographic NG712 SERIES User manual

National Geographic
National Geographic NG770A User manual

National Geographic
National Geographic NG770B User manual

National Geographic
National Geographic NG752 SERIES User manual