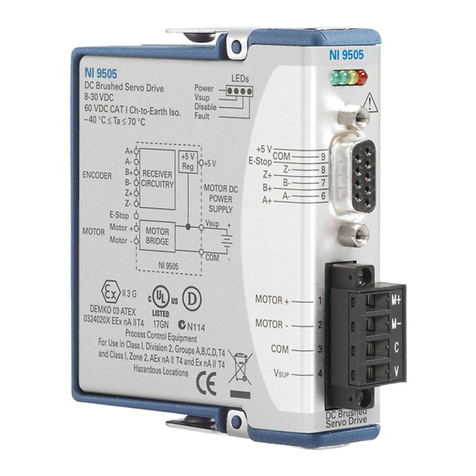
National Instruments NI 9514 User manual

Getting Started with NI 9514/16
C Series Modules and
AKD Servo Drives
This document explains how to install and configure the AKD servo drives for use with the
NI 9514 and NI 9516 C Series drive interface modules.
Tip If you encounter any problems during setup, refer to the Tips and
Troubleshooting section for assistance.
Contents
What You Need to Get Started ................................................................................................. 2
Hardware .......................................................................................................................... 2
Software............................................................................................................................ 3
Hardware Installation and Configuration ................................................................................. 4
Step 1: Set Up the Real Time System............................................................................... 5
Step 2: Connect NI 9514/16 to AKD Drive Cable to the C Series Module ..................... 5
Step 3: Mount the Drive and Connect the Protective Earth ............................................. 7
Step 4: Connect the Logic Power Supply to the NI 9514/16 to AKD Drive Cable ......... 7
Step 5: Connect the NI 9514/16 to AKD Drive Cable to the AKD Servo Drive ............. 7
Step 6: Connect the Motor and Encoder to the Drive....................................................... 9
Step 7: Connect the AC Input Power................................................................................ 9
Step 8: Connect the Drive Communication...................................................................... 11
Step 9: Confirm Drive Connections ................................................................................. 12
Software Installation and Configuration................................................................................... 12
Step 1: Install Software on and Configure the NI RT Controller..................................... 12
Step 2: Creating a Project and Adding NI RT Controller................................................. 13
A. CompactRIO Controller....................................................................................... 13
B. EtherCAT Master and NI 9144 EtherCAT Expansion Chassis ........................... 14
C. NI 9146/7/8/9 Ethernet RIO Expansion Chassis ................................................. 15
Step 3: Adding an NI SoftMotion Axis to the Project...................................................... 15
Step 4: Configure the NI 9514 or NI 9516 C Series Modules.......................................... 17
Step 5: Install AKD WorkBench and Configure the Drive .............................................. 20
Step 6: Enable and Test the Drive using LabVIEW......................................................... 27
Tips and Troubleshooting......................................................................................................... 28
The Drive Does Not Enable.............................................................................................. 28
Using an EtherCAT AKD Drive in Analog Mode ........................................................... 29
Cannot Communicate With the Drive Using Ethernet ..................................................... 29
Connecting to the PC Using a Static IP............................................................................ 30

2|ni.com |Getting Started with NI 9514/16 Modules and AKD Servo Drives
The Motor Responds Poorly............................................................................................. 30
Cannot See the AKD Servo Drive in the AKD WorkBench Software ............................ 30
Wiring Diagram ........................................................................................................................ 31
Where to Go From Here ...........................................................................................................32
Worldwide Support and Services ............................................................................................. 33
What You Need to Get Started
Caution Before installing the drive, review Chapter 2, Safety, of the AKD
Installation Manual that came with your hardware or available from ni.com/
manuals. Failure to follow safety instructions may result in injury or damage to
equipment.
You need the following items to get started.
Hardware
NI 9514 or NI 9516 C Series servo drive interface module
NI Real-Time controller
– CompactRIO controller and chassis that support the RIO Scan Interface
Tip To determine if your controller and chassis support the RIO Scan Interface go
to ni.com/info and enter the Info Code rdsoftwareversion.
or
– NI 9146/7/8/9 Ethernet RIO Expansion Chassis
or
– NI 9144 distributed chassis and compatible RT controller
Power supply for the CompactRIO controller
+24 VDC power supply for the drive interface module and AKD servo drive
Ethernet connection and cable for the CompactRIO controller or Ethernet RIO Expansion
Chassis
Ethernet connection and cable for the AKD servo drive
NI 9514/16 to AKD Drive Cable (Part Number 781524-01)
Kollmorgen AKD servo drive
Kollmorgen AKM or third-party servo motor and encoder

Getting Started with NI 9514/16 Modules and AKD Servo Drives |© National Instruments |3
Note AKM series servo motors available from NI contain built-in feedback and
come pre-wired for use with the AKD servo drive. National Instruments recommends
using one of these motors for the best user experience and system performance.
Software
Note The following are the required software for the NI 9514 module. Depending
on the Real Time controller and other C Series module being used, a newer version
of software maybe needed. NI recommends to use the latest available softwares.
LabVIEW 2009 SP1 (minimum).
LabVIEW 2009 SP1 Real-Time Module (minimum).
LabVIEW 2009 SP1 NI SoftMotion Module (minimum).
NI-RIO 3.4.0 (minimum).
NI-Industrial Communications for EtherCAT® 1.2 (minimum), if you are using the NI 9144
distributed chassis.
AKD WorkBench software. Refer to the Step 1: Install Software on and Configure the
NI RT Controller section of this document for installation information.
Figure 1 shows the required hardware and software.
Figure 1. Required Hardware and Software
Ethernet
Cable
NI 9514/16 to
AKD Drive Cable
Screw Terminal
Connector for
Power Supply &
Additional I/O
(Limits, Position
Compare, etc.)
Ethernet Cable
(Initial Configuration Only)
NI RT Controller
(NI cRIO-9014 shown)
and NI 9514/16 Module
+24 V Power Supply
(NI PS-15 Shown)
AKD Analog
Servo Drive

4|ni.com |Getting Started with NI 9514/16 Modules and AKD Servo Drives
Hardware Installation and Configuration
This section covers the hardware setup for the CompactRIO system, NI 9514 or NI 9516
C Series module, and AKD servo drive.
Figure 2 shows an overview of the connectors on the AKD servo drive.
Figure 2. AKD Servo Drive Connectors
1 24 V Supply, STO (X1)
2 Motor, Brake (X2)
3 AC Input Power (X3)
4 Encoder Emulation (X9)
5 Drive Grounding Lug
6 Feedback (X10)
7 I/O Connector (X8)
8 I/O Connector (X7)
9 Static IP Addressing Switch (S2)
10 Static IP Addressing Switch (S1)
11 Drive Communication (X11)
12 LED Indicators
1
2
36
4
11
9
10
7
5
12
8

Getting Started with NI 9514/16 Modules and AKD Servo Drives |© National Instruments |5
Step 1: Set Up the Real Time System
Complete the following steps to set up the CompactRIO hardware.
1. Refer to the Getting Started guide included with the Real-Time controller to assemble it,
connect it to power, discover it on the network, and install the software in NI MAX.
2. Install the NI 9514 or NI 9516 module in an available slot that supports High Speed
Interface (HSI) in your chassis.
Note Older model chassis, such as cRIO-902x, cRIO-907x, cRIO-908x, NI 9144,
and NI 9148, have HSI support on slots 1 through 4. Refer to your chassis
documentation for more information about HSI slot support.
Step 2: Connect NI 9514/16 to AKD Drive Cable to the
C Series Module
Connect the MDR and DSUB connectors on the NI 9514/16 to AKD Drive Cable (part number
781524-01) to the MDR and DSUB connectors on the C Series module. Figure 3 shows the
NI 9514/16 to AKD Drive Cable connectors.
Figure 3. NI 9514/16 to AKD Drive Cable Connectors
The NI 9514/16 to AKD Drive Cable contains the following connections:
•DSUB Connector—15-pin DSUB connector containing drive command and drive enable
signals.
•MDR Connector—20-pin MDR connector containing encoder, limit, home sensor,
position compare, and position capture signals.
•X8 10-Pin Connector—10-pin connector containing the servo command, enable, and fault
signals.
•X9 DSUB Connector—9-pin DSUB connector containing emulated encoder output
signals from the AKD servo drive.
X9
MDR
Connector
DSUB
Connector
Screw Terminal
Connector
X1 3-Pin
Connector
X810-Pin
Connector
X9 DSUB
Connector

6|ni.com |Getting Started with NI 9514/16 Modules and AKD Servo Drives
•X1 3-pin Connector—+24 V power supply connection for the AKD servo drive provided
through the 20-pin screw terminal connector.
•Screw Terminal Connector—20-pin screw terminal connector for external I/O
connections.
Table 1 shows the screw terminal I/O connector pinout.
Table 1. NI 9514/16 to AKD Drive Cable Screw-Terminal Pinout
Pin Signal Name
1Forward Limit
2Home
3Reverse Limit
4Digital Input 0
5Vsup
6Vsup Return
7Encoder 1 Phase A+ (NI 9516 only)
8Encoder 1 Phase A- (NI 9516 only)
9Encoder 1 Phase B+ (NI 9516 only)
10 Encoder 1 Phase B- (NI 9516 only)
11 +5V OUT
12 Position Compare
13 Position Capture
14 COM
15 Reserved
16 Reserved
17 Reserved
18 Reserved
19 Reserved
20 Reserved

Getting Started with NI 9514/16 Modules and AKD Servo Drives |© National Instruments |7
Step 3: Mount the Drive and Connect the Protective
Earth
1. Mount the drive to a conductive metal plate. Refer to the AKD Installation Manual for
dimensions and additional information specific to the drive model.
2. Connect the protective earth (PE) to either ground screw on the drive grounding lug.
Figure 2 shows the location of the grounding lug on the drive.
Step 4: Connect the Logic Power Supply to the
NI 9514/16 to AKD Drive Cable
The NI 9514/16 to AKD Drive Cable requires connection to an external +24 V power supply.
The +24 V power supply provides both the logic power to the AKD servo drive and powers the
NI 9514 or NI 9516 module.
Note Do not plug in or turn on the +24 V power supply until after you complete the
steps in the Step 8: Connect the Drive Communication section.
Complete the following steps to connect the +24 V power supply to the cable.
1. Connect the +24 V power supply (+) terminal to the Vsup terminal on the NI 9514/16 to
AKD Drive Cable screw terminal connector.
2. Connect the +24 V power supply return (-) terminal to the Vsup Return terminal on the
NI 9514/16 to AKD Drive Cable screw terminal connector.
Step 5: Connect the NI 9514/16 to AKD Drive Cable to
the AKD Servo Drive
Connect the NI 9514/16 to AKD Drive Cable to the AKD servo drive. Refer to Figure 2 for the
location of the connectors.
1. Connect the cable X1 3-pin connector to the AKD servo drive X1 3-pin connector. This
connector provides +24 V power to both the drive logic and to the safe torque out (STO)
input. The STO input must be powered by +24 V for proper drive operation. If you need to
use the STO functionality complete the following additional steps:
a. Disconnect the STO wire from the NI 9514/16 to AKD cable X1 connector and
insulate it.
Note The STO and +24V wires are internally connected in the NI 9514/16 to AKD
cable. You must insulate the STO wire if you disconnect it from the X1 connector.
b. Connect the STO terminal and GND terminal to the output of a safety relay or security
control. The safety relay must comply with the requirements of the SIL 2 according to
IEC 61800-5-2, PL d according to ISO 13849-1, or Category 3 according to EN-954.
Refer to the AKD Installation Manual for more information.

8|ni.com |Getting Started with NI 9514/16 Modules and AKD Servo Drives
Figure 4 shows the X1 connector pin assignment and wire colors.
Figure 4. AKD X1 Connector
2. Connect the cable X9 DSUB connector to the AKD servo drive X9 DSUB connector.
3. Connect the cable X8 10-pin connector to the AKD servo drive X8 10-pin connector.
Note You can use the X7 I/O connector for additional I/O but it is not used for
connection to the NI 9514 and NI 9516 drive interface modules.
Figure 5. NI 9514/16 to AKD Drive Cable Connections
1 +24 V Supply, STO (X1) 2 Encoder Emulation (X9) 3 I/O Connector(X8)
+24 V (Red)
GND (Black)
STO (Brown)
X1 3-Pin
Connector
1
2
3

Getting Started with NI 9514/16 Modules and AKD Servo Drives |© National Instruments |9
Step 6: Connect the Motor and Encoder to the Drive
All Kollmorgen AKM servo motors available from NI come pre-wired for direct connection to
the AKD servo drive X2 motor connector and X10 feedback connector. Refer to Figure 6 for the
location of the connectors.
1. Connect the motor 6-pin connector to the AKD servo drive X2 motor connector.
Note The X2 connector also provides connection for the drive to control the +24 V
holding brake for motors that have a brake. Refer to the AKD Installation Manual for
information about using the holding brake.
2. Connect the motor DSUB feedback connector to the AKD servo drive X10 feedback
connector.
Figure 6. Motor and Encoder Connections
Step 7: Connect the AC Input Power
Connect the X3 mains supply connector to AC input power. Pins 4 through 7 contain the AC
power signals. The X3 connector also provides signals for an external brake (regen) resistor
(±RB) and DC bus link (-DC). Refer to the AKD Installation Manual for information about using
these terminals.
Note Do not turn on the AC power until after you complete Step 8: Connect the
Drive Communication section.
1 Motor Connector (X2) 2 Feedback Connector (X10)
1
2

10 |ni.com |Getting Started with NI 9514/16 Modules and AKD Servo Drives
Figure 7 shows the location and pin assignment for the X3 connector.
Figure 7. AKD Servo Drive X3 Connector
AC input power can be connected for either a three-phase or single-phase operation.
Note External filtering and fusing are optionally provided by the user. Refer to the
AKD Installation Manual for information about filter and fuse requirements.
Figure 8 shows three-phase connection.
Figure 8. AC Input Power Three-Phase Connection
1
2
3
4
5
6
7
–RB
–DC
+RB
L1
L2
L3
PE
DC
Out
L1
User-Provided
Filter
(Optional)
L2
L3
AKD Servo Drive
Protective
Earth
L1
L2
L3
Protective
Earth

Getting Started with NI 9514/16 Modules and AKD Servo Drives |© National Instruments |11
Figure 9 shows single-phase connection.
Figure 9. AC Input Power Single-Phase Connection
Step 8: Connect the Drive Communication
Complete the following steps to set up the drive for software configuration using Ethernet. These
steps assume you are connecting the AKD servo drive using a hub, switch, or router using
DHCP. If you cannot use DHCP, refer to the Connecting to the PC Using a Static IP section for
instructions about direct connection using a static IP address.
1. Set S1 and S2 on the drive to 0 to configure the drive for DHCP mode. The drive obtains
an IP address from an external DHCP server if one exists on the network. If no DHCP
server is present, the drive assumes an automatic private IP address in the form of
169.254.x.x. This process may take up to a minute to complete. Figure 2 shows the
locations of S1 and S2.
2. Connect the AKD servo drive X11 service port to a hub, switch, or router using an Ethernet
cable. Figure 10 shows the location of the X11 service port on the drive.
Figure 10. AKD Servo Drive X11 Connector
L1 User-Provided
Filter
(Optional)
L2
L3
L1
Neutral (L2)
Protective
Earth
Protective
Earth
DC
Out
AKD Servo Drive
LED

12 |ni.com |Getting Started with NI 9514/16 Modules and AKD Servo Drives
Step 9: Confirm Drive Connections
After all hardware connections have been made complete the following steps to confirm the
AKD hardware setup.
1. Apply AC power.
2. Turn on the +24 V power supply. After logic power is supplied to the drive, the drive
displays the following sequence of flashes in the LED indicators. Figure 2 shows the
location of the LED indicators on the AKD servo drive.
a. - -
b. [ ]
c. Drive IP address, flashed sequentially
d. Drive status, either current operation mode or the fault code if there is a fault
condition. The operation modes are as follows:
• o0—torque mode (current mode)
• o1—velocity mode
• o2—position mode
Note If the drive shows a fault code, click the Clear Faults button on the AKD
WorkBench software toolbar after you install the AKD WorkBench software in
Step 5: Install AKD WorkBench and Configure the Drive section and connect to the
drive to clear the fault state. If the fault reappears, refer to the AKD Fault and
Warning Messages Card that came with the drive for more information about the
fault, including possible solutions. After resolving the cause of the fault, click the
Clear Faults button on the toolbar again. Figure 17 shows the location of the Clear
Faults toolbar button in the AKD WorkBench software.
Software Installation and Configuration
This section covers installing and configuring the software for the AKD servo drive and NI 9514
or NI 9516 C Series modules.
Step 1: Install Software on and Configure the NI RT
Controller
Complete the following steps to configure the controller and install software on it.
1. Launch Measurement & Automation Explorer (MAX) on the development computer by
clicking the MAX icon on the desktop, or by selecting Start»All Programs»National
Instruments»NI MAX.
2. Select the controller under Remote Systems in the Configuration pane. If you do not see
the controller, you may need to disable the firewall on the development computer.
3. Verify that the Serial Number in the Identification section matches the serial number on
the device.

Getting Started with NI 9514/16 Modules and AKD Servo Drives |© National Instruments |13
4. Expand the controller item in the tree, right-click Software, and select Add/Remove
Software.
5. Select a recommended software set that includes NI-RIO 3.4.0 or later with NI Scan Engine
Support.
6. Click Next and enable the following add-ons:
• LabVIEW SoftMotion Module
• NI Industrial Communications for EtherCAT if using the NI 9144.
Note If you are using the LabVIEW SoftMotion Module 2010 SP1 or earlier, you
need to install NI Scan Engine Support for LabVIEW SoftMotion Module.
7. Click Next to install the selected software on the controller. Click Help if you need
information about installing recommended software sets.
8. Close MAX.
Step 2: Creating a Project and Adding NI RT Controller
Complete the following steps to create a LabVIEW project.
1. Launch LabVIEW by selecting Start»All Programs»National Instruments»LabVIEW.
2. Click the Empty Project link in the Getting Started window to display the Project
Explorer window. You can also select File»New Project to display the Project Explorer
window.
3. Select Help and make sure that Show Context Help is checked. You can refer to the
context help throughout the tutorial for information about items on the block diagram.
Depending on the hardware configuration being used, continue to the following respective
sections.
A. CompactRIO Controller
If you are using a CompactRIO controller, complete the following steps to add the device to the
project and detect the C Series modules.
1. Right-click the top-level project item in the Project Explorer window and select New»
Targets and Devices from the shortcut menu to display the Add Targets and Devices
dialog box.
2. Make sure that the Existing target or device radio button is selected.
3. Expand Real-Time CompactRIO.
4. Select the CompactRIO controller to add to the project and click OK.
5. If you have LabVIEW FPGA installed, the Select Programming Mode dialog box
appears. Select Scan Interface to put the system into Scan Interface mode.
Tip Use the CompactRIO Chassis Properties dialog box to change the
programming mode in an existing project. Right-click the CompactRIO chassis in the
Project Explorer window and select Properties from the shortcut menu to display
this dialog box.

14 |ni.com |Getting Started with NI 9514/16 Modules and AKD Servo Drives
6. Click Discover in the Discover C Series Modules? dialog box if it appears.
7. Click Continue.
8. Right-click the controller item in the Project Explorer window and select Properties from
the shortcut menu to display the RT Target Properties dialog box. Select Scan Engine
from the Category list to display the Scan Engine page.
9. Set the Scan Period to 5 ms or lower, then click OK to close the RT Target Properties
dialog box.
B. EtherCAT Master and NI 9144 EtherCAT Expansion Chassis
If you are using the NI 9144 chassis, complete the following steps to add the EtherCAT master
device and detect the C Series modules.
1. Add the Master Real Time Controller to the project. Right click the top level project item
in the Project Explorer window and select New»Targets and Devices from the shortcut
menu to display the Add Targets and Devices dialog box.
2. Make sure that Existing target or device radio button is selected.
3. Expand the folder that corresponds to the device you are adding, such as Real Time
Industrial Controller, Real Time PXI, and so on.
4. Select the Real Time to add to the project and click OK.
5. In the LabVIEW Project Explorer window, right-click the master controller and select
New»Targets and Devices.
6. In the Add Targets and Devices dialog window shown in Figure 11, select Existing target
or device and expand the category EtherCAT Master Device to auto-discover the EtherCAT
port on the master controller. An EtherCAT master device and modules can be added
manually at any time.
Figure 11. Adding the EtherCAT Master
When all the slave devices are discovered, the LabVIEW Project Explorer window lists each
slave device and any installed C Series modules.

Getting Started with NI 9514/16 Modules and AKD Servo Drives |© National Instruments |15
C. NI 9146/7/8/9 Ethernet RIO Expansion Chassis
Complete the following steps to add the device to the project and detect the C Series modules if
the NI 9146/7/8/9 Ethernet RIO Expansion chassis is being used.
1. Right-click the top-level project item in the Project Explorer window and select New»
Targets and Devices from the shortcut menu to display the Add Targets and Devices
dialog box.
2. Make sure that the Existing target or device radio button is selected.
3. Expand Ethernet RIO.
4. Select the Ethernet RIO expansion chassis to add to the project and click OK.
5. If you have LabVIEW FPGA installed, the Select Programming Mode dialog box
appears. Select Scan Interface to put the system into Scan Interface mode.
Tip Use the Chassis Properties dialog box to change the programming mode in an
existing project. Right-click the chassis in the Project Explorer window and select
Properties from the shortcut menu to display this dialog box.
6. Click Discover in the Discover C Series Modules? dialog box if it appears.
7. Click Continue.
8. Right-click the controller item in the Project Explorer window and select Properties from
the shortcut menu to display the Ethernet RIO Properties dialog box. Select Scan Engine
from the Category list to display the Scan Engine page.
9. Set the Scan Period to 5 ms or lower, then click OK to close the Ethernet RIO Properties
dialog box.
Step 3: Adding an NI SoftMotion Axis to the Project
Complete the following steps to create a LabVIEW project.
1. Right-click the controller item in the Project Explorer window and select New»NI
SoftMotion Axis from the shortcut menu to open the Axis Manager dialog box, shown in
Figure 12.
2. Click Add New Axis to create an NI SoftMotion axis associated with the NI 9514 or
NI 9516 module. Axes are automatically bound to an available module. You can
double-click the axis name to rename the axis and give it a descriptive name.

16 |ni.com |Getting Started with NI 9514/16 Modules and AKD Servo Drives
Figure 12. Axis Manager Dialog Box
3. Click OK to close the Axis Manager dialog box. The new axis is added to the Project
Explorer window.
Note You cannot associate more than one axis with the same C Series module.
When you have finished these steps your LabVIEW project should look similar to the
image in Figure 13.
Figure 13. Project Explorer Windows with Modules in Scan Interface Mode

Getting Started with NI 9514/16 Modules and AKD Servo Drives |© National Instruments |17
Step 4: Configure the NI 9514 or NI 9516 C Series
Modules
Complete the following steps to configure the axis I/O settings for use with the AKD servo drive.
1. Right-click the axis in the Project Explorer window and select Properties from the
shortcut menu to open the Axis Configuration dialog box.
Figure 14 shows the parts of the Axis Configuration dialog box for NI 9514 and NI 9516
C Series modules.
Figure 14. Axis Configuration Dialog Box
Note The Axis Configuration dialog box user interface may not match this image
exactly depending on which version of the LabVIEW NI SoftMotion Module you are
using.
2. Click the Digital I/O button to open the Digital I/O page and map DI 1 to Drive
Fault/Alarm.

18 |ni.com |Getting Started with NI 9514/16 Modules and AKD Servo Drives
a. Double-click the text in the Mapping column and select Drive Fault/Alarm from the
dropdown list.
b. Ensure that the DI 1 settings match the following:
•Input Type—Sinking
•Active State—Off
•Digital Filter—50 µs
3. Open the Drive Enable page and ensure that the Drive Enable settings match the following:
•Output Type—Sourcing
•Active State—On
•Safe State—Off
4. Complete the following additional steps if you do not have limits and home connected at
this time:
a. Open the Limits & Home page.
b. In the Forward Limit and Reverse Limit sections ensure that the settings match the
following:
Note These configuration settings disable limits for initial setup and testing
purposes. National Instruments recommends connecting and enabling limits in your
final application.
• Clear the Enable checkbox from both Forward Limit and Reverse Limit.
• Set the Active State for both Forward Limit and Reverse Limit to Off. This
prevents a limit warning even though limits are turned off.
c. Open the Home section and clear the Enable checkbox.
5. Open the Position Loop page and make the following changes in the Gains section:
•Set Kp to 50.
•Set Kd to 1000.
•Set Ki to 0.
Note These values do not result in a properly tuned motor, but may allow you to
perform a simple move for testing purposes. After connecting the other mechanical

Getting Started with NI 9514/16 Modules and AKD Servo Drives |© National Instruments |19
elements of the system, use the Gain Tuning Panel to tune the control loop settings
and determine the relative stability of the servo axis. Refer to the Using the Gain
Tuning Panel topic in the NI SoftMotion Module book of the LabVIEW Help for
detailed information about the Gain Tuning Panel and servo system tuning
instructions.
6. Open the Encoder page.
•In the Active State section set the Line State for A, B, and Index to High.
•In the Index Reference Criteria section set the Line State for A and B to
Active.
• Type revolution in the Units text box.
• Set the Counts per Unit to 8,000. This setting is the encoder resolution in
quadrature counts per revolution and must correspond to the AKD WorkBench
emulated encoder output Resolution setting in lines per revolution multiplied
by four. You may want to choose a different resolution depending on your
application needs. Changing this setting allows moves to be commanded in units
of revolutions per second.
Note You configure the emulated encoder output Resolution setting in Step 5:
Install AKD WorkBench and Configure the Drive section.
When you are finished the Encoder Settings page will look similar to Figure 15.
Figure 15. Axis Configuration Encoder Page
7. Configure any additional I/O settings according to your system requirements.
8. Click OK to close the Axis Configuration dialog box.
9. Right-click the controller item in the Project Explorer window and select Deploy All to
deploy the axis information.
10. Select File»Save Project to save the project.
Other manuals for NI 9514
2
This manual suits for next models
1
Table of contents
Other National Instruments Servo Drive manuals

National Instruments
National Instruments AKD EtherCAT User manual

National Instruments
National Instruments NI 9505 User manual

National Instruments
National Instruments NI 9516 User manual

National Instruments
National Instruments NI 9512 C Series User manual

National Instruments
National Instruments NI 9516 User manual

National Instruments
National Instruments NI 9505E User manual

National Instruments
National Instruments NI 9502 User manual

National Instruments
National Instruments NI 9505 User manual