NAUTICA VX3J User manual

CONGRATULATIONS ON OWNING YOUR NEW NAUTICA WATCH
DEVELOPED FROM ADVANCED ELECTRONICS TECHNOLOGY,
THE MOVEMENT IS MANUFACTURED FROM THE BEST QUALITY
COMPONENTS AND POWERED BY A LONG LIFE BATTERY.
INDEX
Page
WATCH INFORMATION AND CARE 2 - 5
OPERATING INSTRUCTIONS
BASIC MODELS 6 - 7
DATE MODELS 8 - 9
MULTI MODELS 10 - 13
INDIGLO MODELS 14 - 15
CHRONOGRAPH MODELS 15 - 53
ANALOG & DIGITAL MODELS 54 - 63
DIGITAL MODELS 64 - 67
SPECIAL MODELS
TIDE 68 - 71
WORLD TIME 72 - 75
HIGH PERFORMANCE MODELS
TIDE, TEMPERATURE & COMPASS 76 - 81
SOLAR 82 - 83
DEPTH 84 - 87

2 32 3
NAUTICA watches have been developed with the highest attention to
quality, function and detail, as befits the NAUTICA tradition.
Please read the following instructions carefully to fully understand all
of the functions of your finely crafted timepiece.
WATER-RESISTANCE
If your watch is water-resistant, it will be indicated on the watch face
or on the caseback.
• 50 Meter Water-Resistant watch withstands water pressure to
86p.s.i.a. (equals immersion to 164 feet or 50 meters below sea
level) and dust as long as crystal, crown and case remain intact.
• 100 Meter Water-Resistant watch withstands water pressure to
160p.s.i.a. (equals immersion to 328 feet or 100 meters below sea
level) and dust as long as crystal, crown and case remain intact.
• 200 Meter Water-Resistant watch withstands water pressure to
320p.s.i.a. (equals immersion to 656 feet or 200 meters below sea
level) and dust as long as crystal, crown and case remain intact.
NOTE: CROWN MUST BE SCREWED INTO THE CASE
PROTRUSION TO ASSURE WATER RESISTANCE.
WATCH IS NOT AN ISO 6425 CERTIFIED DIVE WATCH.
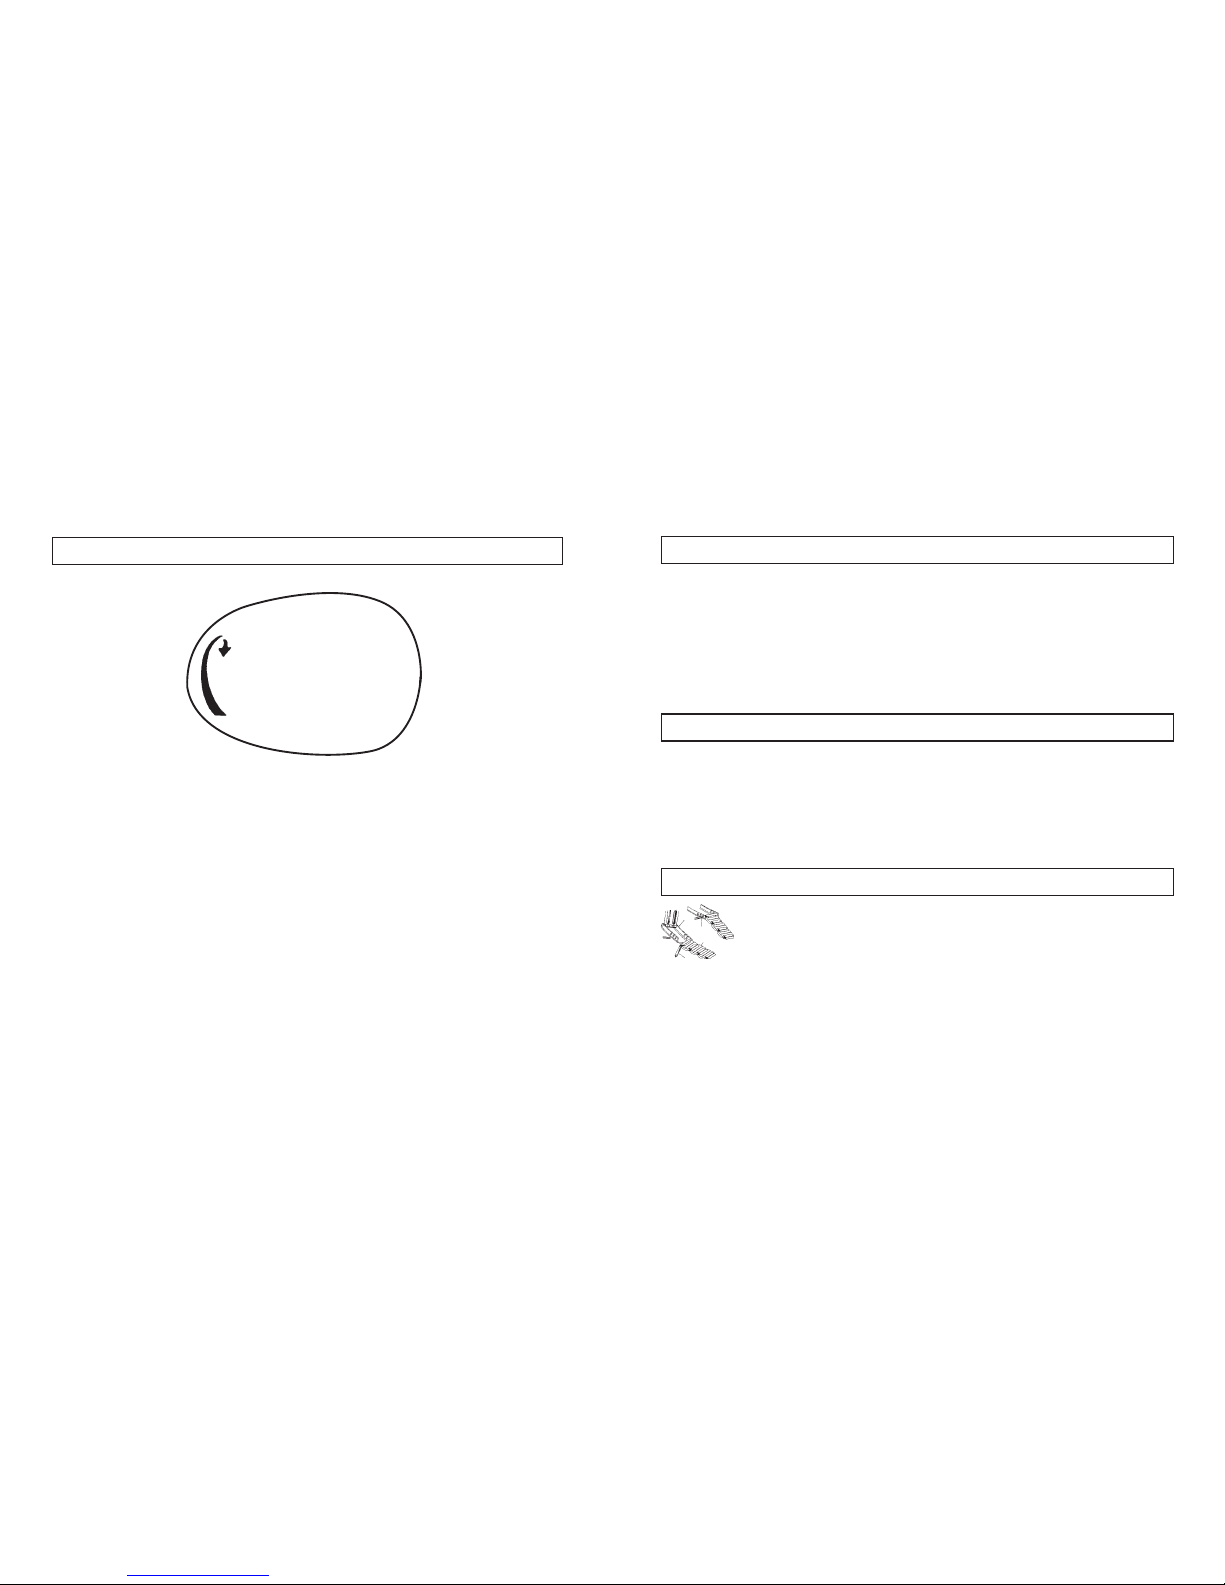
INDIGLO® NIGHT-LIGHT
If your watch has “INDIGLO” on the dial, your watch is equipped with
the INDIGLO Night-Light. To activate this feature, depress the crown or
the pusher on the left side of the watch to illuminate the entire dial for
easy reading during nighttime or low light conditions. Light will appear
immediately.
Your NAUTICA watch featuring INDIGLO Night-Light contains a patented
electroluminescent technology (U.S. Patent Number 4,527,96 and
4,775,964). The INDIGLO Night-Light illuminates the entire watch lens
with a uniform bright light that offers superior readability in all low light
and nighttime conditions. Simply press the appropriate button to activate.
WARNING: DO NOT PRESS THE BUTTON UNDER WATER AS THE
WATCH WILL NOT RETAIN WATER RESISTANCE.
INDIGLO is a registered trademark of Indiglo Corporation.
BATTERY
Please recycle or dispose of battery properly. Do not dispose of battery in
the fire. Do not recharge battery. Keep loose batteries away from children.

SCREW-IN SETTING CROWN
Some deep-depth water-resistant watches require the setting crown to
be screwed in to ensure water-resistancy. If your Nautica watch has
a transparent sticker at back of the case back (diagram above)
please unscrew the crown before setting your watch, and the
crown must be screwed in after setting the watch.
To screw in, push in the crown firmly against the thread protrusion and
hold it in while turning the crown clockwise. Continue to screw in the
crown light until it is tight .
ATTENTION
This is a screw down crown
Do not pull
Please read instruction
booklet before operation
SCREW-IN SETTING CROWN STICKER
4
ELAPSED TIME RING
If your watch is equipped with a rotating outer dial with numbers and
indicators, this Elapsed Time Ring may be used to indicate the length
of time remaining for an activity or the starting time of an activity.
TIME REMAINING - set the outer ring so that the triangle is pointing
to the time the activity is to end.
STARTING TIME - set the triangle on the time the activity is to begin.
TACHYMETER
A tachymeter measures the speed at which the wearer has traveled
over a measured distance, i.e., a measured mile on the highway. For
example, start the chronograph when you pass the starting point and
stop it when you pass the finish point. You can then read your speed
in units per hour off the tachymeter scale.
BAND ADJUSTMENT
To disconnect band from clasp, press in end of spring bar
(use pin or small paper clip) and separate link band from
clasp as illustrated.
To reassemble band to clasp, place spring bar in band and place end of
spring bar into desired hole in clasp. Press opposite end of spring bar in
and slide into clasp and position so tip snaps into corresponding hole.
5

6 7
CROWN POSITION
A B
CROWN POSITION
A B
BASIC MODELS
Y121, 2039, 2036, 608/1010 VX10 / VX51 / YL60 / 4S20
336/168
CROWN
POSITION
A B
TIME
To set the time:
1. Pull crown to “B” position.
2. Turn crown clockwise /counter clockwise to correct time.
3. Push crown to “A” position.

8 98
DATE MODELS
CROWN POSITION
DATE
A B C
VX33
CROWN POSITION
DAY
DATE
A B C
VX12 / VX42 / VX32 / VX82 / 2315 / 2115 / 2415 / AL32
TIME
To set the time:
1. Pull out crown to “C” position.
2. Turn crown clockwise / counter clockwise to correct time.
3. Push in crown to “A” position.
CALENDAR
To set the calendar/date:
1. Pull out crown to “B” position.
2A. Turn crown clockwise / counter clockwise to correct date.
2B. Turn crown counter clockwise to correct date. (For VX33 only)
3. Push in crown to “A” position.
NOTE: The date changes automatically every 24 hours.

10 11
24 HOUR CROWN
POSITION
A B C
VX3R
DATE
DATE
24 HOUR
VX3J
CROWN
POSITION
A B C
DAY
DAY
DAY
DATE
24 HOUR
CROWN
POSITION
A B C
VX3L
24 HOUR
DAY
CROWN
POSITION
A B C
VX3N / VX7N
DATE
DAY
CROWN
POSITION
A B C
VD79
DATE
VX36
CROWN
POSITION
A B C
DATE
MULTI MODELS
TIME
To set the time:
1. Pull crown to “C” position.
2. Turn crown either way to correct time.
3. Push crown to “A” position.
DATE
To set the date:
Note: the date changes automatically every 24 hours.
1. Pull crown to “B” position.
2. Turn crown to correct date.
3. Push crown to “A” position.
DAY OF WEEK (for VX3J / VX3L / VX3N / VX36 / VX7N / VD79)
To set the day:
1. Pull crown to "C" position.
2. Advance time 24 hours to change the day.
3. Push crown to "A" position.
Note: 24 hour indicator can be changed only when setting the time.

12 13
6P27
DAY
DATE
24 HOUR
CROWN POSITION
6P23
DATE
24 HOUR
24 HOUR
A B C
CROWN POSITION
CROWN POSITION
6P29
DAY
A B C
DATE
TIME
To set the time:
1. Pull crown to “C” position.
2. Turn crown either way to correct time.
3. Push crown to “A” position.
DATE
To set the date :
1. Pull crown to “B” position.
2. Turn crown counter clockwise to correct date.
3. Push crown to “A” position.
Note: The day changes automatically every 24 hours.
DAY OF WEEK (for 6P27 / 6P29)
To set the day:
1. Pull crown to “C” position.
2. Turn crown clockwise (hour hands rotate 24 hours) to correct day of
week.
3. Push crown to “A” position.
Note: The day of week changes automatically every 24 hours.

14 15
To activate the Indiglo:
Press crown to indicate Indiglo night light.
TIME
To set the time:
1. Pull crown to "C" position.
2. Turn crown clockwise / counter clockwise to correct time.
3. Push crown to "A" position.
CROWN POSITION
DATE
A B C
M905
INDIGLO MODELS
CALENDAR
To set the date:
1. Pull crown to "B" position.
2. Turn crown counter clockwise or towards you to correct date.
3. Push crown to "A" position.
Note: The date changes automatically every 24 hours.

16 17
STOPWATCH MINUTES HAND
STOPWATCH HOUR HAND
SMALL SECOND HAND
PUSHER “A”
STOPWATCH 1/20SEC. HAND
STOPWATCH SECOND HAND
YM92
CROWN POSITION
A B C
PUSHER “A”
PUSHER “B”
YM91
STOPWATCH
MINUTE HAND
SECOND HAND
CHRONOGRAPH HAND
1/5 SECOND
CHRONOGRAPH MODELS
This Chronograph watch has three functions:
TIME, CALENDAR, STOPWATCH
TIME
To set the time:
1. Pull crown to position “C”.
2. Turn crown clockwise / counter clockwise to correct time.
3. Push crown to position “A”.
CALENDAR
To set the calendar:
1. Pull crown to position “B”.
2. Turn crown clockwise to correct calendar.
3. Push crown to position “A”.
STOPWATCH
This stopwatch is capable of measuring:
– 1/5 second elapsed up to 60 minutes.
– After 60 minutes, it will start counting again from “0” repeatedly up
to 12 hours.
A B C
CROWN POSITION
PUSHER “B”
PUSHER “A”
DATE
YM12 / YM1G
PERMANENT
SECOND HAND
STOPWATCH
SECOND HAND
MINUTE HAND

18 19
Before using the stopwatch, reset the stopwatch hands.
To the “12” and “0” position.
STANDARD STOPWATCH MEASUREMENT:
1. Press pusher “A” to start timing.
2. Press pusher “A” to stop timing.
3. Press pusher “B” to reset.
ACCUMULATED ELAPSED TIME MEASUREMENT:
1. Press pusher “A” to start timing.
2. Press pusher “A” to stop timing.
3. Press pusher “A” to restart timing.
4. Press pusher “A” to stop 2nd timing.
5. Press pusher “B” to reset.
Example of using split time measurement for two runners.
Two runners can be timed simultaneously; the first runner’s time
can be recorded while the second runner’s time will continue to be
accumulated until he finishes.
SPLIT TIME MEASUREMENT:
1. Press pusher “A” to start the timing of the first runner.
2. Press pusher “B” to stop and record the timing of the first runner.
(Once pusher B is activated, even though the stopwatch 1/20
sec. hand and the big stopwatch sec. hand stop on the dial, the
stopwatch still continues to time internally.)
3. Press pusher “B” to start the timing of the second runner. The
stopwatch sec. hand will jump to show internal accumulated time
and to carry on timing of the second runner.
4. Press pusher “A” to stop the timing of the second runner and record
the time.
5. Press pusher “B” for third time to reset, all stop watch hands will
return to 12 o’clock position.
TO ADJUST STOPWATCH HAND (for YM12 / YM91 / YM1G):
1. Pull crown to position “C”.
2. Press pusher “A” for 2 seconds, the stopwatch minute hand turns a
full cycle.
3. Press pusher “B” repeatedly to set stopwatch minute hand to “0”
position.
4. Press pusher “A” again for 2 seconds, the stopwatch second hand
turns a full cycle.

20 21
5. Press pusher “B” repeatedly to set stopwatch second hand to “0”
position.
6. Push crown to position “A”.
Remarks:
This is suggested to check the hour and minute hands to ensure they
are correct before pushing the crown back to position “A”
TO ADJUST STOPWATCH HAND (for YM92) :
1. Pull crown to “C” position.
2. Press pusher “A” for 2 seconds.
3. Press pusher “B” to “0” setting for the 1/20 sec. hand. If the hand
is not at “0” or “12” position, then, press pusher “B” repeatedly, until
the hand moves by each intervaI and returns to “0” or “12” position.
4. Press pusher “A” for 2 seconds.
5. Press pusher “B” to “0” setting for the stopwatch sec. hand. If the
hand is not at “0” or “12” position, then, press pusher “B” repeatedly,
until the hand moves by each intervaI and returns to “0” or “12”
position.
6. Press pusher “A” for 2 seconds.
7. Press pusher “B” to “0” setting for the stopwatch min. / hour hand.
If the hand is not at “0” or “12” position, then, press pusher “B”
repeatedly, until the hand moves by each intervaI and returns to “0”
or “12” position.
8. Push crown to “A” position after the adjustments of all stopwatch
hands.
Note: Please make sure that the stopwatch is stopped and reset
before adjusting.

22 23
A B C
CROWN POSITION
PUSHER “B”
PUSHER “A”
SECOND HAND
HOUR HAND
24-HOUR HAND
CALENDER
FS00 / FS01
STOPWATCH MUNUTE HAND
STOPWATCH SECOND HAND
MINUTE HAND
A B C
CROWN POSITION
PUSHER “B”
PUSHER “A”
SECOND HAND
HOUR HAND
24-HOUR HAND
CALENDER
FS20 / FS21
STOPWATCH MUNUTE HAND
STOPWATCH SECOND HAND
MINUTE HAND
This Chronograph watch has 3 functions:
TIME, CALENDAR, STOPWATCH
TIME
To set the time:
1. Pull crown to position “C”.
2. Turn crown clockwise / counter clockwise to correct time.
3. Push crown to position “A”.
CALENDAR
To set the calendar:
1. Pull crown to position “B”.
2. Turn crown clockwise to correct calendar.
3. Push crown to position “A”.
STOPWATCH
The stopwatch is capable of measuring and displaying 1/1 second unit
up to maximum 1 hour. The stopwatch minute hand synchronizes with
the stopwatch second hand.
1. Press pusher “A” to start timing.
2. Press pusher “A” again to stop timing.
3. Press pusher “B” to reset.

24
CORRECTING STOPWATCH HANDS
If after resetting the stopwatch hands it is found that they are not at
the '12' or '0' position, correct them as follows:
1. Pull crown to “ C” position.
2. Press pusher “A” continuously, the stopwatch hand will advance
rapidly until it gets close to the “ 12” position. Then, press pusher “A”
repeatedly, the stopwatch hand will move by intervals until it returns
to “12” position.
3. Push crown back to “A” position.
4. Press pusher “A” to activate the stopwatch hand.
5. Press pusher “B” reset the stopwatch minute hand at 10 o’clock
until it returns to “0” position.

26 27
A B C
CROWN POSITION
PUSHER “B”
PUSHER “A”
5030D
DATE
MINUTE CHRONO HAND
HOUR
CHRONO
HAND
PERMANENT SECOND HAND
STOPWATCH SECOND HAND
A B C
CROWN POSITION
PUSHER “B”
PUSHER “A”
5040B
DATE
MINUTE CHRONO HAND
1/10 SECOND COUNTER HAND (HOUR
COUNTER HAND AFTER 30 MINUTES)
PERMANENT SECOND HAND
STOPWATCH SECOND HAND
This Chronograph watch has 3 functions:
TIME, CALENDAR, STOPWATCH
TIME
To set the time:
1. Pull crown to position “C”.
2. Turn crown clockwise / counter clockwise to correct time.
3. Push crown back to position “A”.
Calendar
To set the calendar:
1. Pull crown to position “B”.
2. Turn crown clockwise to correct calendar.
3. Push crown back to position “A”.
STOPWATCH
This stopwatch is capable of measuring:
Chrono Hours elapsed up to 12 hours. ( 6 o’clock eye) (For 5030D)
Chrono Hours elapsed up to 10 hours. (6 o'clock eye) (For 5040B)
Chrono Minutes elapsed up to 30 minutes. ( 9 o’clock eye )
Stopwatch Second up to 1 minute. ( Big second hand )

28 29
Before using the stopwatch, reset stopwatch chrono hands to the “12”
and “0” position.
Standard Stopwatch Measurement
1. Press pusher “A” to start timing.
2. Press pusher “A” again to stop timing.
3. Press pusher “B” to reset.
Accumulated Elapsed Time Measurement
1. Press pusher “A” to start timing.
2. Press pusher “A” again to stop timing.
3. Press pusher “A” to restart timing.
4. Press pusher “A” again to stop second timing.
5. Press pusher “B” to reset.
Split Time Measurement
Example of using split time measurement for two runners. Two runners
can be timed simultaneously; the first runner’s time can be recorded
while the second runner’s time will continue to be accumulated until he
finishes.
1. Press pusher “A” to start the timing of the first and second runner.
2. Press pusher “B” to stop and record the timing of the first runner.
(Once pusher “B” is activated, even though the chrono minute hand
and the big stopwatch sec. hand stop on the dial, the stopwatch still
continues to run internally.)
3. Press pusher “B” to catch up the timing of the second runner. The
stopwatch sec. hand will jump to show internal accumulated time
and to carry on timing of the second runner.
4. Press pusher “A” to stop the timing of the second runner and record
the time.
5. Press pusher “B” for third time to reset, all stopwatch chrono hands
will return to “12” and “0” position.
CORRECTIVE MODE FOR STOPWATCH CHRONO HANDS
1. Pull crown to position “C”.
2. Press pushers “A” and “B” simultaneously for at least 2 seconds.
3. The big stopwatch sec hand rotates by 360 degree to activate
corrective mode.
TO ADJUST THE BIG SEC. STOPWATCH HAND
If it is not located at “12” or “0” position, either press pusher “A”
continuously or repeatedly until the hand moves by each interval and
returns to “12” and “0” position.

30 31
After finishing the big sec. stopwatch hand adjustment, press crown
back to position “A” to terminate the adjustment.
TO ADJUST THE 1/10 SECOND COUNT HAND (FOR 5040B)
After activating the corrective mode, if the 1/10 second counter hand
is not located at '12' or '0' position, press pusher “B” once to activate
the corrective mode of the 1/10 second counter hand. Press pusher “A”
continuously or repeatedly until the hand moves by each interval and
returns to “12” and “0” position.
Press crown back to position “A” to terminate the adjustment.
TO ADJUST THE HOUR CHRONO HAND (for 5030D)
After activating the corrective mode, if the hour chrono hand is
not located at '12' or '0' position, press pusher “B” once to activate
the corrective mode of the hour chrono hand. Press pusher “A”
continuously or repeatedly until the hand moves by each interval and
returns to “12” and “0” position.
Press crown back to position “A” to terminate the adjustment.
TO ADJUST THE MINUTE CHRONO HAND
After activating the corrective mode, if the minute chrono is not located
at '12' or '0' position, press pusher “B” twice to activate the corrective
mode of the minute chrono hand.
Press pusher “A” continuously or repeatedly until the hand moves by
each interval and returns to “12” and “0” position.
Press crown back to position “A” to terminate the adjustment.
Once finished adjusting all stopwatch chrono hands, press crown back
to “A” position to terminate adjustment.

32 33
A B C
CROWN
POSITION
PUSHER “B”
PUSHER “A”
DATE
STOPWATCH
MINUTE HAND
24 HOUR HAND
STOPWATCH
SECOND HAND
A B C
CROWN
POSITION
PUSHER “B”
OS2B
DATE
STOPWATCH
MINUTE DISK
SECOND HAND
STOPWATCH
SECOND HAND
OS11
MINUTES HAND
PERMANENT
SECOND HAND
A B C
CROWN
POSITION
STOPWATCH
SECOND HAND
PUSHER “A”
DATE
PUSHER “B”
STOPWATCH
MINUTE HAND
OS21
MINUTES HAND
A B C
CROWN
POSITION
STOPWATCH
SECOND HAND
PUSHER “A”
24 HOUR HAND
PUSHER “B”
HOUR HAND
STOPWATCH
MINUTE HAND
DATE
This Chronograph watch has three functions:
TIME, CALENDAR, STOPWATCH
TIME
To set the time:
1. Pull crown to position "C".
2. Turn crown clockwise / counter clockwise to correct time.
3. Push crown to position "A".
CALENDAR
To set the calendar:
1. Pull crown to position "B".
2. Turn crown counter-clockwise to set calendar.
3. Push crown to position "A".
STOPWATCH
The stopwatch is capable of measuring and displaying time in 1/1
second united up to a maximum of 59 minutes 59 seconds.
1. Press pusher "A" to start timing.
2. Press pusher "A" again to stop timing.
3. Press pusher "B" to reset.

34 35
CORRECTING STOPWATCH HAND
If after resetting the stopwatch second hand it is found that they are
not at the '12' or '0' position, correct as follows:
1. Pull crown to "C" position.
2. Press pusher “A” continuously, the stopwatch second hand will
advance rapidly until it gets close to the “12” position. Then, press
pusher “A” repeatedly, the stopwatch second hand will move by
intervals until it returns to “12” position.
3. Push crown to position “A".

36 37
A B C
CROWN POSITION
VD51
PUSHER B
PUSHER A
STOPWATCH MINUTE HAND
STOPWATCH SECOND HAND
DATE
DATE
A B C
CROWN POSITION
PUSHER “B”
24-HOUR HAND
VD53
STOPWATCH SECOND HAND
STOPWATCH MINUTE HAND
This Chronograph watch has 3 functions:
TIME, CALENDAR, STOPWATCH
TIME
To set the time:
1. Pull crown to position “C”.
2. Turn crown clockwise / counter clockwise to correct time.
3. Push crown to position “A”.
CALENDAR
To set the calendar:
1. Pull crown to position “B”.
2. Turn crown clockwise to correct calendar.
3. Push crown to position “A”.
STOPWATCH
The stopwatch is capable of measuring:
1 minute elapsed up to 60 minutes.
Before using the stopwatch, reset the stopwatch hands to the “12” & “0”
position.

38 39
STANDARD STOPWATCH MEASUREMENT:
1. Press pusher “A” to start timing.
2. Press pusher “A” to stop timing.
3. Press pusher “B” to reset.
split time Measurement
Example of using split time measurement for two runners. Two runners
can be timed simultaneously; the first runner’s time can be recorded while
the second runner’s time will continue to be accumulated until he finishes.
1. Press pusher “A” to start the timing of the first and second runner.
2. Press pusher “B” to stop and record the timing of the first runner.
(Once pusher “B” is activated, even though the chrono minute hand
and the big stopwatch sec. hand stop on the dial, the stopwatch still
continues to run internally.)
3. Press pusher “B” to catch up the timing of the second runner. The
stopwatch sec. hand will jump to show internal accumulated time
and to carry on timing of the second runner.
4. Press pusher “A” to stop the timing of the second runner and record
the time.
5. Press pusher “B” for third time to reset, all stopwatch chrono hands
will return to “12” and “0” position.
TO ADJUST STOPWATCH HAND
1. Pull crown to position "C".
2. Press pusher "A" continuously or repeatedly to adjust the stopwatch
second hand to "0" or "12" position.
3. Press pusher "B" continuously or repeatedly to adjust the stopwatch
minute hand to "0" or "12" position.
4. Push back the crown to position "A".
This manual suits for next models
55
Table of contents
Other NAUTICA Watch manuals
Popular Watch manuals by other brands

Vista Shops
Vista Shops Smart Watch GT08 user manual

Sami Wearable
Sami Wearable WS-2342 user manual

Calypso Watches
Calypso Watches IKMK5815M instruction manual

Jaeger-leCoultre
Jaeger-leCoultre Master Compressor Chronograph user guide

Sony
Sony SmartBand TalkSWR30 user guide

Seiko
Seiko S141A Parts catalogue /technical guide

Jaeger-leCoultre
Jaeger-leCoultre Master Compressor Extreme World user manual

Mountroyal
Mountroyal Miyota 0S60 instruction manual

Casio
Casio 5308 Operation guide

UVI Group
UVI Group GPS-202D user manual

Rolex
Rolex Oyster Perpetual Cosmograph Daytona manual

Garmin
Garmin INSTINCT SOLAR TACTICAL owner's manual