Contents
Safety Instructions 3
Included Items 4
Connecting the Extension Cable 5
Attaching the Wall Mounting Bracket 6
Remote Controller 7
LCD Display Icons 8
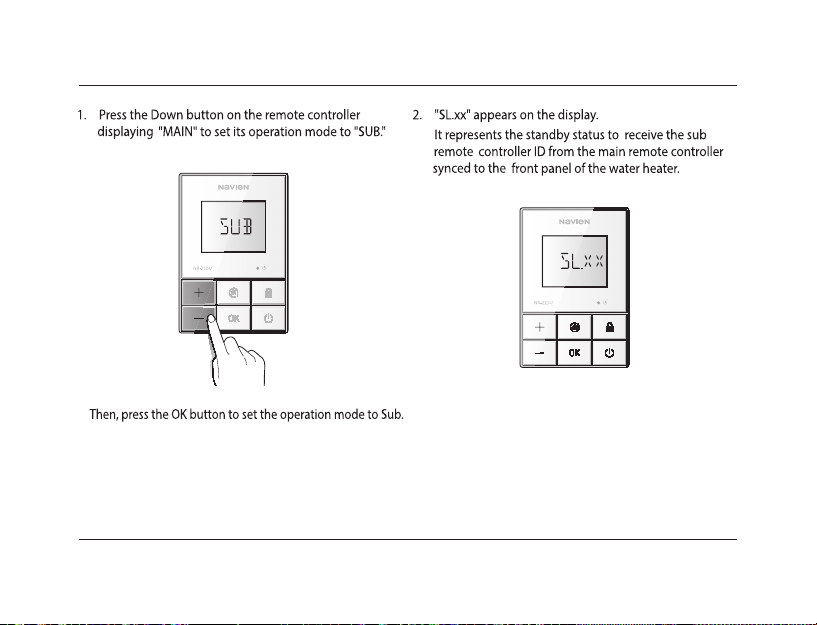
9Multi Remote Controller System
Turning the Controller On or O
Setting the water temperature
14
Starting Recirculation
15
Entering High Temperature Mode (Commercial Mode) 16
Entering Lock Mode 17
Setting the clock
18
Setting the Recirculation timer
19
Canceling all timer settings
21
24
25Additional features for Cascade systems
28
About errors and icons
30
26
27About scale warning
Basic Troubleshooting and Frequently Asked Questions
Error Code Guide
Safety Instructions
The following safety symbols are used in this manual. Read and follow all safety
instructions in this manual precisely to avoid unsafe operating conditions, re,
explosion, property damage, personal injury, or death. Keep this manual for future
reference.
If you do not follow these instructions exactly, a re
or explosion may result causing property damage,
personal injury or loss of life.
Indicates an imminently
hazardous situation which, if not
avoided, could result in severe
injury or death.
Indicates a potential hazardous
situation which, if not avoided,
may result in injury or death.
Indicates a potentially
hazardous situation that, if not
avoided, could result in property
damage.
3