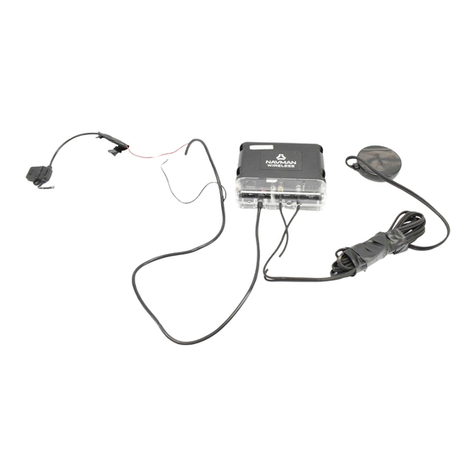
Navman GPS100 SERIES User manual

NAVMAN
Installation Manual
GPS100 SERIES
RECEIVER

2
Navmans GPS100 Series
WELCOME
Congratulations on the purchase of your GPS100 Series Receiver. The GPS100 Series Receiver is designed to connect
via a USB connection. It is designed to be connected to a personal computer, laptop or notebook, and can be used in
conjunction with a variety of commercially available mapping software.
The USB driver supplied is designed for use with Microsoft Windows 98 SE, ME, 2000 and XP.
Minimum hardware specications are one free USB port, and the same minimum hardware specications for your
Windows operating system.
The Global Positioning System is available free of charge, and is accurate to within 6.8 m (22 ft) for 95% of the time.
IMPORTANT NOTICE
When using your GPS100 Series Receiver in a vehicle, it is your sole responsibility to place, secure, and use the device
in a manner that will not cause accidents, personal injury or property damage, or in any manner obstruct your view
or vehicle safety equipment. The user of this product is solely responsible for observing safe driving practices. Do not
operate your GPS100 Series Receiver while driving. Park the vehicle rst.
Using the GPS100 Series Receiver:
The US government is solely responsible for the operation, accuracy and maintenance of the GPS satellites. The
GPS system is subject to changes that will affect the performance and accuracy of all GPS receivers. The GPS
signals may very occasionally be turned off. You must guard against these events by always having another way
of navigating.
The GPS100 Series Receiver complies with European directives (CE) and FCC standards for radio frequency
interference. For reliable operation, it must be mounted correctly, as described in this manual.
The performance of the receiver can be affected by the failure of a part, environmental conditions, interference
and improper installation and use.
Navman NZ Limited disclaim all liability for any use of this product in a way that may cause accidents,
damage or that may violate the law.
ý
ý
3
Navmans GPS100 Series
Contents
1 UNPACKING THE GPS100 SERIES RECEIVER ..............................................4
2 INSTALLATION..................................................................................................5
2-1 Connecting the Cables........................................................................................5
2-2 Using the InstallShield Wizard .............................................................................6
3 USING THE GPS FINDER...............................................................................12
3-1 Checking the status ..........................................................................................12
3-2 The GPS Finder menu.......................................................................................12
3-3 Finding the COM Port number ..........................................................................13
3-4 Exit GPS Finder.................................................................................................13
3-5 Changing the COM Port Number ......................................................................14
4 INSTALLING THE GPS100 SERIES RECEIVER IN A VEHICLE .....................16
4-1 Attaching the Suction Mount to the Windshield .................................................16
4-2 Removing the GPS100 Series Receiver from a vehicle ......................................17
5 TROUBLESHOOTING.....................................................................................18
6 FREQUENTLY ASKED QUESTIONS ..............................................................19
7 ADDITIONAL INFORMATION .........................................................................20
7-1 End User License and Warranty Agreement ......................................................20
7-2 FCC Statement .................................................................................................22
7-3 Contact Us .......................................................................................................23
7-4 Copyright ..........................................................................................................23
ý

4
Navmans GPS100 Series
UNPACKING THE GPS100 SERIES RECEIVER
Typically, the GPS100 Series Receiver is mounted in a position where the receiver has a clear view of the sky and can
receive the GPS signals easily. The GPS100 Series Receiver then sends the GPS position information to your personal
computer, which is used by mapping software to plot your position on a map. Some mapping software applications can
direct you to your destination.
Heres what you should nd in the box. If there is anything missing, please contact Navman USA for assistance (see
Section 7-3).
Key:
1 GPS100 Series Receiver.
2 CD-ROM which includes:
GPS100 Series USB Driver
This Installation Manual in PDF format
Adobe Reader®
3 GPS Interconnect Cable.
4 GPS USB Adaptor.
5 Vehicle Mount Suction Cup.
6 2 x Mounting Screws.
7 Alcohol Swab.
8 This Installation Manual.
1
2
6
7
5
3
1
4
8

5
Navmans GPS100 Series
INSTALLATION
2-1 Connecting the Cables
Connect the GPS100 Series Receiver to the GPS Interconnect Cable and GPS USB Adaptor as illustrated:
2
GPS USB Adaptor
Note: Dont plug the
GPS USB Adaptor into
your computer yet.
GPS100 Series Receiver
Line up the arrows.
GPS Interconnect Cable
Note: The GPS100
Series Receiver will not
get a GPS x indoors.
ý

6
Navmans GPS100 Series
Click
to continue
Step One
Click
to continue
Step Two
Ensure the GPS100 Series Receiver is not plugged into
your computer.
2-2 Using the InstallShield Wizard
Insert the CD-ROM provided.
If the InstallShield Wizard does not start then select Start > Run, then browse to the CD-ROM Drive (usually D:\), select
setup.exe, click open, then click OK.
The following screens illustrate the installation process with Microsoft Windows XP. There will be some differences with
the other Windows operating systems.
ý

7
Navmans GPS100 Series
Click
to continue
Step FourStep Three
Click
to continue
Please wait a moment, while the les are installed.
If you wish to install the GPS100 Series USB driver
in another location, click and browse to
the location you desire.

8
Navmans GPS100 Series
Click
to continue
If this message appears, click Next then Continue Anyway.
Note that the GPS100 Series has been thoroughly tested.
Navman is committed to the highest quality and is in the
process of completing this compatibility testing process.
Click
to continue

9
Navmans GPS100 Series
Step Six
Green Communications Indicator
Turns on when power is detected, then ashes when hardware is detected by
PC or laptop. See the Troubleshooting Guide in section 5 for information on
the Communications Indicator.
Plug in your GPS100 Series Receiver to your
personal computer (see section 2-1 for how to
connect the cables). Wait for the Found New
Hardware screen to appear (see next step).

10
Navmans GPS100 Series
Click
to continue
Step Seven
Click
to continue
If this message appears, click Continue Anyway.
Note that the GPS100 Series has been thoroughly
tested. Navman is committed to the highest quality
and is in the process of completing this compatibility
testing process.

11
Navmans GPS100 Series
Click to complete
hardware installation
Step Eight
Click
to complete
software installation
Step Nine
Click
to continue
After successful installation of your GPS100 Series Receiver,
the green GPS Finder icon appears in the bottom right of
your screen.
Back to contents

12
Navmans GPS100 Series
USING THE GPS FINDER
The GPS Finder is an application used to check the status of your GPS Series Receiver and congure advanced
settings (e.g. COM port settings)
3-1 Checking the status
The status of the GPS100 Series Receiver is indicated by the GPS Finder icon located on the bottom right of your
screen.
(Green) GPS100 Series Receiver is connected
(Gray) GPS100 Series Receiver is not connected
3-2 The GPS Finder menu
Right mouse click (or left double click) the GPS Finder icon located on the bottom right of your screen to bring up the
following menu:
3
ý
ý

13
Navmans GPS100 Series
3-3 Finding the COM Port number
Select Info... to display the GPS100 Series Receiver connection status.
(Gray)
(Green)
3-4 Exit GPS Finder
Select Exit to turn the GPS Finder off.
If you turn the GPS Finder off, the GPS100 Series Receiver will operate with GPS data being sent to the laptop. The
Communications Indicator ashes continuously, indicating normal operation. To restart the GPS Finder, click
then browse to the Navman folder, then select GPS Finder.
Important
Please note the COM Port Number. You will need to select this COM Port Number in your mapping software to
complete the installation. When using mapping software you dont need to select the baud rate. See section 3-5 if you
need to change the COM Port number.
COM Port Number
Tip: Some mapping
software has a limited
range of COM Port
numbers (e.g. 1 to 4)
so make sure the COM
Port Number selected is
within that range.
If you use another
USB port, then you will
need to change the
COM Port Number.
See section 3-5.
ý
ý

14
Navmans GPS100 Series
3-5 Changing the COM Port Number
Use these Advanced Settings only if you need to manually change the automatically allocated COM Port Number.
Advanced settings are not available when icon is gray.
(Gray)
(Green)
Some mapping software has a limited range of
COM Port numbers (e.g. 1 to 4) so make sure the
COM Port Number selected is within that range.
Select a COM Port number that is not in use.
The COM Port Number must match the COM Port
Number that your mapping software is using.
ý

15
Navmans GPS100 Series
Click the right mouse button to get the
Whats This message, then left mouse
button Whats This to get the explanation. OR Left click mouse button
then left click the item to get
the explanation.
Advanced settings for COM Port selection
Please refer to this section only if you require addition assistance with COM Port settings.

16
Navmans GPS100 Series
ý
Important note: The
GPS100 Series Receiver
is not suitable for some
vehicles. To conrm
whether or not the
GPS100 Series Receiver
is suitable for your
vehicle, move the unit
inside your vehicle (i.e.
it has a x immediately
outside the vehicle.) to
see if it loses its GPS x.
INSTALLING THE GPS100 SERIES RECEIVER IN A VEHICLE
Your GPS100 Series Receiver mounting bracket connects with a suction cup to the windshield. Follow these mounting
instructions carefully to ensure proper installation.
For security purposes and to avoid overheating, do not leave the GPS100 Series Receiver on the dash or attached to
the windshield while your vehicle is unattended, especially in strong sunlight.
4-1 Attaching the Suction Mount to the Windshield
1 Attach the GPS100 Series Receiver to the Vehicle Mount Suction Cup by threading cable through the Vehicle
Mount Suction Cup, locate tab, then screw in the two screws provided (do not over tighten).
2 Choose a position on the windshield where the GPS100 Series Receiver will have a clear view of the sky.
Follow the safety instructions (page 2 Important notice) to ensure that the GPS100 Series Receiver
does not obstruct the view of the driver, or interfere with the operation of any airbags or safety
equipment in the vehicle.
3 Use the alcohol swab provided to thoroughly clean the windshield where the suction cup will be mounted. Do not
touch the windshield after it is cleaned.
4 Do not touch the bare suction cup surface.
4
Note: Disconnect
the GPS100 Series
Receiver from the GPS
Interconnect Cable.

17
Navmans GPS100 Series
ý
5 Press the suction cup rmly onto the windshield, then press down the lever on the base.
4-2 Removing the GPS100 Series Receiver from a vehicle
You can remove the GPS100 Series Receiver from the vehicle for security reasons or to use it elsewhere.
1 To remove the GPS100 Series Receiver, unplug the USB cable, release the suction cup by releasing the lever,
then lift the tab to release suction.
2 To replace the GPS100 Series Receiver, follow steps 2 to 5 of section 4-1 (previous section).

18
Navmans GPS100 Series
TROUBLESHOOTING
Communications Indicator
The GPS USB Adaptor has an in-built Communication Indicator (green ashing light). The status of the GPS
communication can be determined as follows:
Flashes once per second USB installation process was unsuccessful, for example Windows may not
have successfully located the USB serial driver. Remove the Navman GPS100
Series Receiver from the USB port and reinstall.
Flashes twice per second USB installation is successful but the Navman GPS100 Series Receiver is
not sending data. This may be the result of a hardware failure or the GPS100
Series Receiver is not plugged in to the USB adaptor.
ON continuously USB installation is successful but the GPS100 Series Receiver is not sending
data. This may be the result of a hardware failure or incorrect application
settings.
Flashes continuously Normal operation, indicating the USB installation was successful and GPS data
is being sent to the laptop.
Changing USB Sockets
Changing from one USB socket to another may reallocate the COM Port Number. You
do not need to reinstall the USB driver. See section 3-5 to manually change the allocated
COM Port Number if required.
GPS Finder icon missing
The GPS Finder has been turned off. To restart the GPS Finder, click then
browse to the Navman folder, then select GPS Finder.
5
Communications
Indicator
ý
ý
ý

19
Navmans GPS100 Series
FREQUENTLY ASKED QUESTIONS
Is the system NMEA (National Marine Electronics Association) compliant?
Yes, all Navman GPS receivers support NMEA 0183 Version 2.20.
How much does it cost to run the system once I have installed it?
Nothing! The Navman GPS receiver uses data from satellites in orbit. This data is available, free of charge, for any user.
Where will the GPS100 Series Receiver work?
As long as the Navman GPS100 Series Receiver has a clear view of the sky and horizon, it will work accurately
anywhere on earth.
How accurate is GPS?
Accuracy of any GPS system will vary slightly over time. The Navman GPS is accurate to within 6.8 m (23 feet) for 95%
of the time.
ý
ý
ý
6
ý

20
Navmans GPS100 Series
ADDITIONAL INFORMATION
7-1 End User License and Warranty Agreement
Software Product License:
IMPORTANT - Please read carefully
NAVMAN (THE LICENSOR) IS WILLING TO LICENSE THE GPS100 SERIES SOFTWARE (THE SOFTWARE) TO YOU (THE CUSTOMER)
ONLY IF YOU ACCEPT ALL THE TERMS OF THIS LICENCE. PLEASE READ THE TERMS CAREFULLY, BECAUSE USING THIS
SOFTWARE WILL BE DEEMED TO BE YOUR ACCEPTANCE THAT YOU ARE USING IT ON THE FOLLOWING TERMS.
IF YOU DO NOT AGREE TO THE TERMS OF THIS LICENCE DO NOT INSTALL OR USE THE SOFTWARE AND RETURN THIS PRODUCT
PROMPTLY, INCLUDING ALL PACKAGING AND WRITTEN MATERIALS, TO THE LICENSORS REPRESENTATIVE AND ANY AMOUNT
YOU MAY HAVE PAID WILL BE REFUNDED TO YOU (LESS ANY DELIVERY AND HANDLING CHARGES).
1. The Licensor grants to the Customer a non-exclusive licence to use: (a) one copy of the Software on one of the Customers computer;
and (b) the accompanying materials, including any manuals contained in the Software (the Materials), in accordance with the terms
and conditions of this Licence.
2. Where the Customer uses the Software on a computer or any other device (the Device) in a vehicle, the Customer must not place,
secure or use the GPS100 Series Receiver or computer in a manner that may cause accidents, personal injury or property damage or
in any way obstruct the visibility of the Customer. The Customer is solely responsible for observing safe driving practices and will not
operate the Software while operating a vehicle.
3. The copyright and all other intellectual property rights in the Software and Materials (including any enhancements or modications)
are vested in the Licensor. The Customer must not to rent, lease, reproduce, translate, adapt, vary, reverse-engineer or modify the
Software or Materials nor communicate the same to any person other than in accordance with the terms of this Licence.
4. The Customer may not copy the Software or Materials except that one copy of the Software may be made to the extent that such
copying is necessary for the Customers own backup purposes.
5. Except for the warranty provided by the Licensor for the product that includes the Software the Licensor expressly excludes to the
fullest extent permitted by law all representations or warranties, express or implied (except any which may not lawfully be excluded),
including the implied warranties of merchantability and tness for a particular purpose.
6. The Licensor will not in any circumstances be liable under the law of tort, contract or otherwise for any indirect or consequential loss
or damage, including any loss of prots, however caused, arising in connection with the use of, or inability to use, the Software.
If any limitation or exclusion or liability contained in this Licence is held to be invalid for any reason and the Licensor becomes liable
for loss or damage that would otherwise have been excluded, that liability will be limited to the total amount actually paid by the
Customer for the Software.
ý
7
Table of contents
Other Navman GPS manuals

Navman
Navman iCN 510 User manual

Navman
Navman Qube3 Installation guide

Navman
Navman iCN 500 series User manual

Navman
Navman TRACKER 5100I User manual

Navman
Navman W300 User manual

Navman
Navman Tracker 5380 User manual

Navman
Navman R300 User manual

Navman
Navman EZY Advanced Instructions for use

Navman
Navman MOVE-30/MOVE-50 User manual

Navman
Navman EZY255LMT User manual

Navman
Navman iCN 320 User manual

Navman
Navman SmartGPS User manual

Navman
Navman M-Nav 800 User manual

Navman
Navman Sport Tool M300 User manual

Navman
Navman iCN 630 User manual

Navman
Navman Jupiter 31 User manual

Navman
Navman 8084 User manual

Navman
Navman F-Series F20 User manual

Navman
Navman Tracker 5505 User manual

Navman
Navman M-Nav 760 User manual