LIMITED WARRANTY
This blood pressure instrument is warranted against defects in materials a nd
workmanship under norm al use and service as follows:
1. Warranty service extends to the original retail purchaser only and commences with the
date of delivery.
2. The entire sphygmomanometer is warranted for one year.
3. The manometer is warranted to remain accurate to ±3mmHg over its full range when
comp ar ed to a re f e rence standard for life.
What is Covered: Calibration, repa ir, or replacement of parts and labor.
What is not covered : Tran sp ortation charges. Damage caused by abuse, misuse, accident, or negligence.
Incidental, special, or consequential damages. Some states do not allow the exclusion or limitation of
incidental, special, or consequential damages, so this limitation may not apply to you.
Implied War r an ty : Any implied warranty shall be limited in duration to the terms of this warranty and in
no case beyond the original selling price (except where prohibited by law). This warranty gives you spe-
cific legal rights and you may have other rights which vary from state to state.
To Obtain Wa rranty Serv i c e : Send item(s) postage paid to War ranty Service Center indicated below.
Please include your name and address, daytime phone no., proof of purchase, a brief note explaining the
pr oblem, and $2.00 to cover the cost of ret urn shipping and handling.
Send products in need of service to:
Warranty Service Center
55 Commerce Drive, Hauppauge, NY 11788
USE, CARE, & MAINTENANCE
OF YOUR ADC PRODUCT
IN T EN DE D U SE
Aneroid sphygmomanometers are used by professional healthcare
providers and individuals trained in auscultatory blood pressure technique
to determine systolic and diastolic blood pres sure in humans and animals.
PART S A N D A SS E MB LY
This booklet contains operating and maintenance information for standard
aneroid sphygmomanometers. This product is assembled in accordance with the
diagram below. Replacement parts are available. Please read and retain. Contact
our Customer Service department for the items appropriate for your unit.
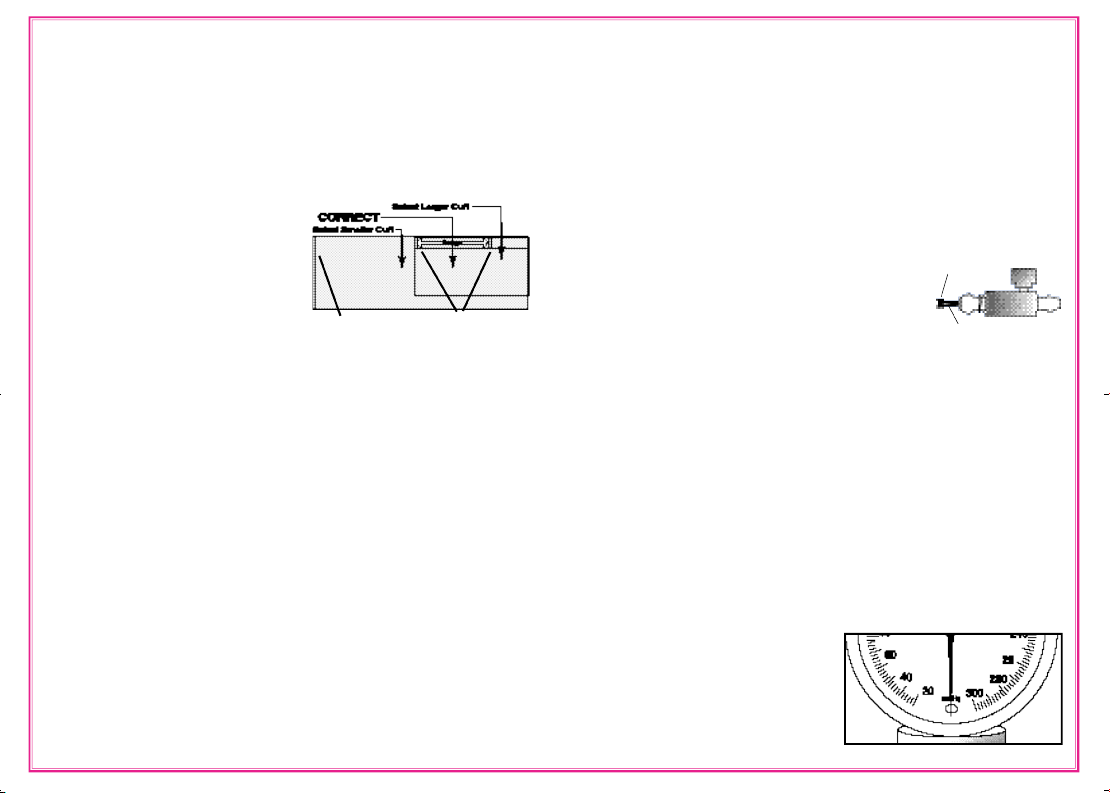
Inserting Bladder into Cuff
To insert the bladder into the cuff, roll bladder
into a tube starting from long edge opposite
tubing. Insert left edge of bladder into cuff
opening (at bottom edge of cuff) until it is
completely inside. Shake cuff until bladder
fully unravels. Thread tubes through smaller
openings (from inside of cuff out) and tuck flap in to
secure bladder. To make sure that bladder fills compartment, inflate by mouth.
Latex-free options are available on some items. To order latex-free
version, ADD “LF” suffix to model number (i.e., 700LF)
CAU T I O N -Unless otherwise indicated, these products contain natural
rubber latex, which may cause allergic reactions.
ME A SU R EM E N T P RO C ED UR E
1. Patient Position
The patient should sit or lie comfortably. The arm should be supported
on a flat surface at heart level. (If the arm’s position varies, or is not
level with the heart, measurement values obtained will not be consistent
with patient’s true blood p ressure). Observer should view manometer (gauge)
in a direct line to avoid ‘‘parallax error’’.
Gauge
Bladder
Bladder
C u ff
Valve
Bulb
End Va l ve
Ca ut i on - Do not allow a blood pressu re cuff to remain on patient for more than 10 minutes when
inflated above 10 mmHg. This may cause patient distress, disturb blood circulation, and contribute
to the injury of peripheral nerve s.
Warn i n g - If luer lock connectors are used in the construction of tubing, there is a possibility that
they might be inadvertently connected to intravascular fluid systems, allowing air to be pumped
into a blood vessel.
Ca u tio n - To obtain the greatest accuracy from your blood pres s ur e instrument, it is recomm end ed
that the instrument be used within a temperature range of 50°F (10°C) to 104°F (40°C), with a relati ve
humidity range of 15-90% (non-condensing).
IB p/n 9361-00 - rev 3Printed in U.S.A.
Warn i ng - A warning statement in this manual identifies a condition or practice which, if not correct ed
or discontinued immediately could lead to patient injury, illness, or death.
Ca ut io n - Federal law restricts this device to sale by or on the order of a physician or licensed
he al th ca re practitioner.
Wa rn i n g - Safety and effectivness with neonate cuff sizes 1 through 5 is not established.
War n in g - For all blood pres sure systems that can be wall mounted, ensure that the unit is securely
mounted prior to use to avoid damage to the instrument and potential patient injury.
9361-00 Limited Warranty-rev 3 12/29/09 2:13 PM Page 1