Nebula TES-ib2 User manual

INDUCTION
COOKTOP
INSTRUCTION MANUAL
TES-ib2

Important!
SAVE THESE INSTRUCTIONS
Carefully read the contents of this manual since it provides important instructions
regarding safety of installation, use and maintenance.
Keep the manual for possible future consultation.
All the operations relating to installation/ replacement(electrical connections)must
be carried out by specialised personnel in conformity with the regulations in force.
Check the appliance for damage after unpacking it. Do not connect the appliance if
it has been damaged in transport.
This appliance has been designed for use only as a cooking appliance. Any other
use (e.g.heating rooms) should be considered incorrect and therefore dangerous.
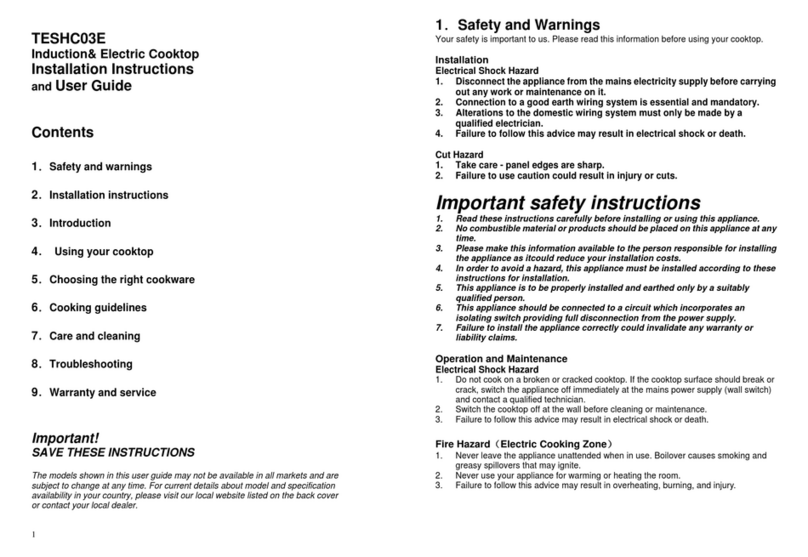
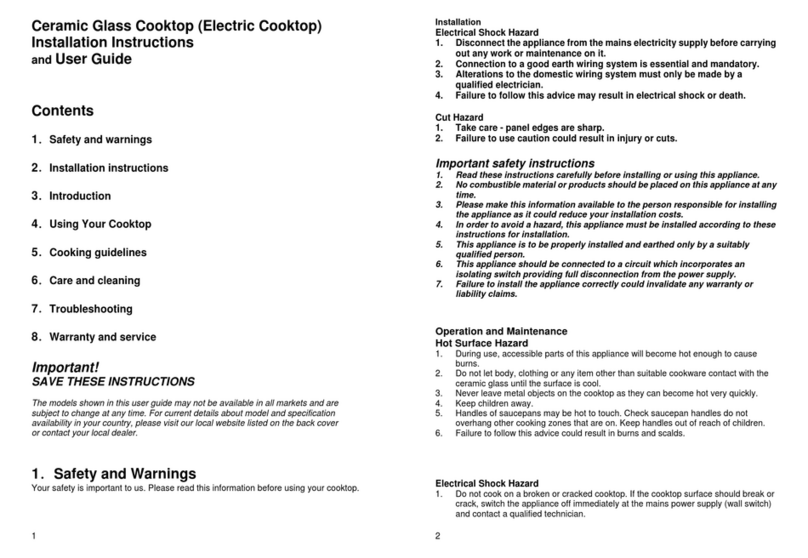
Induction Cooktop
Installation Instructions and User Guide
1.Safety and warnings
2.Installation instructions
3 Description of the appliance
4.Operating your cooktop
5. Suitable cookware
6.Cooking guidelines
7. Care and cleaning
8. What to do if...
9.Warranty and service
Contents

These warnings are provided in the interest of safety. You
MUST read them carefully before installing or using the
appliance.
Important safety instructions
Please provide this information available to the person who is
responsible for installing the appliance as it could reduce your
installation costs.
In order to avoid a hazard, this appliance must be installed
according to these instructions for installation.
Only qualified technician can instal and earth this cooktop properly.
This appliance should be connected to a circuit which incorporates
an isolating switch providing full disconnection from the power supply.
Failure to install the appliance correctly could invalidate any
warranty or liability claims.
Important safety instructions
Electrical Shock Hazard
Cracks or fractures in the glass ceramic may cause electric
shocks. Switch off the circuit breaker in the fuse box. Contact
the after-sales service.
Make sure the appliance is connected to a good earth
wiring system.
Only qualified electrician can make the change of the
domestic wiring system.
Switch the cooktop off at the wall before cleaning or
maintenance.
Do not touch the switch on the wall when your hand is wet.
Failure to follow this advice may result in electrical
shock or death.
Hot Surface Hazard
During and after use of the hob, certain parts will
become very hot. Do not touch hot parts.The highest
temperature of the surface could be 570℃,do not let
children or persons with a disability to use this
appliance.
Do not leave inflammable materials other than
suitable cookware contact with the ceramic glass until
the surface is cool enough to touch.
Do not leave metal objects on the cooktop as they
can become hot very rapidly.
Keep children away.
Failure to follow this advice could result in burns
and scalds.
Fire Hazard
The voltage of the main power supply should
corresponds to the value given on the rating plate.
To connect the cooktop to the mains power supply,
do not use adapters, reducers, or branching devices,
as they can cause overheating and fire.
Do not leave inflammable materials on the Hob top.
Make sure that electrical cords connecting other
appliances in the proximity cannot come in to contact with
the Hob top.
Never leave the appliance unattended when in use.
Boilover causes smoking and greasy spillovers that
may ignite.
Never use your appliance for warming or heating
the room.
overheating without a cookware on it, could cause
damage to the cooktop.
Failure to follow this advice may result in
overheating, burning, and injury.
Cut Hazard
The blade of the cooktop scraper is razor-sharp
Use with extreme care and always store safely
Keep it away from babies and children.
Failure to use caution could result in injury or cuts.
Health Hazard
This appliance complies with electromagnetic safety
standards. However, persons with cardiac pacemakers
or other electrical implants (such as insulin pumps)
must consult with their doctor or implant manufacturer
before using this appliance to make sure that their
implants will not be affected by the electromagnetic
field.

Do not place or leave any magnetisable objects ( eg credit cards,
memory cards) or electronic devices (eg computers, MP3 players)
near the appliance, as they may be affected by its electromagnetic
field.
Do not use the cooktop as storage, benchtop or working space. The
cooking zone controls may be accidentally turned on, resulting in possible
fire, property damage and personal injury.
We recommend using plastic or wooden kitchen utensils for
cooking with your induction cooktop.
Do not place or drop heavy objects on your cooktop .
Do not spray aerosols in the vicinity of the appliance when it is in
operation.
/ Do not use scourers or any other harsh abrasive cleaning agents
to clean your cooktop as these can scratch the ceramic glass , .
To avoid damaging cookware and glass ceramics, do not allow
saucepans or frying pans to boil dry.
Do not use the cooking zones with empty cookware.
After use, always turn off the cooking zones.Do not rely on the pan
detection feature to turn off the cooking zones when you remove the
pans.
This appliance must only be used for food preparation. Do not leave the
appliance unattended during operation.
The appliance is not intended for use by young children or infirm
persons unless they have been adequately supervised by a
responsible person to ensure that they can use the appliance safely.
Do not repair or replace any part of the appliance unless
specifically recommended in the manual All other servicing should be .
done by a qualified technician .
Do not allow large cookware to overhang the hob onto the adjacent
benchtop. This will cause scorching to the benchtop surface.
If the supply cord is damaged, it must be replaced by the
manufacturer or its service agent or similarly qualified person in order
to avoid a hazard.
Do not use a steam cleaner to clean your cooktop .
Never place hot pots or pans on the control panel, the display area or
the surround. This may cause damage.
If the power supply cable is damaged, it must only be replaced by
a qualified technician.
Additions or modifications to the appliance are not permitted.
Important Safety Instructions 2. Installation Instructions
Cooktop and cutout dimensions
Note:
Your appliance should be positioned so that the plug-in unit is
accessible.
The distance between the edge of your appliance and the side and
rear walls (or partitions) must be at least 55 milimetres(fig:1)
860 520
475 810
min55
815
480 min
MODEL
Fig:1
IMPORTANT:
The surface temperature exceeds 95 C. To avoid a hazard, underbench
access must be restricted. Refer to the instructions below.
TES-ib2

Connecting the Cooktop to the Mains Power Supply
Important!
This cooktop must be connected to the mains power supply only by a
suitably qualified person .
Before connecting the cooktop to the mains power supply check that , :
The domestic wiring system is suitable for the power drawn by
the cooktop.
The voltage and power values listed on the data plate are
compatible with the electricity supply and socket. If you have any
doubts, please consult a qualified electrician for assistance.
To connect the cooktop to the mains power supply do not use ,
adapters reducers or branching devices as they can cause, , ,
overheating and fire .
The power supply cable must not touch any hot parts and must be
positioned so that its temperature will not exceed 75 at any point ℃ .
Power Supply:
Important!
Check with an electrician whether the domestic wiring system is
The positioning must allow a fresh air intake and an air outlet of 5
mm minimum(See Fig. 3)
The benchtop is made of a heat-resistant material.And no
structural members interfere with space requirements.
The cooktop will not be installed directly above an appliance such
as dishwasher, fridge, freezer, washing machine, as the humidity
may damage the cooktop electronics.
If a built-in oven or any other appliance that generates heat must
be fitted directly under the glass ceramic cooktop, THIS APPLIANCE
(oven) AND THE GLASS-CERAMIC COOKTOP MUST BE SUITABLY
INSULATED in such a way that the heat generated by the oven,
measured on the bottom right of the cooktop, does not exceed 60°C.
A suitable isolating switch providing full disconnection from the
mains power supply is incorporated in the permanent wiring mounted ,
and positioned to comply with the local wiring rules and regulations .
The power supply cable is not accessible through cupboard doors
or drawers.
If the lower part of the appliance, after installation, is accessible
via the lower part of the cabinet then it is necessary to mount a
thermal protection barrier respecting the distances indicated (See
Fig.4).
min55
650 (minimum clearance from glass
surface to rangehood)
Unit:mm
Fig:2
Fig:4
The thermal protection barrier
must be:
Removable
heat-resistant
made from low thermal conductivity
material
at least 25 mm below the plastic
housing of the cooktop chassis
Thermal protection barrier
vatilation
min.25
min.20
min.5
min.25
oven
min.20
min.5
Thermal protection barrier
cupboard or drawer
space below
Fig:3

suitable without alterations. Any alterations must only be made by a
qualified electrician.
Rating Plate
Connection diagrams
Single-phase connection
220-240V~
Two-phase connection
380-415V 2N~
Connecting the cooktop to the mains power supply
TO BE COMPLETED BY THE INSTALLER
Is the cooktop earthed?
Check that the power supply cable is NOT touching the base of
the cooktop. This will ensure that the cable is not damaged by heat
from the cooktop.
Check that the power supply cable is not accessible via cupboard
doors or drawers.
Is the cooktop fixed securely?
Check that all the cooking zones function correctly. Turn on all of
them to a high setting and leave them on for at least one minute.
Are all touch controls and displays functioning?
To check that the ‘hot surface’ indicators function correctly, turn
off all the zones. Is H displayed in all the cooking zone displays?
Have you shown the customer how to use the cookop?
Make sure you explain to the customer about the ‘Hot surface’
indicators.
Encourage them to read the full user guide before using the
cooktop.
Installer’s name
:
Installer’s signature:
Installation company:
Date of installation:
LEAVE THESE INSTRUCTIONS WITH THE CUSTOMER
3. Description of the appliance
About Induction Cooking
The principle of induction is based on a magnetic phenomenon.
It works by electromagnetic vibrations generating heat directly in the
pan ,and raising its temperature instantly, rather than indirectly through
heating the glass surface . Therefor induction cooking is safe,
advanced, efficient, and economical.
RATED C URRE NT 3x16A
5 4 3 2 1
5 4 3 2 1 N
PE L
5 4 3 2 1
Yellow and Green----PE
Red----L
Blue----N

Before using your new cooktop
Read this guide, taking special note of the ‘Safety and
warnings’ section.
Remove any protective film that may still be on your cooktop.
TES-ib1
1 16A
2 16A
3 16A
4 Touch Control Area
4. Using Your Cooktop
1.How to touch control keys:
Use the ball of your finger, not its tip.
The controls respond to touch, so no pressure is necessary.
When you touch the control keys, stay your finger on the key utill it
responds for your touch.
Make sure the controls are always clean, dry, and there is no
object
such as utensil or cloth covering them. Even a thin film of water
makes the control difficult to operate.
2. Switching ON/OFF of the Touch Control
The Touch Control can be switched ON by pressing the ON/OFF key.
The cooktop switchs from Power ON to OFF after 20 sec., provided
that no cooking zone is activated or a select key is pressed during that
time.
3. Power levels
The power of the cooking zones can be adjusted in 9 levels.
By sliding the finger on the slider area, the cooking level can be
increased or decreased.
The cooking level will be indicated on the according illuminated
bargraph according to the position of the finger.
Booster as highest cooking level. Display on the bargraph and
optionally showing “P”.
4.Residual Heat
The indication of a hot surface can be done in two ways:
a) Traditionally showing “H”
b) Illuminating bars on the bargraph.
The number of bars illuminated is related to the temperature of the
cooking zone.
AAuto
Bridge function and power level start key ( level 1)
Safety lock
Pause and recall
ON/OFF key
Timer increment
Timer decrement
Cooking level sliding area (2-9, for level 1 touch )
a
b
c
d
e
f
12 3
4
Control Keys

5.Child lock
Press safety lock for 2 seconds will lock the control pannel.
All displays will show „L“ as LOCKED.
If anycooking zone is still hot „L“ and „H“ will be displayed alternating.
After switching on the control the child lock can be deactivated. Retouch
safety lock key for 2 seconds will deactivate the control pannel.
6. Timer
Touch and at the same time can activate timer function.
The operation range is between 1 min to 9h 59min.
A Timer can be activated for each active cooking zone. After selecting the
timer, the cooking zone related luminous symbol is fully lighted.
After 10sec without input the timer function is deactivate and the display
is switched off again.
Setting a timer value
Pressing the timer keys a timer value can be set. If the timer-plus-key is
pressed first, the display starts with 1min and can be increased in 1min
steps. If the timer-minus-key is pressed first, the timer starts with 15 min an
can be decreased in 1 min steps.
Timer alarm and acknowledgement
If a timer has expired the timer alarm is activated and the assigned
cooking zone is immediately switched off.
The cooking zone display shows „0“ or „H“ and also the bargraph
indicates a “hot” surface if necessary.
If no user input stops the alarm signal, it will be on for maximum 2
minutes.
The alarm can be deactivated by switching off the control using the main
switch or by pressing the two timer keys or it will be deactivated
automatically after 2 minutes.
Pressing and simultaneously for 2 seconds also resets the timer
value to “0.00".
In order to prevent a unwanted clearing of the timer the timer will only be
reset after a short period.
7. Pause and recall function
Any function key and the according LED can be assigned for the pause
function. While in pause mode no power is output.
While the pause function is active no power will be emitted on any
cooking zone. All system states will bemaintained throughout the pause.
The pause mode can only be active for maximum 10 min. If the pause
mode is not deactivated within 10min, the control switches off
automatically.
Throughout the pause time, the ON/OFF button can be used to switch
the control off. In this case the pause mode is also deactivated.
8. Bridge function
The adaptive induction zones can be bridged. Both zones in the front and
the back will have the same settings after activating this function they are
now connected; one big zone for a large cooking pan).
Activating the bridge mode
1. Put a large cooking pan on both cooking zones. Make sure the zones
are covered correct.
2. Switch on the cooking zone in the front.
3. Hold key of front cooking zone first, and then immediately the key
of the back cooking zone
4. Set the power using the sliding area . Both zones
are set to the same power.
Deactivating the bridge mode
Touch simultaneously two buttons of the adaptive zone in the front
and back to deactivate the bridge mode.
The zone in the front will continue with the power that has been set in
bridge mode.
Or:
Press the on/off button of the cooking zone you want to switch off. You will
hear a beep and the level in the display disappears. The cooking zone
has been switched off completely.
9. Automatic cooking
Boiling function
This function brings the content of the pan to a boil and keeps it boiling.
Simmering function
The temperature of the dish is constantly kept near the boiling point.
Function for keeping warm
The setting for keeping warm works best with a lid on the pan.

Use cookware that matches the diameter of the cooking zone. Low heat
or slow cooking is often due to incorrect cookware size.
How to check the suitability of your cookware
Cookware
Do not use curve-based cookware. Saucepans or heavy frying pans with
jagged edges or a rough base will scratch the glass.
Use heavy-gauge, flat, smooth-based cookware. We recommend that
you select cookware with a thick, flat bottom. The heat will be distributed
better and cooking will be more uniform.
Always lift pans off the cooktop, do not slide, or they may scratch the glass.
NOTE:
The characteristics of the pan base may affect the uniformity of the
cooking results. Pans made from materials which help diffuse heat, such as
stainless steel sandwich pans, distribute heat uniformly, saving time and
energy.
It is safe to put a hot cookware from the oven, or another cooking zone,
on the glass surface when the surface is cool.
Avoid placing anything on a hot cooking zone until it has cooled
completely.
6. Cooking Guidelines
■ Always use a correctly fitting lid for the pan.Cooking without
the lid requires four times as much energy. A glass lid allows
you to observe the cooking without having to lift the lid off.
■Use pans equipped with a solid, flat bottom. Curved pan
bases increase energy consumption.
■ The diameter of the base of your pot or pan should match the
size of the hotplate. In particular, If the diameter of the pan is not the same
as the diameter of the hotplate, it is preferable to use a pan with a bottom
that is larger in diameter than the hotplate, if pots that are too small are
placed on a hotplate, energy will be wasted. Please note:
Cookware manufacturers often specify the diameter of the pan.
Choose pans of a size suited to the amount of food you are
going to cook. A large saucepan containing little food requires more
energy.
By carrying out a magnet test:
Move a magnet towards the base of the pan. If it is attracted, the
pan is suitable for induction.
Put some water in the vessel you want to check, place the vessel
on a cooking zone, and switch the cooking zone on. If there is shows
in the display area, then it means your cookware cannot be used with
induction cooking.
5. Suitable Cookwares
Suitable cookwares
Ferromagnetic cookware or cookware with ferromagnetic base.
Look for the induction symbol on the packaging or the bottom of the
pan.
Improper cookwares
Glass, terra ,cotta, wood, porcelain, ceramic, earthenware,
aluminum without a special finish on the bottom, copper and some
non-magnetic stainless steels.
Tips for saving energy

■Use a small amount of water when cooking. This will save energy. It
also preserves vitamins and minerals in vegetables.
7. Care and Cleaning
• For cleaning, the appliance must be switched off and cooled down.
• For safety reasons, the cleaning of the appliance with steam jet or high
pressure cleaning equipment is not permitted.
• Do not use scourers or any harsh/abrasive cleaning agents to clean your
cooktop, as these can scratch the ceramic glass or stainless steel.
Kind of dirt?
Soiling on glass (fingerprints, marks, dust, food particles, or non-sugary
spillovers on the glass)
What to do?
Switch the power to the cooktop off at the wall.
Wipe the appliance with a damp clothand cooktop cleaner.
Wipe the appliance dry using a clean cloth.
Dust, fat and liquids from food that has boiled over must be removed as
soon as possible.
Kind of dirt?
Non-sugary boilovers: dust, fat and liquids from food that has boiled over,
hot sugary spills on the surface
what to do?
Switch the power to the cooktop off at the wall.
Use a a fish slice, palette knife or razor blade scraper as soon as
possible.
°Hold the scraper or utensil at a 30 angle and scrape the soiling or spill
to a cool area of the cooktop.
Remove the soiling with ceramic cooktop cleaner using a sponge or non-
abrasive scourer suitable for ceramic glass as soon as possible.
Remove any excess cleaner and wipe dry with a clean cloth.
Apply ceramic cooktop conditioner or protector following the instructions
on the dispenser. A micro fiber or ‘glass’ cloth is the best choice.
Important:
Remove stains left by melts and sugary food or spillovers as soon as possible.
If they are allowed to harden they become increasingly difficult to remove. And
they could permanently pit the surface of the hob if left to burn on it.
Cut hazard: The blade of scraper is razor-sharp. Use extreme care and always
store safely and out of reach of children.
NOTE:
When the power to the cooktop is switched off, there will be no ‘hot surface’
indication but the cooking zone may still be hot! Take extreme care.
Do not use heavy-duty scourers, some nylon scourers and harsh/abrasive
cleaning agents such as oven spray or stain remover.
Never leave cleaning residue on the cooktop: the glass may become stained.
8. Troubleshooting
Problem:
Cooking zones cannot be turned on.
Possible causes
No power.
The desired heat setting is not set.
What to do
Make sure the cooktop is connected to the power supply and that it is
switched on at the wall. Check whether there is a power outage in your home
or area. If the fuse trip a number of time, call your Authorised Service Centre
or Customer Care.
Set the heat setting.
Problem:
Cooking zones seem to turn themselves off and on during use.
Possible causes:
They cycle off and on to maintain the selected setting or prevent the glass
from overheating.
Important!

What to do:
This is normal and needs no action.
Problem:
The cooktop has no response
Possible causes:
No power
Using the cooktop in an inappropriate situation, such as unstable wiring
system, thunder strike, high-intensity magnetic field.
What to do:
Switch the power to the cooktop off at the wall, and switch the power to the
cooktop on after 10 sec.
If the problem still remains, call your Authorised Service Centre or
Customer Care.
Problem:
Cooking zones cannot be turned off.
Possible causes:
Technical fault.
What to do:
Switch the power to the cooktop off at the wall and call your Authorised
Repairer or Customer Care.
Problem:
Fan noise coming from the cooktop.
Possible causes:
A cooling fan built into your cooktop has come on to prevent the
electronics from overheating. It may continue to run even after you’ve
turned the cooktop off.
What to do:
This is normal and needs no action. Do not switch the power to the
cooktop off at the wall while the fan is still running.
Problem:
The cooktop turns itself off unexpectedly, beep sounds and an error code
Er is showed in the cooking zone display.
Possible causes:
Technical fault
What to do:
switch the power to the cooktop off at the wall, and contact your
Authorised Service Centre or Customer Care.
Problem:
P flashes in the display when you are trying to set Power Boost.
Possible causes:
In order to protect hob from overheating, Power Boost is temporarily
unavailable.
What to do:
Wait for a while until the cooktop is cooled down.
9. Warranty and Service
Before you call for service or assistance…
Check what you can do by yourself. Refer to the installation instructions
and your user guide and make sure that:
1 your product is correctly installed
2 you are familiar with its normal operation.
If after checking these points you still need assistance, please refer
to the Service & Warranty below for warranty details and contact
information.
Table of contents
Other Nebula Cooktop manuals