manuals.online logo
Brands
  1. Home
  2. •
  3. Brands
  4. •
  5. NEC
  6. •
  7. Server
  8. •
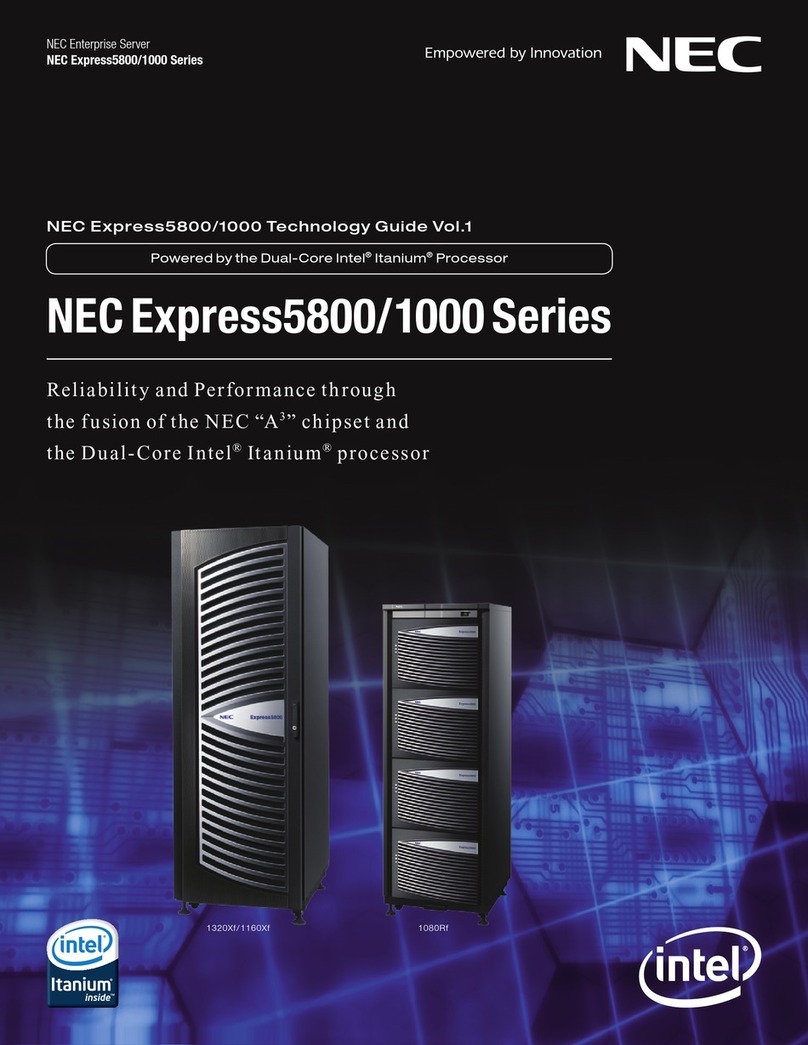
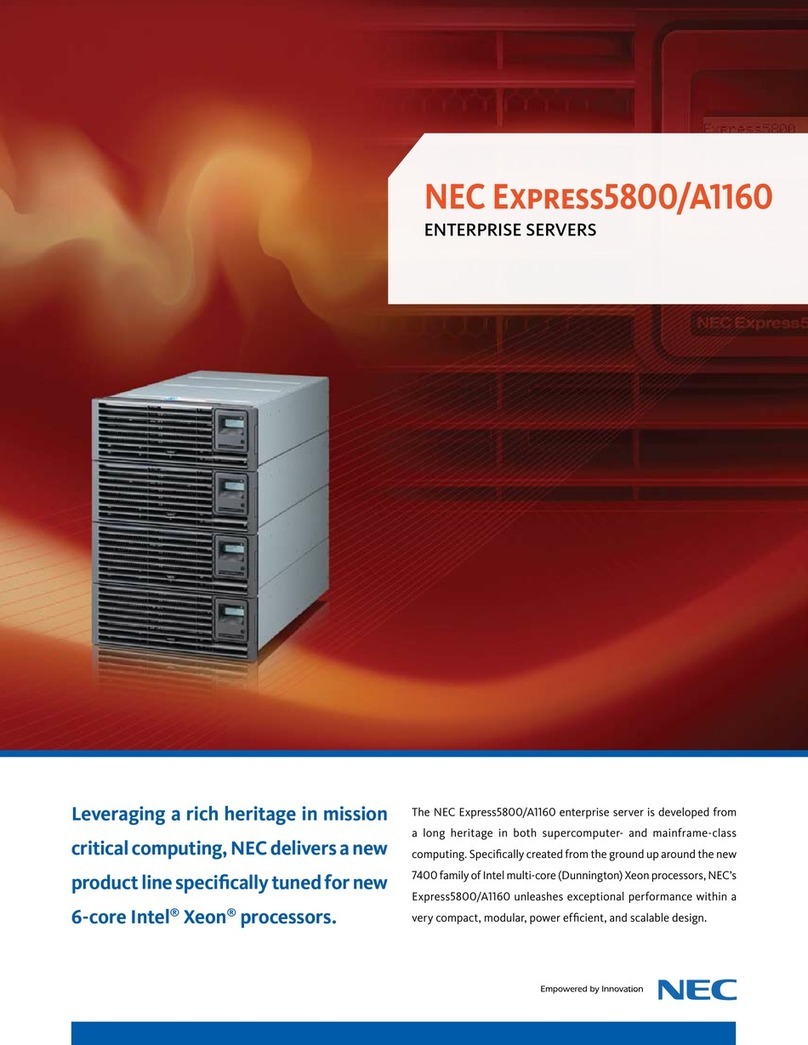
  9. NEC Express5800/R120h-1M 3rd-Gen User manual

NEC Express5800/R120h-1M 3rd-Gen User manual

- 1 -
Express5800/R120h-1M (3rd-Gen), R120h-2M (3rd-Gen)
ご使用時の注意事項
この度は弊社製品をお買い上げいただき、誠にありがとうございます。
本製品のご使用において、ご注意いただくことがあります。誠に恐れ入りますが、ご使用前に下記内容を
必ずご一読ください。
なお、本書は必要なときにすぐに参照できるよう大切に保管してください。
■ 注意事項
● 本製品のマニュアルについて
本製品に関する詳細は、下記サイトに掲載しているマニュアルに記載しています。
https://www.support.nec.co.jp/
「NEC サポートポータル内検索」より、以下の ID で検索してください。
R120h-1M (3rd-Gen) : 3170102353
R120h-2M (3rd-Gen) : 3170102354
また、ESMPRO/ServerManager、ESMPRO/ServerAgentService、エクスプレス通報サービス/エクスプレス通報
サービス(HTTPS)/エクスプレス通報サービス(MG)に関しては、
ESMPRO 日本語ポータルサイト<http://jpn.nec.com/esmsm/>
NEC サポートポータル<http://www.support.nec.co.jp/View.aspx?isIntra=0&id=9010102124>
の最新の情報およびバージョンをご確認の上,ご利用ください。
● Starter Packについて
本製品で使用する Starter Pack は、以下 Web サイトに最新版が掲載されています。
Web に掲載されている内容を確認し、バージョン S8.10-006.06 以降 を適用してください。
https://www.support.nec.co.jp/
(「NEC サポートポータル内検索」より、「S8.10-006」を検索)
なお、Starter Pack バージョン S8.10-004.xx, S8.10-003.xx, S8.10-002.xx, S8.10-001.xx (xx は任意の数字)
は使用できません。
● VMware ESXiのドライバ・サービスモジュールについて
本製品で使用する VMware ESXi のドライバ・サービスモジュールは、以下 Web サイトに最新版が掲載されて
います。Web に掲載されている内容を確認し、適切なバージョンを適用してください。
1. Agentless Management Service および iLO Channel Interface Driver
https://www.support.nec.co.jp/
(「NEC サポートポータル内検索」より、「Agentless Management Service」を検索し
【最新版】と表示された【Agentless Management Service および iLO Channel Interface Driver
(VMware ESXi 6.x 版(x=5 または 7)】を適用してください)
2. WBEM プロバイダおよび CLI ツール
https://www.support.nec.co.jp/
(「NEC サポートポータル内検索」より、「WBEM プロバイダ」を検索
「【最新版】WBEM プロバイダ および CLI ツール (VMware ESXi 6.x 版」(x=5 または 7)を適用してください)
3. VMware ESXi デバイスドライバ
https://www.support.nec.co.jp/View.aspx?id=3140105866
(「PC サーバ/ブレードサーバ(Express5800 シリーズ)」から対象 OS の「デバイスドライバ一覧」を選択)
● 本製品の保守作業時間に関して
本製品は、障害発生時等に伴う保守作業に際し、保守部材と搭載ファームウェア、ドライバの組み合わせに
よっては、保守作業に時間を要することがあります。
- 2 -
● iLOの再起動を行う場合の注意事項
サーバー起動からOSの起動完了までの間(POST(Power On Self Test)実行中も含みます)は、iLOの再起動を
行わないでください。
また、システムユーティリティの操作途中も、iLOの再起動を行わないでください。
該当タイミングでiLOの再起動を行うと、期待しない動作となる場合があります。
例えばシステムユーティリティの設定変更途中にiLOの再起動(※)を行うと、直後のシステム再起動処理(Reboot)
が正常に動作しない場合や、装置に記録されているSerial Number、Product IDなどの設定情報を消失することが
あります。また、POST(Power On Self Test)実行中にiLOの再起動を行うと、iLO Webインターフェース:[情報] –
[概要]ページにおけるUUID、UUID(論理)が不正な表示になる場合があります。
<対象となるiLOの再起動の方法>
- iLO Webインターフェースなどを利用したネットワーク経由でのiLOの再起動。
- UIDスイッチを使用したiLOの再起動。
※ システムユーティリティの「BMC Configuration Utility」での設定変更後の iLO の再起動については、
次項の「システムユーティリティの「BMC Configuration Utility」の操作についての注意事項」を
参照して操作しください。
● システムユーティリティの「BMC Configuration Utility」の操作についての注意事項
システムユーティリティの「BMC Configuration Utility」での操作において、以下の(1)のポップアップが
表示された場合は(2)以降の手順を厳守してください。
注意事項に従った操作を実施されない場合、「Memory Initialization Start」のメッセージで POST 停止、
あるいは、装置に記録されている Serial Number、Product ID の消失が発生する場合があります。
(1) システムユーティリティの「BMC Configuration Utility」において設定の変更を行うと、
iLO の再起動を行うために、次の Warning(注意)ポップ アップが表示されることがあります。
英語表示の場合
日本語表示の場合
(2) 「OK」を押して進めます。
(3) 次の Warning(注意)ポップ アップが表示されます。
英語表示の場合
- 3 -
日本語表示の場合
(4) この Warning(注意)ポップ アップが表示されている状態にて必ず1分以上 お待ちください。
その間、何も操作しないでください。
(5) 1分以上経過後、装置前面のステータスランプが緑色で点灯していることを確認してください。
※iLO が再起動中 :ステータスランプが緑色で点滅(毎秒 1 回)
iLO の再起動が完了し正常動作:ステータスランプが緑色で点灯
(6) 再起動の完了が確認できたら、「OK」を押してください。
(7) <ESC>キーを複数回押してシステムユーティリティの画面に戻ります。
(8) システムユーティリティの「Reboot the System」を選択して再起動します。
● Serial Number、Product IDが消失した場合の対処について
Serial Number、Product ID が消失した場合、以下の手順にて復旧することができます。
(1) 装置の電源を切り、電源コードをコンセントから外します。
(2) 30 秒以上経過したのち、電源コードをコンセントに接続します。
(3) POWER スイッチで装置の電源を ON にします。
(4) サーバーが起動し、POST 画面が表示されます。
(5) <F9>キーを押してシステムユーティリティを起動します。
もし、システムユーティリティが起動できない状態になっている場合は、システムメンテナンス
スイッチの SW6 によりシステム設定をデフォルト値に戻すことで復旧することができます。
詳細な手順は、各機種のメンテナンスガイド(1 章 保守)の「システム設定情報の初期化」の項を
ご参照ください。再起動後、<F9>キーを押してシステムユーティリティを起動します。
(6) システムユーティリティの「System Configuration > BIOS/Platform Configuration (RBSU) > Advanced
Options > Advanced Service Options」メニューより、Serial Number と Product ID の値を確認します。
(正しい Product ID と Serial No.の確認方法については(12)項を参照ください。)
(7) Serial Number と Product ID の値が期待する値ではない(消失している)場合は、システムユーティリ
ティから、「System Configuration > BIOS/Platform Configuration (RBSU) > System Default Options」
を選択します。
(8) 「Restore Default Manufacturing Settings」を選択します。
(9) 「Yes, restore the default settings.」を選択します。
(10) 自動的に装置が再起動し、POST 画面が表示されます。
(11) <F9>キーを押してシステムユーティリティを起動します。
(12) 装置のスライドタグに記載されている Serial Number と Product ID をシステムユーティリティの
「System Configuration > BIOS/Platform Configuration (RBSU) > Advanced Options > Advanced Service
Options」メニューより、設定します。
(13) RBSU 設定項目をデフォルト値から変更されている場合は、その RBSU 項目の確認と再設定をします。
Serial Number
Product ID
- 4 -
● 「Memory Initialization Start」のメッセージでPOST停止した場合の対処について
「Memory Initialization Start」のメッセージで POST 停止した場合、システムメンテナンススイッチの
SW6 によりシステム設定をデフォルト値に戻すことで復旧することができます。
詳細な手順は、メンテナンスガイド(1 章 保守)の「システム設定情報の初期化」の項をご参照ください。
● iLO WebインターフェースのUUIDの不正値表示について
POST(Power On Self Test)実行中に iLO の再起動を行うと、iLO Web インターフェースの[Information]-
[Overview]ページの UUID、UUID(論理)の値が稀に不正な表示となることがあります。
不正な表示となった場合は、本体装置の電源をオフ、オンしてください。
● iLOのセキュリティ機能の注意事項
iLO5 ファームウェア 1.47 以上をご使用の場合、[Information] - [Security Dashboard]及び iLO Web インター
フェース画面の右上部に リスクが常に表示されます。
RBSU の設定や iLO の設定の内容次第で、iLO セキュリティの状態がリスク状態(赤色)で表示されますので、
お客様のセキュアポリシーに応じてセキュリティの対処を行ってください。
推奨値などの詳細については、iLO5 ユーザーズガイドを参照してください。
但し、『Require Host Authentication』設定については、次項の iLO Web インターフェースから [ホスト認証が
必要]設定を有効(※)に設定した場合の注意事項」に注意事項がありますので、ご確認ください。
iLO の負荷の状態により[Information] - [Security Dashboard]の”全体セキュリティーステータス”が『リス
ク』であっても、iLO Web インターフェース画面の右上部の”iLO セキュリティ”アイコンが無色になる場合が
あります。[Information] - [Security Dashboard]の”全体セキュリティーステータス”が現在のセキュリティ
状態を示します。
● iLO Webインターフェースから [ホスト認証が必要]設定を有効(※)に設定した場合の注意事項
(※)[セキュリティ]-[アクセス設定]-[iLO]にある[ホスト認証が必要]を『有効』に設定する。
設定を行った場合、次に示す状況が発生します。
・アラートビューアに、“Remote Insight/ Integrated Lights-Out 認証されないログイン試行検出“ の
メッセージが多数表示されます。
・Starter Pack(Standard Program Package)を適用するとエラーが発生します。
また、次のサービスや機能をご利用頂けません。
・エクスプレス通報サービスにおいてハードウェア障害に関する通報
・RAID 通報
・サーバ診断カルテのハードウェア診断機能
・iLO が収集するハードウェアに関するデバイス情報や設定情報の参照、及びイベントログ採取機能
● iLO 2.10以上へのアップデート後の注意事項
iLO5 ファームウェア 2.10 以上をご使用の場合、仮想 NIC をサポートしていない Windows Server 2012 R2 や USB
CDC-EEM ドライバがインストールされていない Windows Server 2016/2019 上のデバイスマネージャで「Virtual
NIC」が表示される場合があります。
[Security] - [iLO]の”Virtual NIC”を無効(Disabled)に変更してください。
- 5 -
● iLO 1.47以上、2.10未満へのアップデート後の注意事項
iLO5 ファームウェア 1.47 以上、2.10 未満をご使用の場合、[Information] - [Security Dashboard]に[Last
Firmware Scan Result]が表示されますが、本ハイパーリンクをクリックしないでください。
誤ってクリックした場合、Web ページ内のメニュー間移動が出来なくなります。その場合、ブラウザーの
リロードボタンをクリックするか、もしくは一旦 iLO Web インターフェースのログアウトを実行して再度
ログインしなおしてください。
日本語表示の場合
英語語表示の場合
- 6 -
● VMware ESXiを使用する場合の注意事項
ESXi起動時のVMware vSphere の監視 > ハードウェア > システムセンサー > センサーの表示について。
①非冗長 FAN 構成において ESXi 起動完了後、下記のセンサの健全性(vCenter:ステータス)の表示が
『警告(黄色)』となる場合がありますが、ハードウェアの故障を示すものではなく運用に影響ありません
ので、そのまま運用いただけます。
- Cooling Unit 1 Fans
②ESXi 起動完了後、下記のセンサの健全性(vCenter:ステータス)の表示が『?』となる場合がありますが、
ハードウェアの故障を示すものではなく運用に影響ありませんので、そのまま運用いただけます。
- System Chassis 1 UID
● 内蔵DVD-ROM(N8151-137/138)表示について
Embedded SATA Configuration 設定(*1)を [Smart Array SW RAID Support] 設定時、運用環境により
Disk Utilities メニュー(*2)に内蔵 DVD ドライブ情報が2つ表示されます。
どちらのドライブを選択した場合でも同じ内蔵 DVD の情報が参照できます。
(*1)「System Configuration > BIOS/Platform Configuration (RBSU) > Storage Options > SATA Controller
Options > Embedded SATA Configuration」
(*2)「System Configuration > HPE Smart Array S100i SR Gen10 > Disk Utilities」
● ESMPRO/ServerManager(Windows版)およびエクスプレス通報サービス(MG)に関する注意事項
本製品の iLO ファームウェアバージョンと、ESMPRO/ServerManager(Windows 版)およびエクスプレス通報
サービス(MG)のバージョンの組み合わせによっては ESMPRO/ServerManager(Windows 版)および iLO 管理機能
向けの受信情報設定ファイルのアップデートが必要になる場合があります。以下をご参照のうえ、
アップデートが必要な場合は、最新バージョンにアップデートしてください。
各バージョンの確認方法については、本注意事項の末尾に記載します。
◆ESMPRO/ServerManager(Windows 版) に関する発生現象
iLO
ファームウェア
ESMPRO/
ServerManager
(Windows 版)
発生現象
バージョン
2.10 以上
バージョン
6.25 未満
・ 構成タブ - サーバー状態
"SNMP 通報設定" が "取得に失敗しました" と表示される
・ リモート制御タブ - iLO 情報 - IML の表示、IML の保存
IML 情報の取得に失敗し、表示および保存ができない
・ アラートビューア
ファームウェアアップデートにともない追加されたハード
ウェアの障害がアラートビューアに "不明タイプ" の
アラートとして表示される
バージョン
6.47 未満
・ アラートビューア
ファームウェアアップデートにともない追加されたハード
ウェアの障害がアラートビューアに表示されない、もしくは
"不明タイプ" のアラートとして表示される
◆ESMPRO/ServerManager(Windows 版)のアップデート方法
(1) 以下より最新版の ESMPRO/ServerManager をダウンロードします。
https://www.support.nec.co.jp/View.aspx?id=9010103524
(2)「ESMPRO/ServerManager Ver.6 インストレーションガイド(Windows 編)」の「2 章 インストール」を
参照して ESMPRO/ServerManager をアップデートします。
- 7 -
◆iLO 管理機能向けの受信情報設定ファイル に関する発生現象
※エクスプレス通報サービス(MG)をご利用されている方が対象です。
iLO
ファームウェア
iLO 管理機能向けの
受信情報設定
ファイル
発生現象
バージョン
2.10 以上
ilo_jp.mtb
バージョン
1.4.0 未満
iml_jp.mtb
バージョン
1.5.0 未満
※iLO 管理機能向け
の受信情報設定
ファイルは
2 種類あります。
ファームウェアアップデートにともない追加されたハードウェア
の障害を検知することができない。当該障害を通報することが
できない。
※受信情報設定ファイルをアップデートした場合であっても、
ESMPRO/ServerManager がアップデートされていないときは、
上記と同様に追加されたハードウェア障害の検知および通報が
できない。
◆iLO 管理機能向けの受信情報設定ファイルのアップデート方法
(1) 以下より最新版の受信情報設定ファイル(ilo_jp.mtb、iml_jp.mtb)をダウンロードします。
https://www.support.nec.co.jp/View.aspx?id=9010100096
ilo_jp.mtb、iml_jp.mtb は MGMTB.zip に包含しています。
(2) 「エクスプレス通報サービス(MG) インストレーションガイド(Windows 編)」の「3.1.5 受信情報の設定」
または「3.2.4 受信情報の設定」を参照して受信情報の設定画面で登録済みの受信情報を削除します。
(3) (1)でダウンロードした最新版の受信情報設定ファイルを登録します。
「エクスプレス通報サービス(MG) インストレーションガイド」は以下の URL からダウンロードして
ください。
https://www.support.nec.co.jp/View.aspx?id=9010102124
◆iLO ファームウェアのバージョン確認方法
・Server Health Summary で確認する方法
サーバー本体の UID ボタンを押下して、サーバーに接続されたコンソールに表示される iLO Firmware の
バージョンを確認します(Server Health Summary の詳細は iLO 5 ユーザーズガイド参照)。
・ネットワーク経由で確認する方法
iLO にネットワーク接続可能な場合、ブラウザーから iLO にログインして、
メニュー「ファームウェア&OS ソフトウェア」から iLO のバージョンを確認します。
◆ESMPRO/ServerManager(Windows 版)のバージョン確認方法
(1) ESMPRO/ServerManager の WEB にログインします。
(2) 画面右上の「ESMPRO/ServerManager について」のリンクを選択します。
(3) 表示される ESMPRO/ServerManager のバージョン情報を確認します。
◆iLO 管理機能向けの受信情報設定ファイルのバージョン確認方法
「エクスプレス通報サービス(MG) インストレーションガイド(Windows 編)」の「3.1.5 受信情報の設定」
または「3.2.4 受信情報の設定」を参照して受信情報の設定画面で「詳細情報」が「iLO SNMP Trap」の
バージョンを確認します。
● EXPRESSBUILDERヘルプについて
EXPRESSBUILDER のヘルプとメンテナンスガイドで記述が異なる場合は メンテナンスガイドの方を
優先してください。
- 8 -
● サーバ診断カルテについて
サーバ診断カルテは、対象製品の稼働状況を記録し、月毎に稼働状態の診断カルテを提供するサービスです。
サーバ診断カルテの詳細は、Starter Pack 内の「サーバ診断カルテ セットアップガイド」を参照して
ください。
■ 本件に関するお問い合せについて
本書の内容に不明点がありました場合は、下記ファーストコンタクトセンターまでお問い合わせください。
お問い合わせ先:ファーストコンタクトセンター
TEL :0120-5800-72
受付時間 :9:00~12:00 13:00~17:00 月曜日~金曜日(祝日を除く)
※番号をお間違えにならないようお確かめのうえお問い合わせください。
2020年 2月 4版
- 9 -
Precautions for Using
Express5800/R120h-1M (3rd-Gen), R120h-2M (3rd-Gen)
Thank you for purchasing our product.
This document provides the precautions on the use of this product.
Please read through the instructions below and keep this document in a safe place for your future reference.
■ Precautions
● About the manual of this product.
For Starter Pack, the user's guide and the other related documents of this product, please refer to Download
on the following URL. Regarding Starter Pack, it is also provided as an optional product.
< http://www.nec.com/express>
→ Related Links : Download
→ Documents & Software
→ Rack : (Select your server model)
Please check latest information and versions on ESMPRO portal site before using NEC ESMPRO Manager,
NEC ESMPRO ServerAgentService and Express Report Service / Express Report Service (HTTPS) /
Express Report Service (MG).
<http://www.58support.nec.co.jp/global/download/>
Windows OS:
→ ESMPRO
● About Starter pack
Please see the following web site to check the latest Starter Pack.
<https://www.nec.com/en/global/prod/express/>
→ Related Links : Download
→ Documents & Software
→ (Select your server model)
● About service and driver modules for VMware ESXi
Please see the following web site to check the latest modules.
1. Agentless Management Service and iLO Channel Interface Driver
< http://www.nec.com/express>
→ Related Links : Download
→ Documents & Software
→ Rack or Tower: (Select your server model)
2. WBEM Provider and CLI tool
< http://www.nec.com/express>
→ Related Links : Download
→ Utility
● Notice about service operation time of this product
The service operation hour of this product may require more hours than usual depending on the
combination of the equipped firmware and driver.
- 10 -
● Caution about Reset iLO
Do NOT Reset iLO during the period from server boot start to the completion of OS boot. This period
includes the execution of POST (Power On Self Test)
Do NOT Reset iLO while users are using the System Utilities.
Under such circumstances, restarting the iLO may cause unexpected result.
For example, while changing options of the System Utilities, Reset iLO may lead to loss of server settings
such as Serial number and Product ID. If the iLO is reset during POST execution, the screen display of
UUID and UUID logic in iLO Web Interface : [Information] - [Overview], may be corrupted.
iLO Resets which is subject to this caution
- Reset iLO via network such as iLO Web interface
- Reset iLO via UID switch
● Caution for operating BMC Configuration Utility in the System Utilities
If you execute POST or change the BMC configuration while rebooting the iLO, some server settings such
as Serial Number and Product ID may be lost.
In addition, there is a possibility that it does not operate normally in the restart process immediately after.
To avoid this trouble in rebooting the iLO, follow these steps:
(1) In the System Utilities, changing the settings of BMC Configuration Utility may display the following
pop-up before rebooting the iLO:
(2) Press OK to proceed.
(3) The iLO will start to reboot and then the following pop-up appears:
(4) Leave this pop-up at least for one minute.
(5) Confirm if the iLO reboot is completed.
※the iLO is restarting : the Status LED flashes in green (once per second)
the iLO is operating normally through the restart completion : the Status LED lights in green,
(6) If the confirmation succeeds, press OK to proceed.
(7) Press the ESC key several times to return to the top screen of the System Utilities.
(8) From the top screen, select Reboot the System to reboot the server.
- 11 -
● How to recover lost Serial Number and Product ID
If the server loses Serial Number and Product ID, recover them as follows:
(1) Power off the server. Then disconnect the plug from the outlet.
(2) Wait 30 seconds. Then plug the server into the outlet again.
(3) Turn on the server with the POWER button.
(4) The server starts up and the POST screen appears.
(5) Press the F9 key to enter the System Utilities.
If this fails, initialize the RBSU settings with the system maintenance switch (refer to “Chapter 1 7.3.3
Set the System Configuration Back to Default Values” of the maintenance guide).
(6) Check the values of Serial Number and Product ID by selecting the menu of the System Utilities:
System Configuration > BIOS/Platform Configuration (RBSU) > Advanced Options > Advanced
Service Options.
(7) If the values are unexpected or lost, select the menu of the System Utilities: System Configuration >
BIOS/Platform Configuration (RBSU) > System Default Options.
(8) Select the Restore Default Manufacturing Settings option.
(9) Select this option: Yes, restore the default settings.
(10) The server restarts automatically and the POST screen appears.
(11) Press the F9 key to enter the System Utilities.
(12) Set the proper Serial Number and Product ID (indicated on the pull-out tab of the server) via the menu
of the System Utilities: System Configuration > BIOS/Platform Configuration (RBSU) > Advanced
Options > Advanced Service Options.
(13) If the RBSU settings have been changed from the defaults, check and configure the new values.
● How to recover stop POST by the message of "Memory Initialization Start".
If the server stops POST by a message of "Memory Initialization Start", recover them by setting to the
default value by SW6 of the system maintenance switch.
Refer to “Chapter 1 7.3.3 Set the System Configuration Back to Default Values” of the maintenance guide.
● About the corrupted screen display of UUID in iLO Web interface
If the iLO is reset during POST execution, the display of UUID and UUID logic in iLO Web interface:
[Information] - [Overview] page may be corrupted.
When any corrupted texts are displayed, please turn off and on the system.
● Caution about iLO security function
In case that ILO5 firmware 1.47 or latest is used, is always displayed in [Information] - [Security
Dashboard] and in iLO Web interface screen.
Depending on the setting of RBSU or iLO, the status of security may be displayed in red showing security
is at Risk. Please set security settings appropriately in order to follow customer’s security policy.
For the recommended settings, please review the iLO5 User’s Guide.
For the settings of “Require Host Authentication”, please refer to the other descriptions of the case where
the setting “Require Host Authentication” is enabled from iLO Web interface(*).
The iLO security icon on the right upper portion of Web interface may be transparent even if “Overall
Security Status” of [Security Dashboard] is “Risk”.
"Overall Security Status" of [Security Dashboard] indicates the current security status.
Serial Number
Product ID
- 12 -
● Caution for the case where the setting “Require Host Authentication” is enabled from iLO web
interface(*).
(*) Set “Require Host Authentication” Enabled in “Security > Access setting > iLO”
When the setting described above is executed, the following symptoms are expected
・Many messages “Remote Insight/ Integrated Lights-Out Unauthorized Login Attempts” are displayed
in alert viewer.
・Error occurs, when Starter Pack( Standard Program package) is applied.
The following services and functions are not supported
・Report services for hardware faults in Express Report Service
・Report services in RAID Report Service
・Server diagnosis function in Server Diagnostic Karte
・Function to display Device information and configuration collected by iLO
・Function to collect event logs collected by iLO
● Caution for iLO firmware 2.10 or later
If you update to iLO5 firmware 2.10 or later, “Virtual NIC” device may be shown with warning on Windows
device manager. If you do not use iLO virtual NIC functionality, change “Virtual NIC” of “Security > Access
Settings > iLO” to "Disabled".
● Caution for iLO firmware greater than or equal to 1.47 and lower than 2.10 and higher
If you update to iLO5 firmware greater than or equal to 1.47 and lower than 2.10, “Last Firmware Scan
Result” is displayed in “Information > Security Dashboard”. Do not click this Hyper link.
If you click this link by mistake, you won't be able to move between menus and tabs.
In that case, you need to reload the page by the reload button of the browser.
Or you log out the current session of iLO Web interface, and please log in again.
- 13 -
● Caution about VMware ESXi
This caution is about the screen display of VMware vSphere : Monitor > Hardware > System Sensor >
Sensor when the ESXi is booted.
1. In case of non-redundant FAN configuration, there are cases where the screen display of following
sensor Health(vCenter:Status) shows “Warning(Yellow)” after ESXi completes boot, This
“Warning(Yellow)” does not indicate hardware malfunction and there is no impact to the system
operation.
- Cooling Unit 1 Fans
2. There are some cases where the screen display of following sensor Health(vCenter:Status) shows “ ? ”
after ESXi completes boot, this does not indicate hardware malfunction and there is no impact to the
system operation.
- System Chassis 1 UID
●About the internal DVD-ROM (N8151-137/138) display
When Embedded SATA Configuration setting (* 1) is set to [Smart Array SW RAID Support], two internal
DVD drive information is displayed in the Disk Utilities menu (* 2) depending on the operating environment.
Both can refer to the same internal DVD information.
(*1)「System Configuration > BIOS/Platform Configuration (RBSU) > Storage Options > SATA Controller
Options > Embedded SATA Configuration」
(*2)「System Configuration > HPE Smart Array S100i SR Gen10 > Disk Utilities」
- 14 -
● Notice of NEC ESMPRO Manager (Windows) and Express Report Service (MG) (Windows)
Even in the case of adding this product into NEC ESMPRO Manager (Windows) and Express Report
Service (MG) (Windows) which have already been managing same model product as this product,
updating of NEC ESMPRO Manager (Windows) and iLO Receiving Information (ilo_en.mtb, iml_en.mtb)
may be required because this product which is newly shipped from a factory may have newer version of
iLO firmware. Referring to information below, update the software if it is required.
Regarding the steps of confirmation version of iLO firmware, NEC ESMPRO Manager (Windows), and iLO
receiving information, please refer to the end of this chapter.
◆Restrictions without updating the NEC ESMPRO Manager
iLO
firmware
version
NEC ESMPRO
Manager
(Windows)
Version
Restrictions
2.10 or higher
Lower than 6.25
・ Constitution Tab - Server Status screen
"SNMP Alert setting" will show error message "Failed to get SNMP Alert
setting".
・ Remote Control Tab - iLO Information - Show IML or Save IML
NEC ESMPRO Manager will fail to get IML information and Show IML or
Save IML feature will not work.
・ AlertViewer
New Alerts of hardware failure added with firmware update will be displayed
as "Unknown" alert on AlertViewer.
Lower than 6.47
・ AlertViewer
New Alerts of hardware failure added with firmware update will be displayed
as "Unknown" alert on AlertViewer, or they will not be displayed on
AlertViewer.
◆Update steps of NEC ESMPRO Manager (Windows)
(1) Download latest version of NEC ESMPRO Manager from the following website.
http://www.58support.nec.co.jp/global/download/index.html
- ESMPRO tab
- NEC ESMPRO Manager
(2) Update NEC ESMPRO Manager. For details refer to Chapter 2 Installation in "NEC ESMPRO
Manager Ver. 6 Installation Guide (Windows) [PDF]".
◆Restriction without updating the iLO Receiving Information
iLO
firmware
version
iLO Receiving
Information
Version
Restriction
2.10 or higher
ilo_en.mtb
Lower than 1.4.0
iml_en.mtb
Lower than 1.50
* There are 2
kinds of iLO
Receiving
Information.
It is impossible to detect a failure of the hardware added along with the update
of hardware and to issue an alert of this failure.
* If iLO Receiving Information has been updated and NEC ESMPRO
Manager has not been updated, it is impossible to detect the failure of the
added hardware and issue the alert of the failure, as with the above.
◆Update steps of iLO Receiving Information
(1) Download latest version of iLO Receiving Information(ilo_en.mtb, iml_en.mtb) from the following
website.
http://www.58support.nec.co.jp/global/download/index.html
- ESMPRO tab
- Express Report Service (MG) (Windows) Receiving Information
- iLO.zip
- 15 -
(2) Delete current Receiving Information from Express Report Service (MG) (Windows).
For details refer to 3.1.5 Setting for Receiving Information or 3.2.4 Setting for Receiving Information
in "Express Report Service (MG) Installation Guide (Windows)".
(3) Set Receiving Information downloaded in step (1) to Express Report Service (MG)
* Download "Express Report Service (MG) Installation Guide (Windows)" from the following website.
http://www.58support.nec.co.jp/global/download/index.html
- ESMPRO tab
- Express Report Service (MG) (Windows)
◆The steps of confirmation for iLO FW version
- Server Health Summary
Push the UID button on the server and check the version of the iLO firmware on the screen.
(For the detail, refer to Server Health Summary in iLO5 user guide.)
- Remote
Check the version of the iLO firmware on "Firmware & OS Software - Installed Firmware" by
iLO web interface.
◆The steps of confirmation version for NEC ESMPRO Manager
(1) Log in NEC ESMPRO Manager.
(2) Click the "About NEC ESMPRO Manager" link at the top right of the screen.
(3) Confirm "Setup Value" field on the screen.
◆The steps of confirmation version for iLO Receiving Information (ilo_en.mtb, iml_en.mtb))
Confirm the version of “iLO SNMP Trap” in "Setting for receiving information" screen.
Regarding "Setting for receiving information" screen, refer to 3.1.5 Setting for Receiving Information or
3.2.4 Setting for Receiving Information in "Express Report Service (MG) Installation Guide (Windows)".
● About EXPRESSBUILDER Help
If the EXPRESSBUILDER help is different from Maintenance Guide, do not use the help but the guide.
- 16 -
For Inquiries Regarding this Matter
If you have any questions on the contents of this document, please contact the dealer where you purchased
the product or our sales representative.
Feb 2020 4th Edition
* CBZ-036500-001-03 *

This manual suits for next models

1

Other NEC Server manuals

NEC Univerge SV8100 User manual

NEC

NEC Univerge SV8100 User manual

NEC N8100-1573F User manual

NEC

NEC N8100-1573F User manual

NEC NEC Express5800 Series User manual
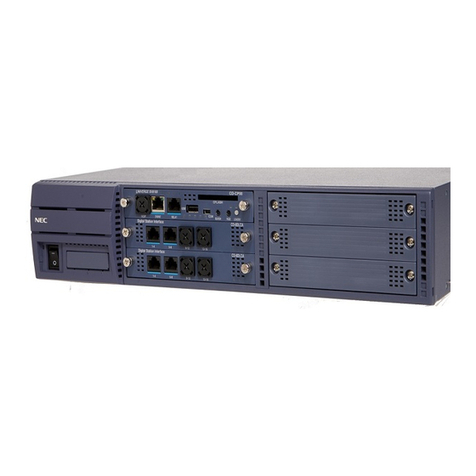
NEC

NEC NEC Express5800 Series User manual
NEC 320Fc Manual

NEC

NEC 320Fc Manual

NEC EXPRESS5800/R320d-E4 User manual

NEC

NEC EXPRESS5800/R320d-E4 User manual

NEC NEC Express5800 Series Reference guide

NEC

NEC NEC Express5800 Series Reference guide

NEC NEC Express5800 Series User manual
NEC

NEC NEC Express5800 Series User manual
NEC Express5800/R110h-1 User manual

NEC

NEC Express5800/R110h-1 User manual

NEC NECCare Gold Express5800/320Fd Manual

NEC

NEC NECCare Gold Express5800/320Fd Manual

NEC NEAX2000 IVS Series User guide

NEC

NEC NEAX2000 IVS Series User guide

NEC Express5800/R120e-2E User manual

NEC

NEC Express5800/R120e-2E User manual

NEC ServerCare Express5800/FT Parts list manual

NEC

NEC ServerCare Express5800/FT Parts list manual

NEC NEC Express5800 Series User manual

NEC

NEC NEC Express5800 Series User manual

NEC EXPRESS5800/140He User manual

NEC

NEC EXPRESS5800/140He User manual

NEC 320 Lb EXP351E User manual

NEC

NEC 320 Lb EXP351E User manual

NEC NovaScale R480 E1 User manual

NEC

NEC NovaScale R480 E1 User manual

NEC Express5800/R120h-2M User manual

NEC

NEC Express5800/R120h-2M User manual

NEC Express5800/R320c-M4 User manual

NEC

NEC Express5800/R320c-M4 User manual

NEC Express5800/120Rf-2 User manual

NEC

NEC Express5800/120Rf-2 User manual

NEC HX4500 User manual

NEC

NEC HX4500 User manual

NEC 340Hb-R User manual

NEC

NEC 340Hb-R User manual

NEC Univerge SV9300 Operating instructions

NEC

NEC Univerge SV9300 Operating instructions

NEC Express5800/R120h-2E User manual

NEC

NEC Express5800/R120h-2E User manual

NEC 120Rf-2 User manual

NEC

NEC 120Rf-2 User manual

Popular Server manuals by other brands

Atop Smart Security IS150 user manual

Atop

Atop Smart Security IS150 user manual

Digitus DN-13005 user manual

Digitus

Digitus DN-13005 user manual

HPE ProLiant DL580 Gen9 user guide

HPE

HPE ProLiant DL580 Gen9 user guide

Sun Microsystems Sun Fire V20z user guide

Sun Microsystems

Sun Microsystems Sun Fire V20z user guide

Advantech EKI-1511 Series user manual

Advantech

Advantech EKI-1511 Series user manual

Lantronix XPortPro user guide

Lantronix

Lantronix XPortPro user guide

Sun Microsystems Fire 4810 Mounting guide

Sun Microsystems

Sun Microsystems Fire 4810 Mounting guide

Avaya CS700 Administration and maintenance

Avaya

Avaya CS700 Administration and maintenance

Compaq ProLiant 8000 Features guide

Compaq

Compaq ProLiant 8000 Features guide

Multitech MA6 quick start guide

Multitech

Multitech MA6 quick start guide

Edimax PS-1208UWg user manual

Edimax

Edimax PS-1208UWg user manual

Sun Oracle SPARC T3-1 Getting started guide

Sun Oracle

Sun Oracle SPARC T3-1 Getting started guide

IBM xSeries 330 Hardware Maintenance Manual

IBM

IBM xSeries 330 Hardware Maintenance Manual

Sun Microsystems Sun Fire X4150 Server installation guide

Sun Microsystems

Sun Microsystems Sun Fire X4150 Server installation guide

HPE ProLiant DL80 Gen9 Maintenance and service guide

HPE

HPE ProLiant DL80 Gen9 Maintenance and service guide

Fujitsu PRIMERGY RX200 S6 Options guide

Fujitsu

Fujitsu PRIMERGY RX200 S6 Options guide

Supermicro 7045B-3 user manual

Supermicro

Supermicro 7045B-3 user manual

DEVA DB4000 Maintenance and operation instruction manual

DEVA

DEVA DB4000 Maintenance and operation instruction manual

manuals.online logo
manuals.online logoBrands
  • About & Mission
  • Contact us
  • Privacy Policy
  • Terms and Conditions

Copyright 2025 Manuals.Online. All Rights Reserved.