Necchi NL11C User manual

I
Instruction Manual
NL11C
NecchiAIO


III
DANGER - To reduce the risk of electric shock:
When using an electrical appliance, basic safety should always be followed,
including the following:
Read all instructions before using this sewing machine.
1. An appliance should never be left unattended when plugged in.
2. Always unplug this appliance from the electric outlet immediately after using
and before cleaning.
WARNING - To reduce the risk of burns, re, electric shock,
or injury to persons:
1. Read the instruction carefully before you use the machine
2. Keep the instructions at a suitable place close to the machine and hand it
over if you give the machine to a third party.
3. Use the machine only in dry locations.
4. Never leave the machine unattended with children or elderly people due to
they may not be able to estimate the risk.
5. This appliance can be used by children aged from 8 years and above and
persons with reduced physical, sensory or mental capabilities or lack of
experience and knowledge if they have been given supervision or instruction
concerning use of the appliance in a safe way and understand the hazards
involved.
6. Children shall not play with the appliance.
7. Cleaning and user maintenance shall not be made by children without
supervision.
8. Alwaysswitchothemachineifyoucarryoutpreparationforwork(change
the needle, feed the yarn through the machine, change the footer, etc.).
9. Always unplug the machine if you leave it unattended, to avoid injury by
expediently switch on the machine.
10. Always unplug the machine if you changing the lamp or carry out
maintenance(oiling,cleaning).
11. Don't use the machine if it’s wet or in humid environment.
12. Never pull at the cord, always unplug the machine by gripping the plug.
13. If the LED lamp is damaged or broken, it must be replaced by the
manufactureroritsserviceagentorasimilarlyqualiedperson,inorderto
avoid a hazard.
Important safety instructions

IV
14. Never place anything on the pedal.
15. Never use the machine if the air vents are blocked, keep the air vents of the
machine and the foot pedal free from dust, fusel and leftovers.
16. The machine must only be used with designated foot controller, in order
to avoid a hazard. If the foot controller is damaged or broken, it must be
replacedbythemanufactureroritsserviceagentorasimilarlyqualied
person.
17.Thesoundpressurelevelatnormaloperationissmallerthan78dB(A).
18. Do not dispose of electrical appliances as unsorted municipal waste, use
separate collection facilities.
19. Contact your local government for information regarding the collection
systems available.
20.Ifelectricalappliancesaredisposedofinlandllsordumps,hazardous
substances can leak into the groundwater and get into the food chain,
damaging your health and well-being.
21. When replacing old appliances with new ones, the retailer is legally obligated
to take back your old appliance for disposal at least for free of charge.
22.Theapplianceisnottobeusedbypersons(includingchildren)withreduced
physical, sensory or mental capabilities, or lack of experience and knowledge,
unlesstheyhavebeengivensupervisionorinstruction.(ForoutsideEurope)
23.Childrenbeingsupervisednottoplaywiththeappliance.(Foroutside
Europe)
SAVE THESE INSTRUCTIONS
This sewing machine is intended for household use only.
Be sure to use the sewing machine in the temperature range from 5ºC to 40ºC.
If the temperature is excessively low, the machine can fail to operate normally.
To carry the sewing machine, hold the carrying handle with your hand, and
support the sewing machine with the other hand.

V
Contents
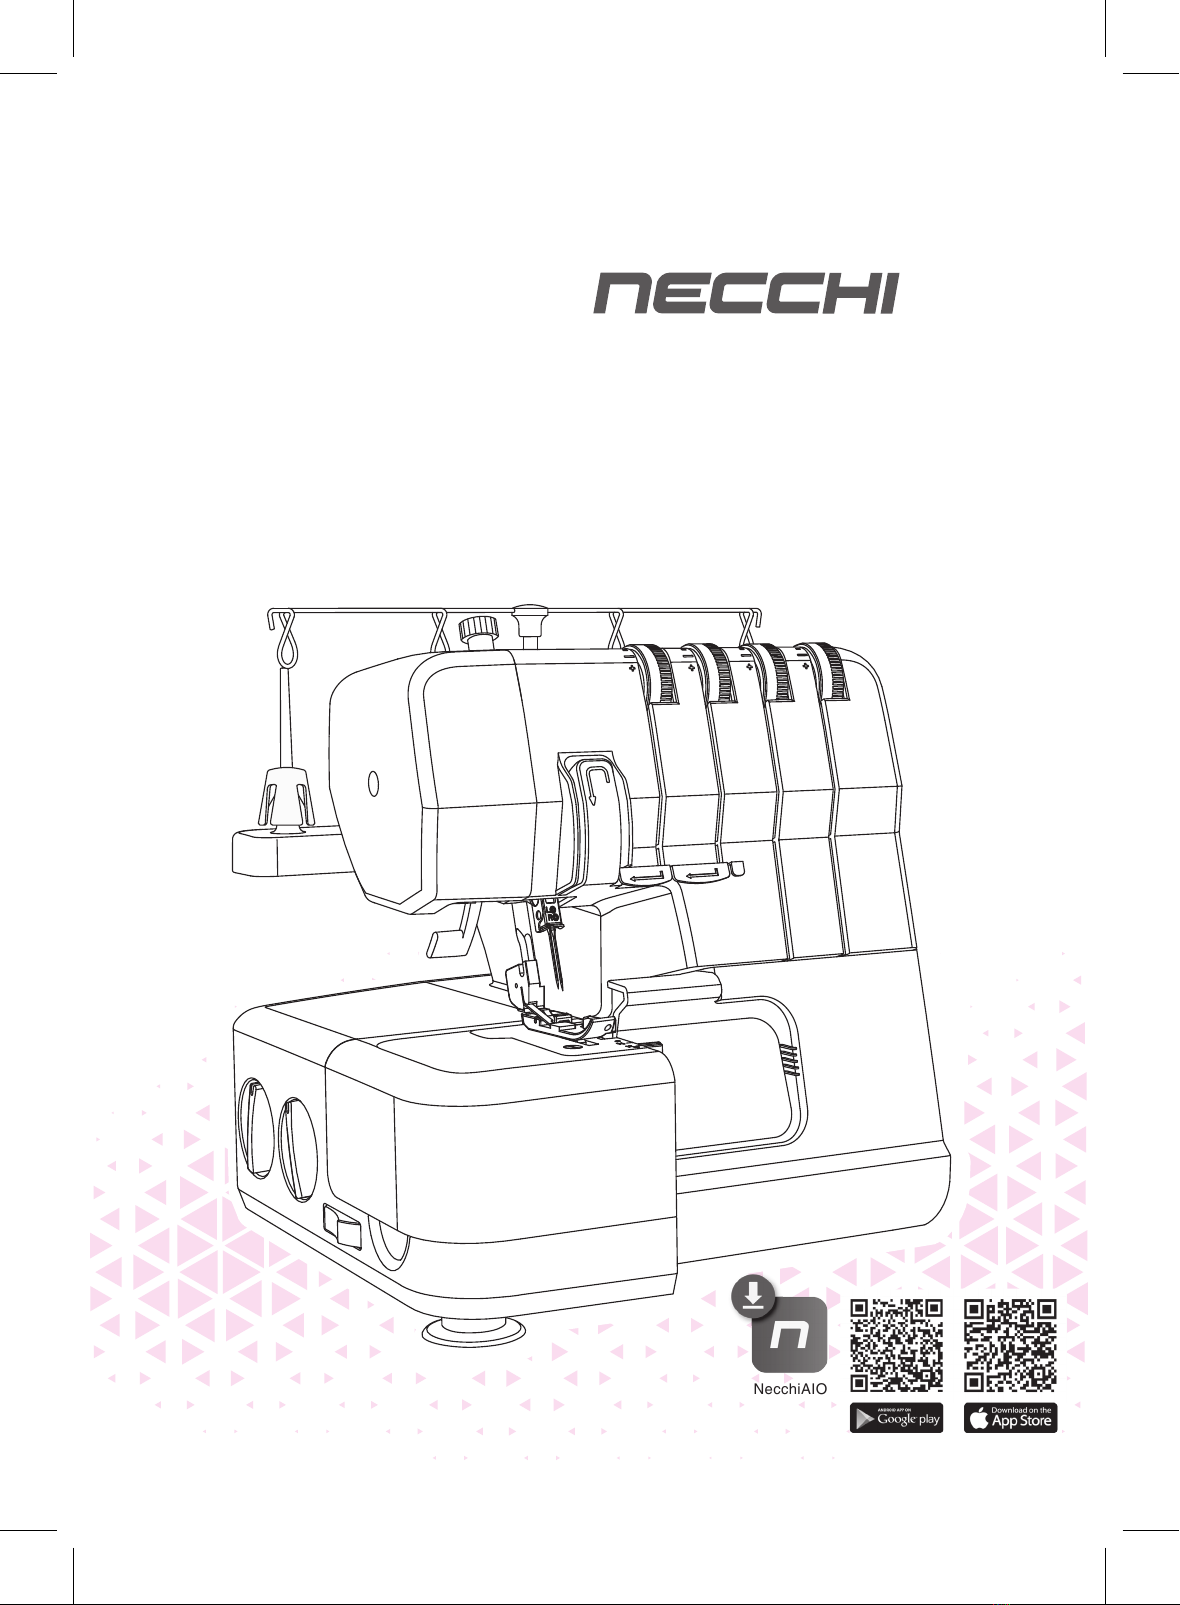
Machine Introduction VII
Principal parts of the machine .................................................................................. 1
Frontandsideofmachine...................................................................................................... 1
Accessories ................................................................................................................ 2
Inside of machine ................................................................................................................... 2
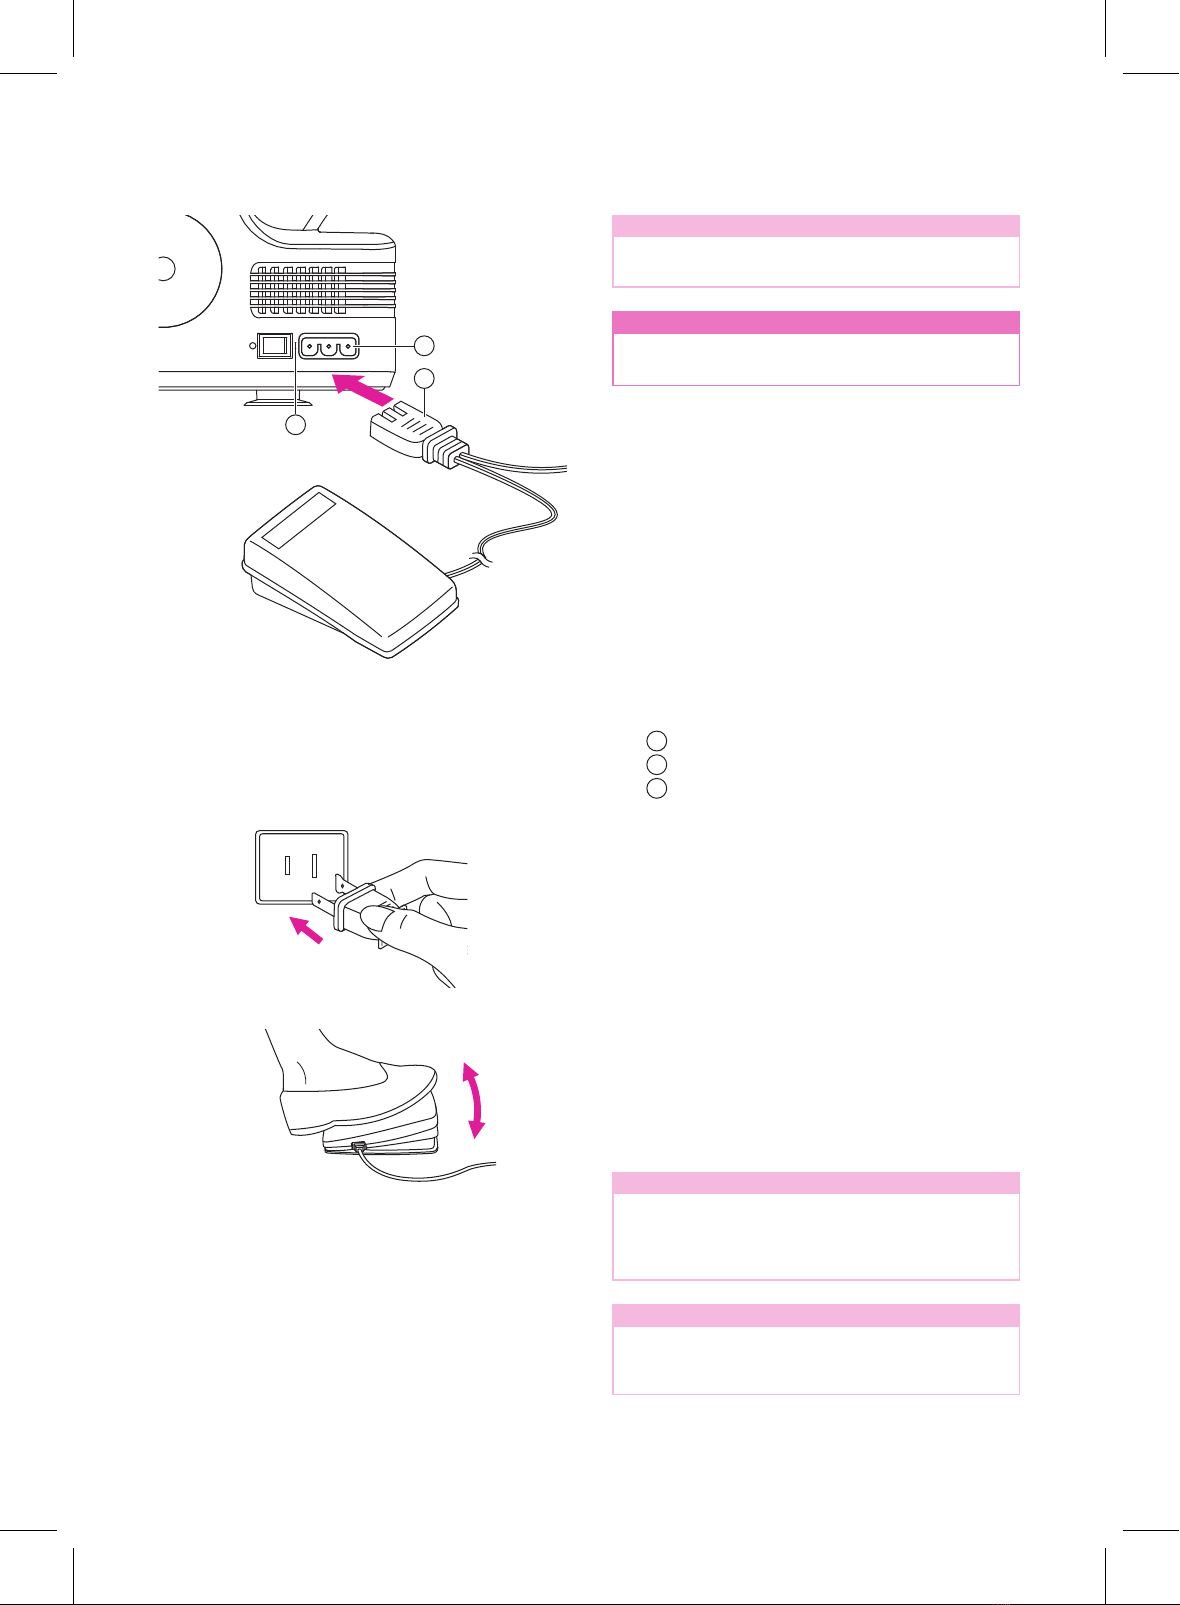
Connecting machine to power source ..................................................................... 3
Polarized plug information...................................................................................................... 3
Footcontrol ............................................................................................................................ 3
Setting up the telescopic thread stand .................................................................... 4
Open and close the front cover................................................................................. 4
Remove and replace the at bed extension ............................................................ 5
Presser foot lifter........................................................................................................ 5
Freearmsewing..................................................................................................................... 5
Removetheatbedextension............................................................................................... 5
Replacetheatbedextension............................................................................................... 5
Changing the needles ................................................................................................ 6
Changing the presser foot......................................................................................... 7
How to use the upper cutter...................................................................................... 7
Deactivate the upper cutter.................................................................................................... 7
Reactivate the upper cutter .................................................................................................... 7
Attach the 2–thread overlock converter .................................................................. 8
Remove the 2-thread overlock converter............................................................................... 8
Machine Settings 9
Getting ready to sew ................................................................................................ 10
Whatneedleandthreadtousewithdierentfabrics........................................................... 10
General threading information ............................................................................................. 10
Threadingtheupperlooper(red) ......................................................................................... 11
Threadingthelowerlooper(yellow) ..................................................................................... 12
Threadingtheleftneedle(purple) ........................................................................................ 14
Threadingtherightneedle(green)....................................................................................... 15
Waste collector ......................................................................................................... 16
Install the waste collector ..................................................................................................... 16
Remove the waste collector ................................................................................................. 16
Thread tension.......................................................................................................... 17
Dierential feed adjustment .................................................................................... 19
Presser foot pressure adjustment .......................................................................... 20
Stitch width settings ................................................................................................ 21
Stitch length settings............................................................................................... 21
Stitch nger lever setting ........................................................................................ 22
Stitch Chart 23
Stitch chart................................................................................................................ 24
Stitch overview ..................................................................................................................... 24

VIVI
Sewing Basics 29
Sewing ....................................................................................................................... 30
Changing thread................................................................................................................... 30
Start sewing ......................................................................................................................... 31
Rolled edge sewing.............................................................................................................. 33
Flatlocksewing..................................................................................................................... 34
Maintenance And Trouble Shooting 36
Machine maintenance .............................................................................................. 37
Replacing the lower cutter.................................................................................................... 38
Replacing the upper cutter................................................................................................... 39
Trouble shooting guide............................................................................................ 40
Technicalspecications ....................................................................................................... 42

Machine Introduction

1
Principal parts of the machine
15
16
17
13
18
5
1
2
3
4
910 11 12
7
8
6
14
13
19
20
22 23 24
21
25
vFront and side of machine
1. Telescopic thread stand
2. Spool pin
3. Cone holder
4. Spool stand
5. Flatbedextension
6. Dierentialfeeddial
7. Stitch length dial
8. Uppercutteron/oswitch
9. Left needle thread tension dial
(purple)
10. Right needle thread tension dial
(green)
11. Upper looper thread tension dial
(red)
12. Lower looper thread tension dial
(yellow)
13. Thread guides
14. Frontcover(accessorystorage
available, Page 4)
15. Presser foot lifter
16. Needle plate
17. Needles
18. Presser foot
19. Presser foot pressure adjustment
knob
20. Stitchngerlever
21. Cutting width lever
22. Hand wheel
23. Power switch
24. Main plug socket
25. Thread guides

2
26
27
28
29
3130
33
32
32
33
vInside of machine
26. Upper cutter
27. Lower cutter
28. Stitchnger
29. Lower looper threader
30. Lower looper
31. Upper looper
32. Upper looper thread guides
33. Lower looper thread guides
1. Needle pack including two
needles, size #90/14
2. Tweezers
3. Allen key to change needles
4. Screwdriver
5. 2-thread overlock converter
6. FootControl
7. Waste collector
8. Brush
9. Thread(4x)
Accessories
5
7 8
9
6
12
34

3
Connecting machine to power source
Note
Amongtheaccessoriesyouwillndthe
power cord and the foot control.
nAttention
Unplug the power cord when the machine
is not in use.
Before connecting the power supply, make
sure that the voltage and frequency shown on
the rating plate is conforming with your mains
power.
Place the machine on a stable table.
1. Connect the power line cord to the
machine by inserting the 2-hole plug into
the mains plug socket.
2. Connect the power line plug to the wall
outlet.
3. Turn on the power switch.
4. The sewing lamp will light up when the
switch is turned on.
1
Footcontrol/electricpowercord
2
Main plug socker
3
Power switch "I"
vFoot control
Press the foot control to start sewing. Use
the foot control to adjust the sewing speed.
The harder you press, the faster the machine
will sew. To stop the machine from sewing,
remove your foot from the control.
Note
When the front cover is open the safety
switch is activated and prevents the
machine from sewing, even if the foot
control is pressed.
Note
Consultaqualiedelectricianifyouarein
doubt about how to connect the machine to
the power source.
vPolarized plug information
Thisappliancehasapolarizedplug(one
blade wider than the other), to reduce the
riskofelectricalshock;thisplugwilltina
polarized outlet only one way. If the plug does
nottfullyintheoutlet,reversetheplug.Ifit
stilldoesnott,contactaqualiedelectrician
to install the proper outlet. Do not modify the
plug in any way.
1
2
3

4
Setting up the telescopic thread stand
Extend the telescopic thread stand to its full
height, then turn until it clicks into place.
Place the thread spools or cones over the
cone holders on the spool pin.
If the machine is already threaded, straighten
the threads to prevent tangling.
Open and close the front cover
Open the front cover
Firstpushthecovertotherightasfarasitwill
go and then pull it downward toward you.
Close the front cover
Firstpullthecoverupwardandthenslideitto
the left until it locks.
Note
The front cover has a safety switch and the
machine will not sew if the front cover is
open.
How to store the accessories
1
Brush
2
Tweezers
3
Screwdriver
4
2-thread overlock converter
5
Allen key to change needles
1
23
4
5

5
Remove and replace the at bed extension
vFree arm sewing
Forfreearmsewing,slideotheatbed
extension. The free arm makes it easier to
sew small items and hard to reach areas such
asarmholesandovercastingtrousercus.
vRemove the at bed extension
Insertangerintheslotontheleftsideofthe
atbedextension.Slidetheatbedextension
to the left and remove it from the machine.
vReplace the at bed extension
Aligntheprojectionsontheatbedextension
with the grooves on the free arm and slide it
to the right until it snaps into place.
Presser foot lifter
Raise the presser foot with the presser foot
lifter at the back of the machine.
1
Presser foot lifter
1

6
Changing the needles
nAttention
Turnothemainpowerswitchandunplug
the machine.
1. Turn the hand wheel toward you until the
needles are at the highest position.
2. Loosen, but do not remove the left or right
needle clamp screw with the allen key
while you are holding the needles.
3. Remove the left or right needle,
depending on the stitch type you want to
sew.
4. Holdthenewneedle(s)withtheat
surface to the back.
5. Inserttheneedle(s)intotheleftand/or
right needle clamp as far as it/they will go.
6. Securely tighten the left or right needle
clamp screw.
1
Right needle clamp screw
2
Left needle clamp screw
Note
When using both needles, the left needle
is positioned a little higher up than the right
needle(theyarenotsupposedtobe‘level’,
like a twin needle).
1
2

7
Changing the presser foot
How to use the upper cutter
nAttention
Turnothemainpowerswitchandunplug
the machine.
1. Raise the presser foot.
2. Turn the hand wheel toward you until the
needles are in the highest position.
3. Push the black button on the back of the
presser foot holder, and the foot will come
o.
4. Place the new foot with the pin right
underneath the groove of the ankle and
lower the presser foot. Push the black
button on the back of the presser foot
holder and the foot will snap into place.
1
Presser foot holder
2
Pin
3
The groove of the ankle
Note
Optional feet are not included.
vDeactivate the upper cutter
- Turn the hand wheel toward you until the
upper cutter is in its lowest position.
- Turnotheuppercutterbyswitching
the upper cutter switch to non-cutting
position.
vReactivate the upper cutter
- Turn on the upper cutter by switching the
upper cutter switch to cutting position.
1
Non-cutting position
2
Cutting position
Note
Always have the upper cutter in the cutting
position when sewing, because this
machinemusttrimoanyexcessfabric
to form the stitch over the fabric edge. An
exception to this is when sewing decorative
atlockseams.Thentheuppercutter
needstobeturnedo.
1
3
2
1
2

8
Attach the 2–thread overlock converter
Note
2-thread overlock stitches are sewn using
one needle thread and the lower looper
thread. Before sewing, the two-thread
converter must be attached to the upper
looper, so the machine will sew with only
two threads.
Open the front cover.
Bring the upper looper to its higher position
by turning the hand wheel toward you.
1
2-thread overlock converter
2
Upper looper
Insertthetipoftheconverter(A)intothehole
oftheupperlooper(B).
Push the converter down into the slot of the
upper looper.
vRemove the 2-thread overlock
converter
Remove the converter by tilting it toward you.
1
A
B
2

Machine Settings

10
Getting ready to sew
vWhat needle and thread to use with dierent fabrics
vGeneral threading information
A color coded diagram is located inside the
frontcoverforquickreference(seeillustration
to the right). Always start threading the
loopers and then the needles from left to right
(followtheorderlistedbelow).
1. Upper looper - Red
2. Lower looper - Yellow
3. Left needle - Purple
4. Right needle - Green
Note
Always raise the presser foot before
threading.
Important:
If the threads break during sewing, re-thread
all thread paths in the order listed below.
1. Unthreadtheneedle(s)
2. Unthread upper and lower looper
3. Thread the upper looper
4. Thread the lower looper
5. Threadtheneedle(s)fromlefttoright
See the table below for recommendations on
whatneedlesandthreadtousefordierent
fabric weights.
Tip:
Your new machine is threaded to sew a
4-thread overlock. Tie your own threads
to these threads and carefully pull them
through the machine, to easily thread your new
overlockmachinethersttime.
LightFabric
(voile,crepe,georgette,etc.)
MediumFabric
(cotton,chino,wool,satin,etc.)
HeavyFabric
(denim,jersey,tweed,etc.)
Needles:
size #80/12 needles,
suitable for overlock
machines
Needles:
size #90/14 needles, suitable for
overlock machines
Needles:
size #90/14 needles, suitable
for overlock machines
Thread
Thread suitable for overlock machines

11
vThreading the upper looper (red)
When threading the upper looper, follow the
thread path marked with a red dot.
Open the front cover. Raise the needle to
highest position by turning the hand wheel
toward you. Raise the presser foot. Pass the
thread from back to front through the thread
guide on the thread stand. Use the tweezers
to make the threading easier.
1
Telescopic thread stand
Thread the looper area of the machine
following the red color coded thread guides.
Use the tweezers to make the threading
easier.
Use the tweezers to bring the thread behind
the lower looper and thread into the hole in
the upper looper from front to back.
Pullabout10cm(4″)ofthreadthroughthe
looper and place it to the back of the stitch
plate.
1
-
3
Thread guides
4
Upper looper hole
While holding the thread with both hands,
pass it between the tension discs and pull
it down to make certain it is properly placed
between the tension discs.
1
Tension discs
Pull the thread from right to left under the
upper thread guide.
1
Upper thread guide
1
1
1
3
2
1
4

12
vThreading the lower looper
(yellow)
When threading the lower looper, follow the
thread path marked with a yellow dot.
Pass the thread from back to front through
the thread guide on the thread stand. Use the
tweezers to make the threading easier.
1
Telescopic thread stand
Thread the looper area of the machine
following the yellow color coded thread
guides. Use the tweezers to make the
threading easier.
After thread guide, pass the thread from front
to back through the hole in the lower looper.
Pullabout10cm(4")ofthreadthroughthe
looper and place it over the upper looper and
to the back of the stitch plate.
1
-
4
Thread guides
5
Lower looper hole
6
Upper looper
While holding the thread with both hands,
pass it between the tension discs and pull
it down to make certain it is properly placed
between the tension discs.
Turn the hand wheel toward you until the
lower looper is at the far right.
1
Tension discs
Pull the thread from right to left under the
upper thread guide at the back on the top
cover.
1
Upper thread guide
1
1
1
2
31
5
4
6

13
Hold the thread end with your left hand. Use
the tweezers to place the thread behind the
ngersofthelowerlooperthreader.
Pull the lever on the lower looper threader
gently upwards as far as it will go. Release
the lever and the lower looper becomes fully
threaded.
1
Fingersofthelowerlooperthreader
2
Lower looper threader lever
Note
When both loopers are threaded, the
threads should run as illustrated to the
right.
1
2
Table of contents
Other Necchi Sewing Machine manuals

Necchi
Necchi NC-204D User manual

Necchi
Necchi Vigorelli S1 User manual

Necchi
Necchi 681C User manual

Necchi
Necchi 270 User manual

Necchi
Necchi FA16 User manual

Necchi
Necchi NC-103D User manual

Necchi
Necchi Creator User manual

Necchi
Necchi NC-59QD User manual

Necchi
Necchi Q421A User manual

Necchi
Necchi EX60 User manual

Necchi
Necchi K121A User manual

Necchi
Necchi Q132A User manual

Necchi
Necchi K408A User manual

Necchi
Necchi EX30 User manual

Necchi
Necchi L234A User manual

Necchi
Necchi Lock 181 User manual

Necchi
Necchi 534 FB User manual

Necchi
Necchi HD22 User manual

Necchi
Necchi Supernova User manual

Necchi
Necchi Automatic Supernova Ultra Mark 2 User manual